Table of Contents
Advertisement
Advertisement
Table of Contents
Troubleshooting

Summary of Contents for MediaAccess TC8305C
- Page 1 SETUP AND USER GUIDE MediaAccess TC8305C...
-
Page 3: Safety Instructions
SAFETY INSTRUCTIONS AND REGULATORY NOTICES Before you start installation or use of this product, carefully read these instructions! - Page 4 Damage requiring service Unplug this product from the wall outlet and refer servicing to qualified service When using this product, always follow the basic safety precautions to reduce the personnel under the following conditions: risk of fire, electric shock and injury to persons, including the following: When the power supply or its plug are damaged.
- Page 5 SETUP AND USER GUIDE MediaAccess TC8305C...
- Page 6 Other brands and product names may be trademarks or registered trademarks of their respective holders. All other logos, trademarks and service marks are the property of their respective owners, where marked or not. Document Information Status: v1.0 (August 2013) Reference: DMS-CTC-20130228-0000 Short Title: Setup and User Guide MediaAccess TC8305C...
-
Page 7: Table Of Contents
CONTENTS About this Setup and User Guide ..................1 1 Getting started......................3 1.1 Features at a glance ..........................4 1.2 Getting to know the Gateway ......................... 5 1.2.1 Front panel ..................................6 1.2.2 Top panel ..................................8 1.2.3 Back panel ..................................9 1.2.4 Bottom panel ................................. - Page 8 7.1 Wireless connection troubleshooting ....................54 7.2 Network diagnostic tools........................55 7.3 Gateway reset and restore options ....................... 56 DMS-CTC-20130228-0000 v1.0...
-
Page 9: About This Setup And User Guide
The note symbol indicates that the text provides additional information about a topic. Terminology Generally, the MediaAccess TC8305C will be referred to as Gateway in this Setup and User Guide. Typographical conventions Following typographical convention is used throughout this manual: This sample text indicates a hyperlink to a Web site. - Page 10 DMS-CTC-20130228-0000 v1.0...
-
Page 11: Getting Started
1 GETTING STARTED 1 Getting started Introduction This chapter gives you a brief overview of the main features and components of the Gateway. After this chapter we will start with the installation. Do not connect any cables to the Gateway until instructed to do so. DMS-CTC-20130228-0000 v1.0... -
Page 12: Features At A Glance
1.1 Features at a glance Introduction This section provides a brief overview of the main features of your Gateway. IPv6 Ready Your Gateway is IPv6 ready. Internet Protocol version 6 (IPv6) is the next generation of Internet technologies aiming to effectively support the ever-expanding Internet usage and functionality, and also to address security concerns that exist in an IPv4 environment. -
Page 13: Getting To Know The Gateway
1 GETTING STARTED 1.2 Getting to know the Gateway This section introduces you to the different components of the Gateway: Topic Page 1.2.1 Front panel 1.2.2 Top panel 1.2.3 Back panel 1.2.4 Bottom panel DMS-CTC-20130228-0000 v1.0... -
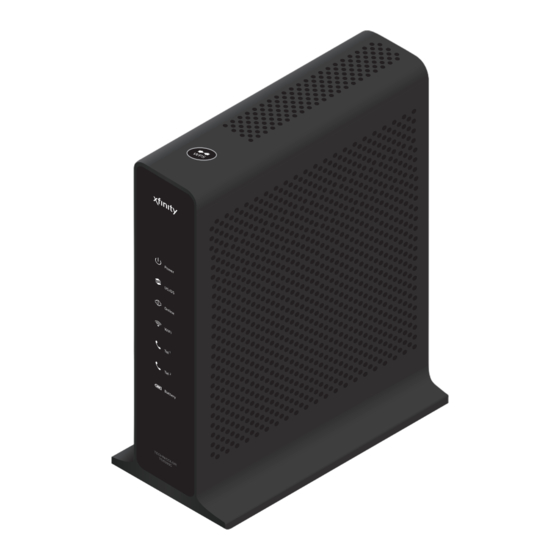
Page 14: Front Panel
1.2.1 Front panel Introduction On the front panel of your Gateway, you can find a number of LEDs that allow you to check the state of the services offered by the Gateway. Power LED State Description Solid on The Gateway is powered on from the electrical outlet. Blinking Power failure or running on battery. - Page 15 1 GETTING STARTED WiFi LED State Description Solid on One or more wireless clients connected to the access point, no wireless activity Blinking One or more wireless clients connected to the access point, wireless activity. The access point is disabled. Tel1 LED State Description...
-
Page 16: Top Panel
1.2.2 Top panel WPS button (item A) The WPS ( ) button allows you to add new wireless clients to your local network in a swift and easy way, without the need to enter any of your wireless settings (network name, wireless network key, encryption type). For more information about WPS, see “2.4.1 How to connect your wireless client via WPS”... -
Page 17: Back Panel
1 GETTING STARTED 1.2.3 Back panel Overview Reset button (item A) The Reset button allows you to: Restart the Gateway. Restore the factory defaults of the Gateway. For more information, see “7.3 Gateway reset and restore options” on page USB port (item B) The USB ( ) port allows you to power or charge a USB device. - Page 18 Cable port (item E) The Cable port allows you to connect to your local coax network and the broadband network of your services provider. Power inlet (item F) The power inlet (Power) allows you to connect the power cord. DMS-CTC-20130228-0000 v1.0...
-
Page 19: Bottom Panel
1 GETTING STARTED 1.2.4 Bottom panel Product label (item A) The label on the bottom of the Gateway contains information about your Gateway, like: Device information Wireless security settings Battery compartment (item B, optional) When the power is down the Gateway will automatically switch to the rechargeable battery (if installed). This to guarantee that the following functions will not be impacted: The connected phones ... -
Page 20: Preparing For The Installation
1.3 Preparing for the installation Local connection requirements Wireless connection If you want to connect your computer using a wireless connection, your computer must be equipped with a WiFi-certified wireless client adapter. Wired connection If you want to connect a computer using a wired connection, your computer must be equipped with an Ethernet Network Interface Card (NIC). -
Page 21: Setup
2 SETUP 2 Setup Setup procedure Complete the following steps to setup the Gateway: 1 Connect your Gateway to your service provider’s network. For more information, see “2.1 Connect the Gateway to your service provider’s network” on page 2 Power on the Gateway. For more information, see “2.2 Power on the Gateway”... -
Page 22: Connect The Gateway To Your Service Provider's Network
2.1 Connect the Gateway to your service provider’s network Introduction This section helps you to connect the Gateway to your service provider’s network. Connecting the cables Proceed as follows: 1 Take one end of the coaxial cable and connect it to your cable splitter. 2 Connect the other end to the Cable port of the Gateway. -
Page 23: Power On The Gateway
2 SETUP 2.2 Power on the Gateway Procedure Proceed as follows: 1 Take the power cord that is included with your Gateway. 2 Connect the small end of the power cord to the Power port on the back of the Gateway. 105+ SN: 8700383561 CM MAC : 00111100ABCD... -
Page 24: Connect Your Wired Devices
2.3 Connect your wired devices Requirements Both your network device (for example, a computer, a gaming console, etc.) and Gateway must have a free Ethernet port. Your network device must be configured to obtain an IP address automatically. This is the default setting. ... -
Page 25: Connect Your Wireless Devices
2 SETUP 2.4 Connect your wireless devices Introduction The Gateway has an integrated 2.4 GHz access point that allows you to connect wireless devices to your home network. Procedure To connect your device via: Via WPS, proceed with “2.4.1 How to connect your wireless client via WPS” on page ... -
Page 26: How To Connect Your Wireless Client Via Wps
2.4.1 How to connect your wireless client via WPS Wi-Fi Protected Setup (WPS) allows you to add new wireless clients to your local network in a swift and easy way, without the need to enter any of your wireless settings (network name, wireless network key, encryption type). Requirements Your wireless client must support WPS. -
Page 27: Troubleshooting
2 SETUP Troubleshooting If you are having trouble connecting your wireless client via WPS, this may be caused by one of the following reasons: WPS can not be correctly executed: Configure your wireless manually. For more information, see “2.4.2 How to manually connect your wireless client” on page Your wireless client is out of range: ... -
Page 28: How To Manually Connect Your Wireless Client
2.4.2 How to manually connect your wireless client Requirements Your network device must be equipped with a WiFi-certified wireless client. Your network device must be configured to obtain an IP address automatically. This is the default setting. Procedure If you want to connect a computer using the wireless network, configure the wireless client on your computer with the wireless settings printed on the Gateway's bottom panel label. - Page 29 2 SETUP How to connect your computer on Windows 8 1 Click the wireless network icon ( )in the notification area. 2 A list of available wireless networks appears. Double-click the Gateway access point. The Gateway is listed with the Network Name (SSID) which is printed on the Gateway's bottom panel label. For more information, see “Product label (item A)”...
- Page 30 How to connect your computer on Windows Vista Proceed as follows: 1 Click Start and click Connect To. 2 A list of available wireless networks appears. 3 Double-click the Gateway access point. The Gateway is listed with the Network Name (SSID) which is printed on the Gateway's bottom panel label. For more information, see “Product label (item A)”...
- Page 31 2 SETUP 3 Windows prompts you to enter the network security key. Type the Network Key (Password) which is printed on the Gateway's bottom panel label in the Network key and Confirm network key box and click Connect. 4 You are now connected to the Gateway: How to connect your computer on Mac OS X Proceed as follows: 1 Click the WiFi icon on the menu bar.
-
Page 32: How To Connect Your Phone
2.5 How to connect your phone Procedure Connect your traditional phone, external DECT base station or fax to the Tel1 port on the back panel of your Gateway. DMS-CTC-20130228-0000 v1.0... -
Page 33: Admin Tool
3 ADMIN TOOL 3 Admin Tool Introduction The Admin Tool allows you to configure the settings of your Gateway via your web browser. Requirements JavaScript must be enabled on your browser (this is the default setting). For more information, consult the help of your web browser. -
Page 34: Components
3.1 Components Components overview The following diagram identifies the sections of the Admin Tool.: Menu (item A) The menu consists of the following menu items: Gateway: Provides basic information about the Gateway and allows you to configure the basic settings. Connected Devices: ... - Page 35 3 ADMIN TOOL Status section (item C) The diagnostics section provides a quick overview of: The battery level The status of the Internet interface The status of the wireless interface The selected firewall level Move your mouse pointer over one of these items to view additional information. Tips section (item D) The tips section provides helpful information about the settings displayed on the current page.
-
Page 36: How To Change The Default Admin Tool Password
3.2 How to change the default Admin Tool password We recommend you to change the default password of the Gateway. The default user name is admin and the default password is password. Procedure 1 Browse to the Admin Tool. For more information, see “Accessing the Admin Tool”... -
Page 37: The Gateway Wireless Access Point
4 THE GATEWAY WIRELESS ACCESS POINT 4 The Gateway wireless access point Introduction This section will help you set up your wireless network. What you need to set up a wireless network To set up a wireless network, you need the following components: Wireless access point (already integrated into your Gateway) ... -
Page 38: How To Configure The Wireless Settings
4.1 How to configure the wireless settings 1 Browse to the Admin Tool (http://10.0.0.1). For more information, see “Accessing the Admin Tool” on page 2 On the Gateway menu, click Connection and then click WiFi. 3 The WiFi page appears. In the Private WiFi Network table, click the EDIT button. 4 The Edit page appears: The following fields are available for configuration: ... -
Page 39: How To Start A Wps Session Via The Admin Tool
4 THE GATEWAY WIRELESS ACCESS POINT 4.2 How to start a WPS session via the Admin Tool Adding a wireless client using WPS PBC 1 Make sure that the WPS button of your wireless client is accessible. This button can be a hardware button or a software button. - Page 40 Adding a wireless client using WPS PIN entry on the Gateway 1 Locate and write down the WPS PIN of your wireless client. The WPS PIN is printed on the Gateway’s bottom panel label or accessible from the software. 2 Browse to the Admin Tool. For more information, see “Accessing the Admin Tool”...
-
Page 41: Internet Security
5 INTERNET SECURITY 5 Internet security Overview The Gateway offers various options to secure your Internet connection: Topic Page 5.1 Parental control 5.1.1 Manage sites 5.1.2 Manage services 5.1.3 Manage devices 5.1.4 View parental control reports 5.2 Firewall DMS-CTC-20130228-0000 v1.0... -
Page 42: Parental Control
5.1 Parental control Introduction The parental control function: Prevents access to specific website based on the URL or keywords. For more information, see “5.1.1 Manage sites” on page Prevents access to specific application or services (for example, FTP). For more information, see “5.1.2 Manage services”... -
Page 43: Manage Sites
5 INTERNET SECURITY 5.1.1 Manage sites Introduction The Managed Sites page allows you to: Block specific websites (always or for a specific time frame) Block keywords (always or for a specific time frame) Mark devices as trusted When a device is marked as trusted, all Managed Sites rules will be ignored. - Page 44 How to block websites based on keywords Proceed as follows, from the Managed Sites page: 1 Under Blocked Sites, click + ADD. 2 The Add Keyword to be Blocked page appears. 3 In the Keyword box type the keyword that you want to block (for example, the webmail keyword will block all URLs that contain the word webmail in the URL).
-
Page 45: Manage Services
5 INTERNET SECURITY 5.1.2 Manage services Introduction The Managed Services page allows you to: Create a service rule to block specific Internet services. Optionally, you can provide a time schedule for a rule. The rule will only be activated within the specified time frame. -
Page 46: Manage Devices
5.1.3 Manage devices On the Managed Devices page you can: Create a device rule to prevent a devices from accessing your network. Optionally, you can provide a time schedule for a rule. The rule will only be activated within the specified time frame. - Page 47 5 INTERNET SECURITY b Under Set Block Days, select the days for which the selected block time should be applied. If you want to have different time schedules depending on the day, you have to group them in separate rules: One rule for weekdays (for example, allow the device from 8:00 PM until 10:00 PM) ...
-
Page 48: View Parental Control Reports
5.1.4 View parental control reports Introduction The Reports page allows you to generate reports on possible infringements of the parental control rules. Procedure 1 Browse to the Admin Tool. For more information, see “Accessing the Admin Tool” on page 2 On the Parental Control menu, click Reports. 3 The Report page appears. -
Page 49: Firewall
5 INTERNET SECURITY 5.2 Firewall Introduction The Gateway comes with an integrated firewall that helps you protect your network from attacks from the Internet. This firewall has a number of predefined levels to allow you to adjust the firewall to your needs. The default Firewall setting is Minimum Security (Low). - Page 50 DMS-CTC-20130228-0000 v1.0...
-
Page 51: Advanced Configuration
6 ADVANCED CONFIGURATION 6 Advanced configuration Introduction This chapters covers the more advanced features. The following topic are available: Topic Page 6.1 Port configuration for applications and services 6.1.1 UPnP 6.1.2 Port forwarding 6.1.3 Port triggering 6.1.4 Configure a DMZ Host 6.2 Assigning a reserved IP to a device DMS-CTC-20130228-0000 v1.0... -
Page 52: Port Configuration For Applications And Services
6.1 Port configuration for applications and services Introduction The Gateway allows you to use one Internet connection for multiple computers. This means that all your computers share one public IP address, as if only one computer were connected to the outside world. Issue When the Gateway receives an incoming message, the Gateway has to decide to which computer it has to send this message. -
Page 53: Upnp
6 ADVANCED CONFIGURATION 6.1.1 UPnP Introduction UPnP is designed to automate the installation and configuration of a (small) network as much as possible. This means that UPnP-capable devices can join and leave a network without any effort of a network administrator. Supported operating systems The following operating systems support UPnP: Windows 8... - Page 54 3 If Explorer prompts you that network discovery and/or file sharing are turned off, click on the message and turn it on. 4 Right-click Technicolor TC8305C and click View device web page. 5 The Admin Tool appears. How use UPnP to access your Gateway on Windows XP If you computer runs Windows XP: 1 Go to My Network Places.
-
Page 55: Port Forwarding
6 ADVANCED CONFIGURATION 6.1.2 Port forwarding Introduction Port forwarding allows you to forward incoming Internet traffic arriving on a specific port to an internal IP address. For example: if you are running a web server and the Gateway receives a request on port 80, this request should be forwarded to your web server. - Page 56 9 Your service is now listed in the Port Forwarding table. All incoming requests for the selected service will now be directed to the selected device. The Gateway will also configure its firewall to allow this service. DMS-CTC-20130228-0000 v1.0...
-
Page 57: Port Triggering
6 ADVANCED CONFIGURATION 6.1.3 Port triggering Introduction Port triggering allows you to define a set of dynamic port forwarding rules that will be activated as soon as a device sends traffic to the Internet over a specific port(s), the trigger port(s). The difference compared to the port forwarding function described in “6.1.2 Port forwarding”... -
Page 58: Configure A Dmz Host
6.1.4 Configure a DMZ Host Introduction The Gateway allows you to configure one local device as a De-Militarized Zone (DMZ) host. This means that: None of the Gateway firewall rules will be applied to this device. All traffic originating from the Internet will be forwarded to this devices unless there is a port forwarding rule defined for ... -
Page 59: Assigning A Reserved Ip To A Device
6 ADVANCED CONFIGURATION 6.2 Assigning a reserved IP to a device Introduction By default, each device will get an IP address from the Gateway’s DHCP server. When a device leaves, is turned off or the lease time of the address has expired, the IP address becomes available and can be re-used for other devices. When you want to run a service on a network device (for example, a web server, network printer, etc.), it is advised to assign a reserved IP to the device. - Page 60 DMS-CTC-20130228-0000 v1.0...
-
Page 61: Support
7 SUPPORT 7 Support Introduction This chapter suggests solutions for issues that you may encounter while installing, configuring or using your Gateway. If the suggestions do not resolve the problem, look at the support pages on www.technicolor.com or contact your service provider. -
Page 62: Wireless Connection Troubleshooting
7.1 Wireless connection troubleshooting No wireless connectivity Try the following: Make sure that the wireless client is enabled (message like “radio on”). Make sure that the wireless client is configured with the correct wireless settings (Network Name, security settings). ... -
Page 63: Network Diagnostic Tools
7 SUPPORT 7.2 Network diagnostic tools Introduction The Admin Tool offers a number of diagnostics tools to test your network connectivity. How to access the network diagnostics tools 1 Browse to the Admin Tool. For more information, see “3 Admin Tool” on page 2 On the Troubleshooting menu, click Diagnostic Tools. -
Page 64: Gateway Reset And Restore Options
7.3 Gateway reset and restore options Reset By performing a reset you will restart a specific set of services (or the complete Gateway). Restore By performing a restore you will reset a specific set of services (or the complete Gateway) and reapply their factory default settings. - Page 65 7 SUPPORT Restore the factory default settings of the Gateway, use a pen or an unfolded paperclip to push the recessed Reset button on the back panel of the Gateway for at least 15 seconds and then release it. 105+ SN: 8700383561 CM MAC : 00111100ABCD...
- Page 66 DMS-CTC-20130228-0000 v1.0...
- Page 68 TECHNICOLOR WORLDWIDE HEADQUARTERS 1, rue Jeanne d’ A rc 92443 Issy-les-Moulineaux France Copyright 2013 Technicolor. All rights reserved. www.technicolor.com All tradenames referenced are service marks, trademarks, or registered trademarks of their respective companies. Specifications subject to change without notice. DMS-CTC-20130228-0000 v1.0...
Need help?
Do you have a question about the TC8305C and is the answer not in the manual?
Questions and answers