
Summary of Contents for Digital Signature MINT
- Page 1 Mint Studio USER GUIDE GUIA DEL USUARIO Mint Studio MANUEL DE L’UTILISATEUR Mint Studio...
-
Page 2: Important Safety Instructions
IMPORTANT SAFETY INSTRUCTIONS To reduce the risk of shock and prevent damage to the Digital Signature™ Mint™ Digital Music Station to yourself or to your property follow these safety precautions: 1. Read these instructions. 12. Use only with the cart, stand, tri- 2. - Page 3 In no event will Digital Signature be liable for direct, indirect, special, incidental, or consequential damages resulting from any breach of warranty or under any other legal theory, even if advised of the possibility of such damages. In any event Digital Signature will not be liable for sums in excess of the purchase price of the product.
-
Page 4: User Interface
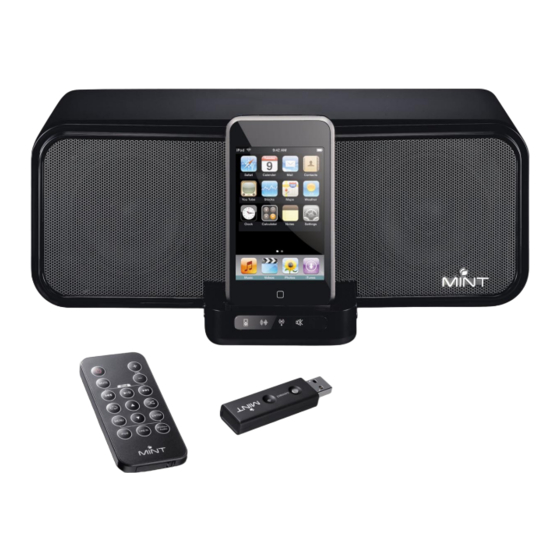
3. Insert the adaptor into the dock. 4. Plug iPod into the dock with the adaptor. 5. MINT Studio automatically detects when an iPod is plugged and changes input mode to iPod. iPod mode indicator 6. You are ready to listen to the music from iPod. -
Page 5: Line-In Connection
• Mini jack to mini jack or RCA to mini jack cables are not included. This cable could be purchased at electronic retail stores or please visit www.mintds.com to purchase online. 2. Plug the mini stereo connector into Line-in port on the back of the MINT Studio. 3. Plug the other side of connector into the device that you want to connect. -
Page 6: Operation
BATTERY REPLACEMENT If the Mint Remote Control stops operating normally or its operation range seems to be reduced, replace the battery. 1. Place the tip of a pencil in the small slot at the bottom of the remote. Pull the tray open. -
Page 7: Troubleshooting
Pairing is a procedure in which your MINT Studio Speaker System identifies your Mint USB Audio Transmitter to work together wirelessly, like other wireless operating computer devices such as wireless keyboard and mouse. Your MINT Studio is already paired with your Mint USB Audio Transmitter. You don’t need to pair unless the wireless input indi- cator is blinking continuously. -
Page 8: Interfaz Del Usuario
3. Introduzca el adaptador en la base dock. 4. Conecte el iPod a la base dock junto con el adaptador. 5. El MINT Studio detecta de una manera automática si se conecta un iPod, así iPod mode indicator como, cambia el modo de entrada para el correspondiente al iPod. -
Page 9: Conexión Inalámbrica
2. Conecte el mini conector estéreo al puerto “Line-In”, que se encuentra en la parte posterior del MINT Studio. 3. Conecte el otro lado del conector al equipo que Usted desea conectar. -
Page 10: Mantenimiento
1. Presione uno de los tres botones de entrada que tiene el control remoto Mint, y de esta forma usted podrá seleccionar el modo que desee, con lo que se iluminará el indicador del modo de entrada seleccionado. -
Page 11: Resolución De Los Problemas
PARA CONECTAR EN PAREJAS La conexión en parejas es un procedimiento en el que su Sistema de Bocinas MINT Studio identifica a su Transmisor de Audio USB Inalámbrico para que funcionen juntos inalámbricamente, igual que cualquier otro dispositivo inalámbrico de computadora, como un tecla- do o un ratón (mouse) inalámbrico. -
Page 12: Installation
3. Insérer l’adaptateur dans la console. 4. Brancher l’ iPod dans la console avec l’adaptateur. 5. MINT Studio détecte automatiquement quand un iPod est branché et change le mode d’entrée au iPod. iPod mode indicator 6. Vous êtes prêts à écouter la musique d’iPod. - Page 13 • Mini prise à mini prise ou prises RCA aux câbles de mini jack ne sont pas inclus. Ce câble peut être acheté aux magasins électron- iques ou en visitant notre magasin en ligne www.mintds.com. 2. Brancher le mini connecteur stéréo sur le port Line In au dos du MINT Studio. 3. Brancher l’autre coté du connecteur sur l’appareil que vous désirez brancher.
-
Page 14: Entretien
Mint Studio a trois sources audio différentes: iPod, Line-in, et sans fils. Il y a deux manières de séectionner les modes d’entrée: 1. Vous pouvez pousser sur l’un des trois boutons de la télécommande Mint pour séectionner le mode que vous désirez et votre indicateur de sélection s’allumera 2. - Page 15 Mint pour fonctionner ensemble sans fil, comme les autres dispositifs informatiques d’exploitation comme le clavier et la souris sans fil. Votre MINT Studio est déjà apparié avec votre émetteur Audio USB sans fil. Vous n’êtes pas obligé d’apparier, excepté si l’indica- teur clignote sans arrêt.
-
Page 16: Service And Support
Copyright © 2008 Digital Signature, Incorporated. All rights reserved. Digital Signature, Mint, and Di-Fi are trade- marks of Digital Signature. iPod and Mac are trademarks of Apple, Inc., registered in the United States and/ or other countries. PurePath Digital is a trademark of Texas Instruments Incorporated. Peerless is a trademark of Tymphany Corporation.
Need help?
Do you have a question about the MINT and is the answer not in the manual?
Questions and answers