Advertisement
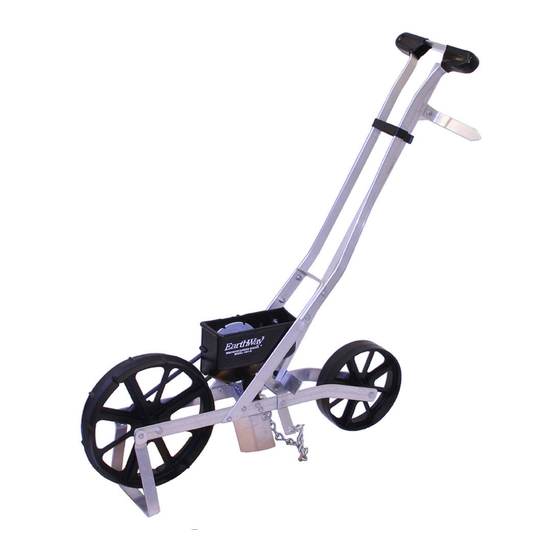
1001-B PRECISION GARDEN SEEDER
ASSEMBLY and OPERATING INSTRUCTIONS
Congratulations on the purchase of this new 1001-B Earthway Precision Garden Seeder. Please contact us if you have any
difficulty with assembly or operation of this product. We can be reached via the telephone at 800-294-0671 or 574-848-7491
Monday - Friday 9:00am ~ 4:00pm or visit us online at www.earthway.com The 1001-B comes with
, email us at techsupport@earthway.com.
support
HELPFUL HINTS: READ THE DIRECTIONS BEFORE ASSEMBLY
5 This seeder comes partially assembled, requiring you to install the wheels, handle assembly and row marker.
5 Assembly time is approximately 15 minutes with basic hand tools.
Clean and dry your seeder thoroughly after each use
5
PRECISION GARDEN SEEDER ~ Assembly
Model 1001-B (Refer to Figure 1, Page 3 for illustration)
REAR WHEEL
Lower kick stand at front to hold planter upright.
Remove nut, bolt, and axle (22, 18, & 25) from frame.
Insert axle through rear wheel (17), place between frame, and line up with holes in end of frame.
Reinstall bolt and nut (18 & 22), and tighten.
HANDLE
Remove nuts and bolts from Plastic Bag. (These are special lock nuts. A wrench will be required to remove
and install them).
Bolt handle (8) in place using bolt & nut (13 & 14) as shown in Figure 1, Page 3 for illustration.
Install the Row Marker Retainer Clip (10) from the front to the back and press into place in the holes
on the handle.
ROW MARKER
Place row marker shaft (1) in front of row marker bracket and line up holes.
Insert clevis pin (7) through row marker shaft (1) and row marker bracket, and
insert hair pin clip (6) through clevis pin. When not in use, secure the row marker
shaft to the New Row Marker Retainer Clip (10) to hold in place.
A cord may be tied to the handle bracket (24) and row marker shaft (1) for
lowering and raising the row marker.
®
.
Earth Way
Earth Way
lifetime technical
1-2012 Pt. #52101
R
R
Advertisement
Table of Contents

Subscribe to Our Youtube Channel
Related Manuals for EarthWay 1001-B PRECISION


Summary of Contents for EarthWay 1001-B PRECISION
- Page 1 ASSEMBLY and OPERATING INSTRUCTIONS Congratulations on the purchase of this new 1001-B Earthway Precision Garden Seeder. Please contact us if you have any difficulty with assembly or operation of this product. We can be reached via the telephone at 800-294-0671 or 574-848-7491 Monday - Friday 9:00am ~ 4:00pm or visit us online at www.earthway.com The 1001-B comes with...
- Page 2 1001-B p recision arden eeder OPERATION (Refer to Figure 1, Page 3 for illustration) You will find one seed plate in place in the hopper, the rest in the box. A. To remove the plate, hold pulley (12) and belt (11) stationary with one hand and rotate the seed plate approximately 1/2” in the “OFF” direction as indicated by an arrow on the seed plate.
- Page 3 Figure 1 Row Marker Bracket 13 & 14 Seed Hopper 11 & 12 18, 22, & 25 Kick Stand...
- Page 4 Seed Plate Guide This is a list of all the seed plates currently produced for the 1001-B Precision Garden Seeder. Custom seed plates are available by calling Customer Service at 574-848-7491. We will need 1 cup of seeds for testing purposes and desired seed spacing requirements.
- Page 5 5-YEAR LIMITED WARRANTY Earthway Products, Inc. warrants this product free of defects in original workmanship and materials for a period of 5-Years to the end user with the original dated purchase receipt. If a manufacturing non-conformance is found, Earthway Products, Inc. at its discretion will repair or replace the part(s) or product at no charge provided the failure is not the result of incorrect installation, mishandling, misuse, tampering, or normal wear and tear as determined by Earthway.
Need help?
Do you have a question about the 1001-B PRECISION and is the answer not in the manual?
Questions and answers