Table of Contents
Advertisement
Advertisement
Table of Contents

Related Manuals for Clavia ddrum4


Summary of Contents for Clavia ddrum4
- Page 1 OWNER´S MANUAL version 1.x © Clavia DMI AB 1997...
- Page 2 The lightning flash with the arrowhead CAUTION CAUTION AVIS AVIS AVIS CAUTION CAUTION AVIS CAUTION AVIS symbol within an equilateral triangle is intended to alert the user to the presence of RISK OF ELECTRIC SHOCK uninsulated voltage within the products DO NOT OPE enclosure that may be of sufficient magnitude to constitute a risk of electric...
-
Page 3: Table Of Contents
Page 3 Table Of Contents 1. Introduction................5 Welcome! ........................5 About this manual and about the ddrum4 system ............. 5 The pads ........................5 Expand your sound library ..................5 2. Overview ................6 Front panel ........................ 6 Rear panel ......................... 8 3. - Page 4 Go see our web site and get free sounds .................. 26 MIDI Sample Dumps ....................... 26 Check the size .......................... 27 How to load new sounds into the ddrum4 ................27 Error codes when loading ......................27 7. Appendix ................28 MIDI Program Change messages ................
-
Page 5: Introduction
Page 5 1. Introduction Welcome! We would first like to congratulate you on your purchase of the ddrum4. The ddrum4 is a new type of electronic drum system with several innovative features. About this manual Please read it. It contains a lot of useful information. The first section contains the necessary information for connecting your system parts. -
Page 6: Overview
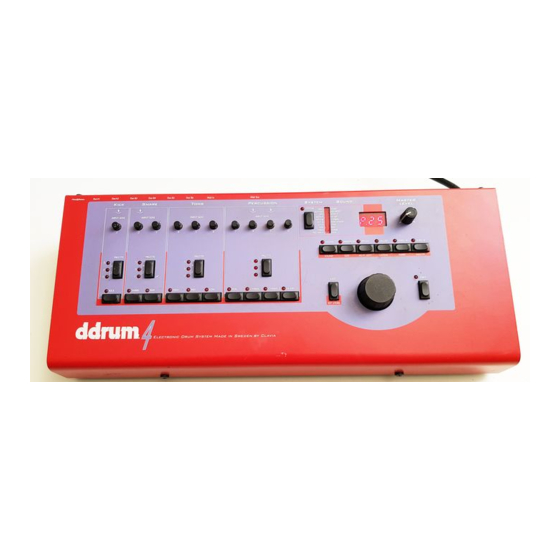
Page 6 Overview 2. Overview Front panel Out A2 Out B3 Out B4 Out B5 Out B6 Midi In Midi Out Kick Snare Toms Percussion INPUT SENS INPUT SENS INPUT SENS INPUT SENS PALETTE PALETTE PALETTE PALETTE KICK SNARE HIGH PERC CYMBAL 1 CYMBAL 2... - Page 7 If the display shows a P. followed by a number, then the ddrum4 is in the Kit mode. If the display shows PAL then the ddrum4 is in the Palette mode. You can always press the...
-
Page 8: Rear Panel
Page 8 Rear panel Rear panel The rear panel contains the jacks, the MIDI connectors and the switch. INPUT OUTPUT POWER The outputs are configured according to this illustration. Trigger inputs Out B6 Out B5 Out B4 Out B3 Out A2 Out A1 Phones The ten... -
Page 9: Connections
INPUT SENS INPUT SENS 3. Connect the main outputs, marked A1 and A2 on the ddrum4 rear panel, to a suitable sound system. If you’d rather use a pair of headphones, a headphone jack has been provided. The control lets you adjust the output volume of the headphone output and of the line MASTER LEVEL level outputs A1 and A2. -
Page 10: Selecting The Trigger Input Type
These trigger sources have their respective characteristics and by selecting the most appropriate for each channel, the ddrum4 will perform at its best. Please turn to page 14 for more details regarding the trigger options. -
Page 11: Adjusting The Input Sensitivity
SYSTEM INDICATOR lights up only during the hardest hits. The sensitivity settings are crucial to the general feel and sound of your ddrum4 system. Dynamics is what it’s all about. Take your time and adjust the sensitivity to your playing style. -
Page 12: Setting The Trigger Threshold
The three things that we have done here, input setting, input sensitivity and trigger threshold are very important to get the right feel when playing on the ddrum4. You might want to go back and adjust these later but there is no need for doing this every time you want to play. The system selections that you have made (trigger input selection and threshold) are automatically stored in ddrum4 until you decide to change them. -
Page 13: Selecting Kits & Sounds
& sounds Palette mode When you turn on the ddrum4, it will set itself to the Palette mode, indicated by PAL in the display. Each one of the four main instrument groups, kick, snare, toms and percussion has a button with which you can quickly choose one of five sound setups. You can program PALETTE your own selection of sounds in the Palette. -
Page 14: How To Store Your Edits
Page 14 How to store your edits As previously mentioned, all editing that you do, while the ddrum4 is in the Palette mode is automatically stored. In the Kit mode however, ddrum4 needs to be told when to store any edits. -
Page 15: Good Drum Sounds
A hi-fi system can be used and will probably sound quite good at low volume levels. There is however a chance that the ddrum4 could cause serious damage to a hi-fi system, so we can not recommend you using one. -
Page 16: Reference
Use this with the ddrum Cast Acoustic pads. H n d Select this if you want to play on the pads with your hands. A c 1 Use this one if you are triggering a ddrum4 channel with an acoustic snaredrum and a... -
Page 17: Thres
10 on the ddrum 4. • When you connect a hi-hat pedal for the first time, and select this trigger type, the ddrum4 needs to be calibrated to the hi-hat pedal. While you are in trig input mode for channel 10, close the pedal (don’t press too hard) and press... -
Page 18: Out A
TRIG INPUT KICK This sets the MIDI note number that each channel is transmitting and responding to. MIDI note number 60 (middle C) is equivalent to C3 in the ddrum4. If you press the button, SHIFT you will get a numerical read-out in the instead of the ”musical”... -
Page 19: Note P
This is helpful for checking sounds at different velocities without pads. Remember that the ddrum4 sounds are extremely velocity sensitive and to judge the quality and playability of a single sound, you need to hear it triggered with various velocities. -
Page 20: Midi
MIDI notes back to the MIDI input on the ddrum4. This creates a MIDI loop. If local is left on, this could cause double triggers and flamming when the MIDI notes arrive back at the MIDI input and trigger the sounds again. -
Page 21: Sound Functions
SOUND No matter if the ddrum4 is in Palette mode or in Kit mode, this is where and how you select a sound to a particular channel. Any sound in the ddrum4 can be assigned to any of the ten sound channels. -
Page 22: Variation
VARIATION SIZE Usually there are several variations to each and everyone of the ddrum4 sounds. A variation uses the same sound sample or multi sample, but with some additional programming or tweak- ing. This could be different equalization, different velocity selections etc. Try them. -
Page 23: Shift Functions
After such an operation, you would need to reload the ddrum4 with new sounds in order to be able to use it again. We have made it a bit difficult to perform this dangerous operation but please read the following paragraphs before you start to experiment with these functions. -
Page 24: Shift-Sound
If, e.g. you have a sound in a computer that is 34,2 kilobytes in size, you will need 35 blocks of free space in the ddrum4. Please note that the memory left indication also includes any sounds that are marked for removal. This is indicated with a flashing dis- play. -
Page 25: Shift-Mark
Do not turn off the ddrum4 during this process! Shift-Exit Sounds that are marked, as described above, can be transmitted as ddrum4 MIDI System Exclusive data via the MIDI Out connector. Press to start the transmission. The... -
Page 26: Sounds, Sound Formats
These samples will not be compressed as much as the ddrum4 sounds (only by a factor of 2), making them bigger than a corresponding ddrum4 version of the same sound, making the transfer process slower. -
Page 27: Check The Size
When you have the sounds on your hard drive, you need to check their size to see if they fit in the ddrum4 sound memory. If you have a PC, just look in the directory to see the size of each sound file. -
Page 28: Appendix
The ddrum4 has a special way of interpreting MIDI Program Change (MPC) messages. The kits, P. 1 ~ 26 are selected by sending MPC 0 to 25 to the ddrum4. The factory kits, F.27 ~ 99 use MPC 26 to 98. -
Page 29: Output Assignment
Appendix Page 29 Output assignment This figure shows the path that the sound from each channel follows to the outputs. Outputs Sound Master Level A Out A level Headphones Level B Out B Dynamic curves This figure shows the relationship between the striking force and the trigger level, with three different dynamic curves. -
Page 30: Index
Out A 18 Out B 18 Channel button 10, 19 Output jacks 8 Connections 9 Control Change messages 20 PAL 9 Palette 13 ddrum4 sounds 26 Pitch 22 Decay 22 Delete 25 Pressure 8 Program Change messages 20 DuP 27 Dyn 17... -
Page 31: Midi Implementation Chart
Page 31 MIDI IMPLEMENTATION CHART Model: Clavia ddrum4 Date: Feb 1997 Version: 1.0 FUNCTION TRANSMITTED RECOGNIZED REMARKS Basic Default Channel Changed 1-16 1-16 Memorized Default Mode 3 Mode 3 Mode Messages Note 0-127 0-127 Number Velocity Note ON O v=0-127...
Need help?
Do you have a question about the ddrum4 and is the answer not in the manual?
Questions and answers