Table of Contents
Advertisement
Quick Links
Advertisement
Table of Contents

Related Manuals for Ground Control Toughsat


Summary of Contents for Ground Control Toughsat
- Page 1 Toughsat Users Manual TOUGHSAT USERS MANUAL Ground Control v5.0...
- Page 2 Ground Control Toughsat System ALL POWER to ALL system electronics MUST be disconnected if connecting the control cable from the Toughsat dish to the Toughsat ACU (Controller) and the iDirect modem. Permanent damage will occur to the unit causing it to cease functionality until the unit is returned to Ground Control’s facility for repairs.
-
Page 3: Toughsat Owner Information
TOUGHSAT Owner Information Please fill out the information on this page with the account information supplied to you from Ground Control and keep the manual in the rack-mount electronics case. It will be helpful both for on-site setup as well as required information if you need to contact Ground Control for support. -
Page 4: Table Of Contents
Updating the Toughsat FLASH file ......................18 How To Adjust The Reference Satellite ..................... 19 Manual Motor Control Of The Toughsat System ..................21 Using The Manual Control Buttons On The Upper Control Board ............23 FINAL WALK-AROUND CHECKLIST ..................25 TOUGHSAT FACTS ........................ - Page 5 Basis Networking Issues ..........................32 Satellite Dish Won’t Search Or Is Stuck..................... 34 BUC Power LED Is Red ..........................35 TESTING / BYPASSING / ROLLING COAXIAL CABLES............36 TOUGHSAT SPECIFICATIONS ....................38 CONTACTING GROUND CONTROL SUPPORT ................ 39 - 5 -...
-
Page 6: Toughsat Features General System Features
Bundled with our High-Performance iDirect Service providing 5Mbps x 2Mbps Internet speeds. We offer special service pricing for Public Safety Organizations. One-Button operation. The Toughsat may be deployed and operated by anyone with little or no training. Establishes a self-contained local area wireless "G" network (100' radius) automatically. - Page 7 Multiple Auto-Stow routines, loss of signal, vehicle movement, power loss. to prevent accidental collisions. Custom TS2 panel and web interface branding available for qualified resellers. Compatible with all Toughsat mobile systems. Web Accessible Interface Screen ACU may be accessed by any connected computer/smartphone with browser. No software to install.
-
Page 8: Toughsat Standard Included Equipment
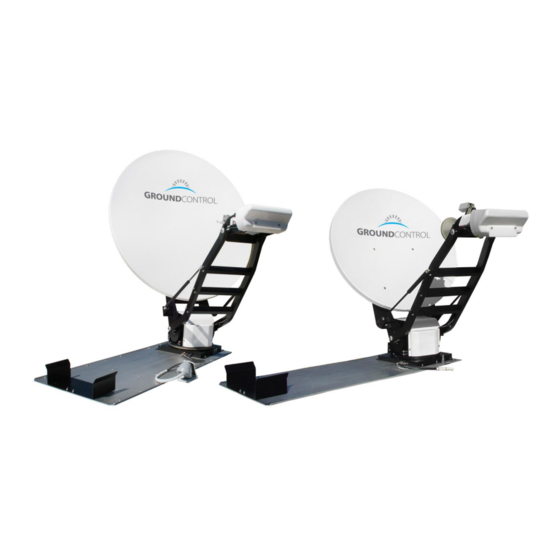
Toughsat Users Manual Ground Control Toughsat Standard Included Equipment ● The Toughsat XP or SP Mobile Satellite System. ● Toughsat TS2 ACU (Antenna Control Unit) with integrated 4 port wireless router. ● Evolution X5 Satellite Gateway (or other purchased VSAT gateway). -
Page 9: Using The Toughsat
Ground Control Using The Toughsat Find A Level Area If the Toughsat is within three degrees of level, it will normally find satellite within 3.5 minutes, otherwise the time to find satellite may be a few minutes longer. A bullseye level in the driving cab will help. Also make sure to park in an open sky area where line-of-sight to the orbiting satellite is possible. -
Page 10: When The Toughsat Is Online
The system is online when the gateway lights (on the iDirect Evolution X5) show solid RX, TX, NET and Power lights are solid green. Also the Toughsat display will display the current system status. If you do not see this light pattern, it could be due to bad or incorrect cable connections. - Page 11 Toughsat Users Manual Ground Control Areas To Physically Avoid The transmission strength is strongest between the radio and the reflector. Do not place any body part in this zone. - 11 -...
-
Page 12: Toughsat Wiring Diagram
Ground Control Toughsat Wiring Diagram Above is the standard wiring between the Toughsat, the TS2 controller, and the iDirect X5 satellite router. Input voltage is between 100/240 Volts AC. We strongly recommend using a UPS (Universal Power Supply) in situations where power is inconsistent, such as fuel powered generators, solar panels, and DC inverters. -
Page 13: Accessing The Wireless Router
First, look to the lower left quadrant of the screen, to the “Input Data” Section: Confirm that it displays “GPS Signal OK” and has GPS coordinates. Without this information, or if the Toughsat does not display “GPS Signal OK”, it will not deploy. -
Page 14: Stowing The Dish
Now look at the “Signal Quality” section, here: and you will see what the Toughsat is doing at this moment, in the “Status” line. The Toughsat will search for signal, and when it’s ready, it will display “Passed Test, System Online”. -
Page 15: Location And Line-Of-Sight To Satellite
Vehicle Level Considerations The tilt tensors on the Toughsat can register and compensate for up to 10 degrees of tilt in any direction. However, all satellite internet radio signals are highly polarized to prevent interference. IF you are more than 3 degrees out of level, your search times will be longer and your dish may not ever get online. - Page 16 Toughsat Users Manual Ground Control From the drop down menus, select the correct satellite for your system (123W for iDirect). Click “Calculate” You should be able to search again and lock on. If you still cannot lock on, please contact Technical Support.
-
Page 17: Advanced Operation
If you wish to allow remote control of the Toughsat, you may want to increase the refresh rate of the control page. Since the control page uses Javascript and AJAX elements, they will change their information too fast for a remotely-connected user to see. -
Page 18: Updating The Toughsat Flash File
Updating the Toughsat FLASH file You will receive a file from Ground Control containing a file with the same name as your Toughsat serial number. Make sure that the file name matches your serial number, then unzip the attachment. Connect a laptop to your system and bring up an FTP client. -
Page 19: How To Adjust The Reference Satellite
Toughsat Users Manual Ground Control How To Adjust The Reference Satellite 1. Power on the unit 2. Connect to the GC Controller 3. Bring up the dish control page at 192.168.1.2 4. In the top center, there will be a blue button that says “Satellite Settings”. Click on it. - Page 20 Toughsat Users Manual Ground Control 6. After the dish finishes saving flash memory, you can press “Find Satellite”. The dish should then deploy and begin its search procedure. - 20 -...
-
Page 21: Manual Motor Control Of The Toughsat System
Users Manual Ground Control Manual Motor Control Of The Toughsat System Manually adjusting the antenna is not normally recommended, but may be a useful troubleshooting step. It is important to note that because the manual control page is still using the antenna software, these controls are still subject to motor current limits and other software controls. - Page 22 Users Manual Ground Control Locate the “Manual Control” button in the upper right corner and click it. You should see Toughsat Main menu. Click on the Manual tab on the top right of the menu. The buttons that you see control all three axes of motion for the antenna. The left and right buttons adjust the azimuth (side to side movement), the up and down buttons control the elevation (up and down movement) and the diagonal arrows adjust the skew / polarity of the antenna clockwise or counter-clockwise.
-
Page 23: Using The Manual Control Buttons On The Upper Control Board
The Toughsat internal parts and electronics are protected by three plastic covers. The front and back covers are held together by the top cover, which must be removed first. After that, the back cover may be removed, exposing the UCB (Upper Control Board) housing (shown below). - Page 24 Toughsat Users Manual Ground Control The Upper Control Board (UCB) - Opened The Upper Control Board is capable of moving all motors and axis of the dish. To do this, locate the two black buttons on the face of the board and press the SELECT button to cycle through which axis motor to move.
-
Page 25: Final Walk-Around Checklist
Most satellite systems will not operating during storms, periods of rain, or thick cloud conditions. While the Toughsat has a larger transmitter, which may allow it to perform in some of these conditions, successful operation of this system is not guaranteed. -
Page 26: The Idirect Modem Led Indicators
The iDirect Modem LED Indicators The iDirect modem has the following front panel lights: Power, Status, Transmit (Tx), Net, and Receive (Rx). The explanations below are for Ground Control service with iDirect platform version 6.0.9.6 (standard continental US settings). The Power light: →... - Page 27 Toughsat Users Manual Ground Control Troubleshooting Indicators Some of the more common trouble indicators are listed below, for reference. Tx light does not come on: This means that your modem is not even attempting to transmit. This is typically caused by a mobile modem not receiving GPS from the controller, or a fix modem that has the wrong GPS coordinates.
-
Page 28: Basic System Troubleshooting
There are several factors which effect a Toughsat’s ability to locate signal, but the majority of them come down to location. This is due to the fact that all satellite communication units require an unobstructed line of site to the satellite in the sky. -
Page 29: On Signal But Tx Light Not Blinking
Toughsat Users Manual Ground Control …The default username and password are both “admin”. Then, check the settings in your router. Go to 192.168.1.1 You should see the main router page: If you do have link lights, but still can’t browse, check IP settings (next section). - Page 30 If you think the modem isn’t enabled in the network than you can call Technical Support and verify this, if it is in fact disabled you can contact Ground Control to verify, if it is in fact disabled enabling a mobile site is a very quick process.
-
Page 31: Unable To Access Network - Check Ip Settings
Toughsat Users Manual Ground Control Unable To Access Network – Check IP Settings If your network settings of the router (which is integrated into the controller) have been accidentally changed, the dish will not be able to communicate with the router. -
Page 32: Basis Networking Issues
Any cables with broken connectors or tears in the cable shielding should be replaced. When powered on and all proper cable connections are present, the status lights on the front of the Toughsat control unit should be lit in conjunction with any ports that have cables connected to them. - Page 33 Toughsat Users Manual Ground Control When prompted for a username and password by the router, leave the username field empty, and enter “admin” in the password field. Use lower case. Hit “OK” and you should be taken to the router’s configuration screen. The default start screen happens to be the main configuration screen, so no extra navigation is required.
-
Page 34: Satellite Dish Won't Search Or Is Stuck
Toughsat Users Manual Ground Control Satellite Dish Won’t Search Or Is Stuck First Steps: First make sure that all equipment is powered on. To do this, look for the indicator lights on the front of the equipment: If you found equipment that wasn’t powered on, try power it on and try your search again. -
Page 35: Buc Power Led Is Red
The example above is just the most common piece to go bad there are several other places where the coax could be broken. Below is a photo showing all the cable runs on a Toughsat. - 35 -... -
Page 36: Testing / Bypassing / Rolling Coaxial Cables
Your Toughsat system uses high-grade Belden 1694-A Shielded coaxial cables to connect the modem to the radio equipment at the end of the support arms. These cables run from the modem to the base of the Toughsat, then internally along the arms. Typically, the most likely place for cables to have damage is inside the unit itself. To that end, we can test coaxial cables in a number of ways. - Page 37 Toughsat Users Manual Ground Control Next, you will need to switch the cables at the base of the antenna, where it mounts to the roof. Doing so will require 2 small 9/16” box-end wrenches. After these cables have been switched, you may continue to the radio equipment.
-
Page 38: Toughsat Specifications
Toughsat Users Manual Ground Control Toughsat Specifications BANDWIDTH & NETWORK (iDirect Services- Galaxy 18) Download (with 4 Watt BUC)..........Up to 3000 Kbps (5000 Kbps with 6 Watt BUC) Upload (with 4 Watt BUC) ..........Up to 1000 Kbps (2000 Kbps with 6 Watt BUC) Public IP Address............. -
Page 39: Contacting Ground Control Support
Ground Control Contacting Ground Control Support Ground Control technical support representatives are available 24 hours per day for your convenience. Please note that our standard hours of operation are Monday – Friday, 8AM to 5PM Pacific Standard Time. If you call outside of these hours, support response may be delayed and certain resources may not be available to the support agent.
Need help?
Do you have a question about the Toughsat and is the answer not in the manual?
Questions and answers