
Summary of Contents for Health Master Elite JLA-8
- Page 1 Owner’s Manual Do Not Operate The HealthMaster Before Reading This Entire Manual FOR HOUSEHOLD USE ONLY. Model: JLA-8 120 VAC 60Hz 1200W SEE WARRANTY INFORMATION IN THIS MANUAL Also for red and white models.
-
Page 2: Table Of Contents
Contents Important Safeguards 3–4 Specifications Avoiding Serious Injury and Burns While Processing Hot Liquids Parts & Accessories Assembling the HealthMaster™ 6–7 Controls Using the Tamper Using Your HealthMaster™ Making Hot Soups/Sauce Making Frozen Blends/Treats Making Dough Chopping with the HealthMaster™ Cleaning and Maintenance 10–11 Troubleshooting... -
Page 3: Important Safeguards
IMPORTANT SAFEGUARDS IMPORTANT: Read this manual carefully and completely before attempting to operate the HealthMaster. Failure to do so could result in serious personal injury. • Blades are sharp. Handle carefully. • Children should not be permitted to operate this, or any other kitchen appliance, without the constant supervision of a qualified adult. -
Page 4: Specifications
IMPORTANT SAFEGUARDS (continued) • Never use hands, fingers, or other utensils to insert food into the Pitcher. Use the Tamper only. • Never leave the HealthMaster unattended while motor is running. • Never add ingredients to the HealthMaster while unit is running at a speed of higher than #1. -
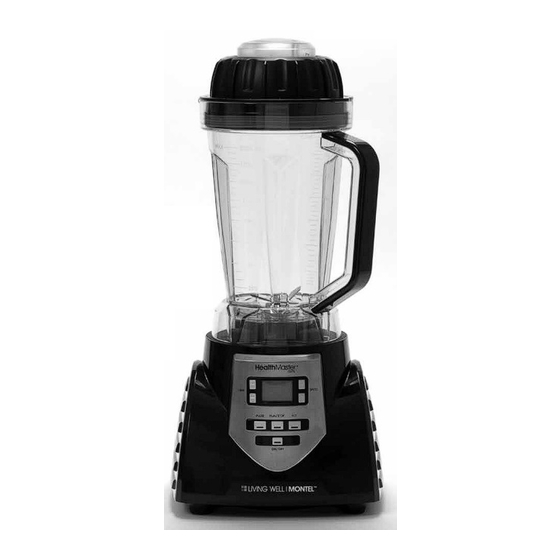
Page 5: Parts & Accessories
Parts & Accessories IMPORTANT: Your HealthMaster has been shipped with the following components. Check everything carefully before use. If any part is missing or has been damaged in shipping do not use this product and contact shipper using the customer service number located in the back of this owner’s manual. -
Page 6: Assembling The Healthmaster
Assembling The HealthMaster™ Figure A Unwind power cord to desired length. This appliance was designed with built-in power cord storage beneath the Base. Store the excess length of cord neatly underneath to avoid accidental tipping of machine while in use. WARNING: Do not plug power cord into electrical outlet until unit... - Page 7 Assembling The HealthMaster™ (continued) 3. Insert the E-Z Lock Cap into the Lid (aligning the Cap’s tabs with the Lid’s slots) and turn clockwise to the lock symbol. TABS NOTE: While the power is ON and as air pressure inside the Pitcher increases, steam will release from the openings on the side of the Cap.
-
Page 8: Controls
Controls Attention: The unit will not run on the RUN setting unless a time is selected. If you have to blend for less than 1 minute, manually stop the unit by pressing the STOP button. ON/OFF Button: Push once for ON. Push once for OFF. The button lights up BLUE when the HealthMaster is plugged in. -
Page 9: Using Your Healthmaster
Using Your HealthMaster™ • Always remove all stems and large pits such as peach, mango, apricot, etc. before processing as these items can damage the Blade and cause the motor to malfunction. • Unless otherwise instructed, insert wet ingredients into the HealthMaster™ first, then dry ingredients, then ice if needed. -
Page 10: Making Dough
Making Dough 1. To make dough for fresh bread or pizza, add the dry ingredients into the Pitcher first. Secure the Lid without the Cap. 2. Press ON button. Increase the speed to 4. Press RUN button. Add the wet ingredients into the Pitcher while the motor is running. -
Page 11: Cleaning And Maintenance
Cleaning and Maintenance (continued) 6. Make sure Base and parts are completely dry before storing in a cool, dry place. 7. Never use abrasive materials or cleansers to clean the main Base or any of the parts. This can scratch the finish causing permanent damage. CAUTION: To avoid personal injury use caution while cleaning inside of Pitcher as Blades are sharp. -
Page 12: Frequently Asked Questions
FREQUENTLY ASKED QUESTIONS LIVING WELL MONTEL HealthMaster™ about the This summary briefly answers common questions. Read operating manual before use. What is the difference between this unit and other blenders on the market? The Healthmaster is not a typical blender. This unit is designed to do 31 kitchen jobs in one. - Page 13 What is the Pitcher made out of? It is made of a BPA free plastic. How many speeds does the unit have? The unit has 8 variable speeds. What are the dimensions of the unit? 19.75”H x 9” W x 8.25”D (assembled) How is the unit able to make soups? The centrifugal force of the Blade spinning causes friction which heats up the contents.
-
Page 14: Warranty Information
Is it normal for my machine to be loud? Yes, this is a powerful motor. And there will be some noise associated with it. Can I make flour in the unit? Yes, you can. Do vegetables need to be cooked before putting in machine? Is the unit dishwasher safe? The Base is not dishwasher safe. -
Page 15: Replacement Parts Order Form
HealthMaster Elite Replacement Parts E-Z LOCK CAP TAMPER PITCHER To order please call or for more information visit: www.myhealthmaster.com or call 1-973-287-5189 Please allow 3–4 weeks for shipping. YES! Please send me the following VISA MasterCard Discover HealthMaster Elite items: Exp. - Page 16 OWNER’S MANUAL Congratulations on your purchase of the HealthMaster™ Elite. We are very proud of the functional design and exceptional quality of this product. Our manufacturing process is geared to deliver long years of product service to our valued customers. Should you experience any problem with your purchase, our dedicated customer service staff is here to serve you.
Need help?
Do you have a question about the Elite JLA-8 and is the answer not in the manual?
Questions and answers
I **** looking for a replacement gasket / seal for the lid of my Health Master Blender and cannot find one. The SN is CA0361278 and the model number is JLA-8WAL
You can order replacement parts, including items like the lid, by mailing a payment to:
HEALTHMASTER
26 Barnes Industrial Rd. North,
P.O. Box 3125, Dept. YD2098,
Wallingford, CT 06494.
The manual lists specific parts for sale, but it does not mention a separate gasket or seal. If needed, contacting the provided customer service number may help.
This answer is automatically generated