
Subscribe to Our Youtube Channel
Summary of Contents for Onix AN-8006
- Page 1 Car Stereo Car CD/CD-R/CR-RW Compatible/AM/FM 2 Band Radio INSTRUCTION MANUAL Model Number AN-8006 N13275 After Sales Support TEL: 1300 886 649 Made in China...
-
Page 2: What Your 1 Year Warranty Means
Congratulations on choosing to buy a ONIX product. All products brought to you by ONIX are manufactured to the highest standards of performance and safety, and, as part of our philosophy of customer service and satisfaction, are backed by our comprehensive Year Warranty. -
Page 3: Table Of Contents
Contents What your 1 year warranty means Contents Installation Using the detachable front panel Wiring Diagram Operations Location and Function of Keys Using the Remote Control General Operations Radio Operations CD/MP3 Operations Mixed-Mode CDs Operations SD/MMC Memory Card Play Operations AUX in Operations USB Device Operations Disc Notes... -
Page 4: Installation
Installation NOTES: - Choose the mounting location where the unit will not interfere with the normal driving function of the driver. - Before finally installing the unit, connect the wiring temporarily and make sure it is all connected up properly and the unit and the system work properly. - Page 5 Installation 1. DIN FRONT-MOUNT (Method A) Installation Opening This unit can be installed in any dashboard having an opening as shown below: 53mm 182m m Installing the unit: Be sure you test all connections first, and then follow these steps to install the unit.
- Page 6 Installation 6. Mount the sleeve by inserting the sleeve into the opening of the dashboard and bend open the tabs located around the sleeve with a screwdriver. Not all tabs will be able to make contact, so examine which ones will be most effective. Bend open the appropriate tabs behind the dashboard to secure the sleeve in place.
- Page 7 Installation 10. Reconnect the cable to the vehicle battery’s negative (-) terminal. Then replace the outer trim ring and install the unit’s front panel (see the steps of ‘to install the front panel’). Removing the unit: 1. Make sure the ignition is turned off, and then disconnect the cable from the vehicle battery’s negative (-) terminal.
-
Page 8: Using The Detachable Front Panel
Using The Detachable Front Panel Removing and protecting the detachable front panel The front panel of the unit may be removed as a theft deterrent. After removing the front panel, use the case provided to keep the front panel from getting damaged. 1 Press the OPEN button to flip down the front panel. -
Page 9: Wiring Diagram
Wiring Diagram After Sales Support TEL: 1300 886 649... -
Page 10: Operations
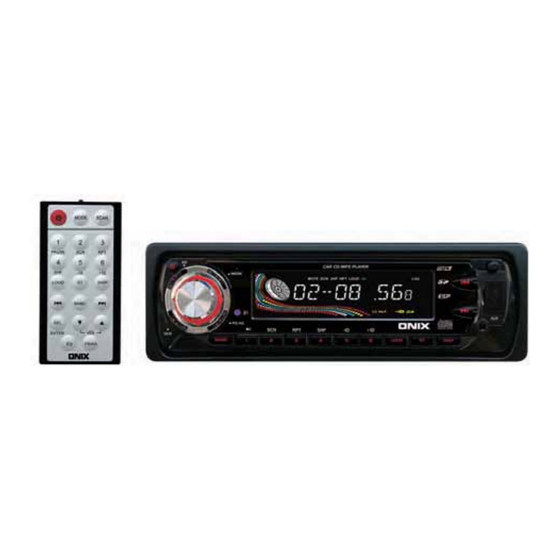
Operations Location and function of the keys Front panel: The front facet after removing the front panel: After Sales Support TEL: 1300 886 649... - Page 11 Descriptions of function controls: Power( )/ Mute Button LCD display Encoder Volume Control/ SEL Button Open ( ) Button Disc slot Eject ( ) key SD/MMC Memory Card Slot USB Port MODE Button DISP Button Anti-theft LED Indicator Reset Button Band/ ID3 Button Preset Station (M1-M6) Buttons PS/AS(Preset memory / Scan Auto-storage)
-
Page 12: Using The Remote Control
Using the remote control: NOTE: Refer to page 10 for key reference. Remark: * Before using the remote control, please take the transparent insulator slice off the bottom of remote control. * Point the remote control at the remote sensor within 2 metres. * It may not be possible to operate the remote control if the remote control sensor is exposed to direct sunlight. - Page 13 Battery replacement: Battery type: a button cell lithium battery (CR2025 3V) 1. Remove the battery holder by pressing the locking tab with your thumb and pulling it out. 2. Replacing the battery: Replace the battery with the same type and the (+) side facing up. 3.
-
Page 14: General Operations
General operation Reset the unit: Operating the unit for the first time, after replacing the car battery or changing the connections, you must reset the unit. 1. Turn off the unit power. 2. Press the OPEN ( ) button and remove the front panel, then press the RESET button with a ballpoint pen to restore the unit to the original factory settings. - Page 15 System menu: Press the SEL button and hold for more than 2 seconds to access the system menu mode, then press the SEL momentarily to select the menu items in series and circulation as follow: SEEK PRI/STEP RPI DX/LOCAL LOUD ON/OFF VOL LAST/ADJ P-VOL BEEP ON/OFF.
- Page 16 LOUD ON / OFF: This function is used to enhance the intensity of bass, after entering this mode,rotate the rotary encoder to choose loudness on or off. VOL LAST/ADJUST: Rotate the rotary encoder to choose between VOL LAST and VOL ADJ. - VOL LAST: The unit switches on at the last volume level when it was last switched off.
- Page 17 LOUD ON / OFF: Press the LOUD button to enhance the intensity of bass. Press again to cancel the loudness effect. To select EQ mode: The car audio device is equipped with 4 preset equalization modes. Press the EQ button repeatedly to select the EQ modes as follow: DSP OFF CLASSIC ROCK POP FLAT .
- Page 18 Clock display and adjustment: To view the current time, press the DISP button briefly, it will be shown for about 5 seconds and then revert to the previous display mode unless the DISP button is pressed again. During the period when the time is shown on the LCD display, you can adjust the clock time, press and hold the DISP button, the hour will twinkle, rotate the rotary encoder on the head unit or press the VOL UP or VOL DOWN...
-
Page 19: Radio Operations
Radio Operations To select a radio band: In tuner mode, press the BAND button repeatedly to select a radio broadcasting band you would like to hear. The FM band is toggled cyclically through the tuning bands: ->FM 1-> FM 2 -> FM 3 ->MW 1 ->... - Page 20 To store / recall a preset radio stations: You can store up to a total of 18 FM and 12 MW radio stations in the memory, manually or automatically. To store a station: - Select a band (if needed). - Select a station by pressing the buttons.
-
Page 21: Cd/Mp3 Operations
CD/MP3 Operations Loading/Removing a Disc: 1. Turn the power on. 2. Press the OPEN ( ) button on the front panel flip down the front panel then insert a disc into the disc slot with the printed side facing upward; the player will play the disc automatically. 3. - Page 22 Scanning playback: You can play the beginning of each track or file for 10 seconds in sequence. - In the CD/MP3/WMA file playback, briefly press the M2 (SCAN) button to play the first 10 seconds of each track. Press again to stop scanning and play the current track. - For MP3/WMA files, press and hold the M2 (SCAN) button to play the first 10 seconds of each track in the current folder.
- Page 23 Select the track or file for playback in MP3 or WMA format: You can access 4 different types of track search modes for MP3/WMA format: Track search --> file name search --> ROOT directory search --> Current directory search --> Exit. Serial number of track search mode: a) In playback of discs with MP3 or WMA format, press the PS/AS button once to access the track number search mode which allow...
- Page 24 The track name search mode: The track name search will allow you to quickly find an MP3/WMA title by name. a) To access this feature, press the PS/AS button twice, the “A” will be shown and blink on the LCD display. b) Change the blinking character by rotating the rotary encoder.
-
Page 25: Mixed-Mode Cds Operations
d) If the selected title is a subdirectory, rotate the rotary encoder to browse all the files in the subdirectory, then press the SEL button to confirm and play a selected file or track. ID3 information of MP3 file: In playback of discs with MP3 format, press the BAND button, the folder name, file name, title, artist and album information will be scrolling on the LCD display automatically. -
Page 26: Aux In Operations
SD/MMC Memory Card Operations This unit is equipped with a memory card slot. Using the SD/MMC card: When you insert a SD/MMC card into the memory card slot, the player will read the SD/MMC card automatically. The unit gives first priority to the latter. -
Page 27: Usb Device Operations
USB Device Operations The unit is equipped with a USB port on the front panel of the unit, you can connect a USB stick through the USB port. Using the USB stick: When you insert a USB stick through the port, the unit will search the MP3 files and start to play it automatically. -
Page 28: Disc Notes
Disc Notes A. Notes on discs: 1. Attempting to use non-standard shape discs (e.g. square, start, and heart) may damage the unit. Be sure to use round shape CD discs only for this unit. 2. Do not stick paper or tape, etc, onto the label side or the recording side of any discs, as it may cause a malfunction. - Page 29 D. Handling and cleaning: - Dirt, dust, scratches and warping discs will cause malfunction. - Do not place stickers or make scratches on discs. - Do not warp discs. - A disc should always be kept in its case when not in use to prevent damage.
- Page 30 E. Preparing new discs with rough spots: A new disc may have rough edges on its inside and outside edges. If a disc with rough edges is used, the proper setting will not be performed and the player will not play the disc. Therefore, remove the rough edges in advance by using a ballpoint pen or pencil as shown below To remove the rough edges, press the side of the pen or pencil against the inside and outside edges of the disc.
-
Page 31: Specifications
Specifications 1. GENERAL Power Supply Requirements DC 12 Volts, Negative Ground Chassis Dimensions 178 mm (W) x 160 mm (D)x 50 mm (H) Tone Controls - Bass (at 100 Hz) ±10 dB - Treble (at 10 KHz) ±10 dB Maximum Output Power 4 x 50 watts Current Drain 15 Ampere (max.) -
Page 32: Important Notes
Important notes • This appliance is not intended for use by young children or infirm persons unless they have been adequately supervised by a responsible person to ensure that they can use the car stereo safely. • Young children should be supervised to ensure they do not play with the car stereo. -
Page 33: Faq's
FAQ’s The following chart will help in solving most problems that may occur. If you still have questions after going through the checklist, please consult your local customer service representative. Before going through this check list, refer to the wiring and operating procedures. - Page 34 No sound Volume is on minimum. Adjust volume to a desired level. The wiring is not Check the wiring properly connection. connected. Sound skips The installation angle is Adjust the installation more than 30° angle to less than 30° The surface of CD is Clean the disc or try to extremely dirty or has replace with a new one.
- Page 35 (This page has been left intentionally blank) After Sales Support TEL: 1300 886 649...
- Page 36 After Sales Support TEL: 1300 886 649...
Need help?
Do you have a question about the AN-8006 and is the answer not in the manual?
Questions and answers