Table of Contents
Advertisement
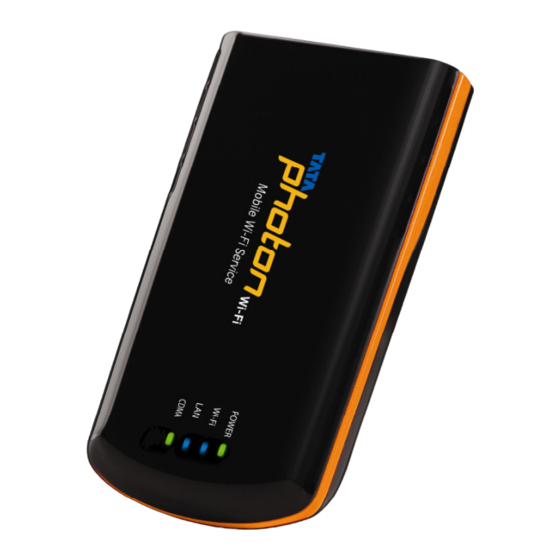
TATA Photon Wi-Fi SER8189
Portable Router User Guide
Part 1: Using the TATA Photon Wi-Fi SER8189 . . . . . . . . . . . . . . . . . . . . . . . .. . . . . . . . . . . . . . . . .. . . . .. . . . 2
Introduction . . . . . . . . . . . . . . . . . . . . . . . . . . . . . . . . . . . . . .. . . . . . . . . . . . . . . . . . . . . .. . . . . . . . . . ... 2
Charging the TATA Photon Wi-Fi SER8189 . . . . . . . . . . . . . . . . . . . . . . . . . . . . . . . . . . . . . . . . . . . . . . . . . 2
Opening the Browser Interface (WIN / MAC) . . . . . . . . . . . . . . . . . . . . . . . . . . . . . . . . . . . . . . . . . . . . . . . 3
Device Activation (WIN / MAC) . . . . . . . . . . . . . . . . . . . . . . . . . . . . . . . . . . . . . . . . . . . . . . . . . . . . . . . . . . 7
Opening the Browser Interface & Device Activation for Linux . . . . . . . . . . . . . . . . . . . . . . . . . . . . . . . . 11
The Browser Interface and Settings . . . . . . . . . . . . . . . . . . . . . . . . . . . . . . . . . . . . . . .. . . . . .. . . . . .. . . . 17
Home . . . .. . . . . . . . . . . . . . . . . . . . . . . . . . . . . . . . . . . . . . . . . . . . . . . . . . . . . . . . . . . . . . . . . . . . .. . . . . . .17
My Account . . . . . . . . . . . . . . . . . . . . . . . . . . . . . . . . . . . . . . . . . . . . . . . . . . . . . . . . . . . . . . . . . . . . . . . .17
CDMA . . . . . . . . . . . . . . . . . . . . . . . . . . . . . . . . . . . . . . . . . . . . . . . . . . . . . . . . . . . . . . . . . . . . . . . . . . . . . . 18
Status. . . . . . . . . . . . . . . . . . . . . . . . . . . . . . . . . . . . . . . . . . . . . . . . . . . . . . . . . . . . . . . . . . . . . . . . . . . . 18
Internet Profile . . . . . . . . . . . . . . . . . . . . . . . . . . . .. . . . . . . . . . . . . . . . . . .. . . . . . . . . . . . . . . . . .. . . . .19
Configuration. . . . . . . . . . . . . . . . . . . . . . . . . . .. . . . . . . . . . . . . . . . . . .. . .. . . . . . . . . . . . . . . . . .. . . . .19
Diagnostics . . . .. . . . . . . . . . . . . . . . . . . . . . . . . . . . . . . . . . . . . . . . . . . . . . . . . . . . . . . . .. . . . . . . . . . .19
Network . . . . . . . . . . . . . . . . . . . . . . . . . . . . . . . . . . . . . . . . . . . . . . . . . . . . . . . . . . . . . . . . . . . . . . . . . .20
Router Address . . . . . . . . . . . . . . . . . . . . . . . . . . . . . . . . . . . . . . . . . . . . . . . . . . . . . . . . . . . . . . . . . . 20
Network Address Server . . . . . . . . . . . . .. . . . . . . . . . . . . . . . . . . . . . . . . . . . . . . . . . . .. . . . . . . . . . .20
WiFi. . . . . . . . . . . . . . . . . . . . . . . . . . . . . . . . . . . . . . . . . . . . . . . . .. . . . . . . . . . . . . . . . . . . . . . . . . . . . . . . 20
Status. . . . . . .. . . . . . . . . . . . . . . . . . . . . . . . . . . . . . . . . . . . . . . . . . . . . . . . . . . . . . . . . . . . . . . . . . . . . 21
Basic . . . . .. . . . .. . . . . . . . . . . . . . . . . . . . . . . . . . . . . . . . . . . . . . . . . . . . . . . . . . . . . . . . .. . . . . . . . . . .21
Multi SSID . . . . .. . . . . . . . . . . . . . . . . . . . . . . . . . . . . . . . . . . . . . . . . . . . . . . . . . . . . . . . .. . . . . . . . . . .21
Secure Profile . .. . . . . . . . . . . . . . . . . . . . . . . . . . . . . . . . . . . . . . . . . . . . . . . . . . . . . . . . .. . . . . . . . . . .22
Trusted MAC Filter. . . . . . . . . . . . . . . . . . . . . . . . . .. . . . . . . . . . . . . . . . . . . . . . . . . . . . . . .. . . . . . . . . 22
Advanced . . . . . . . . . . . . . . . . . . . . . . . . . . . . . . . . . . . . . . . . . . . . . . . . . . . . . . . . . . . . . . . . . . . . . . . . .. .23
Firewall (Port Filtering / VPN Passthrough). . . . .. . . . . . . . . . . . . . . . . . . . . . . . . . . . . . . . . . . . . . . ..23
Traffic Control (Port Forwarding / DMZ). . . . . . . . . . . . . . . . . . . . . . . . . . . . . . . . . . . . . . . . . . . . . . . 24
Manual Activation). . . . . . . . . . . . . . . . . . . . . . . . . . . . . . . . . . . . . . . . . . . . . . . . . . . . .. . . . . . . . . . . .25
Firmware Upgrade . . . . . . . . . . . . . . . . . .. . . . . . . . . . . . . . . . . . . . . . . . . . . . . . . . . . . . . . . . . . . . . . . 27
Help . . . . . . .. . . . . . . . . . . . . . . . . . . . . . . . . . . . . . . . . . . . . . . . . . . . . . . . . . . . . .. . . . . . . . .. . . . .. . .. ..27
Part 2: FAQ. . . . . . . . . . . . . . . . . . . . . . . . . . . . . . . . . . . . . . . . . . . . . . . . . . . . . . . . . . . . . . . . . . . . . . . . . . . .27
Part 3: Glossary. . . . . . . . . . . . . . . . . . . . . . . . . . . . . . . . . . . . . . . . . . . . . . . . . . . . . . . . . . . . . . . . . . . . . . . .30
Page 1 / 32
TATA Photon Wi-Fi SER8189_UG
Table of Contents
Advertisement
Table of Contents

Summary of Contents for TATA Motors Photon Wi-Fi SER8189
-
Page 1: Table Of Contents
Part 1: Using the TATA Photon Wi-Fi SER8189 ........ -
Page 2: Part 1: Using The Tata Photon Wi-Fi Ser8189
2 hours. When fully charged, a solid green light will appear next to ‘Power’ display on the device. <Green> <Orange> <Red> A red or orange light indicates you need to re-charge. Included in your TATA Photon Wi-Fi SER8189 package is an AC-Adapter. Page 2 / 32 TATA Photon Wi-Fi SER8189_UG... -
Page 3: Opening The Browser Interface (Win / Mac)
(Windows Users / MAC Users) 1. Turn on the TATA Photon Wi-Fi SER8189 and ensure your WiFi is enabled on your PC or laptop. You can view your available wireless networks by going through the following path Control Panel -> Network and Sharing Center ->... - Page 4 4. When connected to the TATA Photon Wi-Fi SER8189 you will see the connection as ‘TATA Photon Wi-Fi SER8189 XXXX’ – as shown below. 5. Before proceeding, ensure your wireless connection properties are set to ‘Obtain an IP Address Automatically.’...
- Page 5 For Windows Vista 64-bit and Windows 7 users, you can click on ‘View Status’ as shown below. Note. For MAC users: Ensure your wireless connection set as ‘Using DHCP” as shown below. Page 5 / 32 TATA Photon Wi-Fi SER8189_UG...
- Page 6 6. Next, open your web browser to http://192.168.5.1. This will bring you to the web user interface of the TATA Photon Wi-Fi SER8189. Page 6 / 32 TATA Photon Wi-Fi SER8189_UG...
-
Page 7: Device Activation (Win / Mac)
The default Username and Password is admin/admin. Click OK. Then, you will see the pop up screen requiring Activation. Note. See Advanced > Management > Account of this document for changing the default Username and Password. Page 7 / 32 TATA Photon Wi-Fi SER8189_UG... - Page 8 Ensure your Airport mode is turned on to allow your computer to search for available WiFi networks. 2. Choose “Open Network Preferences” on the drop-down menu and select “TATA Photon Wi-Fi SER8189 XXXX” of your Wi-Fi network and apply it. Page 8 / 32...
- Page 9 Open your web browser to http://192.168.5.1. This will bring you to the web user interface of the TATA Photon Wi- Fi SER8189. Click Login button. You will be prompted to enter your username and password. The default Username and Password is admin/admin.
- Page 10 During the activation, please do not switch off your device or close the web user interface. If the Pin code is incorrect, you will be prompted below window (Activation Failed). Please contact your service provider. Page 10 / 32 TATA Photon Wi-Fi SER8189_UG...
-
Page 11: Opening The Browser Interface & Device Activation For Linux
2. Select “TATA Photon Wi-Fi SER8189 XXXX” of your Wi-Fi network and apply it. (If this SSID does not appear, then click ‘More networks’.) 3. The default security for the TATA Photon Wi-Fi SER8189 is WEP 64-bit. The default security key is “12345”. Enter the key to continue connecting to the TATA Photon Wi-Fi SER8189. - Page 12 Please ensure your wireless connection set as “Automatic (DHCP)” by going through System -> Administration -> Network Tools -> (Network Connections Window, choose ‘Wireless’ tab, click Edit) -> (Editing Auto TATA Photon Wi-Fi SER8189 Window, choose IPv4 Settings tab, choose Automatic (DHCP), Click Apply) The screenshots for the steps are shown below.
- Page 13 CentOS5.5 1. Go to Applications -> Accessories -> Terminal. Command ‘iwlist eth1 scan’ Note. ‘Wireless Tool Package’ should be installed in your computer to use the above command. Page 13 / 32 TATA Photon Wi-Fi SER8189_UG...
- Page 14 You will see wireless SSIDs and ‘TATA Photon Wi-Fi SER8189 XXXX’ should be shown as below. 2. Go to System -> Administration -> Network -> (Network Configuration Window, choose ‘Devices’ tab, select wireless profile and double click) (Wireless Device Configuration Window, choose ‘General’...
- Page 15 (Choose ‘Wireless settings’ tab, input the SSID (TATA Photon Wi-Fi SER8189 xxxx) The default security for the TATA Photon Wi-Fi SER8189 is WEP 64-bit. The default security key is “12345” 3. (Network Configuration Window, choose ‘Devices’ tab, select wireless profile, click ‘Activate’ button and ‘Yes’...
- Page 16 5. Click Login button on the right top of the browser. The default ID and Password is admin/admin. 6. For Activation, follow page 7 (or page 10) of this User Guide. Page 16 / 32 TATA Photon Wi-Fi SER8189_UG...
-
Page 17: The Browser Interface And Settings
Number of users/devices Battery Level Your TATA Photon Wi-Fi SER8189 uses a browser interface to configure the device. The browser interface lets you: View the status of aspects of your network. Set up Activation, Internet Profile, WEP or WPA security, MAC filtering, Port Filtering and Port Forwarding Set up a hotspot to allow a maximum of five connections to your device without having to share your network name and network key. -
Page 18: Cdma
Click Connect to connect to your network. The TATA Photon Wi-Fi SER8189 comes pre-configured with the information required to connect to the network. It will not normally require any additional configuration to the basic settings unless you are using the device behind a corporate firewall, and this may require the appropriate proxy server settings to be modified. -
Page 19: Internet Profile
Hybrid: Device will operate in dual mode with Photon+ and Photon Whiz periodically depending on network strength Photon Whiz: Device will operate only in Photon Whiz mode TATA Photon Plus : Device will operate only in Photon+ mode Diagnostics This menu gives you the information of the device. -
Page 20: Network
(such as wireless printer or an additional laptop). When DHCP server is disabled, you will have to assign static IP address to all devices on your network. Wi-Fi The WiFi menu allows you to view status information for your WiFi network and configure your hotspot. Page 20 / 32 TATA Photon Wi-Fi SER8189_UG... -
Page 21: Status
This menu allows you to modify WiFi and Secure Profile. Network Mode: You can choose a type of wireless networking. Network Name (SSID): You can rename SSID. Default SSID is TATA Photon Wi-Fi SER8189 xxxx. Frequency: It is recommended to set in Auto always. -
Page 22: Secure Profile
When you click Apply, you will need to reconnect to your router by closing your current view and re-opening a browser connection to http://192.168.5.1. Trusted MAC Filtering MAC Filter allows you to limit access to your device to only those devices with a specified MAC address (a unique Page 22 / 32 TATA Photon Wi-Fi SER8189_UG... -
Page 23: Advanced
It consists of six pairs of numbers and letters (for example, 00:21:9B:1C:64:34). You can view the MAC address for any device connected to the TATA Photon Wi-Fi SER8189 device in the WiFi Clients section of the WiFi Status screen. (See “WiFi Clients” on page 15.) Note. -
Page 24: Traffic Control (Port Forwarding / Dmz)
Also, some online games require incoming access to work properly. Note. You cannot use port forwarding with some standard data accounts. To use port forwarding, you may need to request a static IP address from your carrier / service provider.. Page 24 / 32 TATA Photon Wi-Fi SER8189_UG... -
Page 25: Management
Backup menu allows you to save your settings to your PC, memory card, CD etc. And Restore menu allows you to restore previous saved settings. 3) Power Management Enable Ethernet port when you want to connect your computer directly to the device using a LAN (RJ45) cable. Page 25 / 32 TATA Photon Wi-Fi SER8189_UG... -
Page 26: 6) Manual Activation
4) Factory Default Click Update to reset your device to the default factory settings. 5) Activation Please refer page #6-9 for Activation procedure. 6) Manual Activation Please contact your service provider for this menu. Page 26 / 32 TATA Photon Wi-Fi SER8189_UG... -
Page 27: Firmware Upgrade
Q: What is the TATA Photon Wi-Fi SER8189’s main purpose unlike other routers? A: The TATA Photon Wi-Fi SER8189 is a portable WiFi router that fits in the palm of your hand. It will allow you to connect up to 5 devices to access the Internet, such as laptops, digital cameras, portable game consoles or mobile phones. - Page 28 Q. What is the LAN port of TATA Photon Wi-Fi SER8189 can be used for? A: The LAN Port of the TATA Photon Wi-Fi SER8189 is for users who have a laptop or desktop which does not have WiFi capability.
- Page 29 A: The device will need to be within 5 meters of the WiFi device to work. So a user can keep the TATA Photon Wi- Fi SER8189 in their pocket, laptop bag, or sitting on a desk or window ledge across a room (for better coverage).
-
Page 30: Part 3: Glossary
● ESN — Electronic Serial Number. A unique 32-bit number embedded in a wireless device that identifies the device. ● MEID — Mobile Equipment Identifier. The unique second-generation serial number assigned to the TATA Photon Wi-Fi SER8189 for cellular network use. - Page 31 ● WLAN — WLAN LAN. A typically low-power network that transmits a wireless signal over a span of a few hundred feet and usually only to stationary devices. ● WPA/WPA2 — WLAN Protected Access. A security protocol for wireless 802.11 networks from the WLAN Page 31 / 32 TATA Photon Wi-Fi SER8189_UG...
- Page 32 This service is provided through cellular providers. WWAN connectivity allows a user with a laptop and a WWAN device to surf the Internet, check email, or connect to a virtual private network (VPN) from anywhere within the regional boundaries of the cellular service. Page 32 / 32 TATA Photon Wi-Fi SER8189_UG...
Need help?
Do you have a question about the Photon Wi-Fi SER8189 and is the answer not in the manual?
Questions and answers