
Summary of Contents for Saunagen PH-I
- Page 1 SAUNAGEN INFRARED SAUNA OWNER’S MANUAL THIS MANUAL IS FOR MODEL PH-I PH-II PH-III PH-IV Thank you for choosing the SaunaGen Infrared Sauna!
- Page 2 Thank you for purchasing SaunaGen products, we congratulate you on your new path to better health. SaunaGen is striving to become the best infrared sauna supplier in the world; our list of consumers increase daily and we believe your success is our success. We attribute this growth and success entirely to our customer satisfaction, the recognized health benefits, and the quality of our workmanship.
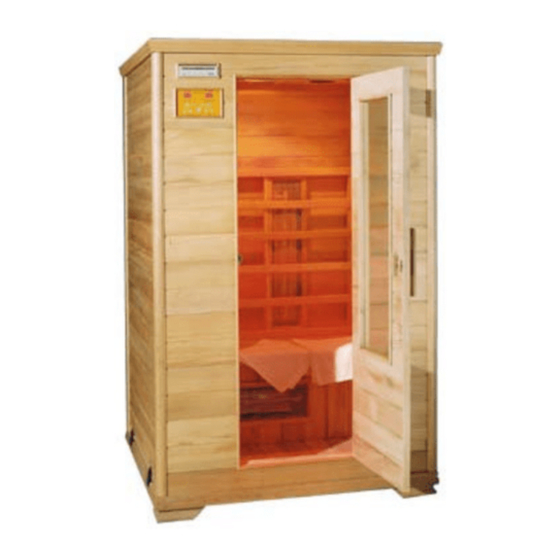
- Page 3 Introduction SaunaGen congratulates you on your new path to better health! Thousands of users enjoy the benefits of an infrared sauna every day. Now you can enjoy the great benefits of far-infrared heat within the privacy of your own home.
- Page 4 Packaging List for Model PH-I Any missing parts please contact SaunaGen customer service at 1-800-319-3588. Item Number: 1. Front Panel, 2. Back Panel, 3. Left Side panel, 4. Right Side Panel Bottom Panel, 6. Top panel, 7. Top Cover, 8. Backrest , 9. Bench Panel, 10.
- Page 5 Packaging List for Model PH-II Any missing parts please contact SaunaGen customer service at 1-800-319-3588. Item Number: 1. Front Panel, 2. Back Panel, 3. Left Side panel, 4. Right Side Panel Bottom Panel, 6. Top panel, 7. Top Cover, 8. Backrest, 9. Bench Panel, 10.
- Page 6 Packaging List for Model PH-III Any missing parts please contact SaunaGen customer service at 1-800-319-3588. Item Number: 1. Front Panel, 2. Back Panel, 3. Left Side panel, 4. Right Side Panel Bottom Panel, 6. Top panel, 7. Top Cover, 8. Backrest, 9. Bench Panel, 10.
- Page 7 Packaging List for Model PH-IV Any missing parts please contact SaunaGen customer service at 1-800-319-3588. Item Number: 1. Front Panel, 2. Left Back Panel, 3. Right Back Panel, 4. Left Side panel, 5. Right Side Panel, 6. Bottom Panel, 7. Top panel, 8. Top Cover, 8. Backrest, 9.
-
Page 8: Installation Requirements
Installation Requirements 1.Do not plug any other appliances into the outlet with your SaunaGen® infrared sauna. 2.Install the sauna on a completely level floor. 3.Do not spray the exterior with water. If the floor is damp, install a floor separator to keep the sauna high &... -
Page 9: Assembly Instructions
Assembly Instructions Assembly of the sauna requires at least 2 adults to complete. Please read the instructions thoroughly before and during assembly to ensure proper installation of the sauna. <1> LOCATION OF SAUNA When you find a good location for your sauna, please notice the following. 1. - Page 10 <4> INSTALL SIDE PANELS Install the side panels (Left & Right) to the bottom and back panels by lining up buckles and fastening them securely in place. 1. Please be sure which side panel is Left Side and Right Side. 2.
- Page 11 <7> CONNECTING FRONT PANEL Align buckles with both side panels and secure in place by fastening them. <8> PLACING TOP PANEL Lower the top panel onto the assembled panels. 1. The top panel must be positioned so that the antenna and cables on the top panel are in the front left corner, right above the CD/Radio player.
- Page 12 <9> Placing Backrest For better protection of your back during sauna session, please screw in the backrest on the back panel. <10>INSTALLING THE CD PLAYER 1. Slide CD-player through slot in front wall. 2. Bolt “Z” shaped bracket to stud on back of CD-player so that the two holes in the bracket are on top of CD-player.
- Page 13 <12> COVERING THE CD BOX In order to protect the CD player, please cover the CD box with screws on front panel and left side panel. Be sure all the cables are covered. <13> THE MAIN POWER CONNECTION ON THE TOP PANEL 1.
- Page 14 Plug in the main power cord into the wall outlet and power up your sauna. Pop in your favorite CD in the CD player of the sauna, grab some towels, a glass of water and step into your sauna and enjoy the benefits of the SaunaGen!!
- Page 15 Digital Control Panel Operating Instructions 1. Power on Plug the main power cord into the wall outlet and power up your sauna. Press “Start/End” button one time, the control panel is now operable, but the heaters are not on. You can now use the stereo CD-Player.
- Page 16 Digital Control Panel Operating Instructions a) Press TEMP UP/DOWN ARROWS to adjust temperature, temperature value will increase or decrease by 1 degree at a time. b) By holding down the UP/DOWN ARROWS, you can speed up the rate of change. F(or C) will be lit to indicate changes being made to temperature setting.
- Page 17 Recommendation for Operate 1.Set up the desired session temperature and time using the control panel. ( suggested 110F-120F) 2.Allow approximately 10~15 minutes for the sauna to warm up before beginning a session. 3.Recommend sauna session use is around 30-45 minutes. 4.
- Page 18 Recommendation for Use 1) To regulate the temperature inside the sauna during your session, use the roof vent or the door (by setting it at an angle). 2) If you need more cooling, simply leave the door open until the air around you feel comfortable. 3) Drink plenty of fluids prior to, during, and after your sauna session.
- Page 19 Safety Read all health and safety instructions. If in doubt as to the advisability of using your infrared sauna, consult with your physician prior to use. If you feel light-headed or heat exhaustion during session, exit the sauna immediately. 1. Read and follow all instructions carefully. 2.
- Page 20 18. All natural wood articles have variations in the color, grain, and irregularities such as knots, and fine cracks. These characteristics are a part of the natural beauty of the wood, and in no way should be considered defective.
- Page 21 Important Safeguards For Your Sauna 1. READ INSTRUCTIONS -- All the safety and operating instructions should be read before the sauna is installed and operated. 2. RETAIN INSTRUCTIONS -- The safety and operating instructions should be retained for future reference. 3.
-
Page 22: Cleaning And Maintenance
Cleaning and Maintenance Before using your infrared sauna for the first time, clean the inside of the sauna with a damp cloth. Use furniture polish to clean the exterior. We recommend placing a soft towel on the floor and on the bench of the sauna to absorb perspiration during sauna use. -
Page 23: Troubleshooting Guide
Troubleshooting Guide Problems Explanations Solutions 1.Check for power to the outlet. Power cord is not plug-in Check connection between Power indicator light not power cord and main control unit. The fuse is burned out Check or replace the fuse. The corresponding indicator light is Repair or replace the control broken or burned out. -
Page 24: Troubleshooting
Check connectors to be sure they The wire connection is loose. make good contact. CD-player is not turned on. Turn on the CD-player. 1. Check faceplate contact on the CD-player. CD-player is not functioning 2. Check fuse in the fuse holder. - Page 25 Any parts claimed to be defective must be shipped freight prepaid, to SaunaGen and the repaired or replaced product will be returned to the sender freight collect. When sent to SaunaGen, the product must be accompanied by the sales receipt or other proof of purchase date, as well as the sender’s...
- Page 26 Please register your SaunaGen product to receive a full warranty. Please fill out the following information and mail the form to the following address within 30 days from the date of purchase: First Name: _________________________ Last Name: __________________________ Home Address: __________________________________________________________...
- Page 27 www.saunagen.com...
Need help?
Do you have a question about the PH-I and is the answer not in the manual?
Questions and answers