
Summary of Contents for CrossXfire CFH10
- Page 1 Heat Alarm Model CFH10 Owner’s Manual • Rate of Rise Temperature Sensing • Selectable Fixed Temperature Sensing • Proprietary Wireless Connectivity SIGNALING MADE IN THE U.S.A. LISTED...
-
Page 2: Table Of Contents
Table of Contents General Information About Your Heat Alarm ..........page 3 Contents of Your Kit ................... page 4 Recommended Locations for Your Heat alarm ..........page 5 Areas Not Appropriate for Heat alarms ............page 6 Complete Home Fire and Gas Protection ............ page 7 Acceptable Wireless Alarm Spacing............. -
Page 3: General Information About Your Heat Alarm
About Your New Heat Alarm Thank you for purchasing the Crossfire CFH10 Heat Alarm. Heat alarms play an important role in protecting your family and home from the dangers of fire. Please carefully read and follow the information in this booklet to ensure that your alarm operates properly and is located in the areas best suited for activation. -
Page 4: Contents Of Your Kit
Contents of Your Kit Please make sure the following is included in your kit: 1” Screws (2) Plastic Anchors (2) Heat Alarm Instruction Mounting Bracket Manual Self Adhesive Label Key Features • The latest dual-sensor differential heat sensing technology. • Rate of Rise and selectable Fixed Temperature triggers (117°F, 135°F and 175°F). -
Page 5: Recommended Locations For Your Heat Alarm
Recommended Locations for your Heat Alarm Kitchens. Most household fires originate in the kitchen. The CFH10 is ideal for the kitchen since it is not activated by the by-products of cooking (i.e. smoke or cooking scents). The recommended Fixed Temperature Setting for kitchens is 117°F (47°C) -
Page 6: Areas Not Appropriate For Heat Alarms
Recommended Locations for your Heat Alarm Laundry Areas. The low volume steam and gases produced by dryers and other equipment will not trigger the CFH10. The recommended Fixed Temperature Setting for laundry areas is 117°F (47°C) Basements and Crawlspaces. The... -
Page 7: Complete Home Fire And Gas Protection
Complete Home Fire and Gas Protection Applied Fire Technologies recommends complete home fire protection. This can be achieved by installing a combination of Crossfire Smoke, CO and Heat alarms in their appropriate locations in every room of the house. Minimum Required Smoke Alarms Minimum Required CO Alarms Recommended Heat Alarms Attic... -
Page 8: Heat Alarm Features And Functions
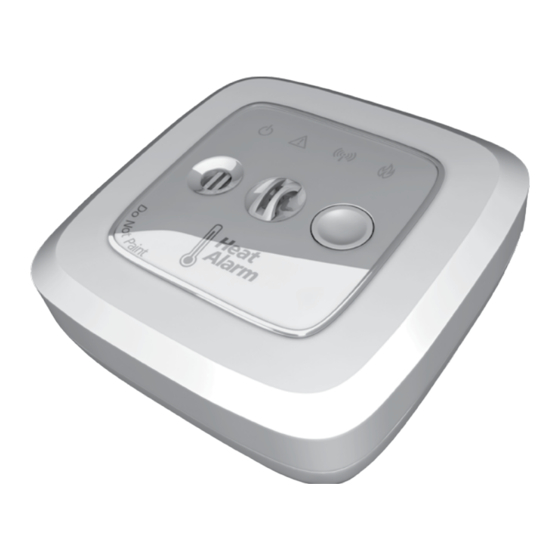
Heat Alarm Features and Functions Power Indicator Light (Green) On the CFH10, the POWER icon will briefly flash once every 30 seconds once the alarm has been activated. Warning Light (Red) WARNING will flash red every 30 seconds accompanied by the horn chirp, for a minimum of 7 days, to indicate Low Battery. - Page 9 Heat Alarm Features and Functions Selecting the Fixed Temperature Setting The CFH10 has three selectable fixed temperatures available, 117°F (47°C), 135°F (57°C) and 175°F (79°C). They can be selected as follows: Press and hold the button on the front cover of the Heat Alarm.
- Page 10 If this occurs, replace the alarm. Silencing Nuisance Alarms The CFH10 alarm is equipped with a silence feature that can silence the alarm. If during normal operation the alarm is triggered, and all appropriate safety precautions are being taken, the alarm can be silenced for ten minutes by pressing the button on the front face of the unit.
-
Page 11: Deactivating Your Heat Alarm
Deactivating the CFH10 Alarm When the alarm’s End-of-Life or Low Battery signal occurs, the alarm must be deactivated and disposed of properly. Have a replacement alarm available. If the alarm’s End-of-Life or Low Battery signal has begun, remove the alarm from its bracket. -
Page 12: Creating Your Wireless Network
Creating Your Wireless Network The Crossfire CFH10 Alarm communicates on its own private home network. This network is created simply by powering up new alarms one at a time. Activate your first alarm by moving the slide switch located on the back side of the alarm in the direction indicated by the arrow. -
Page 13: Adding An Alarm To Your Wireless Network
Adding an Alarm to Your Wireless Network To add an alarm(s) to your existing home network, perform the following steps. Select any alarm on the existing network. Press and hold the button on the front cover of the alarm. The red FIRE light will flash rapidly and the alarm will sound three tones. -
Page 14: Removing An Alarm From Your Wireless Network
Removing a Heat Alarm from a Wireless Network In the event that an alarm must be removed from your network, the alarm’s network data must be erased from its memory. Press and hold the button on the front cover of the alarm. -
Page 15: Choosing The Mounting Location In A Room
Choosing the Mounting Location in a Room BEST Center on ceiling. Note: Avoid placement of alarms close to ceiling fans or heating/air conditioning vents. CAUTION: To avoid a false alarm, do not use where maximum ambient temperature will exceed 25°F below the Fixed Temperature Setting selected. -
Page 16: Applying The Self-Adhesive Warning Label
Choosing the Mounting Location in a Room Do not install between joists or rafters. Install on exposed face of joist or rafter. Room Coverage Area The Heat Alarm has a space rating of 50’ (15.2m) This will cover a room of 35’ x 35’ (10.7m x 10.7m) General Note: Do not install within 36”... -
Page 17: How To Mount The Heat Alarm
How to Mount the Heat Alarm Mark Place the mounting bracket against the ceiling or wall, and using the mount- ing bracket as a template, mark the top and bottom holes with a pencil. Drill Using a 1/8” (3mm) drill bit, drill two pilot holes in the center of the two marked hole locations. -
Page 18: How To Mount The Heat Alarm
How to Mount the Heat Alarm Situation B: No Wood If no wood is present, use a Phillips screwdriver to screw the two plastic wall anchors into the pre-drilled holes until fully seated. Then secure the mounting bracket to the wall anchors using the two 1”... -
Page 19: Alarm Specifications
Alarm Specifications Operating Voltage 3VDC Battery Type Non-replaceable Lithium-Manganese Fixed Temperature Settings 117ºF (47ºC) 135ºF (57ºC) 175ºF (79ºC) Rate of Rise 20ºF (11ºC) / minute, > 100ºF (38ºC) Space Rating 50 feet Operating Ambient Temperature -20°F to 135°F (-29ºC to 57ºC) Operating Humidity 10 - 95% Non-condensing Alarm Dimensions... -
Page 20: Important Fire Safety Information
Important Fire and Emergency Safety Information Be prepared for fire emergencies: Plan Your Escape • Draw a floor plan of your home. • Show two ways out of each room. • Discuss escape routes with everyone in your home. • Agree on an outside meeting place where you’ll gather after escaping. Be Prepared •... -
Page 21: Warning! Limitations Of Heat Alarms
WARNING! Limitations of Heat alarms Wireless Heat alarms have been proven to be both effective and reliable, but they may not be effective under all conditions. No alarm design can offer total protection of life and property. A Heat Alarm is not a substitute for an adequate homeowner’s property insurance or life insurance policy. -
Page 22: Limited Warranty
Applied Fire Technologies LLC will repair your CFH10 alarm or furnish you with a new or rebuilt replacement CFH10 alarm without charge to you except for your costs of shipping the CFH10 alarm to Applied Fire Technologies LLC for warranty coverage. Your repaired or replacement CFH10 alarm will be returned to you without charge and will be covered under this warranty for the remainder of the warranty period. -
Page 23: Replacement Guarantees
(972) 304-3923, to receive information as to then-applicable pricing and for the address to which you should send your CFH10 alarm along with payment for your replacement alarm. Be sure to enclose your return address and daytime telephone number. The CFH10 manufacturer will ship the new replacement unit to you upon its receipt of all of the foregoing materials and information. - Page 24 APPLIED FIRE TECHNOLOGIES 825 W. Sandy Lake Road, Suite 190 Coppell, TX 75019 www.crossfirealarms.com Model CFH10 10-Year Battery Life Return to Above Address for All Service Needs 90-4070-30...
Need help?
Do you have a question about the CFH10 and is the answer not in the manual?
Questions and answers