Table of Contents
Advertisement
Quick Links
Advertisement
Table of Contents

Summary of Contents for Bitstream 3x
-
Page 1: Complete Schematic Of The Midi And Usb Routing
User Manual User Manual User Manual User Manual... -
Page 2: Table Of Contents
MIDI USB R ....................1 OMPLETE CHEMATIC OF THE OUTING ..............................24 HAIN OF ONTROLS Example of Usage...............................24 ASSIGNING MIDI EVENTS TO THE CONTROLS OF THE BITSTREAM 3X.........24 ...........................24 TANDARD VERSUS ..........................24 SING THE ONFIGURATION OFTWARE « A » ............................25 SING THE... - Page 3 NAVIGATION OF THE MENUS........................52 ............................52 RINCIPLES OF NAVIGATION )........................54 IERARCHY OF THE ENUS UMMARY OTHER USEFUL FUNCTIONS.........................58 SHIFT ................................58 Blocking MIDI Data............................58 Blocking Bitstream 3X MIDI Channel insertion....................58 Access to supplementary digital controls......................58 Increasing the range of value changes.......................58 Rev 1.1 - Page...
- Page 4 EVERSAL OF THE VIDEO MODE USAGE EXAMPLES OF THE BITSTREAM 3X.....................62 ...........................62 SAGE WITH A SYNTHESIZER SOFTWARE Propellerheads Reason............................62 Ableton Live................................64 DEFINITION OF THE EXCLUSIVE SYSTEMS OF THE BITSTREAM 3X..........66 ........................66 ENERAL ORMAT OF EXCLUSIVE SYSTEMS ....................68 IST OF THE GLOBAL PARAMETERS ACCESSIBLE VIA YSEXS Example of communication..........................70...
-
Page 5: Introduction
Introduction Congratulations, you have just purchased a MIDI Controller from Wave Idea: the Bitstream 3X. The Bitstream 3X is a part of the latest generation of high performance MIDI controllers dedicated to use in home studios or on stage. Featuring all the required inputs and outputs for the applications below, the Bitstream 3X was developed with the musician in mind to give him all the necessary controls to get maximum usage out of the latest software or MIDI compatible material. -
Page 6: Terminology
MIDI Machine Control : transport function MIDI events, allowing synchronization Note On/Off MIDI Message controlling musical notes « Non volatile memory » : internal memory of the Bitstream 3X, allowing you to save your configuration even without it being powered Push Digital control behaviour of the Bitstream 3X (as opposed to ‘toggle’) -
Page 7: Installation Of The Drivers And Software
MIDI ports, the Bitstream should then be connected to these, being sure to connect the input « MIDI In » on the Bitstream to the « MIDI Out » of the computer and vice-versa as with any other MIDI gear. -
Page 8: Connection Without A Computer
The Bitstream 3X can be connected to all musical instruments which are MIDI via the standard MIDI ports, if the instrument is equipped with MIDI ports with DIN-5 connectors, the Bitstream should be connected to these, taking care to connect the MIDI Input of the Bitstream to the MIDI Output of the instrument, and vice versa. -
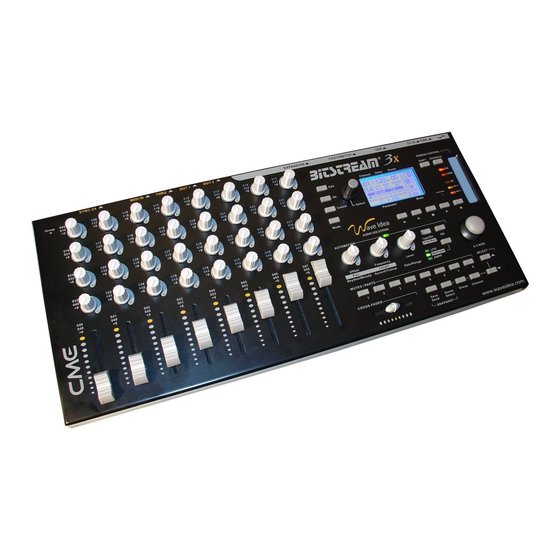
Page 9: Description Of The Front And Rear Panels Of The Bitstream 3X
USER MANUAL Description of the front and rear panels of the Bitstream 3X Front: Type of controls and numbering 1 Joytsick - 2 axes - 1 button 1 Infrared Controler Up-Down Selection Hold Key keys Contrast control Shift Key MIDI channels... - Page 10 Summary of the controls numbers assigned to the Bitstream 3X controls The following table illustrates the huge number of controls available on the Bitstream 3X. Each of these controls is able to generate MIDI events in Standard mode (CC or Note numbers listed here, depending on selected group), as well as in User mode.
-
Page 11: Description Of The Lcd Screen
LCD Chain Alphanumeric chain assigned to each control (16 char.) Switch Display Display for the 16 digital controls present on the Bitstream 3X Name of the group Chain assigned to each of the 21 groups (14 char.) Currently selected group (0-20) -
Page 12: Rear Panel: Description Of The Inputs And Outputs
The Bitstream 3X has an expansion port for receiving analog or digital peripherals such as sliders, buttons, and joysticks … When a peripheral is connected to the Bitstream 3X, it is automatically detected and managed in the same manor as the controls on the Bitstream itself. -
Page 13: Operating Modes Of The Bitstream 3X
For further information about this mode, please refer to the dedicated application note. User Mode The user mode gives access to all MIDI parameters which will be generated by the Bitstream 3X. The user can thus configure complex parameters into the Bitstream 3X, either by using the menus or by using configuration software. -
Page 14: Configuration And Usage Of The Bitstream 3X
Configuration and usage of the Bitstream 3X The Infrared Controller The Bitstream 3X is equipped with an Infrared controller allowing control on the Z axis (vertical). This control is, from the point of view of functionality, considered like a slider or button, and thus it is configured in the same manor, and is capable of generating any MIDI event. -
Page 15: The Cross-Fader
State of the infrared controller The Cross-Fader The Bitstream 3X is equipped with a digital cross-fader, which allows the generation of 2 distinct MIDI events, sending opposing values. The cross-fader can be seen as 2 sliders, each having his MIDI assignment. These 2 virtual sliders send opposing values #1 and #2 to create the function of cross-fader. -
Page 16: The Joystick
The MIDI channels – Finally, to improve the ergonomy of the Bitstream 3X, the notion of « Current Function » is introduced. This « current function» will be the actual function selected (along with the three listed above), which responds to the up-down and encoder buttons. -
Page 17: Selection Of The Group
Note 1: the number of CC and Note controllers assigned in the standard mode are shown on the face of the Bitstream 3X. Each increase or decrease in the group increases or decreases by 8 the Note or CC generated. -
Page 18: Selection Of The Scene Memories
The Bitstream 3X, has 2 MIDI output ports that can be selected independently by each control, it therefore has 32 virtual MIDI channels (16 in each port). The selection of the output port for each control is done via the « assign » menus of the Bitstream 3X, as well as by the configuration software. -
Page 19: Digital Behaviour
1 infrared controller (by using the Hold key) Note 2: The selection of the analog behaviour is done via the menus of the Bitstream 3X Note 3: This parameter concerns the 2 modes of the Bitstream 3X, Standard and User. -
Page 20: Curve Models
5 transport buttons (used with SHIFT active) Curve Models Another strength of the Bitstream 3X: each analog control can vary according to the 7 curve models. The variation given by an analogue control can evolve according to the model: - Linear... -
Page 21: Midi And Usb Inputs
MIDI – SYNC-24 converter USB – SYNC-24 converter The routing of the different MIDI inputs is done across the menus of the Bitstream 3X for each of these functions. Each of these MIDI inputs is not exclusive, except for the functions that necessitate a real-time MIDI clock. -
Page 22: Midi And Usb Outputs
MIDI and USB Outputs The Bitstream 3X has 2 distinct MIDI outputs, repartees on 2 MIDI connectors and 2 MIDI on USB. One MIDI output Thru is also available. This Thru output drives the same signals as the MID input, and allows the user to integrate the Bitstream 3X in its MIDI environment. -
Page 24: Chain Of Controls
Assigning MIDI events to the controls of the Bitstream 3X Standard versus User Mode Two modes are available on the Bitstream 3X, Standard and User, and could easily be called « Pre- programmed » and « to be programmed ». -
Page 25: Using The « Assign » Menus
Once the user presses OK, the following screen will appear: The Bitstream 3X is now waiting for the user to change the position of the control being assigned, and enters automatically into the assign menu of the control being configured. -
Page 26: Configuration Of The Controls Of The Bitstream 3X
USER MANUAL The different parameters accessible through these three high level menus are described below. Configuration of the controls of the Bitstream 3X MIDI events associated with the Standard mode The MIDI events assignable in standard mode can be one of two types:... -
Page 27: The Common Parameters In Standard And User Modes
Note 2: If a MIDI message should be sent from USB Out 2, the user should configure the two parameters MIDI out 2 and USB Out from ON Note 3: After a factory reset, all the available outputs are enabled for each control of the Bitstream 3X. Auto-send “Auto-send”... -
Page 28: Digital Behaviour
The parameters dedicated to User mode The following parameters are dedicated to the user mode of the Bitstream 3X. This means that if a parameter needs to be reconfigured to be compatible with the software or controlling synth, user mode is required. -
Page 29: Selection Of The Midi Delay
Bitstream 3X, in order to make it compatible with all the synths in the market. If the value of this parameter is 0, the Bitstream 3X will not integrate the checksum in the generated sysex, if the value is different than 0, it will correspond with the position of the first byte in the MIDI chain to be taken into account for the checksum. -
Page 30: Chaining The Controls
LCD. This message can recall the name of the synth or software associated with the control (in case there are several which are controlled by Bitstream 3X), as well as the name of the parameter being used for the control. -
Page 31: Midi Channel
MIDI channel of the Bitstream 3X Note 3: In using the MIDI channel of the Bitstream 3X instead of a fixed MIDI channel, the user can control the different synths or software which will be configured to respond on a single MIDI channel. -
Page 32: Control Value Positions 1 & 2
This string can be programmed by the user when using the Bitstream 3X “User defined mode”, only via the dedicated configuration software. It can be up to 21 bytes long, each control of the Bitstream 3X disposes of its own MIDI string, for each of the 21 groups of the Bitstream 3X. -
Page 33: The Transport Bar
MIDI software that responds to real time synchronization events. Also, the Bitstream 3X is capable of being the instrument master of a MIDI system, the user uses this bar to play the other MIDI instruments at the same time, without losing synchronization. -
Page 34: Usage Of Standard Buttons
The different methods of synchronization offered are not exclusive; all the possibilities are authorized and usable at the same time, which makes the Bitstream 3X very powerful in terms of synchronization. Note 1: If one of the three automation functions should be internally synchronized, the Internal Synchronization should be turned on, so that the Bitstream 3X generates the synchronization signals. -
Page 35: Scene Memories
This function allows the saving/restoring of the current value of each slider and button. This function is very useful during a live show. The Bitstream 3X has 100 scene memories, the values of all the controls are saved/restored in one of these 100 scene memories according to the number selected. -
Page 36: Saving The Scenes
Button Three knobs, three buttons and four LED (Light Emitting Diode) are dedicated to automations. The printed words on the face of the Bitstream 3X allows the user to find the different functions controlled by each button and slider. The Selection Button allows the user to choose the control of one of the three automations, each automation has a dedicated LED Selection, and so the user can quickly see which automation is currently selected. -
Page 37: Functions Of The Controls Associated With Automations
This wave can be considered like a slider or knob, and therefore introduced in any MIDI chain defined by the user. This functionality of the Bitstream 3X gives the user a MIDI control without having to manually and continually modify a slider. -
Page 38: Adjustment Of The Frequency And Synchronization
External Synchronization, dependant on the clock received on USB In Once the method of synchronization is chosen, via the menus of the Bitstream 3X, the user can adjust the frequency of the LFO via a knob called « Frequency », in real time. -
Page 39: Adjustment Of The Offset Value
Note 3: Once the LFO is internally synchronized with the MIDI clock generated by the Bitstream 3X, pressing START on the Transport Bar will start the LFO. In this case the menus should be configured so that the Bitstream 3X generates the signals of internal synchronization. - Page 40 30 - 250 Tempo (BPM) internal synchro Note 6: The other parameters associated to the LFO (Amplitude, frequency …) being directly accessible via the dedicated sliders, were not therefore included in the menus of the Bitstream 3X Zone incrustation Median Value...
-
Page 41: Arppeggiator
The RHYTHM parameter allows the user to select the rhythm model of the generated sequence. The Bitstream 3X has as in it’s default settings a library of 128 rhythm models per bank, with 4 style banks: MASTER, HOUSE, BREAKS and LATIN. These banks are accessible via the menu described at the end of this chapter. -
Page 42: Melody
16-trip or "Sixteenth tripled" when there are 24 notes per measure. • Note: The RESOLUTION parameter is only accessible from the menus of the Bitstream 3X Direction The DIRECTION is the order in which the notes in the sequence are played. For example, if the sequence plays a simple motif like a scale or triad, (see MELODY), "UP"... -
Page 43: Modes And Synchronization
External Synchronization, dependant of the USB In clock Once the method of synchronization is chosen via the menus of the Bitstream 3X, the user can choose one of the 4 modes of synchronization for the arppeggiator, depending on the MIDI environment. -
Page 44: Velocity
Note 4: Once the arppeggiator is synchronized internally on the MIDI clock generated by the Bitstream 3X, pressing START on the Transport bar will start the arppeggiator. In this case, the menus should be configured so that the Bitstream 3X generates the signals of internal synchronization. - Page 45 USER MANUAL Screens associated with the arppeggiator Arpeggiator screen without pressing SHIFT Arpeggiator screen while pressing SHIFT Rev 1.1 - Page...
- Page 46 USER MANUAL Menus associated with the arppeggiator Automations Arppeggiator Arpp State On/Off 0-47 Arp Offset Offset Value (0-47) Accent Bnk Master Master Accent Bank Techno Techno/House Accent Bank Breaks Break-beats Accent Bank Latin Latin Accent Bank Master Rythm Bnk Master Rhythm Bank Techno Techno/House Rhythm Bank Breaks...
-
Page 47: Motion Sampler
The characteristics of the motion sampler are as follows: Possible sampling of all controls of the Bitstream 3X (sliders, infrared, joystick, buttons...) 8 sample tracks – 1 control per track Possible restitution of the 8 tracks simultaneously Controllable length of ½, 1, 1 ½, 2, 2 ½, 3, 3 ½, 4 measure(s) independently for each track... -
Page 48: Recording A Sequence
SHIFT key at the same time (step two), the dedicated screen is displayed on the LCD, the user can then modify the length of the recording by using automation slider 2 (step 3). The Sampler waits until the user changes the values of the Bitstream 3X control to be sampled before starting the recording. -
Page 49: Restitution Of A Sequence
At the end of the recording, the Bitstream 3X asks if the user wants to save the movements recorded in the non-volatile memory (the choice is made by choosing OK or CANCEL –step five). Note 1: If the synchronization of the motion sampler is on internal mode, it is best to verify that the Bitstream 3X is configured to generate this synchronization, from the menu «... - Page 50 Note 1: If the synchronization of the motion sampler is on internal mode, it is best to verify that the Bitstream 3X is configured to generate this synchronization, from the menu « midi real-time » Note 2: The parameter « length » is not modifiable except during the recording phase, so it will play according to the previously decided length of the track.
-
Page 51: Sync-24 Output
The Bitstream 3X is capable of generating SYNC-24 signals from real time MIDI messages received from the different MIDI entries (MIDI In from the connector, MIDI In on USB), therefore, the Bitstream 3X can be considered as a MIDI – SYNC-24 converter, and USB MIDI – SYNC-24 converter. -
Page 52: Electrical Signals Generated
Menus of configuration allow the configuration of the parameters of the Bitstream 3X based on the environment, the functions used or not used, etc. The Assign Menus allow the user to assign MIDI events and parameters to the Bitstream 3X, the usage of this menu is described in the dedicated chapter. - Page 53 USER MANUAL The UP – DOWN functions are obtained using the up-down buttons on the face of the Bitstream 3X or, via the end-less encoder. The function OK is obtained using the dedicated OK button, or by using the encoder which becomes...
-
Page 54: Hierarchy Of The Menus (Summary)
USER MANUAL Hierarchy of the Menus (Summary) MIDI Merger Merger Src MIDI In On/Off MIDI Config Usage of MIDI In USB In On/Off Usage of USB In MIDI inputs towards Merger Dst MIDI Out 1 On/Off MIDI Out 1 MIDI inputs USB Out USB Out 1 On/Off MIDI Filter... - Page 55 USER MANUAL Operating mode Standard Selection of standard mode (pre-programmed) User Selection of User mode Reason Selection of Reason mode Automations Low Freq Osc LFO State On/Off ON/OFF LFO Sine Waveform Waveform generated : Sine Square Waveform generated : square Triangle Waveform generated : triangle Random...
- Page 56 USER MANUAL On/Off Automations Arppeggiator Arpp State Arp Offs 0-47 Offset Value (0-47) Accent Bnk Master Master Accent Bank Techno Techno/House Accent Bank Breaks Break-beats Accent Bank Latin Latin Accent Bank Rythm Bnk Master Master Rhythm Bank Techno Techno/House Rhythm Bank Breaks Break-beats Rhythm Bank Latin...
- Page 57 USER MANUAL MIDI Out 1 Automations Arppeggiator Arp outputs On/Off MIDI Out 1 MIDI Out 2 On/Off MIDI Out 2 USB Out On/Off USB Out 1/2 Arp Midi src MIDI In MIDI Inis directed towards the arpp. USB In USB In is directed towards the arpp. Arp sync Internal Internal Synchro for the arpp.
-
Page 58: Other Useful Functions
USER MANUAL Other Useful Functions SHIFT key The SHIFT key of the Bitstream 3X plays several roles in function of the context the Bitstream 3X is used. Blocking MIDI Data In normal mode, when the user presses SHIFT and thus changes a control of the Bitstream 3X, the MIDI event is not sent. -
Page 59: Initialisation Of The Bitstream 3X
USER MANUAL Initialisation of the Bitstream 3X The Bitstream 3X can be initialized in user mode. It’s recommended that you do this after updating the firmware or if there is any strange behaviour from the machine. To initialize the Bitstream 3X, follow these steps: The machine is turned off Press and hold Edit –... -
Page 60: Updating The Firmware
UPDATE, AS DOING SO COULD DAMAGE THE MACHINE. IF YOU ENCOUNTER ANDY PROBLEMS DURING THE UPDATE, CONTACT THE SUPPORT TEAM AT WAVE IDEA Note: If the Bitstream 3X is not detected after you’ve pressed the button « Get from 3X », and the Rev 1.1 - Page... -
Page 61: Reversal Of The Video Mode
If the machine is correctly detected, go to step 4, if not, contact the support team at Wave Idea Once the update is finished, turn off and reboot the Bitstream 3X. It is possible that after the update, the Bitstream 3X will need to be initialized see the dedicated chapter. -
Page 62: Usage Examples Of The Bitstream 3X
– Choice of the MIDI channel for the reception of the Bitstream 3X generated events Usage of the mode « Learn » to assign a control of the Bitstream 3X to a control of the software. – If you have a configuration problem, contact the support team at Wave Idea. - Page 63 « rnb-loop » from the mixing table: In clicking « Learn from MIDI input » and in changing the value of a control of the Bitstream 3X, Reason detects the MIDI message received and assigns modified control automatically.
-
Page 64: Ableton Live
USER MANUAL Ableton Live Choice of the MIDI input peripheral (Option->Preferences) List of the MIDI peripherals available Selection of the MIDI port on which the Bitstream 3X is connected Editing assigned MIDI controls Rev 1.1 - Page... - Page 65 Once Live is in mode « MIDI map editing », click on the control to assign and change the position of one of the controls of the Bitstream 3X so it will be assigned automatically. Live indicates the number of the channel and of the received control, above the control currently being assigned.
-
Page 66: Definition Of The Exclusive Systems Of The Bitstream 3X
Bitstream 3X. Note as well that the configuration software of the Bitstream 3X allows the reading or programming of all the parameters of the Bitstream 3X, without any knowledge of MIDI, hexadecimal or otherwise. - Page 67 Note : The two bits 1 and 0 of the octet Sysex_ID0, once they’re respectively equal to 1 and 0, are reserved for the updating of the firmware, it is therefore imperative that you do not use Sysexs with the bits having these values, as doing so could damage the Bitstream 3X Sysex ID1...
-
Page 68: List Of The Global Parameters Accessible Via Sysexs
USER MANUAL List of the global parameters accessible via Sysexs The following table lists the global parameters of the Bitstream 3X, as well as their respective addresses Global Description Data length / Range Note parameter (bytes) / (Value) address 00 (1) - Page 69 USER MANUAL Description of the octet Bs3x status 0 Bs3x status 0 Description Note Bit 7 Always 0 Bit 6 Arppeggio sync mode 0:internal 1:external Bit 5 Reserved Bit 4 Arppegio USB output 0:disable 1:enable Bit 3 Arppegio MIDI Out 1 output 0:disable 1:enable Bit 2 Arppegio MIDI Out 2 output...
-
Page 70: Example Of Communication
Each octet is sent / received in the form of 2 nibbles; the MSB is sent/received first. To configure a control of the Bitstream 3X, 64 nibbles of data will be therefore sent in the Sysex, in addition to the heading of the Sysex. A checksum calculated based on the total of the data from the sysex will be equally calculated and inserted just before the end marker of the sysex F7. - Page 71 USER MANUAL Complete structure associated with a control of the Bitstream 3X Byte Description Note Ctrl_status_0 Reserved to standard operating mode See description below Ctrl_status_1 Reserved to standard operating mode See description below Ctrl_status_2 Reserved to user operating mode See description below...
-
Page 72: Definition Of The Lcd Assign Data Accessible Via Sysexs
0: No control chained 1-67 : Control number chained minus 1 The general format of the sysex to be sent to the Bitstream 3X in order to reassign a control will be as follow: F0 00 20 4F 00 01 ID0 ID1 ID2 ID3 <... -
Page 73: Midi Overview
USER MANUAL MIDI Overview This chapter presents a brief overview of the Musical Instrument Digital Interface—MIDI. You should also have a more detailed reference on the subject, especially if you need to understand advanced features not covered here, such as MIDI Time Code and Sample Dump Standard. Introduction The MIDI specification details a combination of hardware and software, enabling synthesizers, computers, effects, and other MIDI devices to communicate with each other. -
Page 74: Channel Messages
USER MANUAL end of this chapter for a summary of MIDI messages. Channel messages Channel messages contain their channel number in the lower four bits of the status byte. A value of 0 corresponds to channel 1, 1 to channel 2, and so on, up to a value of 15 (for MIDI channel 16). When status bytes are listed as 1011nnnn (binary), the nnnn part refers to the channel part of the status byte. -
Page 75: Exclusive
USER MANUAL Exclusive System exclusive (or sysex) messages are used to transfer information that may be specific to a given MIDI device. Generally, the actual data that is used describe a sound (usually called a program or patch) is not usable by another device, even from the same manufacturer. This is because the sound generating architecture varies dramatically between devices. - Page 76 USER MANUAL Table 1: MIDI byte value summary Message Hex Decimal Data byte count data 00-7F 0-127 Channel messages Note off 128+n 144+n Note on Polyphonic key pressure 160+n 176+n Control/Mode change Program change 192+n Monophonic channel pressure 208+n Pitch bend change 224+n System exclusive System exclusive status...
- Page 77 USER MANUAL 128 controllers defined in the MIDI standard: Modulation Modulation LSB Porta Pedal Data decrement Breath Control Breath Control LSB Sostenuto Pedal NRPN LSB Control 3 Aftertouch LSB Soft Pedal NRPN MSB Legato Foot Control Foot Control LSB RPN LSB Footswitch Portamento Portamento Time...
-
Page 78: Technical Characteristics
USER MANUAL Technical Characteristics 35 assignable knobs 8 assignable faders 45 mm 16 assignable buttons Joystick –analog, assignable, 2 axes Infrared Controller, assignable Cross-fader, assignable Encoder – footswitch entry 7 response models, per control (lin, inv lin, log, inv log, random, users 0 & 1) SYNC24 Output Extension port Integrated LFO programmable... - Page 79 USER MANUAL Retailler Rev 1.1 - Page...
Need help?
Do you have a question about the 3x and is the answer not in the manual?
Questions and answers