Table of Contents
Advertisement
Quick Links
Operation and
Maintenance Man u al
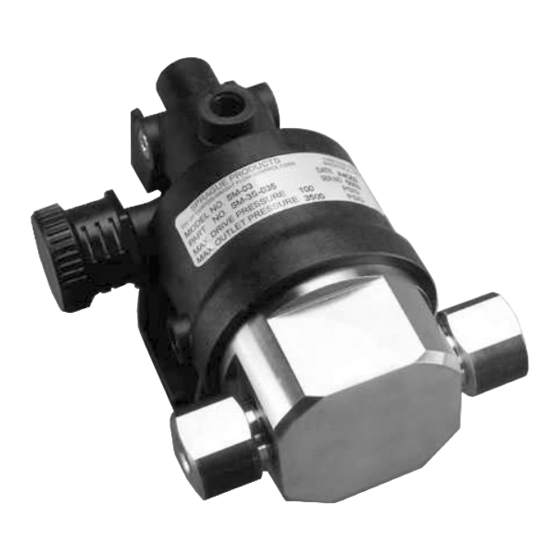
MODEL SM-3
AIR-OPERATED LIQUID MINIPUMP
ISSUED MARCH 2004
Sprague Products
Sprague Products
Sprague Products
Division of Curtiss-Wright Flow Control Corporation
10195 Brecksville Road
Brecksville, OH 44141 USA
Telephone: 440-838-7690 • Fax: 440-838-7513
www.cwfc.com
®
Advertisement
Table of Contents

Summary of Contents for Sprague SM-3
- Page 1 Operation and Maintenance Man u al MODEL SM-3 AIR-OPERATED LIQUID MINIPUMP ISSUED MARCH 2004 Sprague Products Sprague Products Sprague Products ® Division of Curtiss-Wright Flow Control Corporation 10195 Brecksville Road Brecksville, OH 44141 USA Telephone: 440-838-7690 • Fax: 440-838-7513 www.cwfc.com...
-
Page 2: Table Of Contents
PUMP AND ACCESSORIES - TYPICAL ARRANGEMENT METHOD OF OPERATION Air Pressure Gauge Shut-Off Valve Air Pressure Liquid Regulator The Sprague pump develops high output Pressure Gauge pressure by applying the principle of dif- Compressed Air Manifold Line Thru ferential areas. -
Page 3: Safety
SAFETY SM-3 minipumps are designed to provide high levels of safety, provided basic safety guidelines are followed. AIR MODULE LIQUID MODULE Make sure that all air connections are made up properly. SM-3 minipumps can generate very high liquid pressures If NPT connections have been specified, the NPT fit- and great care should be taken in use and maintenance. -
Page 4: Operation
OPERATION STARTING STOPPING SM-3 minipumps are supplied in standard operating mode, Minipump may stall with air supply still connected. which means they are ready to run with a single air connec- MINIPUMP CAN BE STOPPED AT ANY TIME WHEN RUN- tion and the liquid inlet and outlet connected. -
Page 5: Dimensional Data
DIMENSIONAL DATA 5.62″ 4.75″ 60° Air Inlet 1/4″ NPT ″ NPT ″ 3.93″ 60° 12.0″ 2.06″ ″ 11.25″ 7.80″ ″ Hand Pump Option Fluid Inlet 2.93″ 2.12″ 3.95″ Bolt Mounting Slots use1/4″ (6mm) Fasteners 5.00″ 1.92″ 3.20″ Weight: 1.65″ STD. ALUM. BODY 4.5 LBS 3.25″... -
Page 6: Troubleshooting
TROUBLESHOOTING TROUBLE CORRECTION Pump does not operate Make sure clean air supply has correct flow and pressure. (Min. 20 PSI & 3 SCFM) Check if pump has not stalled due to hydraulic pressure at outlet of check valve. Check that pilot air, if remote pilot mode selected, is at correct pressure and available to pump. -
Page 7: User Configured Operation Modes
USER CONFIGURED OPERATING MODES SM-3 minipumps have the capacity to allow the user to simply and quickly alter the way the pump operates. Minipumps are delivered in the standard operating mode condition. For all operating modes the pilot exhaust port is fitted with a vent plug. -
Page 8: Disassembly Procedure
MANUAL OPERATION On request, manual operation minipumps can be supplied. As with standard minipumps, they are supplied in the standard operating mode. These minipumps can also be reconfigured to remote operating or single stroke modes. The hand opera- tion uses a hand lever, where one complete movement of the lever equates to one cycle of the minipump. The hand lever is easily removed for convenience. - Page 9 Slide washer and piston off piston shaft. Remove high pressure seal assembly from recess within high-pressure body. Seal orientation under back-up ring is as shown. See Figure 10a & 10b. Retaining Ring Retaining Ring Bearing Washer Bearing Washer Bearing Bearing Back-Up Ring Back-Up Ring Lip Seal...
- Page 10 Holding high pressure body in vice, remove intlet Remove outlet check valve assembly from outlet check check valve as shown. Watch for inlet check valve valve body. parts inside and o-ring on gland. 14 a) = 5,10, 20, 35 & 60 ratios 12 a) = 5, 10, 20, 35 &...
- Page 11 The following instructions, 19 to 21, apply only to Remove spool and sleeve by gradually applying air pressure to main air inlet port shown while holding the manual operation option, (H). piston shaft fully into sleeve (block off single cycle port and remove protector from main exhaust port as Remove retaining clip and plain washer to hinge shown.) Do not use pliers to extract sleeve, as this will...
-
Page 12: Reassembly Procedure
REASSEMBLY INLET & OUTLET CHECK VALVES Refer to assembly drawings for part numbers and configu- ration. Before reassembling pump, wash metalic parts thoroughly in water solution (“Simple Green”), rinse and dry. Lubri- Reassemble and install inlet and outlet check valves into cate o-rings with “Accrolube”... - Page 13 HIGH PRESSURE SEAL Lubricate the 91417-231-29 o-ring and assemble on the air piston. See figure below. See assembly drawings for part numbers and configura- tion. Lubricate o-ring and assemble into the lip seal. Use care, do not scratch or mark the o-ring or lip seal. As- semble lip seal into high pressure body.
- Page 14 MINIPUMP ASSEMBLY LOW PRESSURE AIR BODY – Lubricate the o-ring with “Accrolube” Teflon grease or equivalent. Use lubricants Lubricate the o-ring with “Accrolube” Teflon grease or compatible with seal compounds. Install the 91417-012-1 equivalent. Use lubricants compatible with seal com- o-ring in the low pressure body internal o-ring groove.
-
Page 15: Assembly Drawings, Parts Lists Including Service Kits
Assembly Drawings and Parts Lists SM3 HP (005-035) Seal Detail RATIOS 5, 10, 20, & 35 RATIOS 5, 10, 20, & 35 � � Outlet Inlet � � � � Quantities the Same as STD. Unit Quantity Item 3A-005 3S-005 3A-010 3S-010 3A-020... - Page 16 SM3 HP (060) Seal Detail �� � RATIO 60:1 � � Outlet Inlet � � � Quantity Quantities Same as STD. Unit Item Description Part No. 3A-060 3S-060 -02 (NEO) -03 (VIT) -04 (EPR) Body, H.P., -060, ALUM. 100704-060A Body, H.P., -060, SST. 100704-060S Piston Shaft, -060 100750-060...
- Page 17 SM3 HP (100-225) Seal Detail �� RATIOS 100, 150, & 225 RATIOS 100, 150, & 225 � � Outlet Inlet � � � � Item Description Part No. Quantity Body, H.P., -100, ALUM. 100704-100A Body, H.P., -100, SST. 100704-100S Body, H.P., -150, SST. 100713-150 Body, H.P., -225, SST.
- Page 18 SM3 LP : Low Pressure Body Assembly PILOT EXHAUST SINGLE CYCLE SINGLE CYCLE PORT (1/4″) PORT (1/4″) PORT (1/4″) MAIN EXHAUST MAIN EXHAUST -H OPTION VENT Item Quantity Description Part No. 3A3S Body, L.P., Air Motor, Std. 100777 STANDARD SUPPLY Body, L.P., Air Motor, Hand 100778 Sleeve, Spool...
- Page 20 Division of Curtiss-Wright Flow Control Corporation 10195 Brecksville Road 10195 Brecksville Road Sprague Products U.K. Sprague Products U.K. Brecksville, OH 44141 USA 202 St. Andrews Road Telephone: 440-838-7690 • Fax: 440-838-7513 Bridport, Dorset DT6 3B6 www.cwfc.com © Sprague Products 2004 SM3 5M 304...
Need help?
Do you have a question about the SM-3 and is the answer not in the manual?
Questions and answers