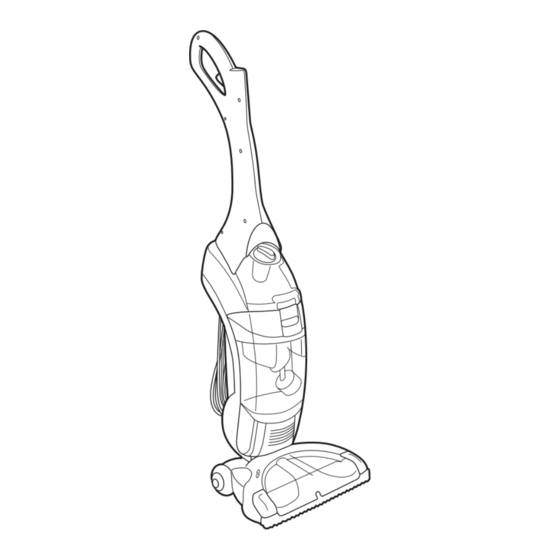
Summary of Contents for Hoover FloorMate PowerBrush 300
- Page 1 ENGLISH pp. 1-17 ESPAÑOL pág. 18-28 FRANÇAIS p. 29-39 FloorMate™ PowerBrush 300 Hard Floor Cleaner ® www.hoover.com...
-
Page 2: Important Safeguards
Hoover Factory corners. Do not run appliance over Service Center or Authorized cord. Keep cord away from heated Hoover Warranty Service Dealer. -
Page 3: Table Of Contents
..... 41 Carton Contents A. Hard floor cleaner B. Upper handle C. Nozzle D. Floor cleaning concentrate © 2005 The Hoover Company www.hoover.com Continued... -
Page 4: Cleaner Description
Cleaner Description Features Hand grip ON/OFF switch Solution trigger: squeeze to release cleaning solution Clean solution tank cap/measuring Clean solution tank Clean solution tank release Recovery tank release Recovery tank lid and filter Recovery tank: collects dry debris as well as dirty cleaning solution 10. -
Page 5: Assembly Handle Assembly
Assemble handle Push upper handle (A) all the way down until you hear it snap in place. Install nozzle For easier installation, place cleaner in upright position. To install nozzle, make sure latches (A) are out. Align middle section (B) of nozzle with opening (C) on cleaner. -
Page 6: Handle Release Pedal
Handle release pedal Step on pedal (A) to lower handle to operating position. Handle does not lock into a single position, but “floats” to allow convenient operation. ON/OFF switch Push switch (A) once to turn cleaner ON. Push switch again to turn cleaner OFF. -
Page 7: General Operation
General operation Your HOOVER FloorMate™ PowerBrush 300 Cleaner can be used to both vacuum dry debris and wet clean non-carpeted floor surfaces such as vinyl, tile and sealed wood. It is not intended for use on carpet or rugs. CAUTION: To prevent damage to wood floors, follow the flooring manufacturer’s cleaning recommendations. -
Page 8: Solution Tank
(2 oz.) HOOVER® Floor to Floor™ Cleaner. Check for worn spots or joint separations before using, as these conditions could lead to damaged flooring when using water to clean floor. - Page 9 Pour cleaning concentrate into tank (B). Fill tank to fill line (C) (1 quart) with warm water. If rubber ring (D) on cap has become dislodged, reposition it with uneven side against ledge (E) as shown. Replace cap. Rotate cap clockwise until it locks in place.
-
Page 10: Recovery Tank
Recovery (lower) tank Automatic shut-off An automatic suction shut-off is built into the recovery tank to prevent the tank from overflowing. When the shut-off activates, the cleaner will not pick up water or debris and the sound of the motor will change. The recovery tank is full and must be emptied. -
Page 11: How To Clean
How to clean Recommended cleaning sequence Use your HOOVER® FloorMate™ PowerBrush 300 Cleaner to: • Dry Vacuum to remove loose dirt, hair and debris. • Wet Scrub the floor surface. The agitator will provide agitation to help loosen dirt. -
Page 12: Cleaning Floors
Cleaning floors NOTE: Your HOOVER® FloorMate™ PowerBrush 300 cleaner may be used to clean wood floors that have been sealed with a polyurethane coating and can be cleaned with water. CAUTION: To prevent damage to wood floors, follow the flooring manufacturer’s cleaning rec- ommendations. -
Page 13: Storage
Storing the cleaner Before storing cleaner: Turn cleaner OFF and disconnect from electrical outlet. • Empty and rinse solution and recovery tanks. Allow to air dry. • Make sure that nothing is pressing on the nozzle squeegee. • Do not store cleaner on a wood surface unless cleaner is completely dry. -
Page 14: Replacing Agitator Brushes
While holding nozzle in place, slide latches inward to lock in place. Replacing the agitator brushes Should the agitator brushes on your FloorMate™ PowerBrush 300 cleaner become worn and need to be replaced, they can be replaced at your nearest HOOVER Sales and Service Center. -
Page 15: Troubleshooting
Troubleshooting Use the list below to help solve minor problems. What’s the problem? What to do Cleaner won’t run Make sure the cleaner is plugged in firmly. Check the fuse or breaker. Low suction Empty the recovery tank; it may be full and the automatic shut-off engaged. -
Page 16: Service
Calling 1-800-944-9200 for an automated referral of authorized service outlet locations (U.S. only) Do not send your cleaner to Hoover in Newton, Iowa for service; this will only result in delay. If further assistance is needed, contact the Hoover Consumer Response Center, Phone: 330-499-9499. -
Page 17: Warranty
For an automated referral of authorized service outlets in the U.S.A., phone 1-800-944-9200 OR visit Hoover on-line at www.hoover.com This warranty does not cover pick up delivery, or house calls; however, if you mail your appliance to a Hoover Sales and Service Center for warranty service, transportation will be paid one way.


Need help?
Do you have a question about the FloorMate PowerBrush 300 and is the answer not in the manual?
Questions and answers