Table of Contents
Advertisement
®
GUIDE
Wuhan Guide Infrared Co., Ltd.
No. 26 Shucheng Rd, Hongshan District, Wuhan 430070 P. R. China
Telephone:
+86-27-8767 1991
Facsimile:
+86-27-8767 1927
Email:
overseas@guide-infrared.com
Internet:
www.guide-infared.com
© Wuhan Guide Infrared Co., Ltd., 2010
Publication No: GUIDE® EASIR-9UM 001
EasIR-9 Thermal Camera
User Manual
Advertisement
Table of Contents

Summary of Contents for Wuhan Guide GUIDE EasIR-9
-
Page 1: User Manual
® GUIDE EasIR-9 Thermal Camera User Manual Wuhan Guide Infrared Co., Ltd. No. 26 Shucheng Rd, Hongshan District, Wuhan 430070 P. R. China Telephone: +86-27-8767 1991 Facsimile: +86-27-8767 1927 Email: overseas@guide-infrared.com Internet: www.guide-infared.com © Wuhan Guide Infrared Co., Ltd., 2010... - Page 2 73/23/EEC). Copyright © Wuhan Guide Infrared Co., Ltd, 2010. All rights reserved worldwide. No parts of the products may be reproduced, transmitted, transcribed or translated into any language or computer language in any form or by any means, electronic, magnetic, optical, manual or otherwise, without the prior written permission of Wuhan Guide Infrared Co., Ltd.
-
Page 3: Table Of Contents
Table of the Contents Table of the Contents ........................1 Introduction ............................1 Precautions ............................1 Maintenance ............................1 Calibration and Repair Philosophy ....................2 Technical Support ..........................2 Feedback to Us ..........................2 ... -
Page 4: Table Of The Contents
User Manual Introduction This publication provides the necessary information required to safely operate the GUIDE® EASIR-9 Thermal Camera. It is important to fully check all equipment with which you have been supplied. The equipment should be used, maintained and serviced by suitably trained personnel, capable of carefully following the procedures and guidelines given in this User Manual. -
Page 5: Calibration And Repair Philosophy
The GUIDE® EASIR-9 Thermal Camera does not incorporate any user serviceable parts. Never attempt to disassemble or modify the camera. Opening the unit invalidates the warranty. Technical Support Technical support for your Wuhan Guide Thermal Imaging System can be obtained by either contacting the address / telephone number... -
Page 6: Technical Specification
User Manual • AC Adapter & cable • USB extension cable • USB driver ® • Guide IrAnalyser Software • User manual • Carry case & strap Options • 13mm wide angle lens • 42mm and 70mm , two tele lens are available •... -
Page 7: System Features
User Manual Temperature Range: -20℃ to 250℃ (350℃ and 1500℃ are optional) Accuracy: ±2℃ or ±2% of reading Emissivity Correction: Variable from 0.01 to 1.00 (in 0.01 increment) Measurement Features: Automatic correction based on distance, relative humidity, dew point function, atmospheric transmission and external optics Optics Transmission Correction: Auto, based on signals from sensors... - Page 8 User Manual Unique Features • Rugged housing and rubber protection offers high effective operation even in harsh environment • High thermal sensitivity 384x288 and precise temperature measurement • Big 3.6" LCD plus three-button button system make for a friendly navigation with the push of a thumb •...
-
Page 9: Parts Described
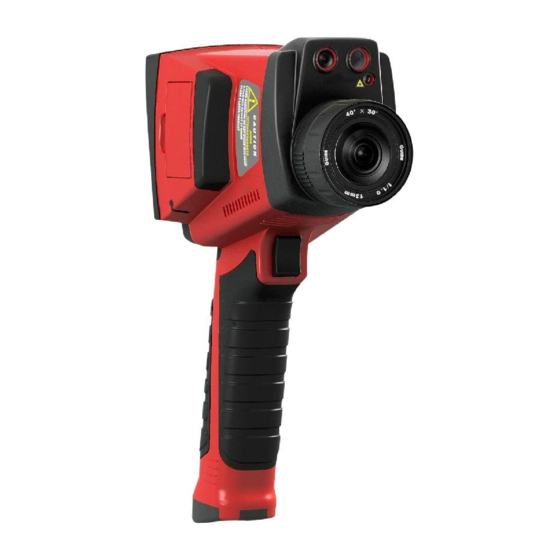
User Manual • Images saved in SD card and the built-in flash memory can be downloaded to PC for further analysis and report ® generation with software Guide IrAnalyser Parts Described LCD Display Charging Indicator Function Softkeys Manual focus lens Microphone Battery Cover Speaker... - Page 10 User Manual Lens lock Visual Camera Illuminator Laser IR Lens Trigger Button...
- Page 11 User Manual USB Interface Video Interface AC Adapter/Charging Input Terminal SD Card Slot...
-
Page 12: Easir-9 Charging Instruction
User Manual EASIR-9 Charging Instruction Note: “Instruction” is only for 2704D PCB “slow flicker” in the text is about 1Hz, “quick flicker” is about 3Hz How to use the adapter The red indicator light will flicker when the adapter is connected with camera. Keep press the button for 3 seconds to power on the camera with the green and red light flicker alternatively. -
Page 13: Buttons Introduction
User Manual Charge when power on Power on when using the batteries, then connect the camera with adapter, the red indicator will flicker slowly. ( When charging Press button to power off the red indicator will flicker slowly After charging, green indicator flickers slowly. Note: The batteries cannot be taken out of the camera in the power-on charging process. - Page 14 User Manual ↑/← ↓/→ L/R / U/D - Press to switch between the X or Y coordinate - Press to adjust the value of X or Y’s coordinate.. - Press T to exit the spot analysis and return the real-time IR mode. Press to enter visual light/Infra Fusion mode :...
- Page 15 User Manual Selecting Span Keep button pressed for 3 seconds to enter span selecting mode. Press to select AutoSpan . Press to select ManualSpan Image frozen and save On the non-menu mode, press T to freeze the image, the following info will be displayed on the screen: Save Voice Visual...
- Page 16 User Manual Press to choose AutoSpan1 or AutoSpan2. Press to enter manual adjust mode, then press to increase/decrease the value of Tmax and Tmin, the picture effect will change accordingly. Press button T to finish operation and return to real-time IR mode Main menu operation On the non-menu mode, press to bring up Main menu, the following info will be displayed on the screen :...
-
Page 17: Function Operation
User Manual About ↑ ↓ On this sub-menu mode, press to enter next sub-menu, press T to exit main-menu operation and return real-time IR mode. On the main menu mode, press to enter system setting sub-menu: Default Lang Tunit TimeDate Lens Pal/Ntsc Sleep... - Page 18 User Manual Press to confirm Setting Tmin and Tmax Keep button pressed to enter span selecting mode. Press to select ManualSpan Press to increase the Tmax value, press to decrease the value, press to switch to Tmin adjustment mode. The same operation for Tmin adjustment. Press button “T”...
- Page 19 User Manual When replaying a thermal image, there would appear “Delete”, “Voice” and “Visual” at the bottom of the LCD screen, Press to switch between the thermal image and visual image Reviewing and Deleting Stored Images To view stored images on the SD card: Press to display the main menu.
- Page 20 User Manual Select “Sleep” by pressing “↑” and “↓”, and “OK” to confirm. Press button to make Sleep mode enabled Press button to decrease/increase the time of sleep mode, sleep time is displayed at the bottom of LCD. Press to save and confirm. Machine auto enter sleep mode after pre-set timing value, press any button activates the machine from sleeping mode.
- Page 21 User Manual Press button and then button to bring location adjustment mode of center spot. The default adjustment mode is “L/R” mode, press and “M” button can move the center spot to left and right under this mode; press “P” button to switch into “U/D” mode, then press button can move the center spot to up and down under this mode.
- Page 22 User Manual Power on the monitor. Power on the camera. Press to display the main menu. Press the “Setup”. Select “Pal/Ntsc by pressing “↑” and “↓”, and “OK” to confirm. Press the “PAL” or “NTSC” to select different output systems. When viewing the live image, you can still use the buttons to control the camera.
- Page 23 User Manual Choose “Install from a list or specific location (advanced)” and include the folder where you save the driver program. Then Click button next to go further. Installation starts. When getting to the step as shown below, choose “Continue anyway” to proceed further.
- Page 24 User Manual Installati continue finishes quickly. Click button Finish. Go to Device Manager to check and confirm whether the driver has been successfully installed. If there is “GUIDE EASIR-9” listed under Universal Serial Bus Controller, it indicates the driver has been properly installed and you can transfer data from the camera to PC now.
- Page 25 User Manual...
Need help?
Do you have a question about the GUIDE EasIR-9 and is the answer not in the manual?
Questions and answers