Advertisement
Advertisement

Summary of Contents for COEF Master Disco 96
- Page 1 ® Programmable Console • OPERATING INSTRUCTIONS • MANUALE ISTRUZIONI Rev. 1...
- Page 2 Le descrizioni ed illustrazioni fornite nella presente pubbli- cazione non sono impegnative. COEF srl. si riserva il diritto di apportare in qualsiasi mo- mento tutte le modifiche che riterrà opportune. Il presente manuale non può essere ceduto in visione a terzi senza specifica autorizzazione scritta da COEF srl.
-
Page 3: Table Of Contents
INDICE INDEX CONCETTO GENERALE - GENERAL CONCEPT ..................pag. 4 1 - DIMENSIONI E PANNELLI - DIMENSIONS and PANELS..............pag. 5 2 - COLLEGAMENTI - CONNECTIONS ......................pag. 6 3 - ACCENSIONE CONSOLE - SWITCH TO POWER ON ................pag. 7 4- SETUP ................................ - Page 4 By the Master Disco 96 it’s possible to control up to 96 DMX channels (for ex: 16 projectors each of 6 channels or 12 proj- ectors each of 8 channels). In the Master Disco 96 are stored to default all the COEF projectors of the Performance line and all the other Coef light effects, with automatic assignment of the channels.
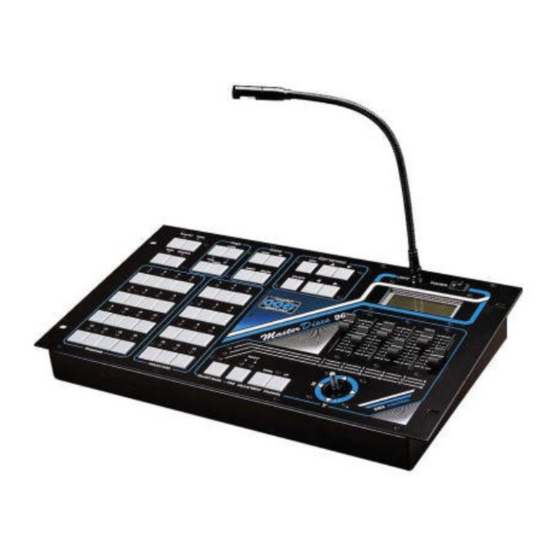
- Page 5 1 - DIMENSIONI E PANNELLI DIMENSIONS and PANELS Figure 3 Figure 2 Pag.5...
- Page 6 2 - COLLEGAMENTI CONNECTIONS Inserire nella presa predisposta nel pannello posteriore del Master Disco 96 lo spinotto proveniente dall’alimentatore a corredo dell’apparecchiatura (vedi Fig.4). POWER ATTENZIONE! La tensione fornita deve essere di 12 Volts DC e 1A. POWER SUPPLY 12 VDC 20% 1A Take out the provided DC adapter and plug it into the relevant socket in the Master Disco 96 back panel (see fig.4).
-
Page 7: Setup
Plug the flexible lamp in the relevant BNC socket ( this lamp is an optional, not essential to the console working: it’s not provided with the console). Switch the Master Disco 96 on by means of the switch on the front panel above the matrix display. - Page 8 4 - SETUP SETUP Selezioniamo con il tasto “V” (fig. 9 pag.7) la sezione [SETUP] e confermiamo con ENTER (tasto R). Questa fase è di estrema importanza, affinchè il funzionamento del parco proiettori collegato alla console, funzioni in ma- niera corretta, permettendo impostazioni veloci e sicure. Il display mostrerà...
- Page 9 Figure 12 Figure 13 La fase di assegnazione dei proiettori è assolutamente necessaria per il funzionamento del Master Disco 96. Non sarà possibile costruire alcun programma, se non avremo associato ai pulsanti PROJECTORS (part.B fig.13) un tipo di proiettore. Si accede atale funzione selezionando la parola [ASSIGN] e premendo ENTER (part. R fig.14).
- Page 10 By means of the S and T buttons you will select the type of projector to link to the selected number; if you have not yet done the step 4 [TYPE] the choice, is limited to the whole series of COEF projectors, that will appear on the display together with in- formations about: - DMX starting channel of the projector “DMX St”...
- Page 11 = Nome da attribuire al proiettore [ChPrj:x] = Canale fisico del proiettore in edit [ChMS96] = Canale assegnato al Master Disco 96 [Interpolation:XX] = Interpolazione o meno del canale [Shutter Value:---] = Valore digitale dell’otturatore chiuso attribuito al canale selezionato “Name:Type xxx”...
- Page 12 = Name for the projector [Name:Type xx] = Channel of the projector in edit [ChPrj:x] = Channel assigned to Master Disco 96 [ChMS96] = Channel interpolation or not [Interpolation:XX] = Digital value of the closed shutter for the selected channel [Shutter Value:---] “Name:Type xxx”...
- Page 13 • Passo 5 AUDIO Configurazione Audio IN • Step AUDIO Audio IN Setting * S E T U P / 2 * [AUDIO] RS232 ----- BEEPER PASSW FORM. Figure 22 ****** AUDIO ****** Input:MIC Input:LINEA Figure 23 Figure 24 Passare alla sezione SETUP2 come precedentemente indicato. Selezionare con i pulsanti U e V (fig.23) la parola [AUDIO] e premere ENTER .
- Page 14 • Passo 7 BEEPER Configurazione cicalino interno • Step BEEPER BEEPER setting Selezionare con i pulsanti U e V (fig.23) la parola [BEEPER] e premere EN- ****** BEEPER ****** TER . In questo modo avremo la possibilità di determinare se rendere attivo o disat- Status:ON tivare il BEEP alla pressione di ogni pulsante.
- Page 15 • Passo 9 FORMAT Formattazione e reset console • Step 9 FORMAT Format and reset console !!!!!! FORMAT !!!!!! Attention, all data will be delete! Press DEL. to start Figure 30 ATTENZIONE! Con questa funzione verranno azzerate tutte le impostazioni effettuate sulla console e saranno anche cancellati tutti programmi memorizzati.
-
Page 16: Programmazione
Immettere la PASSWORD personale se questa è stata configurata (vedi capi- C O E F tolo SETUP paragrafo relativo). Master Disco 96 Come richiede il display (fig.32) selezionare uno dei 16 programmi (pulsanti part. A fig. 34) ed osserviamo le indicazioni presentate dal display (fig. 33). - Page 17 La memoria del Master Disco 96 è di tipo dinamico e si adatta quindi automa- ticamente ad ogni nuovo inserimento di scena nel programma a seconda del nu- ** Out of Memory! ** mero di proiettori (e dunque dei canali impiegati) che vengono inseriti in ogni...
-
Page 18: Programming
C O E F see chapter SET-UP ). Master Disco 96 The display will ask you to select one of the 16 programs (see fig. 45 part A) and after that it will show the following instructions (see fig. 44) : [PROGRAM] SETUP SEQ. -
Page 19: Sequencer Programming
6 - SEQUENCER PROGRAMMING Entering in function [SEQ.] you will have the possibility to insert up to 18 pro- grams number and Master Disco 96 will automatically execute them following [--] -- -- -- -- -- the sequence you have given. The programs numbers are inserted by simply se- -- -- -- -- -- lecting them and they are cancelled by pressing DELETE. -
Page 20: Esecuzione Programmi
7 - ESECUZIONE PROGRAMMI Una volta memorizzati tutti i programmi ed uscendo dalla fase di programmazione, basterà selezionare uno dei program- mi (1-16) per portarlo in esecuzione. In questa modalità sono disponibili alcune funzioni: a) - Cambio della scena con tempo di STAND impostato o con impulso musicale (MIC interno o LINE (vedi SETUP)). b) - Black-OUT temporaneo del programma (chiusura degli otturatori di tutti proiettori). - Page 21 7 - RUN PROGRAMS To send one program in execution you have to exit the programming stage and to push the relevant push-button (1-16). In this stage you also have the following functions available : a) scene changing by a given STAND time or by musical impulse (internal MIC or on LINE - see SETUP). b) temporary black-out of the program (shutter closing of all projectors) c) temporary STOP of the programs (projectors stopped with open shutter) d) manual use of some projectors even if they are used in the program...
- Page 22 ® Realization: PC CAD & VIDEO...
Need help?
Do you have a question about the Master Disco 96 and is the answer not in the manual?
Questions and answers