Table of Contents
Advertisement
Advertisement
Table of Contents

Related Manuals for Tdrum DD-402

Summary of Contents for Tdrum DD-402
- Page 1 DD-402 E-Drum Set Users manual 00028064 Version 12/2012...
- Page 2 PRECAUTIONS THE FCC REGULATION WARNING (for USA) This equipment has been tested and found to comply with PLEASE READ CAREFULLY BEFORE PROCEEDING the limits for a Class B digital device, pursuant to Part 15 of the FCC Rules. Please keep this manual in a safe place for future reference. These limits are designed to provide reasonable protection against harmful interference in a residential installation.
-
Page 3: Table Of Contents
Switch reverb on/off ........9 Panel Description Front Panel ........... 4 Voice Rear Panel ............ 4 Select the voice ..........10 Adjust the voice volume ........ 10 Setup Adjust the midi note ........11 Connect the pads and the pedal ...... 5 Tempo Connections Adjust the tempo ......... -
Page 4: Panel Description
Panel Description Front Panel MASTER VOLUME KNOB Control the volume of phone and line out. Turn it clockwise to increase the volume and anticlockwise to decrease the volume. [START/STOP] BUTTON Start or stop Pattern playing. 3-DIGIT LED DISPLAY 3-digit LED and LED indicators [CLICK] BUTTON Press [click] button to start/stop the click. -
Page 5: Setup
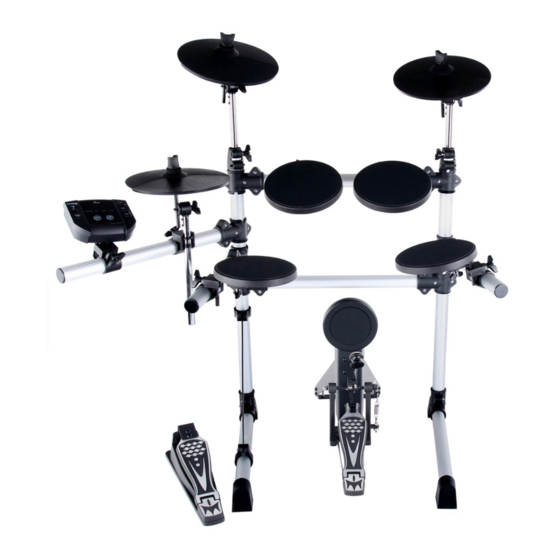
Setup Caution! To prevent electric shock and damage to the device, make sure the power is switched OFF on the drum and all related device before making any connection. Connecting Pads and Pedals Using the provided cables, the cable received by marking the corresponding drum pads, cymbal pads and pedals. -
Page 6: Connect An Audio Equipment
Connect an audio equipment Amplifier Amplifier 1.When you want to listen to the voices with an amplifier, connect amplifiers with the Output L/MONO and R jacks on the rear panel. (For monaural playback, use the L/MONO jack; for stereo playback, connect both L/MONO and R jacks.) 2. -
Page 7: Menu
Menu Menu tree PATTERN Number Acmp Volume Drum Volume Number Volume Reverb Number VOICE Volume MIDI note Time Signature CLICK Interval Click Instrument Volume In the main menu there are 4 menu items PATTERN DRUM KIT VOICE CLICK Operation Press [MODE] button to change the mode. Press [PAGE] button to select the page of current mode. -
Page 8: Pattern
Pattern In pattern mode, there are 3 pages: 1.Pattern number (1- 40,default 1) 2. Pattern accompaniment volume(0-32) 3.Pattern drum volume(0-32) Select a pattern PAGE 1 In pattern mode, Pattern number (001-040,default 001) CLICK 1.Press the [MODE] button to select the pattern mode, the pattern LED indicator will be lighted up, the 3-digit-LED will MODE display the pattern number(001) -
Page 9: Drum Kit
Drum Kit In kit mode, there are 3 pages: 1. kit number(001-010,default 1). 2. kit volume (0-32). 3. kit reverb:(on/off, default on). Select a kit Select a kit PAGE 1 In kit mode, kit number(001-010,default 1). 1. Press [MODE] button to select the kit mode, the kit LED indicator will be lighted up, the 3-digit-LED will display the kit number(001). -
Page 10: Voice
Voice In voice mode, there are 3pages: 1. Voice number:(1-108). 2. Voice volume:(0-32). 3. Midi note:(0-99). Select the voice In voice mode, voice number:(1-108). 1. Press [MODE] button to select the voice mode, the voice LED indicator will be lighted up, strike a drum pad, the 3-digit-LED will display the voice number. -
Page 11: Adjust The Midi Note
Voice Adjust the midi note PAGE 3 In voice mode, midi note:(0-99). 1. Press [MODE] button to select the voice mode, the voice LED indicator will be lighted up. PATTERN VOICE CLICK 2. Press [PAGE] button to select the midi note page, strike a strike a drum pad, the 3-digit-LED will display the midi note (n48). -
Page 12: Click
Click In click mode, there are 4 pages: 1.Time signature:(1/4-7/4,3/8,6/8). 2. Interval:(1/4,1/8,1/12,1/16,1/24,default 1/4). 3. Instrument:(1-5,default 1). 4. Click volume:(0-32). Adjust the click time signature In click mode, Time signature:(1/4-7/4,3/8,6/8). PAGE 1 1. Press [MODE] button select the click mode, the click LED indicator will be lighted up. -
Page 13: Restore The Factory Preset
Restore the factory preset Restoring the factory preset can be implemented by following operations: Turn on the power with both [ + ] and [ - ] unreleased. This function will replace the current settings of following parameters by their default preset values: Kit volume, voice number, voice volume and MIDI note. -
Page 14: Specifications
Specifications Drum Pad Display 4 drum pads , 3 cymbal pads ,1 hi-hat LED display control pedal , 1 kick pedal Preset Drum kits Connections 10 preset kits PHONES AUX IN Drum Instrument OUTPUT (R & L/MONO) MIDI OUT Preset Pattern ON/OFF Controls Power Supply... -
Page 15: Preset Drum Kit List
Preset Drum KIT list Name Acoustic Standard 1 Rock Standard 2 Funk Jazz Brush Electronic House Drum Instrument List Name Name Name Name Name KICK Camco Tom 4 Standard Crash 2 Bongo Low Standard Kick 1 Acoustic Snare Rim Camco Tom 5 Rock Crash Standard Kick 2 Funk Band Snare... -
Page 16: Gm Backing Instrument List
GM Backing Instrument List PIANO STRINGS ENSEMBLE EFFECTS Acoustic Grand Piano Strings Ensemble 1 FX1 (rain) Bright Acoustic Piano Strings Ensemble 2 FX2 (soundtrack) Electric Grand Piano Synth Strings 1 FX3 (crystal) Honky-Tonk Piano Synth Strings 2 FX4 (atmosphere) E.Piano 1 Choir Aahs FX5 (brightness) E.Piano 2... - Page 17 GM Drum Kit List Click Standard 1 (bank 0 ) Standard 2 (bank 4 ) Room (bank 8 ) Rock (bank 16 ) Funk (bank 17 NET NO. 7-D#1 <- <- <- <- High Q - 28 E1 <- <- <- <- Slap...
-
Page 18: Gm Drum Kit List
GM Drum Kit List Electronic (bank 24 ) 808 (bank 25 ) House (bank 28 ) Jazz (bank 32 ) Brush (bank 40 ) NET NO. <- <- <- <- <- 7-D#1 - 28 E1 <- <- <- <- <- 29-F1 <- <-... -
Page 19: Midi Implementation Chart
MIDI Implementation Chart Function... Transmitted Recognized Remarks Basic Default 1-16 Channel Changed Default Mode Messages Altered ************** ************** Note 0-127 0-127 Number: True voice ************** 0-127 0-127 Velocity Note on O 9 9 H, V=1-127 Note off (9 9H. V=0) 0-127 After Key's...
Need help?
Do you have a question about the DD-402 and is the answer not in the manual?
Questions and answers
Hello. Full disclosure: I am a computer **** who acquired a kit third hand and am trying to sort things out. The snare volume is very low compared to the other drums. Is there a way to increase it individually? Also, on page 15 I see sumpin' mentioned about wooden blocks and I think the hi one might make a good replacement for a cowbell. I see there are 10 pre-set kit sounds. Is there a way to modify them individually? I'm thinkin' Tom 2 would serve as a cowbell. Thanx for your help . . . and patience . . . in advance.
@Debbie Wall That should read "computer ****."
AARRGGHH! That should read "computer ****." Further proof is not required. Where is dat edit button, anyway?
@Debbie Wall So it's NOT me. Seems like the system won't accept the word b-o-o-b.