Table of Contents
Advertisement
Advertisement
Table of Contents

Related Manuals for REL Acoustics TZERO


Summary of Contents for REL Acoustics TZERO
- Page 1 Operating Instructions for the ZERO Sub-Bass System...
- Page 3 Important Safeguards 1 Read all of these instructions. 2 Save these instructions for future use. 3 Heed all warnings. 4 Follow all instructions. 5 Unplug from the wall socket before cleaning. Clean only with a dry cloth. 6 Keep away from water or other liquids. Do not rest drinks, vases or other liquid-filled items on the unit. 7 Do not place on a stand or table;...
- Page 4 Warning This item is heavy. To avoid risk of injury, take care when handling. Design Safety This apparatus is supplied with a detachable mains cord. A 2A fuse is fitted in the socket. Should the fuse need to be replaced use a similar rated fuse approved to ASTA or BSI 362 standards. Do not use without the fuse cover in place.
- Page 5 Welcome to the REL Family Thank you for purchasing a REL T Sub-Bass System. The T is the result of a state-of-the-art collaboration ZERO ZERO between our American design and engineering team and our British production team. is conceived as the most cost effective high end product we know how to build. We have spared none ZERO of the materials and finishing techniques our larger designs are noted for.
- Page 6 Overview Sub-Bass System ZERO Many or most loudspeakers emphasize the mid-bass. This is the range from 50 to 90 Hz. We at REL believe this is an incomplete approach and that loudspeakers need to be extended in the lower frequencies for true full range reproduction.
- Page 7 REL T Rear Panel Connection Legend ZERO...
- Page 8 1 Volume Control for HI/LOW INPUT: Use to adjust output when using either HIGH-LEVEL or LOW-LEVEL input. Do not use both simultaneously. 2 Volume Control for .1/LFE INPUT: Use to adjust output level when using .1/LFE input from a 5.1 amplifier or processor.
- Page 9 Connecting Up Always switch your system off before disconnecting any wires. ALWAYS connect using the REL HIGH-LEVEL input, unless your system simply cannot accommodate this. While rare, a few esoteric systems, such as those that deliver a pure digital signal to active speakers, preclude this possibility.
- Page 10 main system is carried forward into the Sub-Bass System. This is a very important point and together with REL’s Natural RollOff™ circuitry, ensures far superior system integration of the Sub-Bass System with the main system. HIGH-LEVEL INPUT: Connections should be made to the same binding post on main amplifier as the main speakers.
- Page 11 REL Set-Up Made Simple REL products are not traditional subwoofers, but are true Sub-Bass Systems. A REL is designed to augment the performance of “full range” speaker systems in order to provide, in certain cases, linear response below 12 Hz. Therefore, for the moment, set aside everything you’ve been taught about subwoofers and how they are integrated into a stereo or home cinema system.
- Page 12 • The standard HIGH-LEVEL hook up procedure is: attach the red wire to the amplifier’s right positive speaker output terminal; attach the yellow wire to the amplifier’s left positive speaker output terminal; attach the black wire to whichever of the amplifier’s ground output terminals is convenient; plug the Speakon connector into the Sub-Bass System’s HIGH-LEVEL input.
- Page 13 • If connecting two RELs in a stereo configuration, connect the black wire of each REL to the negative speaker terminal of the corresponding amplifier channel; twist together the red and yellow wires of each REL separately and connect each pair to the positive speaker terminal of the corresponding amplifier channel. Supplied Neutrik Speakon HIGH-LEVEL Interconnect Supplied Neutrik Speakon HIGH-LEVEL Interconnect Yellow...
- Page 14 • If connecting a REL as a dedicated rear channel sub, connect the black wire of the REL to either the left rear or right rear negative speaker terminal; connect the yellow wire to the left rear positive speaker terminal; connect the red wire to the right rear positive speaker terminal. Supplied Neutrik Speakon HIGH-LEVEL Interconnect Yellow Black...
- Page 15 Working with a partner, one in the listening position and one at the REL manipulating the controls, is the most effective and efficient way to set up the REL. If working alone, the initial steps in the set-up can be very effectively carried out from the location of the REL.
- Page 16 Hint: There may be a tendency to set the crossover point too high and the volume of the Sub-Bass System too low when first learning how to integrate a REL with the system, the fear being one of overwhelming the main speakers with bass.
- Page 17 In the rear corner (ideally that which is opposite the primary sub), connect a second REL to the rear speakers using REL Theater Reference connectivity. The purpose of the rear channel REL is to ensure proper front-to-rear balance and weight; too often virtually ALL the power and weight in a theater comes from the front and it produces unnatural weighting as well as hot spots.
- Page 18 When you have accomplished this task, plug all three units in and re-check your gain settings as the cumulative effect of hooking all three up will usually result in, temporarily, excessive output. Work carefully and methodically to reduce the settings on primary, then rear, and finally center channel RELs and in a few minutes balance should be restored.
- Page 19 Power Saving Efficiency All REL Sub-Bass Systems are designed for maximum power efficiency, both when passing a signal through to its resultant output sound into the room and also when silent. In addition to the low power draw exhibited by all REL models, the T also features an automatic standby ZERO mode that is enabled when the power mode switch on the rear of the unit is set to the “ENERGY SAVER”...
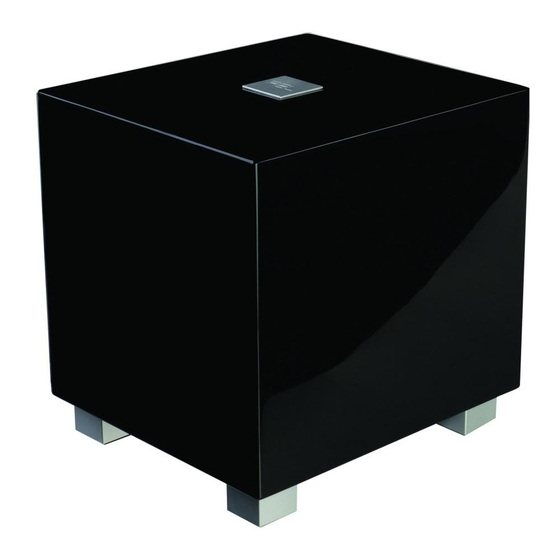
- Page 20 15 lbs. (6.8 kg) Finish: Gloss Piano Black or White Lacquer Supplied Accessories Mains Lead: Neutrik Speakon Interconnect: Yes (10 Meters Nominal) User Manual: In the interest of product improvement, REL Acoustics Limited reserves the right to alter these specifications without notice.
- Page 21 Notes...
- Page 22 REL Acoustics Limited North Road, Bridgend industrial Estate . Bridgend, CF31 3TP . United Kingdom Telephone: +44 (0)1 656 768 777 . Fax: +44 (0) 1 656 766 093 Web: www.rel.net...
Need help?
Do you have a question about the TZERO and is the answer not in the manual?
Questions and answers