
Summary of Contents for Infinite Response VAX77
- Page 1 VAX77 User Manual Version 3.2 Infinite Response, Inc 512.535.5599 vax77@infiniteresponse.com...
-
Page 3: Table Of Contents
Contents Chapter 1: Unpacking and Initial Setup ......9 Remove from box .............. 10 Unfold ................11 Set up ................14 Plug in ................14 Connect hardware synths ........... 15 USB connection to your computer ........16 Mac ....................17 PC ....................... - Page 4 Contents Effect Button ..................33 Hot Key ....................34 Host Control Channel Override ............35 USB Dest – MIDI IN jack ..............36 Poly Aftertouch Delay and Update ............. 36 Manually Setting Aftertouch Pressure ..........37 Assigning Synths to Channels ..........38 Synthesizer..................
- Page 5 Contents Receptor 2 Multi Banks ..............53 Controlling the VST Host from the VAX77 ......54 Using Organ Mode During Host Control ......56 Chapter 5: Playlist Mode ..........61 Playlist Screen ................61 Introduction to Playlist Mode ..........62 Element of the Playlist Screen ..........62 Center Column ...................
- Page 6 Groups view ..................86 Banks & Patches view ................. 88 Add a new synth to the database ............89 Download to flash memory in the VAX77 ......91 Updating the VAX77 firmware ..........93 Activating the new firmware ..........94...
- Page 7 Contents...
-
Page 9: Chapter 1: Unpacking And Initial Setup
Chapter 1: Unpacking and Initial Setup This chapter covers the following topics: removing the VAX77 from its protective packaging unfolding and locking the VAX77 setting up on a table or stand connecting the power cable to the VAX77 ... -
Page 10: Remove From Box
Protective foam fits snugly around the VAX77 so it is best to remove it from the box with some help. Lift from the front and the back of the keyboard, not the foam, and place it on the ground. -
Page 11: Unfold
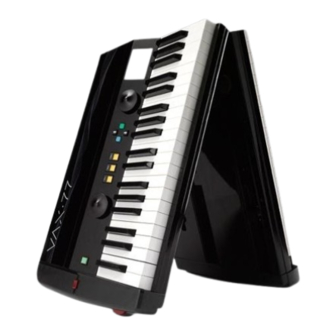
Chapter 1: Unpacking and Initial Setup Unfold With two hands, grab the left half of the keyboard near the end cap and slowly raise it keeping the right half of the keyboard balanced on the ground. - Page 12 Chapter 1: Unpacking and Initial Setup Once it is fully extended, loosen the clamping knobs and position the two slides across the center of the keyboard. Tighten the four clamping knobs.
- Page 13 Chapter 1: Unpacking and Initial Setup...
-
Page 14: Set Up
Chapter 1: Unpacking and Initial Setup Set up The VAX77 has four rubber feet that stabilize and level the instrument when it is used on a table. The front two feet are adjustable and should be set high enough to ensure that the clamping knobs do not contact the table. -
Page 15: Connect Hardware Synths
Chapter 1: Unpacking and Initial Setup Connect hardware synths Use the MIDI OUT jack on the side of the VAX77 to connect to the MIDI IN jack of hardware synths, sound modules, or Receptor. The first 16 MIDI channels are supported through the MIDI OUT jack, as well as being simultaneously transmitted through the USB connector. -
Page 16: Usb Connection To Your Computer
Chapter 1: Unpacking and Initial Setup USB connection to your computer The VAX77 communicates with your PC or Mac at 12 megabits per second. Even with USB packet overhead, it is... -
Page 17: Mac
MIDI input device is no longer attached, but you can re- attach and continue playing without incident. When you first plug the VAX77 into a USB port on a PC (XP SP2, Vista, Win7) the “Found new hardware” message is displayed and the PC will automatically load the standard windows audio driver (WDM). - Page 18 17-32, and so on. For example, if you are running four different software synths simultaneously, you might want to assign each to a different device (VAX77 (1) to synth 1, VAX77(2) to synth 2, etc.). Later, in Setup Mode you would assign channels 1 thru 16 to synth 1, channels 17 thru 32 to synth 2, etc.
-
Page 19: Quick Start Tips
Chapter 1: Unpacking and Initial Setup Quick Start Tips 1. Calibrate controllers: Before any pedals, modulation wheel or pitch bend will work properly out of the box, you must perform a controller calibration (see Ch. 3, pg. 44). Once complete, you will only have to perform this calibration again if you add a new pedal(s) or change their input assignments. - Page 20 Chapter 1: Unpacking and Initial Setup 2. A quick way to start playing sounds from a MIDI rack- module or virtual instrument host would be to use the VAX‟s Channel Selector mode. This is the initial screen from within Host Control (see Ch. 4, pg. 54 for more details), and provides touchscreen access to any of the 16 MIDI channels output on Port 1 (MIDI or USB).
- Page 21 Chapter 1: Unpacking and Initial Setup 3. Hot Key: the 77 reverse color key at the top can be very useful in many setups. It is normally shipped in Program Change mode – if this is a problem right out of the box, you can go into the Setup menu (middle yellow button), and change the Hot Key to „Off,‟...
- Page 22 Chapter 1: Unpacking and Initial Setup...
-
Page 23: Chapter 2: Front Panel Controls
Chapter 2: Front Panel Controls This chapter covers the following topics: front panel controls with a single function front panel controls that vary with operating mode touch screen display hot key... -
Page 24: Single-Function Controls
Chapter 2: Front Panel Controls Single-function controls Setup Power switch Press to enter setup mode (light on). Illuminates green Press again to leave setup mode and when main power is save all changes to flash memory. received. 8va Octave Volume Shifts keyboard up one Rotate to change octave. -
Page 25: Multi-Function Controls
Chapter 2: Front Panel Controls Multi-function controls Many of the controls are context sensitive; their function varies depending on the current operating mode. For example, the EFFECT switch may toggle between Channel Pressure and Polyphonic Aftertouch – OR – toggle between No Aftertouch and Channel Pressure depending on how it is defined on the Setup screen. -
Page 26: Touch Screen
Chapter 2: Front Panel Controls Touch screen The VAX77 has a color touch screen display. Almost every mode includes touch screen buttons that affect the operation of the keyboard. This touch screen does not have multi-touch capability. Consequently, screen buttons are pressed with a single tap. Try not to drag your finger across the screen or linger on a button after it is pressed, as this may give unexpected results. - Page 27 Chapter 2: Front Panel Controls...
-
Page 28: Chapter 3: Setup Mode
Chapter 3: Setup Mode This chapter covers the following topics: global keyboard settings assigning synths to channels calibrating pedals and the modulation slider Globals Press the yellow button labeled Setup to enter setup mode. -
Page 29: Keyboard Sensitivity
Medium Heavy At the heaviest setting, the VAX77 requires a key velocity of over 150 cm/sec to reach maximum MIDI velocity. Each lighter setting reduces that speed by 10%. Aftertouch Sensitivity This determines how much additional force is required to reach the maximum aftertouch value of 127 after the note is struck. -
Page 30: Velocity Curve
MIDI velocity number they use a logarithmic function or a series of linear equations that approximate a logarithmic function. The VAX77 uses floating point arithmetic to make this calculation using a natural log function. As the velocity of a note increases it takes a lot more energy to make the note a little bit louder. -
Page 31: Pedal A B And C
Chapter 3: Setup Mode Pedal A B and C The Pedal inputs on the right side of the VAX77 can be used for additional functions. When these functions are selected, no MIDI controller data will be sent. The choices are: Norm ... -
Page 32: Start Screen
4 (expression), every change in the pedal position will generate a cc 4 and a cc 35. Start Screen On power-up, the VAX77 goes into Library mode, Playlist mode, Host Control or QuickSet depending on this setting. OCT Transpose This value sets the offset in semitones when the Octave button is on. -
Page 33: Effect Button
Chapter 3: Setup Mode When set to On/Off, the VAX77 will only send a zero or 127 in response to the pedal position using the sustain pedal controller (cc64). This is consistent with the operation of a pedal that is a simple switch, either on or off. -
Page 34: Hot Key
Chapter 3: Setup Mode The phrase on the left of the slash refers to the type of aftertouch that is selected when the effect button is off. The phrase on the right of the slash refers to the type of aftertouch that is selected when the effect button is on. -
Page 35: Host Control Channel Override
Chapter 3: Setup Mode If your VAX77 is equipped with the Stevie Wonder Enunciator (call for details), set this field to VOICE to turn the enunciator on and off with the Hot Key. Host Control Channel Override When operating in Host Control mode the VAX77 is synchronized with the VST/plug-in host on your PC (Brainspawn Forte) or Mac (Apple MainStage). -
Page 36: Usb Dest - Midi In Jack
Chapter 3: Setup Mode operate on any MIDI channel through any of the four ports. Routing of the MIDI In port will be addressed in the following section. USB Dest – MIDI IN jack The VAX will accept incoming MIDI from another keyboard or controller via its MIDI in port as noted in the previous section. -
Page 37: Manually Setting Aftertouch Pressure
Chapter 3: Setup Mode Manually Setting Aftertouch Pressure The VAX77 employs an algorithm for establishing the minimum pressure for aftertouch messages. The harder you strike a note, the more pressure is required to initiate aftertouch. Alternatively, you can manually set the minimum pressure for each key by pressing the Left Side Wheel to enter Diagnostics Mode. -
Page 38: Assigning Synths To Channels
Chapter 3: Setup Mode Assigning Synths to Channels The VAX77 has a number of powerful features for controlling hardware and software synthesizers. To take advantage of these features, the VAX77 must know the listening channel of each synthesizer. Many synthesizers are multi-timbral and the same synthesizer can be assigned to several channels. -
Page 39: Synthesizer
Press the up arrow to repeat this for each channel you plan to use. Send Program Change When you select a new preset on the VAX77 front panel, it sends a program change to the selected synthesizer. - Page 40 You can set up each preset to listen on a different channel, and when you select the preset on the VAX77, it will begin sending notes on the new channel. Program Change Only is used with synthesizers that do not recognize bank changes.
-
Page 41: Release Velocity / Cc88 Velocity / Organ
Release velocity is sent as part of a note off command and ranges in value from zero to 127. The VAX77 can send release velocity on synthesizer channels that understand it. A value of 127 is an instantaneous release;... -
Page 42: Initial Volume
Initialize Bank and Program On power up the VAX77 can send a bank change and a program change to every channel. When set to off, no changes are sent for that channel. When set to a valid... -
Page 43: Pedals A, B, And C
Pedals A, B, and C There are three assignable pedal inputs on the right side of the VAX77 in addition to the sustain-pedal input. These pedals inputs are initially set to A=cc#4, B=cc#11 (expression), and C=cc#12 (on all MIDI channels). In this MIDI channel setup parameter, pedals A, B &... - Page 44 MIDI pedals are a part of a voltage divider circuit, but pedal manufacturers use many different values for the potentiometer. This calibration exercise lets the VAX77 measure your pedals and scale them over 128 MIDI values. This is how the pedal configuration screen appears when it is first selected or after pressing the blue button to begin re-calibration.
- Page 45 Chapter 3: Setup Mode If you plug a continuous MIDI pedal into the B input and an on-off type pedal into the sustain input, the screen will show something similar to this: Move the pedals throughout their range to establish the minimum and maximum voltage in the circuit.
- Page 46 Chapter 3: Setup Mode Once the pedals and the modulation slider are configured and calibrated, press the up arrow to continue with setup tasks or press the setup button to exit setup mode and save the configuration to flash memory.
-
Page 47: Chapter 4: Library Mode & Host Control
Controlling the VST Host from the VAX77 Banks, Groups and Presets Library mode presents the banks (or groups defined in the VAX77 patch librarian) and presets for every synthesizer that has been assigned to a MIDI channel. The MIDI channel is selected by touching the soft buttons across the top of the display. -
Page 48: Auditioning Sounds
Rotate the right side wheel to highlight a preset. The highlighted preset is shown in red. Auditioning Sounds To listen to the highlighted preset, press the green button. The VAX77 will send a program change instruction using the rules defined for that channel/synthesizer. Building a Playlist... -
Page 49: Host Control Mode
When you have finished editing your playlist, press the blue button to save your changes to flash memory. The VAX77 will display the playlist screen. Host Control Mode There are currently three leading VST Hosting systems that were designed for live performance;... - Page 50 Concert. If you change to a different preset from the laptop keyboard, the highlight bar will move to that preset on the VAX77 screen. If you change to a different preset from the VAX77 front panel, the laptop...
-
Page 51: Configuring Mainstage, Forte And Receptor
Configuring MainStage, Forte and Receptor MainStage The latest version of MainStage 2 automatically recognizes the VAX77 and maps the VAX77 controls to MainStage controls. In the controller list in MainStage, you will see the nine touch screen sliders, pedals A, B and C, the Black Key (hot key) controller, and the left side wheel. - Page 52 Chapter 4: Library Mode & Host Control to bypass all but the active MIDI channel being played by the VAX, and focus all its CPU resources on that specific plug-in. (to summarize, this approach requires loading of the Receptor Bank and Patch file into Editor Librarian, downloading the specific activated plug-ins as „synths‟...
-
Page 53: Receptor 2
As described below, you can randomly access any Receptor channel by touching the VAX77 touchscreen. You can also use the wheel or arrow buttons to select channels. Receptor 2 Multi Banks Many Receptor users rely on Multi Banks to configure the setups they need during a performance. -
Page 54: Controlling The Vst Host From The Vax77
Chapter 4: Library Mode & Host Control The VAX77 give you access to all 128 banks from its touchscreen. Once communications is established between Receptor and the VAX77 by pressing the Blue button, you can press the Left Side Wheel to activate Multi Bank control. - Page 55 Chapter 4: Library Mode & Host Control Additionally, the Hot Key and pedals can be set to advance patches and banks (MainStage) or scenes (Forte) in a number of ways, as customized in the software (and commonly assigned by „Learn‟ functions). Pedals can be assigned to send Program Change data to move from patch to patch, and the hot key can additionally be set to cc#9 or cc#9 toggle mode as a...
-
Page 56: Using Organ Mode During Host Control
Using Organ Mode During Host Control Organ mode sets key triggering early in the keystroke so the VAX77 plays more like a console organ. This feature is normally assigned to a particular MIDI channel, but since Host Control dictates the active channel, a different method for activating Organ Mode is required. - Page 57 Chapter 4: Library Mode & Host Control...
- Page 58 Chapter 4: Library Mode & Host Control Host Control Notes and Tips When playing a patch in Host Control mode, you can hold a note or chord on the existing sound as you change to a new patch, and it will continue to play until you release the notes.
- Page 59 Chapter 4: Library Mode & Host Control to where the individual MIDI channels are routed; it may be necessary to specify or filter incoming MIDI channels on any sound source receiving Port 1 to avoid simultaneous triggering. If your Port 1 MIDI unit is multi-timbral, it might be helpful to assign MainStage to Ports 2-4 only (MIDI channel setup page #s 17-64).
- Page 60 Chapter 5: Playlist Mode...
-
Page 61: Chapter 5: Playlist Mode
Chapter 5: Playlist Mode This chapter covers the following topics: Playlist display Standby cursor touch screen MIDI controllers / drawbars pedal override Playlist Screen... -
Page 62: Introduction To Playlist Mode
Chapter 5: Playlist Mode Introduction to Playlist Mode Playlist mode has been entirely redesigned for version 2.0. Like Host Control mode, it gives you random access to any preset on the display while providing a mechanism for sequencing though a predefined series of presets. -
Page 63: New
Chapter 5: Playlist Mode the next preset is selected. Its background will change to green. You can also select a preset by touching its name on the RIGHT half of the window. The Standby Cursor is shown with a yellow background. Use the Standby Cursor to preselect the next sound, then use the hotkey or the green button to activate that standby sound. -
Page 64: Edit
Chapter 5: Playlist Mode numbers in ASCII order. The Right Side Wheel advances the cursor to the next letter position. Touch the channel, bank and program change fields and use the Right Side Wheel to set their values. When finished, press the Blue button to save the new playlist entry to flash, or press the Green button to cancel the operation. -
Page 65: Sort
Green button to exit without saving. If you do not save the new sort order either by pressing the Blue button here or by pressing the Blue button from the Playlist screen, the new order will be lost when you power off the VAX77. -
Page 66: Library (Libry)
(favorites) from the playlist. Host The Host button takes you to Host Control mode. If no host is connected to the VAX77, the Channel Selector is displayed. Press the Green button to return to Playlist mode. Controllers (Ctrl) -
Page 67: Using The Touch Screen Controllers
10 is pan. Others are more loosely defined and mean different things in different synthesizers. The VAX77 can manipulate the data values of 12 different MIDI controllers for each preset in the playlist in real time. - Page 68 Chapter 5: Playlist Mode The boxes along the bottom of the screen are for the controller number. Use the up and down arrows to set the controller number; holding either button scrolls the controller value more quickly. The touchscreen sliders represent the data value for that controller number.
-
Page 69: Drawbars
Chapter 5: Playlist Mode Many controllers lend themselves to real-time manipulation. Slide your finger nail up and down to alter these controllers as you play. Drawbars For organ sounds, drawbars are more appropriate icons. Press the green button to display the sliders as drawbars. -
Page 70: Using Pedals To Manipulate Controllers
Chapter 5: Playlist Mode Using Pedals to Manipulate Controllers Pedal inputs A, B and C on the right side of the VAX77 can also manipulate MIDI controllers. The controller numbers for each channel are preset as A=4, B=11, and C=12, but any preset in the playlist can override the channel settings. - Page 71 Chapter 5: Playlist Mode...
-
Page 73: Chapter 6: Quickset Splits And Layers
Chapter 6: QuickSet Splits and Layers This chapter covers the following topics: Using QuickSets to randomly access presets, splits and layers creating splits and layers filtering effects and controllers recalling and editing QuickSet splits QuickSets QuickSet mode was designed for performers that need instant recall of presets from a small group of frequently used sounds, particularly spread across several discrete sound sources, or a multi-timbral synth/sampler... - Page 74 Chapter 6: QuickSet Splits and Layers The QuickSet screen is divided into eight large soft buttons. Touch one to select it and it turns green. If it has not been previously defined, the button will display the word QuickSet and the memory position of that button.
-
Page 75: Introduction To Splits And Layers
Chapter 6: QuickSet Splits and Layers When a QuickSet button is highlighted green, press the green navigation button to assign presets, splits or layers to that QuickSet memory location. The only difference between assigning a QuickSet button to a preset versus a split or layer is that a preset only uses the first element of the definition. -
Page 76: Important Note
Each preset in a split or layer MUST be on a different MIDI Channel The VAX77 can store up to 128 splits and layers, and each can be made up of up to four elements. An element is a preset with its associated boundaries, effects and controllers. -
Page 77: Preset
Chapter 6: QuickSet Splits and Layers element windows, press the up or down arrow to display elements three and four. Preset Touch one of the preset windows and rotate the right side wheel to select a sound for an element. When you rotate the right side wheel, the entire playlist will scroll... -
Page 78: Low And High Note
Touch the low or high window and rotate the right side wheel to set the lowest or highest note in the split. Middle C is C5. The lowest note on the VAX77 is A1. Volume Touch the volume window and rotate the right side wheel to set the volume for each element. -
Page 79: Filtering Effects And Controllers
Chapter 6: QuickSet Splits and Layers Filtering Effects and Controllers Send The SEND line under each element determines which effects are active for that element. If controllers (sliders) or pedal overrides are defined for a preset, you can choose whether or not to send them as part of the split. By default no controllers or effects are sent in a split. - Page 80 Chapter 6: QuickSet Splits and Layers create a layer where a single chord is sending channel pressure to one synth and poly aftertouch to another.
- Page 81 Chapter 6: QuickSet Splits and Layers...
-
Page 83: Chapter 7: Patch Librarian
updating the VAX77 firmware What Patch Librarian does The VAX77 has over a megabyte of flash memory dedicated to holding the names of synthesizers, banks and presets. Use the Patch Librarian software to initialize and maintain that flash memory for the synthesizers that you play. - Page 84 Once you load the descriptions of your synthesizers into the VAX77, you'll be able select every preset by name instead of by bank number and preset number. You can also choose how to group presets in library mode. For...
-
Page 85: Install It On Your Pc
3.5 and SQL Server Express. If these are not on your computer, Setup will install them along with the Patch Librarian software. To run Patch Librarian, click the start button, open the Infinite Response folder, and click on Patch Librarian. -
Page 86: Arrange The Presets
VAX77. When you select that piano group, all the presets that are members of that group will be on the right side of the library mode screen. - Page 87 Use the checkbox next to the synthesizer name to mark it for downloading to the VAX77. Begin by clicking on the synthesizer name to highlight it. The banks and groups defined for that synthesizer are now displayed on the top right side. The presets that are defined for the highlighted bank or group are listed on the lower right side.
-
Page 88: Banks & Patches View
Chapter 7: Patch Librarian Banks & Patches view The Banks & Patches tab shows the presets as they are organized within the synth. The MIDI specification divides presets into banks of up to 128 presets each. There can be up to 16,384 different banks, but most synths use less than 20. -
Page 89: Add A New Synth To The Database
0/0 and a program change of 9 will recall the 70's E Grand preset. The names of the presets will appear on the VAX77 screen exactly as they do here in Patch Librarian. You can rename a preset by clicking it in the grid and typing a new name. - Page 90 Chapter 7: Patch Librarian Type the name of the manufacturer and model number as well as the bank numbers for the first bank. Click OK. Click in the first grid box and type the name of the first preset. Repeat for all the presets in that Bank. If some program numbers are not used, leave them empty.
-
Page 91: Download To Flash Memory In The Vax77
If you would like to make your synth definition available to other VAX77 users, please export the midnam file and upload it to the Infinite Response website. - Page 92 There is a status indicator in the lower right-hand corner of the screen that indicates the connection status with the VAX77. It displays a green circle with a check mark when the connection is good and a red circle with an X when it is not.
-
Page 93: Updating The Vax77 Firmware
Updating the VAX77 firmware Periodically, you may receive a firmware update for the VAX77. This is a single file that contains the entire operating system and VAX77 control program. The firmware update will ordinarily include bug fixes as well as new features. -
Page 94: Activating The New Firmware
When the firmware download is complete, follow the steps below. If a communications error prevents the download from completing, close Patch Librarian, cycle power on the VAX77, restart Patch Librarian and try again. Activating the new firmware disconnect the USB cable ... - Page 95 VAX. Hold these buttons about 10 seconds, release the buttons, then power off the VAX. When restarted, the VAX should be restored to its original settings. Credit Brad Kaenel, a VAX77 owner, for the many improvements in Patch Librarian version 2.2...
- Page 96 Chapter 7: Patch Librarian...
Need help?
Do you have a question about the VAX77 and is the answer not in the manual?
Questions and answers