Table of Contents
Advertisement
Advertisement
Table of Contents

Related Manuals for Husqvarna GTH2250


Summary of Contents for Husqvarna GTH2250
- Page 1 GTH2250 GTH2250 GTH2250 GTH2250 GTH2250 Owner’s Manual...
-
Page 2: General Operation
SAFE OPERATION PRACTICES FOR RIDE-ON MOWERS IMPORTANT: THIS CUTTING MACHINE IS CAPABLE OF AMPUTATING HANDS AND FEET AND THROWING OBJECTS. FAILURE TO OBSERVE THE FOLLOWING SAFETY INSTRUCTIONS COULD RESULT IN SERIOUS INJURY OR DEATH. I. GENERAL OPERATION • Read, understand, and follow all instructions in the manual and on the machine before starting. - Page 3 Safe Operation Practices for Ride-On Mowers • Be sure the area is clear of other people before mowing. Stop machine if anyone enters the area. • Never carry passengers or children even with the blades off. • Do not mow in reverse unless absolutely necessary. Al- ways look down and behind before and while backing.
-
Page 4: Table Of Contents
PRODUCT SPECIFICATIONS GASOLINE CAPACITY 3.5 GALLONS AND TYPE: UNLEADED REGULAR OIL TYPE (API-SF-SJ): SAE 30 (above 32°F) SAE 5W-30 (below 32°F) OIL CAPACITY: W/ FILTER: W/O FILTER: 3.7 PINTS SPARK PLUG: CHAMPION RC12YC (GAP: .040") GROUND SPEED (MPH): FORWARD: 0 – 5.8 REVERSE: 0 –... -
Page 5: Unassembled Parts
UNASSEMBLED PARTS Steering Wheel Steering Wheel Insert Steering Wheel Seat (1) Washer 17/32 x 1-3/16 x 12 Gauge (1) Knob Mower (2) Front Link Assemblies (3) Retainer Springs (double loop) (4) Retainer Springs (single loop) Keys (2) Keys Gauge Wheels (4) Shoulder Bolts (4) Adjusting Bars (4) Clevis Pins... -
Page 6: Assembly
Your new tractor has been assembled at the factory with exception of those parts left unassembled for shipping purposes. To ensure safe and proper operation of your tractor all parts and hardware you assemble must be tightened securely. Use the correct tools as necessary to insure proper tightness. - Page 7 INSTALL SEAT (See Fig. 3) Adjust seat before tightening adjustment knob. • Remove adjustment knob and flat washer securing seat to cardboard packing and set aside for assembly of seat to tractor. • Pivot seat upward and remove from the cardboard packing.
- Page 8 ASSEMBLE GAUGE WHEELS AND BRACKETS TO MOWER DECK (See Fig. 5) The gauge wheels are designed to keep the mower deck in proper position when operating mower. Be sure they are properly adjusted to ensure optimum mower performance. • Attach front gauge wheel brackets marked front left (FL), front right (FR) to mower deck using (3) carriage bolts and (3) locknuts.
-
Page 9: Assembly
CHASSIS BRACKET GAUGE WHEEL DOUBLE LOOP ANTI-SWAY RETAINER SPRING USE PLIERS FOR RETAINER SPRINGS LOOP DOWN C HECKLIST BEFORE YOU OPERATE AND ENJOY YOUR NEW TRAC- TOR, WE WISH TO ASSURE THAT YOU RECEIVE THE BEST PERFORMANCE AND SATISFACTION FROM THIS QUALITY PRODUCT. -
Page 10: Operation
OPERATION These symbols may appear on your tractor or in literature supplied with the product. Learn and understand their meaning. BATTERY CAUTION OR REVERSE FORWARD FAST SLOW WARNING LIGHTS ON OVER TEMP ENGINE ON ENGINE OFF OIL PRESSURE LIGHT PARKING BRAKE UNLOCKED MOWER LIFT FUEL... -
Page 11: Know Your Tractor
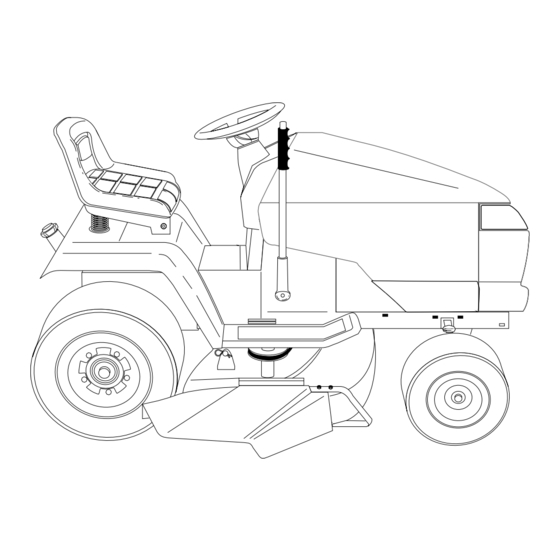
KNOW YOUR TRACTOR READ THIS OWNER'S MANUAL AND SAFETY RULES BEFORE OPERATING YOUR TRACTOR. Compare the illustrations with your tractor to familiarize yourself with the location of various controls and adjustments. Save this manual for future reference. AMMETER THROTTLE CONTROL CLUTCH/BRAKE PEDAL CHOKE... -
Page 12: How To Use Your Tractor
The operation of any tractor can result in foreign objects thrown into the eyes, which can result in severe eye damage. Always wear safety glasses or eye shields while operating your tractor or performing any adjustments or repairs. We recommend a wide vision safety mask over spectacles or standard safety glasses. -
Page 13: To Operate On Hills
• Be sure tractor is on a flat level surface. • Lower mower and adjust mower to desired cutting height. • Remove retainer spring and clevis pin which secure each gauge wheel bar. • Lower gauge wheels to ground. Raise gauge wheels slightly to align holes in bracket and gauge wheel bar and insert clevis pin. -
Page 14: Before Starting The Engine
BEFORE STARTING THE ENGINE CHECK ENGINE OIL LEVEL (See Fig. 12) • The engine in your tractor has been shipped, from the factory, already filled with summer weight oil. • Check engine oil with tractor on level ground. • Remove oil fill cap/dipstick and wipe clean, reinsert the dipstick and screw cap tight, wait for a few seconds, remove and read oil level. -
Page 15: Mowing Tips
PURGE TRANSMISSION CAUTION: Never engage or disengage freewheel lever while the engine is run- ning. To ensure proper operation and performance, it is recom- mended that the transmission be purged before operating tractor for the first time. This procedure will remove any trapped air inside the transmission which may have devel- oped during shipping of your tractor. -
Page 16: Customer Responsibilities
CUSTOMER RESPONSIBILITIES MAINTENANCE SCHEDULE FILL IN DATES AS YOU COMPLETE REGULAR SERVICE Check Brake Operation Check Tire Pressure Check Operator Presence and Interlock Systems Check for Loose Fasteners Sharpen/Replace Mower Blades Lubrication Chart Check Battery Level Clean Battery and Terminals Check Transaxle Cooling Adjust Blade Belt(s) Tension Adjust Motion Drive Belt(s) Tension... -
Page 17: Operator Presence System
CUSTOMER RESPONSIBILITIES TRACTOR Always observe safety rules when performing any mainte- nance. BRAKE OPERATION If tractor requires more than six (6) feet stopping distance at high speed in highest gear, then brake must be adjusted. (See “TO ADJUST BRAKE” in the Service and Adjustments section of this manual). -
Page 18: Clean Air Screen
CUSTOMER RESPONSIBILITIES V-BELTS Check V-belts for deterioration and wear after 100 hours of operation and replace if necessary. The belts are not adjustable. Replace belts if they begin to slip from wear. TRANSAXLE COOLING The transmission fan and cooling fins should be kept clean to assure proper cooling. - Page 19 CUSTOMER RESPONSIBILITIES AIR FILTER (See Fig. 18) Your engine will not run properly using a dirty air filter. Clean the foam pre-cleaner after every 25 hours of operation or every season. Service paper cartridge every 100 hours of operation or every season, whichever occurs first. Service air cleaner more often under dusty conditions.
-
Page 20: Service And Adjustments
SERVICE AND ADJUSTMENTS CAUTION: BEFORE PERFORMING ANY SERVICE OR ADJUSTMENTS: • Depress clutch/brake pedal fully and set parking brake. • Place motion control lever in neutral (N) position. • Place attachment clutch in “DISENGAGED” position. • Turn ignition key “OFF” and remove key. •... -
Page 21: To Replace Mower Drive Belt
SERVICE AND ADJUSTMENTS NOTE: Each full turn of adjustment nut will change mower height about 3/16". • Recheck measurements after adjusting. FRONT-TO-BACK ADJUSTMENT (See Figs. 22 and 23) - IMPORTANT: DECK MUST BE LEVEL SIDE-TO-SIDE. IF THE FOLLOWING FRONT-TO-BACK ADJUSTMENT IS NECESSARY, BE SURE TO ADJUST BOTH FRONT LINKS EQUALLY SO MOWER WILL STAY LEVEL SIDE-TO-SIDE. -
Page 22: To Replace Mower Blade Drive Belt
SERVICE AND ADJUSTMENTS TO REPLACE MOWER BLADE DRIVE BELT (See Fig. 25) Park the tractor on level surface. Engage parking brake. • Remove mower drive belt (See “TO REPLACE MOWER DRIVE BELT” in this section of this manual). • Remove mower (See “TO REMOVE MOWER” in this section of this manual). - Page 23 SERVICE AND ADJUSTMENTS TO REPLACE MOTION DRIVE BELT (See Fig. 28) Park the tractor on level surface. Engage parking brake. For ease of service there is a belt installation guide decal on bottom of left footrest. • Remove mower (See “TO REMOVE MOWER” in this section of this manual.) BELT REMOVAL - •...
- Page 24 SERVICE AND ADJUSTMENTS FRONT WHEEL CAMBER The front wheel camber is not adjustable on your tractor. If damage has occurred to affect the front wheel camber, contact your nearest authorized service center/department. FRONT OF TRACTOR FIG. 30 ADJUSTMENT SLEEVE JAM NUTS ADJUSTMENT SLEEVE FIG.
- Page 25 SERVICE AND ADJUSTMENTS REPLACING BATTERY (See Fig. 34) CAUTION: Do not short battery termi- nals by allowing a wrench or any other object to contact both terminals at the same time. Before connecting battery, remove metal bracelets, wristwatch bands,rings,etc. Positive terminal must be connected first to prevent sparking from acciden- tal grounding.
-
Page 26: Engine Stop
SERVICE AND ADJUSTMENTS ENGINE TO ADJUST THROTTLE CONTROL CABLE (See Fig. 37) The throttle control has been preset at the factory and adjustment should not be necessary. Check adjustment as described below before loosening cable. If adjustment is necessary, proceed as follows: •... -
Page 27: Storage
Immediately prepare your tractor for storage at the end of the season or if the tractor will not be used for 30 days or more. CAUTION: Never store the tractor with gasoline in the tank inside a building where fumes may reach an open flame or spark. -
Page 28: Troubleshooting
TROUBLESHOOTING POINTS PROBLEM CAUSE Will not start Out of fuel. Engine not “CHOKED” properly. Engine flooded. Bad spark plug. Dirty air filter. Dirty fuel filter. Water in fuel. Loose or damaged wiring. Carburetor out of adjustment. Engine valves out of adjustment. Hard to start Dirty air filter. - Page 29 TROUBLESHOOTING POINTS PROBLEM CAUSE Engine continues to run Faulty operator-safety presence control system. when operator leaves seat with attachment clutch engaged Poor cut - uneven Worn, bent or loose blade. Mower deck not level. Buildup of grass, leaves, and trash under mower. Bent blade mandrel.
-
Page 30: Service Notes
SERVICE NOTES... -
Page 31: Repair Parts
TRACTOR - - MODEL NO. GTH2250A REPAIR PARTS TRACTOR - - MODEL NO. GTH2250A SCHEMATIC AMMETER (OPTIONAL) IGNITION SWITCH IGNITION SWITCH POSITION CIRCUIT “MAKE” M + G + A1 NONE ON + LIGHTS B + A1 L + A2 B + A1 NONE START B + S + A1... -
Page 32: Repair Parts
REPAIR PARTS TRACTOR - - MODEL NO. GTH2250A ELECTRICAL D .C... - Page 33 REPAIR PARTS TRACTOR - - MODEL NO. GTH2250A ELECTRICAL PART DESCRIPTION 532144926 Battery 874760412 Bolt Hex Head 1/4-20 x 3/4 532124886 Tray, Battery 532145211 Bolt, Battery Front 1/4-20 x 7.5 Zinc 532150109 Holddown Battery Front Mount 532145769 Nut, Push Nylon 1.4" Battery Front 532153664 Switch Interlock Push-In 532166184...
-
Page 34: Chassis And Enclosures
REPAIR PARTS TRACTOR - - MODEL NO. GTH2250A CHASSIS AND ENCLOSURES... - Page 35 REPAIR PARTS TRACTOR - - MODEL NO. GTH2250A CHASSIS AND ENCLOSURES PART DESCRIPTION 532175465 Rail, Frame RH 532175282 Drawbar, Gt 873800700 Nut, Lock Hex 7/16 Unc 532177582 Dash, Plastic 532157882 Dash, 1PCS, Lower 817720408 Screw, Thd Cut 1/4-20 x 1/2 532145166 Support, Battery 532177583...
-
Page 36: Ground Drive
REPAIR PARTS TRACTOR - - MODEL NO. GTH2250A GROUND DRIVE... - Page 37 REPAIR PARTS TRACTOR - - MODEL NO. GTH2250A GROUND DRIVE PART DESCRIPTION - - - - - - Transaxle, Hydro 222-3010 (Order Parts From Transaxle Manufacturer) 532007070 Key 1/4 x 2.5 532007563 Washer Thrust Axle Harden 873680600 Nut Crownlock 3/8-16 876020412 Pin Cotter 1/8 x 3/4 532140507...
-
Page 38: Steering Assembly
REPAIR PARTS TRACTOR - - MODEL NO. GTH2250A STEERING ASSEMBLY 37,39 38,40... - Page 39 REPAIR PARTS TRACTOR - - MODEL NO. GTH2250A STEERING ASSEMBLY NOTE: All component dimensions given in U.S. inches PART DESCRIPTION 532166627 Wheel, Steering 532178557 Axle Asm., Front 532124836 Fitting, Grease 532161849 Spindle Asm, LH 532161848 Spindle Asm., RH 532124931 Bearing, Race Thrust Harden 532121748 Washer 25/32 x 1-5/8 x 16 Ga.
- Page 40 REPAIR PARTS TRACTOR - - MODEL NO. GTH2250A ENGINE PART DESCRIPTION - - - - - - - Engine Briggs, Model No. 407777 (Order parts from engine manuf.) 532149723 Muffler Side 532121361 Pulley V-Idler 532177748 Keeper Asm. Belt Engine VGT 532175287 Bushing 532170056...
-
Page 41: Seat Assembly
REPAIR PARTS TRACTOR - - MODEL NO. GTH2250A SEAT ASSEMBLY PART DESCRIPTION 532140840 Seat 532140551 Bracket, Pivot Seat 532140675 Strap, Fender 532127018 Bolt, Shoulder 5/16-18 X .62 532145006 Clip, Push In Hinged 873800600 Nut, Crownlock 3/8-16 532124181 Spring, Seat Cprsn 532171877 Bolt 5/16-18 UNC X 3/4 532174894... -
Page 42: Wheels And Tires
REPAIR PARTS TRACTOR - - MODEL NO. GTH2250A DECALS PART DESCRIPTION 532176861 Decal, Hood, RH 532176862 Decal, Hood, LH 532176776 Decal, Side Panel 532170563 Decal, Warning 532176863 Decal, Engine HP 532176864 Decal, Dash 532176822 Decal, Fender 532157140 Decal, Danger 532101892 Decal, Clutch/Brake 532176775 Decal, Engine RCL... -
Page 43: Lift Assembly
REPAIR PARTS TRACTOR - - MODEL NO. GTH2250A LIFT ASSEMBLY PART DESCRIPTION 532121006 Rod Asm., Lever 532159045 Shaft Asm., Lift Vgt 532159189 Lever Asm., Lift Rh 812000022 E-Ring Truarc #5133-87 819292016 Washer 29/32 x 1-1/4 x 16 Ga. 871110624 Bolt, Fin Hex 3/8-16 x 1-1/2 532125631 Grip, Handle 532124526... -
Page 44: Mower Deck
REPAIR PARTS TRACTOR - - MODEL NO. GTH2250A MOWER DECK... - Page 45 REPAIR PARTS TRACTOR - - MODEL NO. GTH2250A MOWER DECK PART DESCRIPTION 532178897 Deck Asm., Mower 50" 873680500 Nut, Crownlock 5/16-18 532138457 Bracket Asm., Sway Bar 532124670 Retainer, Spring 532130832 Arm Suspension, Rear 532850857 Bolt 3/8-24 x 1.25 Gr. 8 Patched 810030600 Washer, Lock Hvy 3/8 Unplated 532140296...
- Page 46 REPAIR PARTS TRACTOR - - MODEL NO. GTH2250A...
-
Page 47: Warranty
REPAIR PARTS TRACTOR - - MODEL NO. GTH2250A... - Page 48 532176973 Rev. 6 4.27.01 JH/MH/JH/MH Printed in U.S.A.
Need help?
Do you have a question about the GTH2250 and is the answer not in the manual?
Questions and answers