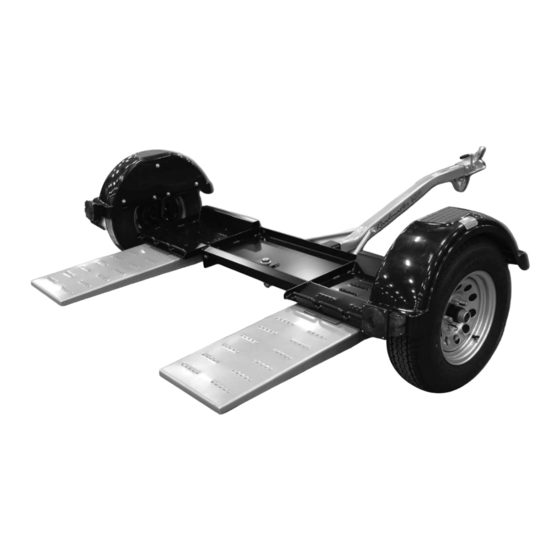
Summary of Contents for Roadmaster Tow Dolly RM3477
- Page 1 Owner's Manual Entire contents of manual must be read by owner Towing and Suspension Solutions ROADMASTER, Inc. • 6110 NE 127th Ave • Vancouver, WA 98682 800-669-9690 • fax: 360-735-9300 • roadmasterinc.com...
-
Page 2: Specifications
WELCOME TO THE ROADMASTER FAMILY! his manual has been prepared to acquaint you with the assembly and operation of your tow dolly, and to provide you with important safety information. Read your owner’s manual cover to cover. Understand how to assemble and operate your tow dolly, and carefully follow the instructions and safety precautions. -
Page 3: Table Of Contents
TABLE OF CONTENTS Specifications ........inside front cover Towing ..............9 Safety Definitions ......inside front cover Unloading the Dolly ..........9 Tow Dolly Safety Requirements ......... 2 Pulling the Dolly Empty ........10 Before you assemble the dolly Maintenance ............10 (pre-assembly instructions) ........ -
Page 4: Tow Dolly Safety Requirements
TOW DOLLY SAFETY REQUIREMENTS If towing the dolly unladen, reduce the tire pressure by 15 psi. Read all instructions before assembling or op- Before each trip, inspect the tires for road damage erating the tow dolly. Failure to understand how to or unusual wear patterns. -
Page 5: Before You Assemble The Dolly (Pre-Assembly Instructions)
BEFORE YOU ASSEMBLE THE DOLLY… Read all instructions before assembling or op- erating the tow dolly. Failure to understand how to assemble or operate the tow dolly could result in property damage, personal injury or even death. Musts for installation safety 1. -
Page 6: Initial Assembly
INITIAL ASSEMBLY Although it is not necessary, it may be more conve- nient to attach the brake drums, fenders and wheels if the axle is supported with three jack stands or blocks, at a height of eight to 10 inches. Position one jack stand or block at the end of each axle, and one under the center arm. - Page 7 INITIAL ASSEMBLY 8. Attach the stabilizer bars — use the ½" x 4½" bolt, continued from preceding page 5. Attach the wheels — at each flat washers (both sides) and nut to attach the two wheel, finger-tighten the five lug stabilizer bars to the pre-drilled holes in the tongue, nuts, then use the crossing pattern and the ½"-13 x 1¼"...
-
Page 8: Initial Assembly
INITIAL ASSEMBLY continued from preceding page Figure 7 If the ramps are not adjusted as described above, the dolly may veer to the left or the right during towing, which may cause a loss of vehicular con- trol. Failure to follow these instructions may cause property damage, personal injury or even death. -
Page 9: Using Your Tow Dolly
USING YOUR TOW DOLLY Before Loading Figure 10 1. Before loading the towed vehicle, make certain that the ramps have been adjusted to correspond to the width of the towed vehicle’s tires. See the “Initial Assembly” section, steps 10 and 11, for detailed instructions on how to adjust the ramps. - Page 10 USING YOUR TOW DOLLY continued from preceding page Figure 11 damage will result to both vehicles. 8. Put front wheel drive vehicles in park. If the vehicle is a rear wheel drive, make certain it can be towed with the rear wheels on the ground without damaging the transmission.
-
Page 11: Loading
4. Remove the pivot pin and safety Note: nearly every state requires lighting at the rear pin (Figure 3). of the towed vehicle. ROADMASTER manufactures 5. Unlock the ratchets — use your three lighting systems: thumb to pull down the release bar • The Universal Wiring Kit (part number 154) allows... -
Page 12: Pulling The Dolly Empty
USING YOUR TOW DOLLY Pulling the Dolly Empty scribed above, the dolly will bounce and vibrate ex- cessively. The dolly ramps and/or other components When empty, the dolly is likely to bounce around may be cracked or otherwise damaged. behind the motorhome. It is advisable to reduce the tire pressure by 15 psi to help alleviate bouncing and vibration. -
Page 13: Adjusting The Tiedown ™ Straps
ADJUSTING THE TIEDOWN STRAPS ™ Even though they may appear to be identical, one TieDown strap is designed for the driver’s side and the Be certain that the strap is routed through the other for the passenger side. buckle, as shown in Figure 13, before towing. The Although the straps come pre-assembled, the pro- strap will not secure the towed vehicle if it is not cess is explained below (Figure 13). -
Page 14: Limited Warranty
1a. WARRANTY OF CONFORMITY AT TIME OF SALE not provide, and will not be liable for, labor, costs of removal ROADMASTER, Inc. warrants that at the time of sale of this or reinstallation of components, disposal, shipping, freight, product it will be free from defects in material and manufacture taxes, or other incidental charges. - Page 15 TieDown straps ™ part number 155 Why are RoadMaster TieDown straps the best? • One strap fits the driver's or passenger's side. 3. Magnetic tow lights • Tough, durable nylon resists damage from rubbing and chaf- ROADMASTER's magnetic ing.
-
Page 16: Pre-Trip Safety Checklist
All photos, illustrations and specifications contained herein are based on the latest information available at the time of publication. ROADMASTER, Inc. reserves the right to make changes at any time, without notice, in material, specifications and models, or to discontinue models. You may not use any of the contents of this document without the permission of ROADMASTER, Inc.

Need help?
Do you have a question about the Tow Dolly RM3477 and is the answer not in the manual?
Questions and answers