
Subscribe to Our Youtube Channel
Summary of Contents for Olitec Speed'Com 56000
- Page 1 OLITEC OLITEC A passport A passport to the world to the world User’s manual OLICOM and OLIFAX WINDOWS...
- Page 3 AFTER-SALES AND GUARANTEE REGISTRATION CARD Product guarantee : 1 year Cut out this form and send it to the address below within 15 days of purchase. The guarantee and telephone help-line commence on the date of reception of the duly completed card, accompanied by proof of purchase (copy of the invoice). You will be sent your client number which should be communicated to us when requesting assistance.
- Page 4 This user guide is protected by all international conventions applicable to authors’ rights. In application of these laws and conventions, no reproduction, either in whole or in part, of this book or software, except for one back up copy, is authorised without the prior and written consent of OLITEC.
- Page 5 This user guide is protected by all international conventions applicable to authors’ rights. In application of these laws and conventions, no reproduction, either in whole or in part, of this book or software, except for one back up copy, is authorised without the prior and written consent of OLITEC.
- Page 6 AT commands glossary Page 63 OLITEC on the internet Page 85 Olitec Toolbar use (with Windows 95 or 98) Page 86 Throughout this book important items are indicated by the Olitec mouse. Thank you for purchasing this Olitec product. IMPORTANT...
- Page 7 ODEM NSTALLATION...
- Page 8 I N S T A L L I N G O L I T E C CONTENTS Presentation of the Speed’Com 56000 and accessories Page 5 Installation of the Speed’Com 56000 Page 6 Table of telephone and electrical connectors Page 10 Hot-line telephone numbers Page 12 Sales office addresses...
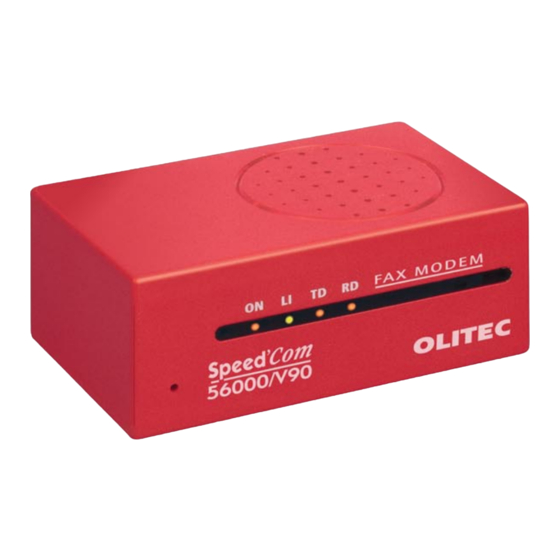
- Page 9 O L I T E C INSTALLATION / THE SPEED’COM 56000 Presentation of Speed‘Com 56000 and its accessories page 10 for telephone connector Telephone cable page 10 for electrical connector Serial port cable Speed’Com 56000 Power supply unit The power supply unit : Telephone cable : The power supply has a female connector This cable has a telephone plug at one end...
- Page 10 INSTALLATION / THE SPEED’COM 56000 O L I T E C SAFETY STANDARDS: the power supply unit also acts as a power breaker and should always be easily accessible page 10 telephone wall for telephone socket connector téléphone Power supply unit plug- Speed’Com 56000 computer ged into mains socket.
-
Page 11: Connecting To The Telephone Line
O L I T E C INSTALLATION / THE SPEED’COM 56000 2 - Connecting to the telephone line: Insert the RJ11 plug into the female socket on the modem. REAR OF COMPUTER RJ11Female socket line LINE Branchez la prise gigogne du câble de liaison téléphonique sur votre connecteur mural. Wall telephone socket page 10 for telephone... - Page 12 INSTALLATION / THE SPEED’COM 56000 O L I T E C Switch the modem ON. It should emit a beep. loudspeaker F A X M O D E M LINE AUDIO AUDIO SERIAL ON/OFF POWER ’ Speed 56000/V90 On the rear panel of the modem are: On the front panel are: •...
- Page 13 O L I T E C INSTALLATION / THE SPEED’COM 56000 Installing the drivers provided with Windows 95 or 98 : Your Speed’Com 56000 should be 4) Insert the CD-Rom or the Olicom Windows connected and switched on. diskette. Do not click on the option Do not detect modem…, click on Next.
- Page 14 TABLE OF TELEPHONE AND ELECTRICAL CONNECTORS O L I T E C TELEPHONE POWER SUPPLY COUNTRY CONNECTOR UNIT GERMANY THE NETHERLANDS BELGIUM SWITZERLAND...
- Page 15 O L I T E C TABLE OF TELEPHONE AND ELECTRICAL CONNECTORS SWEDEN WORLDWIDE CONNECTORS (RJ 11)
- Page 16 Tel.: +44 (0) 870 240 02 30 Tel.: +31 (0) 162 42 45 20 Fax: +44 (0) 184 385 35 05 Fax: +31 (0) 162 42 45 83 Web site: http://www.olitec.co.uk E-mail: aftersales@olitec.co.uk ELGIUM Tel.: +32 (0) 3 820 72 43...
- Page 17 10 Devonshire Gardens Margate 2610 Wilrijk Kent CT 93 AF Tel: +32 (0) 3 820 72 43 Tel/Fax: +44 (0) 870 240 20 26 Fax: +32 (0) 3 825 27 72 E-mail: sales@olitec.co.uk SWITZERLAND SWEDEN ERMAN SPEAKING ESTERLIN Skogvirsvägen TUDERUS ELECOM 236 3B Höllviken...
- Page 19 LICOM WINDOWS...
-
Page 20: Table Of Contents
O L I C O M W I N D O W S O L I T E C CONTENTS Presentation Page 17 Minimum system requirements Page 17 Installation Page 17 Minitel Page 19 Terminals available Page 20 Calling a service Page 20 Information about the modem Page 21... -
Page 21: Presentation
The SMODEM remote loading protocol is 3.1, 95 or 98 : integrated into the software. Insert the CD-Rom into the lector CD to load the menu. (if not, launch D:OLITEC) Click on install Olicom . The installation programm is stored. - Page 22 O L I C O M W I N D O W S O L I T E C If the directory does not exist it will be Permanent: the loudspeaker is always created. enabled. B/ Prefix If you are connected to a PABX network, type in the prefix to obtain an outside line, e.g.
-
Page 23: Minitel
Click on OK to continue. has a screen and a mobile keyboard. When you start Olicom the keyboard comes out An OLITEC program group has now been and when you quit the keyboard closes again. created and the OLICOM icon has been added to Program Manager. -
Page 24: Terminals Available
Olicom memorises the last ten calls as well as their settings. Select the number you wish to dial from the list or enter a new number. You may also specify a service, e.g. OLITEC. Dialler allows Olicom to be used to dial num- bers. See chapter Dialler. -
Page 25: Information About The Modem
O L I T E C O L I C O M W I N D O W S You can specify a different setting for each Adapting Olicom to number. Select the connection mode by your needs moving the left hand switch. The selected connection mode is displayed at the top of the box. -
Page 26: Updating The Phonebooks
Click on Colour or Monochrome according Updating to your requirements. the phonebook The Olitec protocol is used for file transfers. See chapter File Transfers. C/ Communication You can see commands transmitted to the modem during dialling by using the Debug mode. -
Page 27: Using The Phonebook
O L I T E C O L I C O M W I N D O W S Click Add. Use the mouse to select the group from which you wish to call a number. Type in the number you wish to dial and if Announcements necessary the service code. -
Page 28: Review A Connection
O L I C O M W I N D O W S O L I T E C Review a connection Printing screens Click on Consult capture in the File menu or Check that you have selected the correct prin- click Consult box. -
Page 29: Using Olicom As A Dialler
Olicom users. Specify the directory. File sender The default directory is: • Check that the Olitec protocol is enabled in the Preference option of the Settings menu. C:\OLICOMW\TRANSFER\ • Click on Call in the Comm menu. • Adjust communication parameters (Parameters box) •... -
Page 30: Example Of A File Transfer
File type: 1=binary. The file is always trea- File recipient ted as a binary file. • Check that the Olitec protocol is enabled in the Preferences option of the Settings menu. Control type: method of controlling batches. • Adjust communication parameters. (Option Communication in the Settings menu). - Page 31 O L I T E C O L I C O M W I N D O W S • The transfer starts automatically (the file recipient just has to wait). If you are receiving a file. • The sender must follow the above steps. (If you have chosen Zmodem do not change any settings).
-
Page 32: Sending A Text File To A Server
O L I C O M W I N D O W S O L I T E C Sending a text file to B/ Sending a text file to the server a server Prepare your text when disconnected and save in text format. -
Page 33: Downloaded File Directory
Rem Dials 11 first file, OLICOM displays the downloading AttendCurseur(13,5); Rem waits for the cursor to reach control panel. column 13, line 5 Emet(‘OLITEC’) Rem Sends Olitec The control panel disappears a few seconds after loading is completed. Tsuite; Rem Suite switch... -
Page 34: Tutorial Mode
Wait for the connection then the welcome asks for information about the company page. Choose the service you require. In the Olitec, creates a file, captures the screen, meantime OLICOM has saved everything you then hangs up. have typed in the file. -
Page 35: Editor-Compiler
O L I T E C O L I C O M W I N D O W S Editor-compiler Copy a field onto the clipboard Click on Copy in the Edit menu. OLICOM editor can process any text file smaller than 32Kb. - Page 36 O L I C O M W I N D O W S O L I T E C Scenario structure Defvariable Enter all variables Enddef Your programme starts here. EndProg (End the programme - optional) Several scenarios are supplied with the pac- kage.
-
Page 37: Appendix
O L I T E C A P P E N D I X APPENDIX A This programme detects serial port activity. If your modem or Minitel is correctly connec- ted its parameters will be displayed on the Serial ports: screen. -
Page 38: Appendix Cglossary
A P P E N D I X O L I T E C APPENDIX B APPENDIX C GLOSSARY Control characters: ANSI Dec Hex Control characters Characters American National Standard Institute (Nu) (Sh) ASCII (Sx) American Standard Code for Information (Ex) Interchange. - Page 39 O L I T E C A P P E N D I X A standard for fax machines that specifies the format of documents, modulation, coding Carrier Detect (109 of ITU-T V24) and exchange protocol. CHECKSUM HALF DUPLEX A control by adding data. Half duplex modems cannot simultaneously receive and send data.
- Page 40 A P P E N D I X O L I T E C An error checking procedure in which the STAND-ALONE number of 1’s must always be the same - Mode where the modem works without com- either even or odd - for each group of bits puter (automatic reception of voice and fax transmitted.
- Page 41 LIFAX WINDOWS...
- Page 42 O L I F A X W I N D O W S O L I T E C CONTENTS Presentation Page 39 Minimum system requirements Page 39 Installation Page 39 Basic fax principles Page 41 Sending/receiving faxes Page 42 Olifax Page 42 Phonebook...
-
Page 43: Presentation
Installing the software with Windows 3.1, 95 or 98 : Insert the CD-Rom into the lector CD to load the menu. (if not, launch D:OLITEC) Click on install Olifax . The installation programm is stored. Select the language you want to use for the... - Page 44 O L I F A X W I N D O W S O L I T E C If you chose Customised first specify the directory where you wish Olifax Windows to be installed. If the directory does not exist it will be created.
-
Page 45: Basic Fax Principles
The installation is now complete. Click Yes to consult document modifications. Click No if do not wish to consult modifications. An OLITEC programme group has been crea- ted and OLIFAX and MONITOR icons have been added. If the StartUp group did not... -
Page 46: Sending/Receiving Faxes
• resubmit faxes Fax manager enables fax receive and send to Olifax start up procedure be carried out as background tasks Monitor Open the OLITEC programme group. Monitor controls: Double click on the Olifax icon. This module is in the Windows StartUp group and should not be removed. -
Page 47: Phonebook
O L I T E C O L I F A X W I N D O W S Phonebook If the country is not on the list, select New and enter the code. If an international line is needed click on Dial inter prefix. - Page 48 O L I F A X W I N D O W S O L I T E C I/ IMPORTING INFORMATION IN TEXT E.g. FORMAT John Smith, J. JONES Ltd, 4 High Street, 01536 131546, BD20 6JS, Bradford • Select ASCII as import type. •...
-
Page 49: Recipient Lists
O L I T E C O L I F A X W I N D O W S Recipient lists Save: Save the list on the disk. Quit: Quit list manager. Load a list: Load a list that has already been A recipient list is created from one or several created. - Page 50 O L I F A X W I N D O W S O L I T E C One or several numbers: Message preview: preview the message on the screen before sending. Click on the button Choose a phonebook to select one or several numbers.
-
Page 51: Cover Page
O L I T E C O L I F A X W I N D O W S Cover page If your application does not allow you to change printers, use the Windows Control A cover page is a customised page which Panel. -
Page 52: Manual Fax Reception
O L I F A X W I N D O W S O L I T E C Complete dialogue fields with the name(s) Transmission of a fax and number(s) of the recipient(s). Click on list Send. The fax is added to the fax pending file. Olifax allows the transmission of fax lists The fax pending file is the list of faxes waiting (.OFX). -
Page 53: Log Books
O L I T E C O L I F A X W I N D O W S Log books Interrupts transmission of fax selected (Space) he log books have the following headings • Sent • On-hold • Errors • Received faxes Using the Drag and drop function in the log books: Consulting a log book... -
Page 54: Viewing Faxes
O L I F A X W I N D O W S O L I T E C Fax printed Convert fax being viewed to BMP format file. Fax is been transferred or waiting for Print fax. Click on All to print the transfer whole document. -
Page 55: Printing
O L I T E C O L I F A X W I N D O W S Printing Fax Setup Check that the printer is enabled. Click on Click on the menu configuration and then Print Setup in the File menu. on Software settings or click on: Select the printer from the list if it is not enabled. - Page 56 O L I F A X W I N D O W S O L I T E C prefix will be dialled according to your whe- Always enabled: loudspeaker is always reabouts. If the country is not on the list, enabled.
- Page 57 O L I T E C O L I F A X W I N D O W S Default phonebook Header/log book font: allows you to change the font for printing the fax print header and List of phonebooks: click on Phonebooks log books.
-
Page 58: Configuration
O L I F A X W I N D O W S O L I T E C • Inactive voice announcements: Enables or disables the voice announcement. Voice announcement of • Manual the number of faxes, messages or e-mails recei- •... -
Page 59: Upgrading Flash Memory
Using other modem. communications New Firmware upgrades will be available on applications our Web site: www.olitec.com, under PC Download Upgrade. If you wish to use another communications If the selected version is identical to or older application (such as Internet programmes) -
Page 60: Problems And Solutions
O L I F A X W I N D O W S O L I T E C Problems Problem Faxes sent from your application and solutions are white. Solution Make sure that page format and orientation are correct. Installation Olifax only works with the for- mat A4. - Page 61 Under Modem enter 0 in the Solution The list can be found by clic- field Initialise the modem king on About Olifax in the every … minutes. Olitec program group. Information can also be found under Detail at the bottom of Problem When starting an application the Send log book.
- Page 62 O L I F A X W I N D O W S O L I T E C driver to Canon BJ 100, BJ 200 You receive a call: or BJC 4000 the closest to your • Olicom choose model.
- Page 63 If both sender and recipient are PERSO.BMP. not using Olicom go into Setup, IMPORTANT Preferences and deselect the protocol OLITEC. All sizes are not available in each font. Use standard in all Cover pages. modifications first in order to try things out.
- Page 64 O L I F A X W I N D O W S O L I T E C edit the file modeles.1st (in the book. Olifax directory) adding • Click on Import. PERSO. • Complete the different fields. Modeles.1st is a text file that Tick the option Ascii and can be edited using a text edi- Conversion Ascii__Ansi.
- Page 65 O L I T E C O L I F A X W I N D O W S If you see question marks After completing the modifica- appear, it is because one of the tion save it and restart fields was not completed.
- Page 66 Windows NT com- pared with Windows 3.1 , 95 or The modem is treated as a printer through the OLIPRINT driver. Olitec applications are set up to operate under Windows 3.1 , 95 or 98. Under NT faxes can be sent...
- Page 67 COMMANDS LOSSARY...
- Page 68 C O M M A N D G L O S S A R Y O L I T E C CONTENTS AT COMMAND GLOSSARY AT commands Page 65 AT& commands Page 71 AT\ commands Page 74 AT% commands Page 75 AT* commands Page 75 Result codes...
-
Page 69: At Commands
O L I T E C C O M M A N D G L O S S A R Y AT commands When the modem is switched on it obeys AT commands (command mode). Every command line must start with the letters AT as a signal to the modem. When the modem receives this command it detects the rate, format and parity of its link with the data terminal equipment (DTE). - Page 70 C O M M A N D G L O S S A R Y O L I T E C Makes a connection in manual answer mode (identical to automatic answer after several rings). N.B.1: during the phase when the modem quits command mode to make a connection (handshake) the communication will be interrupted if the terminal sends a character or the DTR signal is disabled.
- Page 71 O L I T E C C O M M A N D G L O S S A R Y Starts a connection procedure. E.g. : ATDCR (the modem takes the line and waits for the carrier tone of the remote modem modem in order to connect).
- Page 72 C O M M A N D G L O S S A R Y O L I T E C Hook control. H, H0 hang-up. Note: during connection, when the +++ sequence is sent (escape character defined by S2, standby time before and after the sequence defined by S12) the modem switches into the command mode, sending the command ATH makes modem hang up.
- Page 73 O L I T E C C O M M A N D G L O S S A R Y Consults n register. The reversed decimal value is between 000 and 255 (3 character format). E.g.: consultation of S0 register (ring count before answering) ATS0?CR Indicates the v decimal value (between 0 and 255) in the n register.
- Page 74 C O M M A N D G L O S S A R Y O L I T E C Filters replies sent by the modem. X, X0 Only sent OK, CONNECT, RING, NO CARRIER, ERROR messages. X0 case +complete connection messages, CONNECT X (X=rate. X1 case + message NO DIALTONE.
-
Page 75: At& Commands
O L I T E C C O M M A N D G L O S S A R Y AT& commands &A Controls the action of a character sent by DTE during the phase between dialling and connection (transition phase between command mode and line mode). - Page 76 C O M M A N D G L O S S A R Y O L I T E C &K Selects the data flow control with terminal. Local flow control avoids loss of data when terminal rate is higher than modem line rate. Flow control is neces- sary for communications with compression (see %C command).
- Page 77 O L I T E C C O M M A N D G L O S S A R Y &S data station ready (DSR or107) on V24 interface. &S, &S0 The DSR signal is always enabled (defaut setting). The DSR signal is enabled(off/on)when the 2100 Hz answer tone is &S1 detected and stops when the carrier is lost.
-
Page 78: At\ Commands
C O M M A N D G L O S S A R Y O L I T E C AT\ commands Selects type of connection Normal mode, the modem operates in asynchronous buffer \N, \N0 mode. There is neither compression nor correction. DTE rates and DCE rates may be different. -
Page 79: At% Commands
O L I T E C C O M M A N D G L O S S A R Y AT% commands Management of data compression mode. %C, %C0 Invalidates compression. Authorises MNP5 negociation only. Authorises V42bis negociation only. Authorises MNP5 or V42bis negociation (default setting). -
Page 80: Result Codes
C O M M A N D G L O S S A R Y O L I T E C Result codes ATV commands allow form of messages sent by the modem to be chosen. The default setting is V1. The ATW command allows the message sent when connecting to be chosen. - Page 81 O L I T E C C O M M A N D G L O S S A R Y Number Literal Description message message Indicates line rate (V32 - 7200 or CONNECT 7200 V34-7200) or terminal rate on connection. Default setting: line rate.
- Page 82 C O M M A N D G L O S S A R Y O L I T E C Number Literal Description message message Connection made at line rate 7200 bps CARRIER 7200 (V32bis-7200 or V34-7200. CARRIER 9600 Connection made at line rate 9600 bps (V32-9600 or V 32bis-9600 or V34-9600).
- Page 83 O L I T E C C O M M A N D G L O S S A R Y Number Literal Description message message Message sent during a connection with MNP5 COMPRESSION : MNP5 compression. COMPRESSION : V42BIS Message sent during a connection with V42bis compression.
- Page 84 C O M M A N D G L O S S A R Y O L I T E C Number Literal Description message message Connection made at receive line rate 42000 CARRIER 42000 bps (K56Flex-42000). Note: the 33600 range does not use this message.
- Page 85 O L I T E C C O M M A N D G L O S S A R Y Number Literal Description message message Connection made at receive line rate 40000 CONNECT 40000 bps (K56Flex-40000). Note: The 33600 range does not use this message.
-
Page 86: Registers
C O M M A N D G L O S S A R Y O L I T E C Number Literal Description message message Connection made at receive line rate 34667 bps CARRIER 34667 (V90-34667) CARRIER 37333 Connection made at receive line rate 37333 bps (V90-37333) CARRIER 38667 Connection made at receive line rate 38667 bps... - Page 87 O L I T E C C O M M A N D G L O S S A R Y Waiting time between pickup and dialling. Default setting: S6=002 (2 seconds, not modifiable). Waiting time between dialling and connection. Default setting: S7=060 (60 seconds, modifiable from 40 to 90 seconds).
-
Page 88: Automatic Answer Mode
O L I T E C T H E I N T E R N E T O L I T E C Automatic answer mode Using the modem on a system sending no Hayes commands to the modem (Automates or others). The initialisation string is: - after opening Olicom, choose Teletype terminal, then type in the following commands, followed by enter:... - Page 89 • Initialisation string for 42667 to 56000 (V90) connections with RTS/CTS flow control AT&F&K3B24 • Initialisation string for 42667 to 56000 (V90) connections with XON/XOFF flow control AT&F&K4B24 Olitec on the Internet Consult our Web site: http://www.olitec.com You will find new products and new features, brochures, technical specification, software...
- Page 90 . To open the Toolbar, doubleclick on the icon • E-mail (Eudora, Netscape, Outlook) . Olitec Toolbar which is located on the bottom • Terminal (Olicom) right corner of the screen on the menu bar. • Fax transmission (Olifax) Each button has one function : •...
Need help?
Do you have a question about the Speed'Com 56000 and is the answer not in the manual?
Questions and answers