Miele Dishwasher Operating Instructions Manual
Hide thumbs
Also See for Dishwasher:
- Operating instructions manual (92 pages) ,
- Care and maintenance (44 pages) ,
- Operating instructions manual (68 pages)
Table of Contents

Related Manuals for Miele Dishwasher


Summary of Contents for Miele Dishwasher
-
Page 1: Operating Instructions
Operating instructions for dishwashers To avoid the risk of accidents or en - GB damage to the appliance, it is essential to read these instructions as well as the installation plan before it is installed and used for the first time. M.-Nr. -
Page 2: Table Of Contents
Loading the dishwasher ........ - Page 3 Unloading the dishwasher ........
- Page 4 Plumbing............75 The Miele waterproof anti-leak system ....... . . 75 Connection to the water supply .
-
Page 5: Description Of The Appliance
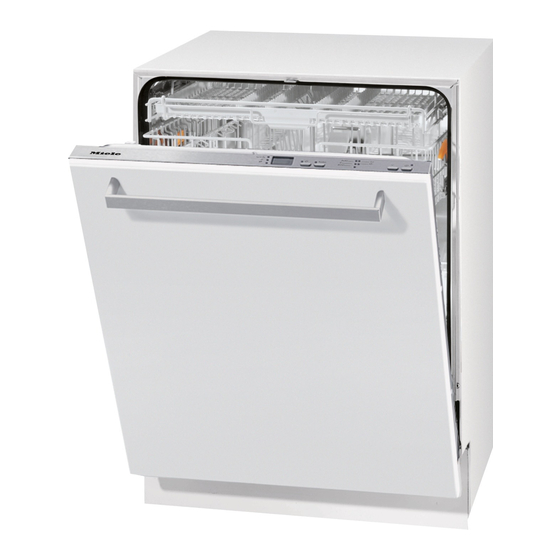
Description of the appliance Appliance overview a Upper spray arm (not visible) g Filter combination b Cutlery tray (depending on model) h Data plate c Upper basket i Rinse aid reservoir d Middle spray arm j Dual compartment detergent dispenser e Air inlet for drying k Salt reservoir (depending on model) -
Page 6: Control Panel
On/Off button K with indicator light with indicator light d Turbo button with indicator light This instruction book applies to several different dishwasher models. The specific dishwasher models are referred to as follows: Standard = 80.5 cm high dishwashers (integrated) and 84.5 cm high dishwashers (freestanding) -
Page 7: Warning And Safety Instructions
Keep these instructions in a safe place and pass them on to any future owner. Correct application This dishwasher is not designed for commercial use. It is intended for use in domestic households and in similar working and residential environments. - Page 8 Children under 8 years of age must be kept away from the appliance unless they are constantly supervised. Children 8 years and older may only use the dishwasher if they have been shown how to use it in a safe way and understand the hazards involved.
- Page 9 (See "Electrical connection"). There must be no electrical sockets behind the dishwasher. Danger of overheating and fire risk if the dishwasher were to be pushed up against a plug. The dishwasher must not be installed under a hob. The high radiant temperatures which are sometimes generated by a hob could damage the dishwasher.
- Page 10 The appliance must not be used in a non-stationary location (e.g. on a ship). Do not install the dishwasher in a room where there is a risk of frost. Frozen hoses may burst or split. The reliability of the electronic...
- Page 11 The Waterproof system will work even if the appliance is switched off. However, the appliance must remain connected to the electricity supply. A damaged dishwasher could be dangerous. If the dishwasher gets damaged, switch it off at the mains and call your Miele Dealer or the Miele Service Department.
- Page 12 Warning and Safety instructions Unauthorised repairs could result in unforeseen dangers for the user, for which Miele cannot accept liability. Repairs should only be undertaken by a Miele approved service technician, otherwise any subsequent damage will not be covered by the guarantee.
- Page 13 The dishwasher must be installed and connected in compliance with the diagram supplied. Take care, both before and during installation of the dishwasher, not to cut yourself on the metal parts. Danger of injury. Wear protective gloves. The dishwasher must be correctly aligned to ensure problem-free operation.
- Page 14 Do not sit or lean on the opened door. This could cause the dishwasher to tip and be damaged, and you could get injured. Only use detergent and rinse aid formulated for domestic dishwashers. Do not use washing-up liquid.
- Page 15 Do not fill the salt reservoir with powder or liquid dishwasher detergent. This will damage the water softener. Make sure you have picked up the correct packet of dishwasher salt before filling the salt reservoir! Only use special coarse grained dishwasher salt for reactivation, as other salts may contain insoluble additives which can impair the functioning of the water softener.
- Page 16 Warning and Safety instructions Accessories Only use genuine Miele original spare parts and accessories with this dishwasher. Using spare parts or accessories from other manufacturers will invalidate the guarantee, and Miele cannot accept liability. Disposal of your old dishwasher Make the door lock inoperative so that children cannot accidentally shut themselves in.
-
Page 17: Caring For Our Environment
Caring for our environment Disposal of the packing Disposal of your old appliance material Electrical and electronic appliances often contain materials which, if The transport and protective packing handled or disposed of incorrectly, has been selected from materials which could be potentially hazardous to are environmentally friendly for disposal human health and to the environment. -
Page 18: Energy Saving Dishwashing
You can make the most of your appliance by following these tips: ^ If your water supply is suitable, this dishwasher can be connected to a hot water supply for further economies. If the water is heated by solar panels, for example, this would be energy efficient. -
Page 19: Before Using For The First Time
Before using for the first time To open the door To close the door ^ Push the baskets right in. ^ Then lift the door upwards and push until it clicks into position. ^ Pull the handle. If the door is opened during operation all functions are automatically interrupted. -
Page 20: Water Softener
This takes place automatically in the integrated water softener. The water softener in this dishwasher is suitable for a water hardness level of up to 12.6 mmol/l (70 °d - German scale). – The water softener requires dishwasher salt. -
Page 21: Programming The Water Hardness Level
°d mmol/l °f Value German displayed ^ Switch the dishwasher off with the scale On/Off button K, if it is switched on. ^ Press and hold the Programme selector button in. ^ Switch the dishwasher on using the On/Off button K, and hold the... -
Page 22: Before Using The Appliance For The First Time, You Require
If the water in your area is very soft – approx. 2 litres of water, and constantly lower than 0.7 mmol/l (4 °d), you do not need – approx. 2 kg dishwasher salt*, to add dishwasher salt. The water – domestic dishwasher detergent*, softener must, however, still be programmed to correspond to the –... -
Page 23: Salt Indicator
^ Remove the lower basket and Salt indicator unscrew the salt reservoir cap. ^ Fill the salt reservoir with dishwasher salt when the salt indicator light Water or saline solution will run out comes on. (If it comes on during a... -
Page 24: Switching Off The Refill Indicators
– "p 1": the refill indicators are switched in your dishwasher, you can switch both of these indicators off if you wish. ^ Switch the dishwasher off using the – "p 0": the refill indicators are On/Off button K. switched off. -
Page 25: Rinse Aid
Do not use vinegar with a higher acid content (e.g. vinegar essence containing 25% acid). This would damage the dishwasher. If you only ever use combination products containing rinse aid in your dishwasher, you do not need to add rinse aid. -
Page 26: Rinse Aid Indicator
^ Add rinse aid in plenty of time. If you only ever use combination products containing salt and rinse aid in your dishwasher, you can switch both of the indicators off if you wish (see "Before using for the first time - Switching off the refill indicators"). -
Page 27: Setting The Rinse Aid Dosage
Before using for the first time ^ Switch the dishwasher off using the Setting the rinse aid dosage On/Off button K. The rinse aid dosage can be set from ^ Press the programme selector button approx. 0-6 ml. It is set to a recommended setting of approx. -
Page 28: Loading The Dishwasher
If in doubt, test for free movement by Do not wash items soiled with manually rotating the spray arms. ash, sand, wax, lubricating grease or paint in the dishwasher. – Make sure that small items cannot These substances will damage the fall through the holders in the dishwasher. -
Page 29: Items Not Suitable For Dishwashers
The glue used in – If delicate glassware is washed in the these items is not dishwasher-proof dishwasher ensure that only very low and wooden handles may come temperatures are used (see loose after being washed in a programme chart), or a special dishwasher. -
Page 30: Upper Basket
Hinged spikes (depending on model) The rows of spikes can be lowered to For safety reasons, do not make more room for larger items such operate the dishwasher without the as casserole dishes. upper and lower baskets in place Tall items (except when running the 65 °C... -
Page 31: Jumbo Cup Rack (Depending On Model)
Loading the dishwasher ^ Lower the rail and lean tall glasses Jumbo cup rack (depending on against it. model) ^ You can also move one of the side The cup rack can be set at two different widths so that it can also accommodate inserts of the cutlery tray to make large cups. -
Page 32: Adjusting The Upper Basket
In order to gain more space for taller can be accommodated. pieces of crockery in the lower or upper basket, the upper basket can be Dishwasher with cutlery tray adjusted on three levels with 2 cm (see data plate for model number) between each level. -
Page 33: Lower Basket
Loading the dishwasher Lower basket ^ For larger and heavier items such as plates, serving platters, saucepans, bowls, etc. Glasses, cups and small items such as saucers can also be placed in the lower basket. Do not place thin, delicate glassware in the lower basket. -
Page 34: Multicomfort Area
Loading the dishwasher MultiComfort area Hinged spikes (depending on model) The rear section of the lower basket is The spikes at the front are used for used for washing cups, glasses, plates, washing plates, soup bowls, platters, pots and pans. -
Page 35: Cutlery
Loading the dishwasher Cutlery 3D cutlery tray (depending on model) If spoon handles do not fit between the holders, then lay them the other way round. ^ Arrange the cutlery in the tray as shown. To make unloading much easier,... -
Page 36: Cutlery Basket (Depending On Model)
Loading the dishwasher Cutlery basket (depending on model) ^ Fit it onto the cutlery basket if required. The cutlery basket can be placed anywhere on the front rows of spikes in the lower basket. ^ To avoid the risk of injury, knives and forks should be placed with the handles upwards in the basket. -
Page 37: Operation
(e.g. tea, For optimum cleaning and drying coffee, tomato sauce). results, use Miele dishwasher detergent and add Miele salt and Most dishwasher detergents contain Miele rinse aid separately. See phosphates and are mildly alkaline with "Optional accessories". - Page 38 Operation safety lock (if your dishwasher is Failure to dispense the fitted with one). recommended amount of detergent may impair cleaning results. Avoid inhalation of powder detergents and do not ingest dishwasher detergent. Dishwasher detergents contain irritant or corrosive ingredients which can...
-
Page 39: Adding Detergent
Operation Adding detergent ^ Press the opening catch on the detergent dispenser. The flap will spring open. The flap is always open at the end of a programme. ^ Add the required amount of detergent and close the flap. ^ Make sure that the detergent packaging is properly closed after use to avoid it getting damp and becoming lumpy. - Page 40 Operation For information Compartment I holds max. 10 ml, Compartment II holds max. 50 ml. There are markings in compartment II to assist with dispensing: 20, 30. The marks indicate a level of approx. 20 or 30 ml when the door is open in a horizontal position.
-
Page 41: Switching On
A programme can only be cancelled in the first few minutes. Otherwise obstructed. the programme must continue to the ^ Switch the dishwasher on with the end so that important programme On/Off button K. stages (e.g. reactivating the water The On/Off indicator light K and one of softener) are not omitted. -
Page 42: Time Display
If the dishwasher is not switched off at how dirty it is. the end of the programme, it will switch When a programme is selected for the... -
Page 43: At The End Of The Programme
On/Off button K. If the dishwasher is not going to be The drying fan will continue to run used for a longer period of time, e. g. -
Page 44: Interrupting A Programme
Danger of scalding. ^ Open the door. Only open the door if absolutely necessary and exercise extreme ^ Switch the dishwasher off using the caution when doing so. Before On/Off button K. closing the door again, leave it ajar ^ Switch the dishwasher on again with for approx. -
Page 45: Additional Functions
^ Open the door. If you only ever use combination products containing salt and rinse aid ^ Switch the dishwasher on with the in your dishwasher, you can switch the On/Off button K. refill indicators off if you wish (see The On/Off indicator light K will come "Before using for the first time -... -
Page 46: Delay Start
Additional functions ^ Open the door. Delay start ^ Switch the dishwasher on using the The start time of a programme can be On/Off button K. delayed, e.g. to benefit from economy rates of electricity. A Delay start time of... - Page 47 Proceed as follows: At the end of the delay period, the ^ Open the door. programme selected begins ^ Switch the dishwasher off using the automatically. The time left for a On/Off button K. programme to run then shows in the...
-
Page 48: Buzzer
The setting is now stored in memory. The buzzer is activated as standard at ^ Switch the dishwasher off using the the factory. On/Off button K. You can deactivate the buzzer at the end of a programme if you wish. The buzzer which sounds when there is fault cannot be deactivated. -
Page 49: Adjust Sensor Wash
^ Open the door. – "p 0": The Adjust Sensor wash function is deactivated. ^ Switch the dishwasher off using the On/Off button K. ^ If you want to change the setting, press the Programme selector ^ Press the Programme selector button button. -
Page 50: Memory
– "p 0": The Memory function is the last programme selected will come deactivated. on when the dishwasher is switched off ^ If you want to change the setting, and back on again at the end of a press the Programme selector programme. -
Page 51: Optimise Standby
Keep the programme selector button flash slowly. pressed in until the lower right hand If the dishwasher is not switched off at programme indicator comes on. the end of the programme, it will switch If this does not happen, start the off completely after a few minutes in procedure again from the beginning. -
Page 52: Factory Default
– "p 0": At least one setting has been ^ Open the door. changed. ^ Switch the dishwasher off using the ^ To reset to the factory default On/Off button K. settings, press the programme selector button. -
Page 53: Cleaning And Care
^ Wipe off any food or drink residues which may have dripped onto the The external surfaces of the sides of dishwasher door before dishwasher are susceptible to closing it. scratching. If this is not done, mould could build up... -
Page 54: Cleaning The Control Panel And Door Front
^ The control panel should only be – solvent-based cleaning agents, wiped with a damp cloth. ^ Clean the front using a damp Miele – stainless steel cleaning agents, microfibre E-cloth*, or with a clean – dishwasher cleaner, sponge and a solution of hot water –... -
Page 55: Cleaning The Filters In The Wash Cabinet
This dishwasher must not be used without all the filters in place. Collection of coarse soil may cause the ^ Turn the handle anti-clockwise to filters to clog. - Page 56 Cleaning and care ^ Replace the filter combination so that To clean the inside of the filter, the flap must be opened: it lies flat in the base of the wash cabinet. ^ Press catches a together in the ^ Then turn the handle clockwise to direction of the arrows as shown, and open the filter b.
-
Page 57: Cleaning The Spray Arms
The spray arms should therefore be inspected and cleaned regularly (approx. every 4 - 6 months). ^ Switch the dishwasher off. Remove the spray arms as follows: ^ Take out the cutlery tray (if your dishwasher is fitted with one). -
Page 58: Problem Solving Guide
The mains fuse has – Reset the trip switch or stops during a tripped. replace the fuse in the programme. plug (minimum fuse rating - see data plate). – If the mains fuse trips again, call the Miele Ser- vice Department. - Page 59 Problem solving guide Problem Possible cause Remedy The buzzer is sounding. There may be a Switch the dishwasher off using the On/Off button K. All the Programme technical fault. indicators flash when After a few seconds: the door is open.
-
Page 60: Water Inlet/Drain Fault
The Inlet/Drain indicator flashes when the door is opened. The dishwasher Before rectifying the problem: stops during a – Switch the dishwasher off using the On/Off button K. programme. The buzzer sounds. Fault F12/F13: – Open the stopcock fully. The Inlet/Drain Water intake is –... -
Page 61: General Problems
Water remains in the Before rectifying the wash cabinet at the problem: end of a programme. – Switch the dishwasher off using the On/Off button The filter combination in Clean the filter combination. the wash cabinet is See "Cleaning and care". -
Page 62: Noises
Knocking noise in the This may be caused by This has no influence on water pipes. the on-site installation or dishwasher function. If in the cross-section of the doubt, contact a suitably piping. qualified plumber. -
Page 63: Unsatisfactory Washing Result
Possible cause Remedy The dishes are not The dishes were not loaded See notes in "Loading the clean. correctly. dishwasher". The programme was not Select a more intensive powerful enough. programme. See Programme chart. There is some stubborn Use the "Adjust Sensor soiling although most of the wash"... - Page 64 Change your detergent. Use detergent has been used. a standard liquid, tablet or powder detergent, and fill the salt and rinse aid reservoirs in the dishwasher. The water softener is Select a higher water programmed to a setting softener setting (see "Water which is too low.
- Page 65 Purchase cutlery which is dishwasher-proof. A programme was not run Always run the "Quick wash" after dishwasher salt was programme, without any added. Traces of salt have crockery in the dishwasher got into the wash cycle. and without selecting the "Turbo"...
-
Page 66: Maintenance
^ Reconnect the inlet hose to the Cleaning the filter: stopcock, making sure it goes on ^ Disconnect the dishwasher from the correctly and is not cross-threaded. mains supply. Switch off at the mains ^ Turn on the stopcock gradually to socket and withdraw the plug. -
Page 67: Cleaning The Drain Pump And Non-Return Valve
They are, however, easy to clean. ^ Disconnect the dishwasher from the mains supply. Switch off at the mains socket and withdraw the plug. ^ Take the filter combination out of the wash cabinet (see "Cleaning and... -
Page 68: Programme Chart
Programme chart Crockery Food deposits Action required This needs an Mixed, All normal adaptable programme... everyday crockery food deposits Shorter duration... Heat-sensitive glasses This needs a short and plastic programme... Fresh, easily removed food deposits This needs a gentle programme with glass care... - Page 69 Programme chart Programme Detergent Compartment I Compartment II 25 ml Sensor wash – 1 tab + Turbo option 25 ml Quick wash 40°C – 1 tab 25 ml Sensor wash gentle – 1 tab 25 ml Light soiling 50°C – 1 tab + Turbo option 25 ml...
- Page 70 Programme chart Programme Programme sequence Pre-wash Main wash Interim rinse Final rinse Drying °C °C Sensor wash Variable programme sequence, sensor controlled adjustment according to the amount of crockery and level of food deposits If required 45-65 If required Quick wash 40 °C Sensor wash Variable programme sequence with glass care, gentle #...
- Page 71 Programme chart Consumption Duration Electricity Water Cold water Hot water Litres Cold water Hot water connection connection connection connection (15 °C) (55 °C) (15 °C) (55 °C) h:min h:min 0.95 -1.35 0.70 -1.00 10.0 -17.0 1:36-2:38 1:23-2:21 0.60 0.25 10.0 0:38 0:27 0.70...
-
Page 72: After Sales Service
– Your Miele dealer, or technology. – the Miele Service Department (see Information regarding programme back cover for address). updates will be made known by the Miele Company as and when such Please note that telephone calls may developments become available. -
Page 73: Optional Accessories
... wash long-stemmed glassware … a glass rack for the lower basket Miele CareCollection Miele branded cleaning and care products, including dishwasher salt, detergent and rinse aid, are available to order from the Miele Spare Parts Department or via the Internet at www.miele-shop.com. -
Page 74: Electrical Connection
Electrical connection Electrical connection U.K. This appliance must not be used with so-called energy saving devices. These All electrical work must be reduce the energy supply to the carried out by a suitably qualified appliance which could then become and competent person, in too warm. -
Page 75: Plumbing
Water in the dishwasher must not be used as drinking water. To avoid any damage to the appliance, the dishwasher must only – The dishwasher may be connected be connected to a fully vented to a cold or hot water supply, max. plumbing system. -
Page 76: Drainage
Venting the drainage system – The dishwasher is supplied with If the on-site drain connection is approx. -
Page 77: Technical Data
Technical data Dishwasher model Standard Height 80.5 cm 84.5 cm (adjustable + 6.5 cm) (adjustable + 6.5 cm) Height of building-in recess Min. 80.5 cm (+ 6.5 cm) Min. 84.5 cm (+ 6.5 cm) Width 59.8 cm 59.8 cm Width of building-in recess... - Page 80 Alteration rights reserved/ M.-Nr. 09 276 800 / 01 G5470/G5475 / 2812...
Need help?
Do you have a question about the Dishwasher and is the answer not in the manual?
Questions and answers
Message F14
The F14 message on a Miele dishwasher means the circulation pump is blocked. This can happen if the pump becomes dry and sticks together, especially after long periods without use. It may also be caused by a worn-out motor or something limiting water pressure in the system.
This answer is automatically generated