
Related Manuals for Simplicity American Denim SA1100


Summary of Contents for Simplicity American Denim SA1100
-
Page 1: Instruction Manual
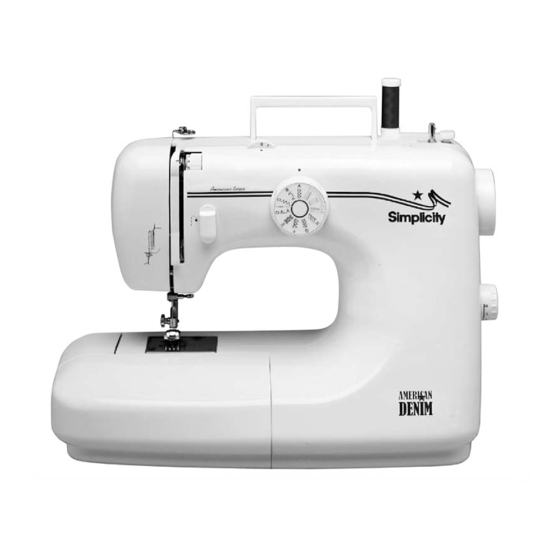
Sewing Machine Model SA1100 INSTRUCTION MANUAL & REFERENCE GUIDE Simplicity Sewing Machine Education Helpline: 636-651-0030... -
Page 2: Important Safety Instructions
IMPORTANT SAFETY INSTRUCTIONS When using the sewing machine, basic safety precautions should always be followed, including the following: READ ALL INSTRUCTIONS BEFORE USING MACHINE DANGER - To reduce risk of electric shock: 1. The sewing machine should never be left unattended when plugged in. 2. - Page 3 Congratulations on being the owner of a new Simplicity sewing machine. Whether you’re new to sewing, a lifelong sewer, or returning to sewing, we at Simplicity Sewing Machines are dedicated to providing you with simply the BEST features, quality, and cus- tomer service to ensure you many pleasurable hours of sewing satisfaction and success.
-
Page 4: Table Of Contents
TABLE OF CONTENTS STITCH “A” ZIGZAG ............18 KNOW YOUR SIMPLICITY SEWING MACHINE Overedging ..............18 PRINCIPAL PARTS ............4-5 Bartacking..............18 ACCESSORIES ..............6 Satin stitch for appliqué ..........18 Attaching buttons ............19 SIMPLICITY SEWING MACHINE SET-UP Seaming knits.............19 PREPARATION FOR SEWING ..........7 STITCH “B” BLINDHEM............20 ACCESSORY STORAGE ............7... -
Page 5: Know Your Simplicity Sewing Machine
KNOW YOUR SIMPLICITY SEWING MACHINE FRONT VIEW BACK VIEW... - Page 6 BACK VIEW STITCH SELECTOR DIAL Turn the dial in either direction to select a stitch. CARRY HANDLE Simply lift to carry the Simplicity sewing BOBBIN WINDER SPINDLE machine from one place to another. Winds thread on a bobbin for lower threading.
-
Page 7: Accessories
KNOW YOUR SIMPLICITY SEWING MACHINE ACCESSORIES ALL-PURPOSE FOOT - snap-on The SIMPLICITY sewing machine comes Use for most straight and zigzag seams. The needle with the presser feet and accessories you opening is rectangular to accommodate the swing of the will need, conveniently stored in the free needle in a zigzag stitch. -
Page 8: Simplicity Sewing Machine Set-Up
SIMPLICITY SEWING MACHINE SET-UP The Simplicity sewing machine has many conversion options for a multitude of sewing applications. PREPARATION FOR SEWING on/off The power cord and foot control are one unit. Insert the three-prong plug into the machine [Fig. 1]. -
Page 9: Free-Arm Sewing
SIMPLICITY SEWING MACHINE SET-UP OPTIONS CONVERTING TO FREE-ARM SEWING Free arm sewing makes it easy to sew hard to reach areas such as sleeves, pant legs, and necklines. To convert to free arm sewing, grasp the left end of the free-arm cover and pull it out to the left to remove [Fig. -
Page 10: Stitch Selection
SIMPLICITY CUSTOM STITCH SELECTION Each built-in stitch can be customized for specific sewing needs by making stitch length and stitch width adjustments. The machine is color-coded for easy stitch length and width selection. STITCH SELECTION STITCH SELECTOR DIAL [Fig. 1] To select a stitch, turn the stitch selector dial to align the stitch desired with the indicator dot. -
Page 11: Stitch Selection Table
SIMPLICITY CUSTOM STITCH SELECTION TITCH TITCH RESSER TITCH ATTERN WIDTH LENGTH FOOT FEED Straight All feet Zigzag All-purpose Blindhem Blind hem 3-step zigzag All-purpose Shell All-purpose Stretch straight All-purpose Rick rack All-purpose Stretch overcast All-purpose Honeycomb All-purpose Slant overcast All-purpose Buttonhole .5-1... -
Page 12: Winding The Bobbin
THREADING YOUR SIMPLICITY SEWING MACHINE For best sewing results, use a top quality, long staple, polyester or poly/cotton thread for all-purpose sewing. Skipped stitches, broken threads, and poor stitch quality are often a result of using old or inferior thread. Use the same type of thread for both upper and lower threading for a consistent stitch quality. -
Page 13: Lower Threading
THREADING YOUR SIMPLICITY SEWING MACHINE LOWER THREADING Removing the bobbin from the bobbin case: 1. Turn the handwheel toward you to raise the needle to its highest position. 2. Remove the free-arm cover and open the bobbin cover [Fig. 1]. -
Page 14: Upper Threading
THREADING YOUR SIMPLICITY SEWING MACHINE UPPER THREADING 1. Turn the handwheel toward you to raise the take-up lever to its highest position [Fig. 1]. 2. Raise the presser foot to release the thread tension [Fig. 2]. 3. Place felt cushion on spool pin. Place a spool of thread on the spool pin with the thread coming from the back of the spool [Fig. -
Page 15: Sewing
SEWING Several synchronized parts of the sewing machine interact to form a stitch. The needle moves up and down as the shuttle spins in perfect time so that the bobbin thread interlocks with the needle thread through the layers of fabric. To maintain this perfectly tuned timing, here are a few sewing tips you'll want to follow: SEWING TIPS •... -
Page 16: Needle, Thread & Fabric Guide
SEWING NEEDLE, THREAD & FABRIC GUIDE Knit Fabrics NEEDLE STYLE NEEDLE SIZE Lightweight: Tricot Universal or Ballpoint 9/65, 10/70 Medium: Interlock, Lycra Universal or Ballpoint 11/75, 12/80, 14/90 Heavyweight: Double Knit, Velour Universal or Ballpoint 12/80, 14/90 Fake Furs, Napped Fabrics Universal or Ballpoint 14/90, 16/100 Woven Fabrics... -
Page 17: Built-In Stitches
BUILT-IN STITCHES STITCH “A” - STRAIGHT STITCH SEAMING Use for seaming two or more layers of fabric together. STITCH STITCH WIDTH STITCH LENGTH PRESSER FOOT All-purpose Align the fabric edge with the seam guide marking on the needle plate and begin sewing [Fig. 1]. Take a few stitches in reverse (backstitch) to secure the seam. -
Page 18: Gathering
BUILT-IN STITCHES STITCH “A” - STRAIGHT STITCH GATHERING Create beautiful ruffles and flounces with the gathering technique. STITCH STITCH WIDTH STITCH LENGTH PRESSER FOOT All-purpose Sew a row of basting stitches 1/4” away from the fabric edge. Sew a second row of basting stitches 1/2” away from the fabric edge [Fig. -
Page 19: Stitch "A" Zigzag
BUILT-IN STITCHES STITCH “A” - ZIGZAG OVEREDGING The zigzag stitch is handy for overedging facings, hems, and seam allowances to minimize raveling. STITCH STITCH WIDTH STITCH LENGTH PRESSER FOOT All-purpose Position the fabric under the presser foot so the right swing of the stitch forms just inside the edge of the fabric [Fig. -
Page 20: Attaching Buttons
BUILT-IN STITCHES STITCH “A” - ZIGZAG ATTACHING BUTTONS Use this foot to quickly and securely attach flat buttons. STITCH STITCH WIDTH DROP FEED PRESSER FOOT Lowered Button attaching Attach the button sewing foot. Set the stitch width to 0. Position the button and fabric under the foot. Position the needle over the left hole [Fig. -
Page 21: Stitch "B" Blindhem
BUILT-IN STITCHES STITCH “B” - BLINDHEM BLINDHEMMING Eliminate time consuming hand sewing with the use of the blindhem stitch. Use a thread color that matches the ⁄ ˝ fabric color for the best results. STITCH STITCH WIDTH STITCH LENGTH PRESSER FOOT Blindhem Turn up the finished edge of the fabric to the desired hem depth [Fig. -
Page 22: Attaching Flat Elastic
BUILT-IN STITCHES STITCH “C” - THREE-STEP ZIGZAG ATTACHING FLAT ELASTIC Using the three-step zigzag prevents elastic from tunneling or buckling. STITCH STITCH WIDTH STITCH LENGTH PRESSER FOOT All-purpose Place elastic and fabric under the presser foot. Take a few stitches to anchor the elastic. Adjust the width of the stitch to the width of the elastic. -
Page 23: Stitch "E" Stretch Straight Stitch
BUILT-IN STITCHES STITCH “E” - STRETCH STRAIGHT SEAMING BIAS CURVES The triple stitch action of the stretch straight stitch offers flexible and durable seams. Use it to sew stress areas such as the crotch seams in pants or the sleeve under- arm area. -
Page 24: Stitch "E" Rick Rack
BUILT-IN STITCHES STITCH “E” - RICK RACK OVERCASTING HEAVY FABRICS Sew on heavier weight stretch fabrics in any area you would use a zigzag stitch. STITCH STITCH WIDTH STITCH LENGTH PRESSER FOOT All-purpose Position the fabric under the presser foot and guide the fabric so the right swing of the stitch forms just inside the edge of the fabric [Fig. -
Page 25: Stitch "G" Honeycomb
BUILT-IN STITCHES STITCH “G” - HONEYCOMB DECORATIVE RIBBON ATTACHING This stitch is ideal for decorative topstitching. Use alone or topstitch over ribbon or cording. Use a variegated thread for extra pizzazz. STITCH STITCH WIDTH STITCH LENGTH PRESSER FOOT All-purpose Place the ribbon along the stitching line [Fig. 1]. When stitching over ribbon, it’s easiest to secure the rib- Fig. -
Page 26: Buttonhole Stitch
BUILT-IN STITCHES BUTTONHOLE STITCH CREATING BUTTONHOLES Your Simplicity sewing machine makes made-to-measure Fixing screw buttonholes in four easy steps. Posts Button STITCH WIDTH STITCH LENGTH PRESSER FOOT Yellow range Yellow range Buttonhole [Fig. 1] Loosen the fixing screw and place the button on the foot between the white posts of the foot and the black prong of the fixing screw. -
Page 27: Free-Motion Sewing
FREE-MOTION SEWING Darning or free-motion sewing and quilting are easily accomplished by lowering the feed teeth and removing the presser foot and presser foot holder [Fig. 1]. This allows “free” movement of the fabric in any direction. Use stitch “A” and a stitch width setting from 0-5. There is no need to adjust the stitch length because you will actually be guiding the fabric movement. -
Page 28: Specialty Sewing Techniques
PRESSER FOOT 1.5-4 Roller The size 16 needle, included with the Simplicity sewing Create a bold look or add extra color to a stitch by machine, is designed for sewing through multiple layers sewing with two threads through the upper threading of heavy fabric. -
Page 29: Care And Maintenance
Disconnect the machine from the power source before performing any maintenance. NEEDLES The Simplicity sewing machine uses standard sewing machine needles (15x1). The size and type of your nee- dle should be compatible with the fabric (see page 15). -
Page 30: Troubleshooting
TROUBLESHOOTING GUIDE Problem Possible Cause Solution TOP THREAD BREAKS Machine is threaded incorrectly ..Rethread machine and needle Tension is too tight ....Reduce tension on top to a smaller number Thread is too heavy for needle size . - Page 31 Stitch length and/or width dials are set . Refer to instructions for proper machine settings incorrectly for the type of stitch used 1760 Gilsinn Lane Fenton, MO 63026 For Sewing Machine assistance call: Simplicity Education Department 636-651-0030 Monday-Friday 9:00 a.m. - 5:00 p.m. CT ©2002 Tacony Corporation...
Need help?
Do you have a question about the American Denim SA1100 and is the answer not in the manual?
Questions and answers