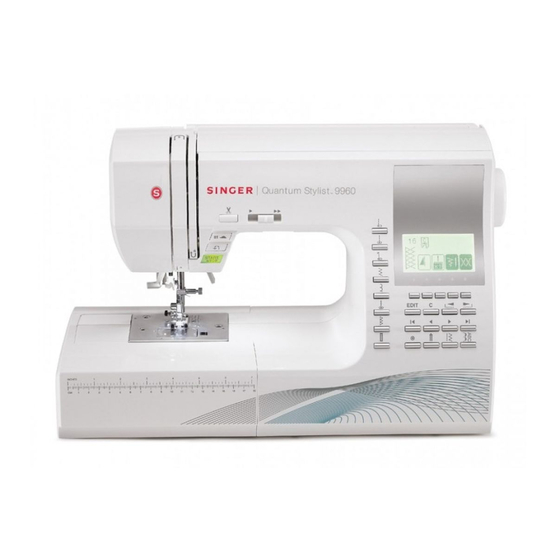
Singer 9960 Instruction Manual
Hide thumbs
Also See for 9960:
- Instruction manual (108 pages) ,
- Service manual (33 pages) ,
- Datasheet (5 pages)
Table of Contents
Advertisement
Quick Links
Advertisement
Table of Contents

Related Manuals for Singer 9960


Summary of Contents for Singer 9960
- Page 1 INSTRUCTION MANUAL 9960...
-
Page 2: Important Safety Instructions
18. Do not expose the machine or machine case to sunlight directly. Also, do not keep it in a very warm or damp place. SAVE THESE INSTRUCTIONS Servicing should be performed by an authorized service representative. SINGER is a registered Trademark of The Singer Company Ltd. -
Page 3: Table Of Contents
CONTENTS IMPORTANT SAFETY INSTRUCTIONS .... 2 WHERE TO USE EACH STITCH ..... 24 MODEL 9960 ............4 STRAIGHT STITCH SEWING ......25 FOR EUROPEAN AND SIMILAR TERRITORIES: ..4 A. Straight Stitch ................ 25 B. Straight Stitch With Auto-lock Stitch (Pattern No. 3, 4) ..25 MAIN PARTS ............ -
Page 4: Model 9960
Copyright © 2010 THE SINGER COMPANY All Rights Reserved Throughout The World. FOR EUROPEAN AND SIMILAR TERRITORIES: This product is suppressed for radio and television interference with the International Electrotechnical Commission requirements of the CISPR. -
Page 5: Main Parts
MAIN PARTS 1.Handle 2.Top Cover 3.Thread Take-Up Lever (Inside) 4.Face Plate 5.Thread Cutter Button 6.Speed Control Button 7.Needle Up-Down / Slow Button 8.Reverse Stitch Button 9.Start/Stop Button 10.Extension Table (Accessories) 11.Presser Foot Lifter 12.Forward / Reverse Adjusting Screw (underneath machine) 13.Foot Controller 14.Power Line Cord 15.Hand Wheel... -
Page 6: Accessories
ACCESSORIES Accessories are provided in the accessory case. (See next page, [EXTENSION TABLE]) 1. Needle Pack 2. 4 Bobbins ( 1 is in the machine) 3. Seam Ripper 4. Brush 5. Auxiliary Spool Pin with Felt Washer 6. Screw Driver 7. -
Page 7: Extension Table
EXTENSION TABLE a. REMOVING THE EXTENSION TABLE Hook your finger to the left bottom side of extension table and slide it to the left. To attach, insert to the right. b. OPENING THE ACCESSORY CASE Hook your finger to the left side of accessory case and pull toward you. -
Page 8: Inserting The Needle
Syn 50 - 80 knit, tricot, green shank Needle for knit and Silk 50 spandex, jersey synthetic fabric Polyester Sweatshirt, Swim- 2001 wear, Double Knit, green shank Polyester Sweater Knit Leather 2032 Leather Use a Singer brand needle for better sewing results. -
Page 9: Connecting The Machine
CONNECTING THE MACHINE DANGER: To reduce the risk of electric shock. Never leave unattended when plugged in. Always unplug this machine from the electric outlet immediately after using and before maintenance. WARNING: To reduce the risk of burns, fire, electric shock, or injury to persons. -
Page 10: Function Of Each Part
FUNCTION OF EACH PART A. START/STOP BUTTON The machine will start running when start/stop button is pressed and will stop when pressed the second time. The machine will rotate slowly at start of sewing. MONITOR LAMP Green Light “ON” Ready to sew or bobbin winding. Red Light “ON”... -
Page 11: Thread Cutter Button
F. THREAD CUTTER BUTTON Press this button after sewing to cut the upper and bobbin threads. The machine will cut both threads automatically. CAUTION 1. Do not press this button when there is no fabric in the machine or no need to cut the threads. The thread may tangle, resulting in damage. -
Page 12: Control Panel
CONTROL PANEL When you turn on the power, machine will select the straight stitch and indicate information of stitch on the L.C.D. A. L.C.D. DISPLAY Stitch information is indicated on this display. According to the pattern or mode, information will be changed. -
Page 13: Clear Button
I. CLEAR BUTTON UTILITY STITCH SEWING If you changed the setting (mirror/reverse, elongation, stitch width, length and thread tension) of utility stitch pattern, you can return to preset setting by pressing this button. DECORATIVE & LETTER STITCH SEWING By pressing this button, you can delete one combined stitch pattern or all stitch patterns. -
Page 14: Bobbin Setting
BOBBIN SETTING A. REMOVING THE BOBBIN 1. Pull the bobbin cover latch to the right and remove the bobbin cover. 2. Lift up the bobbin from the machine. B. SETTING SPOOL OF THREAD ON SPOOL PIN 1. Pull up the left end of spool pin and set the spool of thread on spool pin so that the thread unrolls from the front of the spool. -
Page 15: Inserting The Bobbin
4. Pull thread out about 10 cm (4 inches). Replace the bobbin cover. Set the left tab into the hole in needle plate and push the right side of bobbin cover down until it clicks into place. NOTE: Use Singer bobbins only. -
Page 16: Threading The Machine
THREADING THE MACHINE A. PREPARING TO THREAD MACHINE 1. Raise the presser foot lifter. 2. Press the needle up/down button and set the needle in up position. (Keep this position until needle eye threading.) B. SETTING SPOOL OF THREAD ON SPOOL PIN 1. -
Page 17: Threading The Needle Eye
D. THREADING THE NEEDLE EYE CAUTION: To prevent accidents. 1. Keep fingers away from all moving parts. Special care is required around the needle. 2. Do not lower the threader lever while machine is operating. Note:The needle threader is used for needle sizes 11/80, 14/90, and 16/100. -
Page 18: Starting To Sew
STARTING TO SEW The machine will be set to sew straight stitch when power switch is turned on. CAUTION: To prevent accidents. While sewing, special care is required around the needle. Machine automatically feeds the fabric, do not pull or push the fabric. A. -
Page 19: Reverse Stitching
B. REVERSE STITCHING Reverse stitching is used for reinforcing the ends of the seams. 1. Place the fabric in position where back stitching is to be made and lower the presser foot. 2. Press and hold the reverse button. Sew 4-5 reverse stitch. 3. -
Page 20: Turning Corners
D. TURNING CORNERS 1. Stop the machine when you reach a corner. The machine will stop the needle into the fabric. 2. Raise the presser foot. 3. Use the needle as a pivot and turn fabric. 4. Lower the presser foot and resume sewing. E. -
Page 21: Thread Tension
THREAD TENSION This machine adjusts the thread tension automatically when pattern is selected. However you can change the thread tension as follows. 1. Press the fuction F5 button directly under the tension mark. LCD changes to the thread tension mode. 2. -
Page 22: Selecting Utility Stitch Pattern
SELECTING UTILITY STITCH PATTERN Utility stitches are indicated in the pattern chart located inside of the top cover. When you turn on the machine, straight stitch will be selected automatically. Select utility stitch pattern as follows. A. DIRECT STITCH PATTERN You can select basic utility stitch patterns directly by pressing the Direct Stitch Selection Buttons. -
Page 23: Elongation
D. ELONGATION Some patterns may be elongated from the original length. You may elongate the pattern by pressing the function button (F3) directly under the elongation icon. a. Regular length b. Elongated A pattern cannot be elongated if the elongation icon is not indicated. -
Page 24: Where To Use Each Stitch
WHERE TO USE EACH STITCH 01. Straight stitch center needle positon • For top stitching, zipper sewing etc. 02. Straight stitch left needle position • For top stitching etc. 03. Straight stitch with auto-reverse stitch center needle position 04. Straight stitch with auto-reverse stitch left needle position 05. -
Page 25: Straight Stitch Sewing
STRAIGHT STITCH SEWING Straight stitch patterns should be selected to suit the type of fabric being sewn. Left needle position (No.2) is most suited for sewing light weight fabrics. No. 1. Center needle Position No. 2. Left needle Position No. 3. Center needle with built-in reverse stitch No. -
Page 26: Basting
BASTING You can baste a garment before trying it on. No. 5 Basting Stitch Darning/Embroidery Foot A. ATTACHING THE DARNING/ EMBROIDERY FOOT 1. Lower the feed dogs by moving the drop feed lever to the left. 2. Remove the presser foot and holder. (See page 3. -
Page 27: Elastic Stitch Sewing
ELASTIC STITCH SEWING Elastic stitches are strong and flexible and will give with the fabric without breaking. Good for easy to ravel and knit fabrics as well as joining durable fabrics such as denims. No. 6 Straight Stretch Stitch No. 7 Stem Stitch for Stretch fabrics No.17 Ric-rac Stitch General Purpose Foot (A) We recommend that you use a needle for knit and... -
Page 28: Zigzag Stitch Sewing
ZIGZAG STITCH SEWING Your machine can sew zigzag stitches of various widths and lengths by changing the settings of the stitch width and stitch length. No. 9 Zigzag Stitch General or Satin Foot (A, B) Zigzag stitches are very good for joining two pieces of fabrics, applique and sewing various decorative patterns. -
Page 29: Overcasting-Overlocking
OVERCASTING- OVERLOCKING A. USING THE OVERCASTING FOOT No. 9 (Stitch Width 5.0) No. 15, 16, 30 (Stitch Width 5.0-7.0) Overcasting Foot (C) Press fabric against the guide plate of the overcasting foot so that needle falls near the edge of seam. a. -
Page 30: Blind Hem Stitching
BLIND HEM STITCHING This stitch will sew without stitches showing on right side of fabric. No. 10 Blind hemming for stretch fabric. No. 11 Blind hem for regular fabric. Blind Hem Foot (D) 1. Fold the fabric as shown on drawing. a. -
Page 31: Patch Work
PATCH WORK For additional decorative purposes, use different kind of materials. No. 19, 20 General Purpose or Satin Foot (A, B) 1. Place two pieces of fabric right sides together and sew a long straight stitch. 2. Press the seam open. 3. -
Page 32: Inserting Zippers Centered Insertion
INSERTING ZIPPERS CENTERED INSERTION No. 1 Straight Stitch (Center Needle Position) Zipper Foot (E) CAUTION: To prevent accidents. Zipper foot should be used for sewing center needle position straight stitch No. 1 only. It is possible that needle could hit the presser foot and break when sewing other patterns. -
Page 33: Lapped Insertion
INSERTING ZIPPERS LAPPED INSERTION No. 1 Straight Stitch (Center Needle Position) Zipper Foot (E) CAUTION: To prevent accidents. Zipper foot should be used for sewing center needle position straight stitch No. 1 only. It is possible that needle could hit the presser foot and break when sewing other patterns. -
Page 34: Buttonhole Sewing
BUTTONHOLE SEWING This machine can sew 13 types of buttonholes. 104. Bar-tack Buttonhole (Narrow) for light to medium weight fabrics 105. Bar-tack Buttonhole (Wide) for large buttons 106. Keyhole Buttonhole for heavy weight fabrics 107. Keyhole Buttonhole with reinforced bar tack 108. - Page 35 7. Machine will sew the buttonhole in the order as shown and stop automatically after sewing. 8. Press the thread cutter button and raise the presser foot to remove the fabric. b. To sew over same buttonhole, raise presser foot to return to original position. 9.
-
Page 36: Bound Buttonhole
BOUND BUTTONHOLE A bound buttonhole provides a professional tailored touch to women’s dresses, suits and coats. 116. Bound Buttonhole Buttonhole Foot (F) 1. Cut a patch of fabric 2.5 cm wide, 1 cm longer than the finished buttonhole. Baste a patch so that the center line of patch will align with the center line mark of buttonhole. -
Page 37: Eyelet
10.Fold the fabric and stitch along the seams on each side, just a needle width from the original stitching line. Remove the basting. c. Wrong side of fabric 11.Fold the fabric along the buttonhole end and stitch triangular ends on the original stitching line. -
Page 38: Automatic Bar-Tack And Darning
AUTOMATIC BAR-TACK AND DARNING You can sew automatic bar-tack and darning using the buttonhole foot. No. 102 Bar-tack, to reinforce areas that will be subject to strain, such as pocket corners. No.103 Darning, mending and other applications. Buttonhole Foot (F) 1. -
Page 39: Sewing On Buttons
SEWING ON BUTTONS No. 13 Button Sewing Foot 1. Lower the feed dogs by moving the drop feed lever to the left. 2. Attach the button sewing foot. Align two holes of the button with slot of presser foot and lower foot to hold the button securely. -
Page 40: Narrow Hemming
NARROW HEMMING No. 1 Straight Stitch (Center Needle Position) Rolled Hem Foot 1. Fold edge of fabric over about 3 mm (1/8 inch), 3 mm then fold it over again 3 mm for about 5 cm (2 inches) along edge of fabric. 2. -
Page 41: Continuous Decorative Pattern
CONTINUOUS DECORATIVE PATTERN Use the satin foot for continuous decorative stitch patterns. This foot has a full indentation on the underside to easily allow closely spaced zigzag stitches and fabric to feed freely under foot. No. 19-100 Satin foot (B) To tailor the continuous decorative stitch pattern, you may adjust the length and width of pattern. -
Page 42: Darning/Free-Hand Embroidery
DARNING/FREE-HAND EMBROIDERY No. 1.Center needle Position Darning/Embroidery Foot A. ATTACHING THE DARNING/ EMBROIDERY FOOT 1. Lower the feed dogs by moving the drop feed lever to the left. 2. Remove the presser foot and holder. (See page 3. The arm of darning/embroidery foot should ride onto the shaft of the needle clamp screw. -
Page 43: Twin Needle Sewing
General Purpose Foot or Satin Foot (A, B) Note: A twin needle is not provided with this machine. Call for your Singer Dealer to purchase. CAUTION: To prevent accidents. a. Use only needle designed for this machine (Singer Style 2025). Other needles may break. -
Page 44: Decorative & Letter Stitch Sewing
DECORATIVE & LETTER STITCH SEWING You can combine decorative & letter stitches into a string by selecting each pattern. A. SELECTING DECORATIVE & LETTER STITCH (selecting mode) 1. Press the decorative & letter stitch button. First 5 patterns of decorative patterns will be indicated on the lower line of LCD. -
Page 45: To Check Selected Patterns
c. By pressing the far left cursor “I<” button, the first selected pattern will be highlighted. d. By pressing the far right cursor “I>” button, the cursor is moved to the right side of selected patterns. The cursor is used to check selected patterns, insert patterns, delete patterns or editing of each pattern as described below. -
Page 46: Editing Of Each Pattern
F. EDITING OF EACH PATTERN You can change the stitch width, length, mirror/ reverse stitch and elongation of each pattern. And you can change the thread tension of selected all patterns 1. Press the EDIT button. LCD will change to the editing mode. 2. -
Page 47: To Recall The Selected Patterns
c. Setting the stitch width and length Machine will pre-set the stitch width and length suitable for the pattern. 1. You can make changes by pressing the function button (F4) directly under the witdh and length mark. 2. For narrower width, press function button F2(–). For wider width, press function button F3 (+). -
Page 48: Sewing The Selected Patterns
H.SEWING THE SELECTED PATTERNS a. Single sewing You can combine the tack stitch by pressing the tack button at selecting mode. When you combined the tack stitch or letter stitch at the end of pattern, machine will stop automatically after sewing selected patterns. b. -
Page 49: Decorative And Letter Stitch Chart
DECORATIVE AND LETTER STITCH CHART The decorative patterns in bold print are one unit of the stitch pattern. Description of Chart Symbols: Mirror Stitch included Reverse Stitch included Mirror and Reverse stitch included X5 Elongation included ADJUSTING THE FORWARD AND REVERSE STITCHES Depending on the type of fabric you sew, it may be necessary to adjust the forward and reverse... -
Page 50: Maintenance
MAINTENANCE DANGER: To reduce the risk of electric shock. Disconnect the power line plug from electric outlet before carrying out any maintenance. CLEANING If lint and bits of thread accumulate in the hook, this will interfere with the smooth operation of the machine. -
Page 51: Helpful Hints
HELPFUL HINTS PROBLEM CAUSE CORRECTION Page Machine not properly threaded. Re-thread machine. Upper thread Thread entwined around bobbin. Remove entwined thread. breaks Needle inserted incorrectly. Re-insert needle. Thread tension too tight. Readjust thread tension. Thread of incorrect size or poor quality. Choose correct thread. -
Page 52: Messages On Lcd
Messages on LCD 1. Winding the bobbin. 2. Lower the buttonhole lever. 3. After sewing buttonhole, raise the presser foot lifter and set the frame of buttonhole foot to starting position. 4. Release the foot controller pedal. 5. Lower the presser foot. 6. - Page 56 9960English 34108 B0...