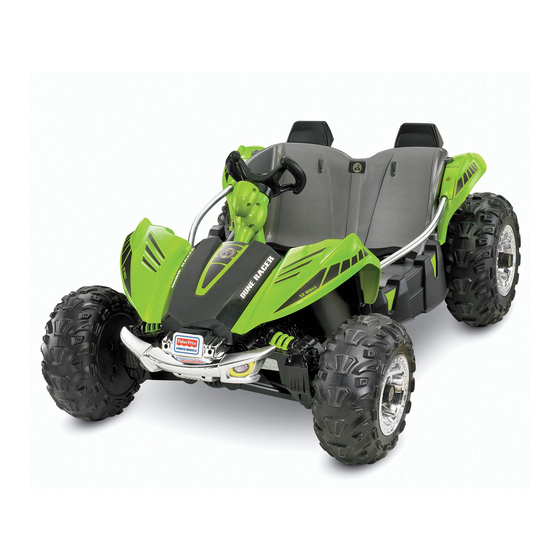
Fisher-Price Hot Wheels Dune Racer W6201 Owner's Manual With Assembly Instructions
Hide thumbs
Also See for Hot Wheels Dune Racer W6201:
- Owner's manual with assembly instructions (30 pages)
Table of Contents
Advertisement
Owner's Manual
with Assembly Instructions
For Model W6201
Please read this manual and save it with your
original sales receipt.
Tools needed for assembly: assembly wrench
(included); Phillips screwdriver and adjustable
wrench (both not included).
®
Use only with a Power Wheels
12 Volt Lead-Acid
Rechargeable Battery and a Power Wheels
®
12 Volt
Charger (both included).
Advertisement
Table of Contents

Related Manuals for Fisher-Price Hot Wheels Dune Racer W6201


Summary of Contents for Fisher-Price Hot Wheels Dune Racer W6201
- Page 1 Owner's Manual with Assembly Instructions For Model W6201 Please read this manual and save it with your original sales receipt. Tools needed for assembly: assembly wrench (included); Phillips screwdriver and adjustable wrench (both not included). ® Use only with a Power Wheels...
-
Page 2: Electrical Hazard
IMPORTANT INFORMATION ELECTRICAL HAZARD WARNING • Battery can fall out and injure a child if vehicle tips over. Always use battery retainer (door). • PREVENT FIRE - Never modify the electrical system. Alterations could cause a fi re resulting in serious injury and could also ruin the electrical system. - Page 3 ó necesita asistencia llame gratis can be damaged by riding this vehicle indoors. 1-800-348-0755 para los Estados Unidos. Tenemos Fisher-Price® will not be responsible for damage representantes que hablan español para atender to the fl oor if the vehicle is used indoors.
-
Page 4: Assembled Parts
ASSEMBLED PARTS • If you experience a problem with this product, please call us at 1-800-348-0751, rather than return this product to a store. • Please identify all parts before assembly and save all packaging material until assembly is complete to ensure that no parts are discarded. - Page 5 ASSEMBLED PARTS 2 Front Hubcaps 2 Rear Hubcaps 2 Sidebar Covers Steering Wheel Cap (Left and Right) Assembly Wrench 2 Bushings 2 Front Axle 2 Rear Axle Fastener Caps Fastener Caps 12V Battery 12V Charger Part Not Shown: Label Sheet "...
- Page 6 ASSEMBLED PARTS Note: Some parts shown are assembled on both sides of the vehicle. Fasteners not shown. W6201pr-0920...
-
Page 7: Battery Charging
BATTERY CHARGING • Make sure you charge the battery for at least 18 hours ELECTRICAL HAZARD using the enclosed Power Wheels ® 12 volt charger before operating your vehicle for the first time. Charge the battery for at least 14 hours after each use of the WARNING vehicle. -
Page 8: Assembly
ASSEMBLY WARNING Children can be harmed by small parts, sharp edges and sharp points in the vehicle's unassembled state, or by electrical items. Care should be taken in unpacking and assembly of the vehicle. Children should not handle parts, including the battery, or help in assembly of the vehicle. - Page 9 ASSEMBLY Front Axle FRONT SIDE VIEW Front Axle Bushing • Pull to rotate the front axles completely towards the front of the vehicle. • Remove the cap on the end of the front axle. Dispose of the cap in the trash. •...
- Page 10 ASSEMBLY Front Hubcap 3/8” (1 cm) Assembly • Fit the tabs on the front hubcap into the slots in the Lock Nut Wrench front wheel. Push to "snap" into place. • Repeat steps 9-14 to assemble the remaining bushing, • Fit a "...
- Page 11 ASSEMBLY #8 x ¾” (1,9 cm) Screws Folded Folded Fastener Fastener Side Side Long Seat Belt Note: Make sure the fasteners on the long seat belt are facing the fasteners on the short seat belts. • Insert the ends of the long seat belt up through the slots in the center of the seat.
- Page 12 ASSEMBLY #8 x ¾” (1,9 cm) Screw #8 x ¾” (1,9 cm) Screw Seat Vehicle Frame DO NOT insert screws here. • Insert a #8 x ¾" (1,9 cm) screw into the upper hole in each side of the seat and tighten. Note: Do not insert screws into the lower holes in the seat.
- Page 13 ASSEMBLY Sidebar with Sidebar with Front Fenders Curve Out Curve Out Tabs Tabs • Fit the sidebars into the slots in the vehicle frame and • Fit the front fenders onto the front of the vehicle, rear fenders. as shown. Hint: Each sidebar is designed to fit one way.
- Page 14 ASSEMBLY #8 x ¾” (1,9 cm) Screws #8 x ¾” (1,9 cm) Screws Bumper #8 x ¾” (1,9 cm) Screws #8 x ¾” (1,9 cm) Screws • Fit the folded end of the strap attached to the hood up into the slot in the front end of the vehicle. •...
- Page 15 ASSEMBLY ” (1 cm) Steering Column Steering Lock Nut Column Post Bend in Steering Column Slot Hole Assembly TOP SIDE VIEW Wrench • Pull the straight end of the steering column up so that BOTTOM VIEW only the bend is visible (out from the bottom of the steering column post).
- Page 16 ASSEMBLY Steering Wheel Steering Wheel Cap • Fit the steering wheel cap to the center of the steering wheel. Push to "snap" into place. INSIDE VIEW • Turn the vehicle upright. • Fit the steering wheel onto the steering column assembly. Hint: The steering wheel is designed to fit the steering column one way.
-
Page 17: Top Front View
DECORATION • Before applying the labels, wipe the surface of the vehicle with a clean, dry cloth to remove any dust or oils. • Place the labels exactly as shown in the illustrations. For best results, avoid repositioning a label once it has been applied to the vehicle. -
Page 18: Right Side View
DECORATION RIGHT SIDE VIEW LEFT SIDE VIEW W6201pr-0920... -
Page 19: Battery Installation
BATTERY INSTALLATION ® IMPORTANT! Use only a Power Wheels 12 volt battery. Use of any other battery will damage your vehicle. PRESS PRESS Motor Harness • Plug the motor harness connector into the battery. Push firmly. Battery Door • Press the battery door button on the back end of the vehicle. -
Page 20: Safe Driving Rules
SAFE DRIVING RULES Before children use this vehicle, an adult should carefully RIDING HAZARD evaluate the driving area as well as the child’s skill level and ability to drive the vehicle safely. Teach appropriate WARNING safety rules to your child before allowing operation of this vehicle. -
Page 21: Vehicle Operation
VEHICLE OPERATION Advanced Use – High Speed Help your child practice steering to learn how far and how quickly to turn the steering wheel when driving, and automatically knows how to stop. Remove Place lock-out screw lock-out screw for high speed. here for storage. -
Page 22: Battery Care
BATTERY CARE FCC STATEMENT If a battery leak develops, avoid contact with the United States Only leaking acid and place the damaged battery in a plastic This equipment has been tested and found to comply bag. See next section for proper disposal. with the limits for a Class B digital device, pursuant to Part 15 of the FCC Rules. -
Page 23: Vehicle Care
VEHICLE CARE LIMITED WARRANTY • Check all screws and their protective coverings Bumper-to-Bumper* Limited Warranty regularly and tighten as required. Check plastic parts *One year limited warranty from the date of on a regular basis for cracks or broken pieces. ®... -
Page 24: Problems And Solutions Guide
PROBLEMS AND SOLUTIONS GUIDE IMPORTANT! If you experience a problem with your vehicle, first check the Problems and Solutions Guide below. If you still experience a problem, please contact Power Wheels ® Consumer Relations, or your local Power Wheels ® authorized service center. - Page 25 PROBLEMS AND SOLUTIONS GUIDE POSSIBLE PROBLEM SOLUTION CAUSE Vehicle was running but Loose wires or loose Check all wires and connectors. Make sure the battery suddenly suddenly stopped connectors stopped connector is tightly plugged into the motor harness connector, and that there are no loose wires around the motors. Tripped thermal fuse The built-in thermal fuse may “trip”...
- Page 26 PROBLEMS AND SOLUTIONS GUIDE POSSIBLE PROBLEM SOLUTION CAUSE When the foot pedal is Operation of vehicle in It is possible that only one rear wheel may spin when both rear pressed only one rear low speed. wheels are raised off the ground and the vehicle is in low speed. This wheel spins does not necessarily indicate a problem.
- Page 27 PROBLEMS AND SOLUTIONS GUIDE POSSIBLE PROBLEM SOLUTION CAUSE When the foot pedal is Loose wire or connector Check all wires around the motors and all connectors the vehicle pressed, the vehicle won’t won’t run without to make sure they are tight. run without a push “Dead Spot”...
- Page 28 For the location nearest you, visit us on-line at www.powerwheels.com. Fisher-Price, Inc., a subsidiary of Mattel, Inc., East Aurora, NY 14052 U.S.A. ©2011 Mattel, Inc. All Rights Reserved. ® and ™ designate U.S. trademarks of Mattel, Inc. PRINTED IN MEXICO...
Need help?
Do you have a question about the Hot Wheels Dune Racer W6201 and is the answer not in the manual?
Questions and answers