Table of Contents
Advertisement
Available languages
Available languages
Advertisement
Table of Contents

Subscribe to Our Youtube Channel
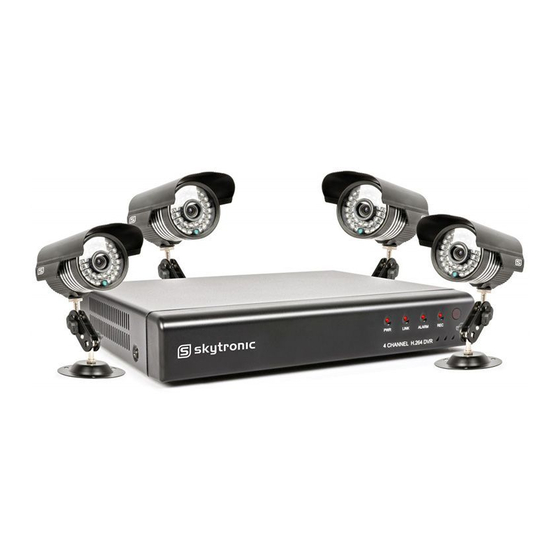
Related Manuals for SKYTRONIC DVR


Summary of Contents for SKYTRONIC DVR
- Page 1 Digital Video Recorder USER’S MANUAL HANDLEIDING 351.124...
-
Page 2: Table Of Contents
3.1 Hard Drive Installation ..............................7 3.2 Camera and Monitor Connection ............................. 7 3.3 Power Supply connection ..............................7 Chapter 4: DVR Boot up ............................... 8 4.1 System Initialization ................................8 4.2 Main Interface................................... 8 Chapter 5: DVR Menu ................................8 5.1 Main Menu Preview ................................ - Page 3 User Manual 5.2.7.3 Video Setup............................... 28 5.2.7.4 Language................................29 5.2.7.5 Info..................................29 5.2.7.6 System Maintenance ............................29 5.3 Menu Lock..................................29 5.4 Video Search..................................29 5.5 PTZ Control ..................................30 5.6 Record ..................................... 30 5.7 Stop recording ................................. 30 Chapter 6: Net-Viewer Program ............................31 6.1 Plug-ins download and installation ..........................
-
Page 4: User Manual
This DVR system uses a hard drive for video storage, which generates heat during operation. Do not block air holes (bottom, upper, sides and back) of the DVR that cool down the system while running. Install or place this product in an area where there is good air circulation. -
Page 5: Chapter 1: Dvr Features
Backup Recordings Supports DVR backup via USB flash drive and hard drive. Playback Recordings Supports DVR single CH and multiple CH playback of recorded files Network operation Supports remote surveillance by multiple users simultaneously Supports HDD & video input alarm management and external alarm signal... -
Page 6: Chapter 2:Layoutt
User Manual Chapter 2:Layoutt 2.1 Front Panel 2.1.1 4-CH Front Panel (Details please refer to the real product) Item Key title/Indicator Marks Functions Power Switch Turn Power on and off Power indicator If the “Green” indicator is on the system is getting power IR Receiver Receives signal from Remote Control When the “Red”... -
Page 7: 8-Ch Front Panel (Details Please Refer To The Real Product)
User Manual 2.1.2 8-CH Front Panel (Details please refer to the real product) Power Switch PAUSE: Pause / Frame Play PWR: PWR Indicator PLAY: Play IR receiver for Remote Control FWD: Play Forward / Move Right HDD: HDD Indicator STOP: Stop Playback; Stop manual Recording SEARCH: Recording Search REC: Manual Recording MUTE: Audio Mute key... -
Page 8: 8-Ch Rear Panel (Details Please Refer To The Real Product)
User Manual 2.2.2 8-CH Rear Panel (Details please refer to the real product) CH1-8: Video inputs Audio Output Video Outputs USB port: backup to Flash Drive & Hard Drive Audio Input Mouse port LAN: LAN port for Network Access RS-485/Sensor / Alarm port VGA port Connect power supply 8-CH: RS485/Sensor/Alarm port functions... -
Page 9: Remote Control
User Manual 2.3 Remote Control Channel Select 1-8 ; Numeric key Numeric Key 9、0 Preview all Channel Enter/Exit Main Menu Menu ▲ Up Key ▼ Down Key ◄ / Left / Right Key Select Key/ Edit Key Rewind key Play Key, Enter to recording search menu Forward Key ●... -
Page 10: Chapter 3: Dvr Installation
Connect camera cable to video input of DVR, and from video output of DVR to Monitor via BNC connector (Refer to section2.2-Rear Panel); or If the camera is a PTZ speed dome, you could connect RS485 A & B to the according port of DVR respectively (refer to system figuration on Chapter 8). -
Page 11: Chapter 4: Dvr Boot Up
User Manual Chapter 4: DVR Boot up 4.1 System Initialization After connecting the power adapter and turning On the power button, the system will boot-up and start initializing. Picture 4-1 4.2 Main Interface After finishing system initialization the system will enter into main interface. -
Page 12: Main Menu Preview
User Manual 5.1 Main Menu Preview Color set Camera Dwell time display Recording Network Search Playback Rec. Search File List HDD Management Alarm Setting E-mail setting Device PTZ Setting Management Mobile Area setting Motion Time Setting User password Video Setting System Language Select System Information... -
Page 13: Camera Setup
User Manual 5.2.1 Camera setup Go to [Main Menu Camera] to set up the name display and position display of each channel (Shown as Picture 5-3), You can also adjust image brightness, saturation, contrast and hue settings of each channel after entering into [Color] Menu and set up whether each channel can be previewed or not under Live display and/or Recording mode. -
Page 14: Network Set
5.2.3 Network Set Enter into [Main Menu Network Set] to proceed network set (Shown as picture 5-7): After selecting network mode - such as DHCP、PPPOE and static allocation and setup web port, you could visit DVR remotely via network. Picture 5-7... - Page 15 DVR accordingly, you could visit DVR remotely via IE browser. (shown as picture 5-10) Picture 5-10 If you need to visit DVR via Internet, you should setup the inflection of video port at the public Router located in the DVR (shown as Picture 5-11).
-
Page 16: Recording Search
Explanation: Backup file will be in H264 format, you can convert it to AVI format using the Multimedia Player program that comes with the DVR or through the net-viewer program, so you can use any player which supports AVI format. - Page 17 User Manual 2、Open multimedia player and click [File Local (F)] to find/select the backup file, and then click [open] button Note: the file type you have selected should be *.264 format. Picture 5-24 Picture 5-25 3、Open backup file: (1) 、Click [Play] menu (P) on the top of multimedia player interface to select playing the backup file;...
-
Page 18: Device Management
User Manual Capture picture Mute switch Reduce window Volume adjust 4、Please refer to the below [Video on] setting procedure (System default - video for every channel is on) Setting Video play setting Normal video Bar Select the channel you want to display Select to play the video Apply OK Picture 5-27... -
Page 19: Alarm Set
30s, 1minute,2minute,5minute) 。 Alarm Type Function Sends alarm when DVR can’t receive video signal (such as camera damage, cable broken or Video Loss When an object moves into motion detection area, alarm will be triggered. You can adjust sensitivity... - Page 20 Receiver address: indicates receiver’s email address. The email address is used to receive image t ransmitted from motion detection alarm of DVR. Please clear the images you have received as soon as possible to avoid overloading your email account. For detailed SMTP protocols settings refer to the below picture 5-35A.
-
Page 21: Ptz Setup
Main Menu then Devices then Mobile and enter your user name and password, and set the Server Port to 18600. This port also needs to be forwarded to the IP address of the DVR along with the ports from 5.2.3 Network Setup. - Page 22 Server address: Public IP address of router DVR is connected to. Web port: Same as the Server Port you setup in the DVR, it needs to be forwarded to the IP address of the DVR, setting range is between 1024 and 65535, the default setting is 18600. Note: this port is in addition to the ports used for standard remote access.
- Page 23 User Manual 2. Select the QQEye icon in this window (red box in Pic 2) to install it, this will display Pic 3). Pic 1 Pic 2 Pic 3 After the phone finishes preparation it will display Pic 4 asking for permission to install the program. Select the Yes button (red box in Pic 4).
- Page 24 Server Port: Web port: Same as the web port setting on the DVR, you need to forward this port from the Router to the DVR. Setting range is between 1024 and 65535, the default setting is 18600. Note: this port is in addition to the ports used for standard remote access.
- Page 25 User Manual 2.1.2 Continue 2.1.3 Select & continue 2.1.4 Fill in your personal info & continue.
- Page 26 User Manual Please note that the options of Payment Method are different from different regions, please select another payment method. Don’t worry, “Aplayer” is a free software & you don’t need to pay for it. 2.1.5 Finished the register, and go to your email box to verify your account. Click the link included in the email message.
- Page 27 User Manual The register of your iTunes store account has been done. 2.2 Authorize Computer You need to authorize your computer with the registered ID. Move to the menu “Store”, and click the option “Authorize Computer”. Input your registered ID & password, then click Authorize button. 2.3 Download &...
- Page 28 User Manual 2.3.1 Click iTunes Store(1), then input “aplayer” into the search bar(2) on the right upper corner and press Enter. You will find the Aplayer icon displayed as below. 2.3.2 Click the icon and it will turn to the download page. Click the “GET APP” button to download the file.
- Page 29 User Manual 2.3.3 Connect your iPhone to the computer, you will find your Device displayed on the left sidebar. Select the DEVICES ID(1), and then click “Applications” option(2). Select the “Sync Applications” & “Aplayer” (3) and then click “Sync” button(4). * The devices ID is different from different iPhones.
-
Page 30: Motion Detect
User Manual 3.1 Access information setup Turn into setup menu, and fill in the information according to your DVR Mobile settings. Server IP: input the IP address or domain name to visit your DVR Port: same with the server port you have set in your DVR mobile settings... -
Page 31: System Function
DST (day saving time) status and mode. Picture 5-41 5.2.7.2 Password This option allows you set the device ID for the DVR and set the system password if you want to use one. The new passwords will be available after clicking [APPLY] button. -
Page 32: Language
5.3 Menu Lock As a system safety feature you can click [Menu Lock] menu to lock menu when leaving the DVR. If you want to login to the DVR, you would input device code and password (refer to the Menu Locking interface- Picture 5-48). -
Page 33: Ptz Control
(shown as Picture 5-56) to add additional settings, and then enter into Cruise Set again and click [Set] and [Save] to make sure your setting is setup successfully. Clean: remove settings. Note: this DVR model supports up to 100 pre-set points. But actual quantities may be restricted by the PTZ camera you are using. 5.6 Record When you want the system to start recording click [ Rec ] button to start manual recording. -
Page 34: Chapter 6: Net-Viewer Program
Chapter 6 Net-Viewer Program 6.1 Plug-ins download and installation Open IE browser and input IP address and web port of DVR, such as http://172.18.6.202:80/ and confirm to download and install webcam. If your computer is connected to internet, computer will auto download and install the webcam. -
Page 35: Main Interface Of Net-Viewer
User Manual 6.3 Main Interface of Net-viewer Picture 6.3 Log in Net-viewer and show the interface as follows 6.3.1 Menu column (Section 1 on Picture 6-3) 6.3.2 PTZ Control (Numbers 2, 3, 4 on Picture 6-3) 6.3.3 Live Play Control (Numbers 6 through 10 on Picture 6-3) 6.3.1 Menu column (Section 1 on Picture 6-3) Menu column include [Live] menu, [Replay] menu and [Setup] menu and [Logout] menu. -
Page 36: Setup
Control] Menu, [Network Setting] menu, [System Setting] menu and [Host Info] menu. Explanation: Only when DVR is on the status of live display, you could modify and save its parameters remotely at this moment, the settings are available. The modification method to DVR via Net-viewer is the same as local adjustment of DVR. -
Page 37: Log Out
DVR remotely (shown as Picture 6-8) Picture 6-8 ③ PTZ Control Click [PTZ control] to setup PTZ cameras. Remote setup methods are the same as local DVR setup. Please refer to Section 5.2.5.3 (shown as Picture 6-9). Picture 6-9 ④... -
Page 38: Ptz Control
“Off” clicking the button opens the Live display. .Capture [ ]:Capture Screen image and save to PC as *bmp image. .Recording [ ]:Operate DVR recording remotely Channel display [ ]:The icons stand for Single Channel display, Quad Channel display, 3x3 Channel display and 4x4 Channel display respectively. -
Page 39: Chapter 7: Specifications
Supports TCP/IP, DHCP, UDP, DDNS, PPPOE network Protocol Support preview live display remotely via mobile phone and real time monitoring via IE-based Network Function browser and/or network, and support parameter setting of DVR remotely Power consumption 10~15W (exclude HDD) Power Adapter... -
Page 40: Chapter 8: Windows Vista User
User Manual Chapter 8: Windows Vista User 1、Open IE browse firstly, then enter into Tool bar- and select appear the below picture: 2、Second, select icon tick the settings of “ActiveX controls and plug-ins”to Enable, details as follows: Lastly after tick all the “Enable”, please click to exit. - Page 41 User Manual Open IE browser and input IP address and web port of DVR…computer will auto downloadand install the widget. We suggest Visita user set user access authority in order to make your PC safer. Setting processing as follows: Click [Start Set Control panel User account] to set user access authority shown as below picture.
-
Page 42: Chapter 9: Appendix
Live display Real time video input remotely Remote recording Setting recording mode and status of DVR remotely Remote playback Check local recording history via network Network PTZ control Remotely control PTZ camera, position, focus, zoom and iris etc. -
Page 43: Recording Alarm Setting
Q: Can I use the hard drive from my PC in the DVR? A: You can if the hard drive is the same type and the size is supported by the DVR. If you install it in the DVR it will be formatted for use in the DVR and the PC will not be able to read it. -
Page 44: Email Server Check List
3. Please not plug in RS-232 and RS-485 when power is on to avoid any damage to the port. 4. Please check the HDD cable and data cable to avoid the cable aging. 5. Please avoid other electronics device interfere video/audio signal of DVR a.s.a.p., or static electricity and induced voltage damage to DVR. -
Page 45: System Connection Configuration
User Manual 9.6 System connection Configuration 4-CH 8-CH... - Page 46 User Manual...
- Page 47 Handleiding Veiligheid Lees deze handleiding eerst door alvorens het product te gebruiken. Volg de instructies op anders zou de garantie kunnen vervallen. Neem ook altijd alle veiligheids maatregelen om brand en/of een electrische schok te voorkomen. Tevens is het ook raadzaam om reparaties / modificaties e.d. over te laten aan gekwalificeerd personeel om een electrische schok te voorkomen..
- Page 48 DVR slaat real-time beelden op, op de HDD Opname Backup Ondersteunt DVR backup via USB flash-drive en hard-drive. Afspelen Opnamen Ondersteunt DVR enkel- en meerkanaals playback van opgenomen files Netwerk Ondersteunt bewaking op afstand door meerdere gebruikers tegelijk Ondersteunt HDD & video ingang alarm-management en externe alarm...
- Page 49 Handleiding Hoofdstuk 2 : Overzicht 2.1 Voorzijde 2.1.1 4-Kanaals voorpaneel Item Naam Markering Functies Aan/Uit schakelaar Aan- en uit schakelen De “Groene” indicator geeft aan dat het apparaat aan Aan/Uit indicator staat IR Sensor Ontvangt signalen van de afstandsbediening Als de “Rode” indicator knippert betekent dit dat de HDD indicator Hdd wordt gelezen of dat er naar geschreven wordt Kanaalkeuze:...
- Page 50 Handleiding 2.1.2 8-Kanaals voorpaneel Aan/Uit schakelaar PAUSE: Pauze / “Frame” afspelen PWR: PWR Indicator PLAY: Afspelen IR-sensor voor afstandsbediening FWD: Verderspoelen / Cursor naar rechts HDD Indicator STOP: Stop afspelen / Stop “manual”- opname SEARCH: Recording Search REC: “Manual”- opname MUTE: Audiosignaal dempen MENU/ESC: Menu / Verlaten CH-: Naar vorig kanaal schakelen...
- Page 51 Handleiding 2.2 Achterzijde 2.2.1 4-Kanaals achterpaneel Item Aansluiting/poort Item Video ingang Kan.1-4 ( BNC interface) Video uitgang Monitor ( BNC interface) Audio ingang Kan.1-4 audio signaal (RCA interface) Audio uitgang Signaal uitgang (RCA interface) Ethernet: Poort Intranet, internet (RJ45 interface) VGA Poort VGA monitor USB Poort...
- Page 52 Handleiding RS 485 Poort Config. 8-Kan: RS485/Sensor/Alarm poort functies 4-Kan: RS485/Sensor/Alarm poort (van links naar rechts): functies (van links naar rechts): Pin 1-2:PTZ Control poort Pin 1-2:PTZ Control poort Pin 1:RS-485A / Pin 2:RS-485B Pin 1:RS-485A Pin 3-4:Sensor 1 ingang Pin 2:RS-485B Pin 4-5:Sensor 2 ingang Pin 3-4:...
- Page 53 Handleiding Kanaalkeuze 1-8 ; Nummeriek 2.3 Afstandsbediening Kanaalkeuze 9-0 ; Nummeriek 9、0 Alle kanalen vooraf bekijken Menu Enter/Exit Hoofdmenu ▲ Cursor omhoog ▼ Cursor omlaag ◄ / Cursor naar Links / Rechts Keuzetoets/ Edit toets Terugspoelen Afspeeltoets / Naar opname search menu Verderspoelen ●...
- Page 54 (3) Plaats het bovendeksel terug en bevestig de schroeven 3.2 Camera en Monitor Aansluitingen Sluit de camera aan op de video ingang en de monitor op de video uitgang van de DVR via BNC connectoren (Zie Hoofdstuk 2.2 achterzijde) of als de camera een PTZ speed dome is gebruik connector RS485 A &...
- Page 55 Handleiding Hoofdstuk 4 : DVR Opstarten 4.1 Systeem Initialiseren Na het aansluiten van de adapter en het aanzetten van de de DVR zal het systeem opstarten en beginnen met initialiseren. Fig. 4-1 4.2 Main Interface Na het initialiseren komt het systeem in Main Interface (zie fig. 4-2) , die in deze figuur geen video-ingangssignalen weergeeft.
- Page 56 Handleiding 5.1 Hoofdmenu Preview Kleur-set Camera Dwell time display Record Network Search Playback Rec. Search File List HDD Management Alarm Setting E-mail setting Device PTZ Setting Management Mobile Zone setting Bewegin Tijdinstelling Passwoord A/V Setting System Taal Selecteren Systeem Informatie Systeem Onderhoud 5.2 Hoofdmenu Wanneer u na het initialiseren rechts-klikt in Main Interface Mode...
- Page 57 Handleiding 5.2.1 Camera setup Klik [Main Menu Camera] om de naam en positie van ieder kanaal in te stellen (Zie fig. 5-3). Ieder kanaal kan vooraf worden bekeken (of niet) in Live View en/of Recording mode. NB : De naam van elk kanaal kan uit 8 karakters bestaan. Fig.
- Page 58 PPPOE, STATIC en Setup webpoort, kunt u via het netwerk op afstand de camerabeelden bekijken. Fig. 5-7 Na het selecteren van DHCP, zal de DHCP server de DVR automatisch een IP adres toewijzen. Na het selecteren van Type= PPPoE, moet de gebruikersnaam en passwoord worden ingegeven.
- Page 59 DVR via de internet browser bekijken. (zie fig. 5-10) Fig. 5-10 Wanneer je de DVR via Internet wilt bekijken, moet de juiste poort “geforward” worden in de router waarop de DVR is aangesloten (zie fig. 5-11).
- Page 60 Handleiding 5.2.4 “Searched”- opzoeken en afspelen Klik [Main menu search] om in [Video Search] menu te komen (zie fig. 5-20). Searched playback: Als u een bepaalde datum ingeeft en klikt op [Search], vindt u alle opnames van die dag. Wanneer [Date] wordt geselecteerd, zullen de opnamen in 4-kanaals mode worden afgespeeld of klik op [File list] om de File list interface weer te geven, waar u een geselecteerde file kunt afspelen.
-
Page 61: Multimedia Player
Handleiding 5.2.5 Multimedia player 1、Kopieer een backup file naar uw PC. 2、Open multimedia-player en klik [File Local (F)] om de backup file te selecteren en klik dan op [open] N.B. : Het geselecteerde filetype moet een *.264 formaat zijn. Fig. 5-24 Fig. - Page 62 Handleiding Afspelen Alle schermen Vorige opgenomen file Scherm toevoegen Pauze Start Stop Knippen Voorgaande frame / Volgende frame Verwijderen Langzaam, Normaal, Snel afspelen Convert AVI Volgende Uur Sla huidig frame op Mute schakelaar Beeldscherm verkleinen Volume regeling 4、Zie hieronder de [Video-on] instel procedure (Systeem default - video voor elk kanaal is aan) Selecteer Video play setting Normal video Bar Fig.5-27.
- Page 63 NO contacten en gebruik NC bij sensoren met NC contacten, gebruik “OFF” als u geen externe sensoren gebruikt. In dit geval kunt u de interne bewegingsdetectie mode (Motion) van de DVR gebruiken. M.b.v. deze mode zijn zone’s in te stellen, bij bewegingsdetectie worden geen sensoren gebruikt.
- Page 64 OFF selecteert volgt er geen alarm. VIDEO LOSS: De opties zijn ON en OFF. Als u ON selecteert hoort u een alarm wanneer de DVR geen videosignaal ontvangt.tevens wordt er in het beeld de melding “video loss”weergegeven; als u OFF selecteert volgt er geen alarm., toch zal dan in het beeld de melding “video loss”...
- Page 65 Ontvanger adres: Geeft het email adres van de ontvanger weer. Het email adres wordt gebruikt om beelden te ontvangen die door de DVR zijn verstuurd na een bewegingsdetectie. Verwijder de mail met beelden z.s.m. om te voorkomen dat de mailbox vol raakt. Voor gedetailleerde SMTP protocol instel lingen zie fig.
- Page 66 De DVR ondersteunt mobiele telefoons onder Windows Mobile- en Symbian besturingssysteem in 3G netwerken. Voordat u toegang heeft tot de DVR vanaf een mobiele telefoon moet u de Network-Configuration instellen op the DVR. Ga naar sectie 5.2.3 Network-Setup op pagina 14. Ga ook naar Main Menu...
- Page 67 Web port: Instelling is tussen 1024 en 65535 én zet de Server Poort op (?)18600 Onthoud u dit. Deze moet “geforward” worden naar het IP adres Van de DVR. Let op: deze poort is een extra toevoeging bij de poorten die gebruikt worden bij standaard externe toegang.
- Page 68 Server Adres: Voer het IP-adres van de router in waaraan de DVR is aangesloten.(kijk naar sectie 5.2.3 Network Setup). Server Port: Web poort: Zelfde als de webpoort instyelling van de DVR, U moet deze poort forwarden in de routervan de...
- Page 69 Zelfde als de gebruikers naam setup van de DVR onder Menu, Devices, Mobile Paswoord: Gelijk aan paswoord setup van de DVR. (Druk op functie toets om het paswoord op te slaan, linker “soft key” kan niet gebruikt worden om het paswoord op te slaan) Kanaal: Selecteer het kanaaldat u wilt bekijken en klik op [OK] toets om “video connection”te starten.
- Page 70 Handleiding Met een iTunes Store Account kunt u de 2.1.5 Continue laatste Muziek- en Video versies en meer downloaden. Klik op Continue voor aanmaken account 2.1.6 Selecteer & klik Continue 2.1.7 Vul uw persoonlijke gegevens in en klik op Continue. Houd er rekening mee dat de betalings condities per regio verschillen, selecteer een andere betaal methode.
- Page 71 Handleiding 2.1.5 Kijk in uw email box om uw account te verifieren. Klik op de link in het email bericht. U gaat naar “ iTunes store “ en iTunes interface. Meldt uw account aan.
- Page 72 Handleiding Uw iTunes-store-account is aangemaakt. 2.2 Computer Authorisatie U dient uw computer te authoriseren met de registered-ID. Ga naar het menu “Store”, en klik op “Authorize Computer”. Vul uw ID & password in en klik op Authorize. 2.3 Download & installeer “Aplayer” op uw iPhone...
- Page 73 Handleiding 2.3.1 Klik op iTunes Store(1), vul in “aplayer” in de zoekbalk (2) rechts bovenaan en druk op Enter. U ziet het Aplayer icoon hieronder. 2.3.2 Klik op het icoon en u komt op de download pagina. Klik “GET APP” om de file te downloaden. U vindt de gedownloade file in the directory “Application”.
- Page 74 Handleiding 2.3.3 Sluit uw iPhone aan op de computer, uw toestel is links onder Device in iTunes terug te vinden. Selecteer DEVICES ID(1), klik op “Applications”(2). Selecteer “Sync Applications” & “Aplayer” (3) en klik op “Sync”(4). * De devices-ID is per iPhone anders. Nadat het synchroniseren is voltooid vindt u het Aplayer Icoon op uw iPhone.( Fig.
- Page 75 10 . Setup 3.1 Toegang informatie setup Ga naar Settings (setup menu) en vul de informatie in, overeenkomend met uw DVR-Mobile settings. Server IP: Vul het IP adres in om toegang tot uw DVR te krijgen. Port: Zie DVR mobile settings.
- Page 76 Datum en Tijd in te stellen, maar ook DST (day saving time) status en mode. Fig. 5-41 5.2.7.2 Passwoord Deze optie stelt u in staat de Device-ID voor de DVR in te stellen en het passwoordgebruik in/uit te schakelen. Nieuwe passwoorden zijn pas beschikbaar na [APPLY] te hebben aangeklikt.
- Page 77 MAC adres. Fig. 5-46 5.2.7.6 Systeem Onderhoud M.b.v. deze optie kunt u de DVR resetten naar standaard instellingen (default settings), systeem updaten (software) en het systeem op auto-maintenance zetten. Click [Main menu System Maintain] to enter into the [System Maintain] menu (shown as Picture 5-47).
- Page 78 [Cruise-Setup] en klik vervolgens op [Set] en [Save] om op te slaan. Clean: Verwijderen van instellingen. N.B.: Dit DVR model ondersteunt 100 preset-points , dit kan worden beperkt door de eigenschappen van de PTZ-camera die u gebruikt.
- Page 79 Net-Viewer Programma 6.1 Plug-ins download en installatie Open de IE browser en breng het IP-adres en webpoort van de DVR in, bv http://172.18.6.202:80/ en bevestig download en installatie webcam. Als uw computer verbonden is met internet, zal deze automatisch de webcam downloaden en installeren.
- Page 80 Handleiding 6.3 Net-viewer Interface Fig. 6.3 Log in op Net-viewer. Bediening : 6.3.1 Menu (Zie fig. 6-3 item 1) 6.3.2 PTZ (Zie fig. 6-3 items 2-3-4) 6.3.3 Live Weergave (Zie fig. 6-3 items 5-6-7-8-9) 6.3.1 Menu Menu inhoud : [Live] menu, [Replay] menu, [Setup] menu, [Logout] menu.
- Page 81 Control] Menu, [Network Setting] menu, [System Setting] menu and [Host Info] menu. Uitleg: Alleen wanneer de DVR in de [live-display] status is, kunt u parameters op afstand wijzigen en opslaan. De DVR instellen via Net-viewer gaat op de zelfde manier als de DVR rechtstreeks instellen.
-
Page 82: Host Info
Fig. 6-9 ④ Network Klik op [Network] om in het [Network] menu te komen. De methode om op afstand in te stellen is hetzelfde als de [DVR setup]. Zie Sectie 5.2.3. – Network Set. Fig. 6-10 ⑤ Setting Klik [Setting] om in het interface menu(Fig.6-11) te komen. - Page 83 ]:Wanneer Live display status op “On” staat, wordt bij een klik de status gesloten en vice versa. ] :Capture Screen image en sla het op de PC op als bmp image. .Capture [ :Op afstand DVR-opnamen inschakelen. .Recording [ .Kanaal Weergave [ ]: De iconen geven respectievelijk Enkel-kanaals display, 4-Kanaals display, 3x3 Kanaals display en 4x4 Kanaals display weer.
- Page 84 Supports TCP/IP, DHCP, UDP, DDNS, PPPOE network Protocol Support preview live display remotely via mobile phone and real time monitoring via IE-based Network Function browser and/or network, and support parameter setting of DVR remotely Power consumption 10~15W (exclude HDD) Power Adapter...
- Page 85 Handleiding Hoofdstuk 8: Windows Vista User 1、Open IE browser, ga naar Tool bar selecteer om de volgende weergave te zien: 2 、 Selecteer het icoon klik de instellingen van “ActiveX controls plug-ins” schakelen, details zijn als volgt: Als u alle “Enable”- instellingen heeft aangevinkt, klikt u op om [Settings] te verlaten.
- Page 86 Handleiding Open de IE browser en voer het IP adres en de web port van de DVR in De computer zal automatiscch de widget downloaden en installeren. Wij adviseren voor Visita gebruikers, gebruikers account om uw PC veiliger te maken. Setting processing as follows: Click [Start Set Control panel User account] om gebruikers toegang in te stellen.
- Page 87 Lijst 9-2 Wanneer de DVR in opname mode staat, verschijnt een [ ] of [ ] icoon op het scherm. [ ] en [ ] iconen op het scherm geven een bewegingsdetectie weer. Een [ ] icoon verschijnt wanneer een hard drive alarm plaatsvindt.
- Page 88 . V: We hebben een PTZ camera aangesloten maar kunnen deze niet bedienen? A: Verifieer dat het Protocol, baud rate, adres, en andere instellingen op de PTZ camera overeenkomen met de instellingen die gedaan zijn op de DVR. Zorg ervoor dat de datakabels goed zijn aangesloten op de RS485 poort van de DVR.
- Page 89 Handleiding 9.6 Systeem aansluitingen 4-Kanaals 8-Kanaals...
- Page 90 Specifications and design are subject to change without prior notice.. www.tronios.com Copyright © 2010 by TRONIOS the Netherlands...
Need help?
Do you have a question about the DVR and is the answer not in the manual?
Questions and answers