Table of Contents
Advertisement
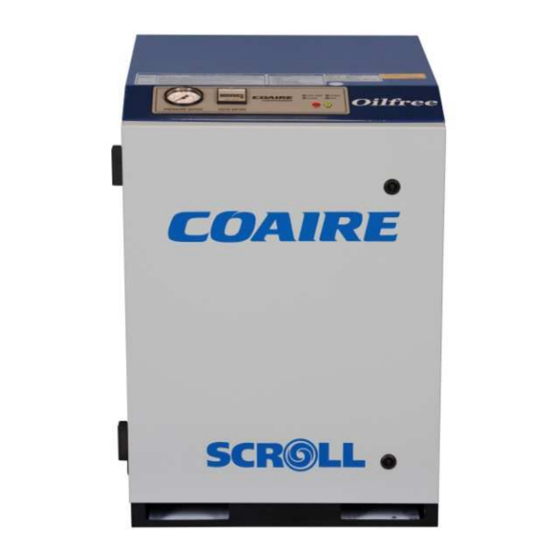
OILLESS SCROLL AIR COMPRESSORS
All rights reserved
For proper and safe use of the compressor, please follow all instructions and safety precautions as identified in
this manual, along with general safety regulations and practices.
MAINTENANCE MANUAL AND PARTS LIST
CSOF-M3PL/H12
CSOF-M3PL/H22
CSOF-M3PL/H32
CSOF-M3PL/H42
CSOF-M5PL/H22
CSOF-M5PL/H32
CSOF-M5PL/H42
CSOF-S8PL/H22
CSOF-S8PL/H32
CSOF-S8PL/H42
CSOF-S10PL/H22
CSOF-S10PL/H32
CSOF-S10PL/H42
September, 2012
Printed in U.S.A.
Advertisement
Table of Contents

Related Manuals for Coaire SCROLL CSOF-M3PL/H12

Summary of Contents for Coaire SCROLL CSOF-M3PL/H12
- Page 1 OILLESS SCROLL AIR COMPRESSORS MAINTENANCE MANUAL AND PARTS LIST CSOF-M3PL/H12 CSOF-M3PL/H22 CSOF-M3PL/H32 CSOF-M3PL/H42 CSOF-M5PL/H22 CSOF-M5PL/H32 CSOF-M5PL/H42 CSOF-S8PL/H22 CSOF-S8PL/H32 CSOF-S8PL/H42 CSOF-S10PL/H22 CSOF-S10PL/H32 CSOF-S10PL/H42 September, 2012 All rights reserved Printed in U.S.A. For proper and safe use of the compressor, please follow all instructions and safety precautions as identified in...
- Page 2 STATEMENT OF WARRANTY TERMS & CONDITIONS COAIRE’s scroll air compressors are warranted to be free of defects in materials and workmanship u nder proper use, installation, and application. This warranty shall be for a period of 15 months from date of shipment from our factory or 12 months from date of installation or 5000 hours run time after start-up whichever comes first.
-
Page 3: Table Of Contents
CONTENTS 1.0 Table of contents Table of contents -------1 Control 7-1 Controller ------21 Safety and warnings 7-2 Major functions ------21 2-1 General -------2 7-3 Configuration of functions ------22 2-2 Safety caution -------2 7-4 Error messages ------28 2-3 Safety and warnings -------3 Maintenance General... -
Page 4: Safety And Warnings
4) Do not leave inflammables and explosives near the air compressor. 5) Make sure to use only the genuine Coaire parts. Other types of replacement may cause a serious failure. 6) The equipment shall safely be operated in compliance with all safety requirements and regulations. -
Page 5: Safety And Warnings
SAFETY AND WARINGS 2-3 Safety and Warnings 2-3-1 CSOF-M3PL(H) , CSOF-M5PL(H) HAZARDOUS VOLTAGE INSIDE. SHUT OFF POWER. WILL SHOCK, CAUSE INJURY OR DEATH. DO NOT TOUCH! HOT SURFACE. WILL CAUSE INJURY. HIGH PRESSURE. SAFETY DEPRESSURE THE COMPRESSED AIR. FLYING PARTS FROM COMPRESSED AIR CAN CAUSE INJURY OR DEATH. - Page 6 SAFETY AND WARINGS 2-3-2 CSOF-S8PL(H) , CSOF-S10PL(H) DO NOT TOUCH! HOT SURFACE. WILL CAUSE INJURY OR DEATH. [ Fig. 2-3 Front Side WILL CAUSE INJURY OR DEATH. DO NOT TOUCH! HOT SURFACE. HIGH PRESSURE. SAFETY DEPRESSURE THE COMPRESSED AIR. FLYING PARTS FROM COMPRESSED AIR CAN CAUSE INJURY OR DEATH.
-
Page 7: General
GENERAL 3.0 General 3-1 Specification Model CSOF-M3PL(H) CSOF-M5PL(H) CSOF-S8PL(H) CSOF-S10PL(H) Type Single Stage Oil Free Scroll Air Compressor 115 psi 14.1 22.6 28.3 Delivery (cfm) 140 psi 19.2 UNIT Driving 3V-380x2EA Belt 3V-360x2EA 3V-380x2EA 3V-405x4EA Method 3V-405x2EA High temp. stop (℉) 2.2/3 x 1SET 2.2/3 3.7/5... -
Page 8: Major Component
GENERAL 3-2 Major Component 3-2-1 CSOF-M3PL(H), CSOF-M5PL(H) #. DESCRIPTION 1. COMMON BASE 2. COVER & FRAME 3. AIREND 4. MOTOR 5. MOTOR PULLEY 6. AIREND PULLEY 7. SUCTION FILTER 8. AIR RECEIVER TANK 9. AIR DELIVERY PIPE 10. AIR COOLER 11. - Page 9 GENERAL 3-2-2 CSOF-S8PL(H), CSOF-S10PL(H) #. DESCRIPTION 1. COMMON BASE 2. COVER & FRAME 3. AIREND 4. MOTOR 5. MOTOR PULLEY 6. AIREND PULLEY 7. SUCTION FILTER 8. AIR DELIVERY SOCKET 9. AIR DELIVERY PIPE 10. AIR COOLER 11. COOLING FAN 12.
-
Page 10: System Diagram
GENERAL 3-3 System Diagram 3-3-1 CSOF-M3PL(H), CSOF-M5PL(H) [ Fig.3-7 ] System Diagram The CSOF-M Series are an oil-free scroll air compressor. In an operation, a main motor is run to initiate the compression at an airend. The external air is filtered through a suction filter before entering into the airend. - Page 11 GENERAL 3-3-2 CSOF-S8PL(H), CSOF-S10PL(H) [ Fig.3-8 ] System Diagram The basic principle of the CSOF-S8PL(H) and CSOF-S10PL(H) is equal to that of CSOF-M3PL(H) and CSOF-M5PL(H). However, the CSOF-S8PL(H) and CSOF-S10PL(H) have two airends to sequentially be started up depending on the load to be used. As there is no air tank in the compressor, a drain valve is used on the discharge end to drain the condensate water generated during the compression.
-
Page 12: Installation
INSTALLATION 4.0 Installation 4-1 Inspection When you receive the compressor please inspect it closely. Upon delivery, carefully check the compressor for damage during transportation. If goods are received in damaged condition, it is important that you notify the carrier and insist on a notation of loss or damage across the freight bill. -
Page 13: Installation
4-3 Installation 4-3-1 Where to Install Coaire air compressor is designed for the indoor use. The ventilation facility and piping affect the performance and the service life of the compressor. Please follow the instructions in the user’s manual. [ Fig.4-4 ] Installation of the Air Compressor 4-3-2 Ventilation Poor ventilation in the compressor room may raise the temperature of the air discharged. -
Page 14: Requirements For The Piping
Foundation - It is recommended to install the compressor 4inch above the floor, though Coaire air compressor generates an insignificant amount of vibration. - Optimal ambient temperature is 32~104℉ during the operation. - Install the compressor at low temperature and moisture, if possible. -
Page 15: Wiring
INSTALLATION 4-4 Requirements for the Piping 1) Use a larger diameter and install the pipe without an excessive bending to reduce the pressure drop. 2) Always place a branch pipe on the top of a main pipe to reduce the discharge of oil or water. 3) For the compressed air pipes, reduce the number of sections bending and connecting, and the number of valves installed to reduce the pressure loss. - Page 16 INSTALLATION 7) It is recommended that the thickness of the cable shall allow more than the minimum requirement specified for a power condenser, and the length of the cable shall be within 1.5 m. No wiring is necessary if there is a power condenser with a sufficient capacity in the bus conductor. 8) Leave intact the factory specification of the overcurrent protection device.
- Page 17 INSTALLATION [ Table 4-4 ] Electrical Specification(3 Ph) Main Driving Starting Voltage Output Input MCCB Power Ground Current Current Cable Model (Poles) TRIP [kW] [kW] [㎟] 208-230 63.8 CSOF- M3PL(H) 2.84 (4P) 32.3 15.8 208-230 14-13.2 93.8 CSOF- M5PL(H) 4.53 (4P) 44.8 63.8...
-
Page 18: Operation
OPERATION 5.0 Operation 5-1 Commissioning ( Initial Operation ) 5-1-1 Structure of the Controller Start monitor Stop Menu Cancel Down Enter Reset [ Fig 5-1 ] Control Button 5-1-2 Checklists before the Commissioning 1) Check if the voltage of the main power is within a normal range specified. 2) Cut the main power to connect the power line to the control panel. -
Page 19: Routine Operation
OPERATION 5-2 Routine Operation 5-2-1 Checklists before the Operation Check the following conditions before starting the operation. 1) Connect the main power to check the display on the monitor. 2) Push the “START” button on the controller to check if the compressor is well started up, and the indicator lamps are normally on. - Page 20 OPERATION 5-2-2 Start-Up 1) Check if the tank pressure is 0 psi. 2) Check if the monitor indicates a normal condition for the operation, and then push the “RUN” button. 3) Fully open the valve on the discharge side before starting the compressor. 4) Check if there is any abnormal noise, and the operation is in good condition.
-
Page 21: Functional Descriptions
FUNCTIONAL DESCRIPTIONS 6.0 Functional Descriptions 6-1 Airend An oil free scroll airend is the most important part in the compressor. In any case, the oil is not entered into the compression chamber. As the inside of the compression chamber is delicate, entering the dusts or foreign substances results in a serious damage to the compressor. -
Page 22: Fan
6-5 Suction Filter An airend consists of precision parts that need a clean air to be used for an optimal service life. Coaire air compressor is equipped with a paper suction filter that has 99.9% of the dedusting efficiency. The filer needs to be replaced every 2000-3000 hrs. If it is unavoidable circumstance, the reuse is only allowed once after cleaning. -
Page 23: Control
7.0 Control 7-1 Controller Coaire air compressor uses a controller based on a microprocessor for an optimal operation of the compressor. The controller is a system that precisely determines the time to adjust the capacity to save the energy, gives an alarm to prevent the accident before happens, and notifies the information necessary for repair and maintenance. -
Page 24: Configuration Of Functions
CONTROL 7-3 Configuration of functions [ Fig.7-2 ] Keypad of Controller [ Table 7-1 ] Description of Keypad Enter started condition/Exit started condition STRAT / STOP RESET Reset and clear fault condition MENU Enter to Menu table ENTER Confirm selection of value adjustment Scroll up/down through menu, menu item options UP / DOWN or increment/decrement value... - Page 25 CONTROL 7-3-1 Status Display Ramp STATUS LED Green Display working status along ON / OFF FAULT, ALARM LED Display fault or alarm status along ON / OFF ※ NOTE 1) ON : illuminated continuously 2) SF : slow flash on/off once per second 3) FF : fast flash on/off five times per second 4) IF : Intermittent Flash on/off every four seconds 5) OFF : Extinguished continuously...
- Page 26 CONTROL 7-3-3 Equipment Status Display 1. START/STOP REQUEST SOURCE DISPLAY LOC : Controller keyboard NET : Communication request REM : Digital inputs 2. LOAD REQUEST SOURCE DISPLAY PRE : Pressure sensor NET : Communication request (Option) REM : Digital inputs 3.
- Page 27 CONTROL 7-3-5 Digital Input Symbols Symbol Description Remark Over-load Main Motor #1 fault (open) Over-load Main Motor #2 fault (open) Emergency Switch fault (open) Remote Start/Stop Control Run (closed) INPUT fault (open) 7-3-6 Digital Output Symbols Symbol Description Description Compressor #1 Main Magnetic Contactor Compressor #2 Main Magnetic Contactor N1, N2 Alram...
-
Page 28: Main Menu
CONTROL 7-3-7 Menu structure and navigation Main Menu Select Sub Menu Select Parameter Adjustment [Fig.7-3 ] Menu structure and navigation 7-3-8 Menu level ACCESS LEVEL USER (CODE = 0000) SERVICE 1 (CODE = 0100) 00. STATUS MODE 00. STATUS MODE 01. - Page 29 CONTROL [ Fig.7-4 ] ACCESS CODE ENTRY DISPLAY NOTE 1) When access level is “SERVICE 1”, [Equipment Environment Setup] menu cannot be adjusted. 2) Press “CANCEL” button for three seconds at any time to return to the system locked condition. 7-3-9 Digital output ACCESS CODE ( 0100 ) Editable...
-
Page 30: Error Messages
CONTROL 7-4 Error messages 7-4-1 TRIP / ALARM MESSAGE Item Description Detect condition System Error Parameter Error Emergency stop Push the emergency stop switch Press. Sensor Fault Low Resistance, Short Circuit, Short Circuit to Earth Detection Pressure >= [ DIS. PRESS LIMIT] Delivery Pressure High Reset Pressure <... -
Page 31: Maintenance
MAINTENANCE 8.0 Maintenance 8-1 Scheduled Maintenance – Low pressure 115 psi (Model : CSOF-M3,5PL/ CSOF-S8,10PL) Maintenance should be followed below criteria A,B,C ■ Criteria A: Under 2,500 working hours (annually) ■ Criteria B: Between 2,500 ~ 5,000 working hours (annually) ■... -
Page 32: Scheduled Maintenance
MAINTENANCE 8-2 Scheduled Maintenance – High pressure 140 psi (Model : CSOF-M3,5PH/ CSOF-S8,10PH) Maintenance should be followed below criteria A,B,C ■ Criteria A: Under 2,500 working hours (annually) ■ Criteria B: Between 2,500 ~ 5,000 working hours (annually) ■ Criteria C: Over 5,000 working hours (annually) ○... -
Page 33: Maintenance
High Pressure (140 psi). The maintenance period is different by type specified in the identification plate attached on an airend. The standard specification of Coaire airend is a low pressure type. 3) Periodically lubricate an airend with grease. See the maintenance schedule for when the lubrication is needed. - Page 34 MAINTENANCE 8-3-3 Adjustment of the Belt Tension Adjust the belt tension in first 500 hrs after the purchase, and every 3,000 hrs (6 months) thereafter in the following procedures. 1) Use a tension-meter to measure the displacement of each belt. 2) Loose the anchor bolt on the motor base, and use the tension adjusting bolt to adjust the tension with reference to the [Table 8-1].
- Page 35 1) An air compressor is automatically operated. Do not check and replace the belt until the compressor is stopped and the main power is turned off. 2) Only use the belt specified by Coaire for a replacement. Do not use old and new belts mixed, and replace the entire set of belts all at once.
- Page 36 MAINTENANCE 8-3-6 Check valve Compressed air leakage may come from suction filter SPRING originated form check valve leakage. In severe case, airend Back-lash occurred. This case may cause severe damage to SEAT airend because of foreign objects from outside. To prevent VALVE BODY possible defect, check valve every 2,500hours 1) Screw CAP open .
-
Page 37: Troubleshooting
TROUBLESHOOTING 9.0 Troubleshooting 9-1 Overview The following flow diagrams show the procedures to repair the typical failures. If the alarm is on and the compressor is stopped, do not restart the operation until the cause is clearly addressed and eliminated. Always turn the main power off, and remove the pressure from the compressor prior to a repair and maintenance. - Page 38 TROUBLESHOOTING 9-2-3 Unable to Start Motor Unable to start motor - Take necessary action to correct the Check the error message error on the controller - Check the tripping error - Check the resistance of incoming line Lead-in wiring is disconnected - Test wiring and cable capacity, and replace the cable, if necessary...
- Page 39 TROUBLESHOOTING 9-2-4 No Compression Low discharge pressure - Check the pipe for leakage Excessive amount - Install an additional compressor if of air used the capacity is insufficient Suction filter is - Clean the suction filter, and clogged replace, if necessary - Check the rotation Airend is - Check if there is any abnormal...
- Page 40 TROUBLESHOOTING 9-2-6 Discharge Temperature Rise Discharge temperature rise Error message “High temp.” appears - Keep the internal temperature 104℉ or below High ambient temperature - Check the ventilation facility and duct - Check the input/out of the temperature sensor Check the controller - Replace the temperature sensor, if necessary...
-
Page 41: Outline Drawings
OUTLINE DRAWINGS 10.0 Outline drawings 10-1 CSOF-M3PL(H), CSOF-M5PL(H) EXHAUST AIR OUTLET (SIROCCO FAN) EXHAUST AIR OUTLET (COOLING FAN) 57mm [2.2"] 28mm [1.1"] 118mm [4.6"] 166mm [6.5"] CONTROLLER EMERGENCY STOP POWER IN AIR DISCHARGE (1/2") WATER DRAIN (1/4") 640mm [25.2"] 100mm [3.9"] 700mm [27.6"] 740mm [29.1"]... -
Page 42: Csof-S8Pl(H), Csof-S10Pl(H)
OUTLINE DRAWINGS 10-2 CSOF-S8PL(H), CSOF-S10PL(H) 376mm [14.8"] 122mm [4.8"] AIR INTLET 169mm [6.7"] 221mm [8.7"] Ground R S T Main Terminal block EXHAUST AIR OUTLET EMERGENCY STOP AIR OUTLET PS 25A(PS1") MAIN POWER INLET 75mm [3"] 640mm [25.2"] 1150mm [45.3"]... -
Page 43: Electrical Wiring Drawings
ELECTRICAL WIRING DRAWINGS 11.0 Electrical wiring drawings 11-1 CSOF-M3PL(H), CSOF-M5PL(H) -
Page 44: Csof-S8Pl(H), Csof-S10Pl(H)
ELECTRICAL WIRING DRAWINGS 11-2 CSOF-S8PL(H), CSOF-S10PL(H) -
Page 45: Startup Report
STARTUP REPORT Please fill out completely and return to the factory to validate warranty. CUSTOMER AND MACHINE INFORMATION CUSTOMER FACTORY SHIP DATE ADDRESS DATE STARTED UP CITY/STATE MODEL NUMBER PHONE SERIAL NUMBER WRITTTEN BY HOURS ON MACHINE Hrs. MACHINE INFORMATIONS AND INITIAL STARTUP Compressor Environment- excellent , good , fair... -
Page 46: Warranty Claim Report
Warranty Claim Report Please complete the following claim form, your claim will be confirmed by our sales representative. To : Coaire, Division of Quietside 8750 Pioneer Blvd., Santa Fe Springs, CA 90670 Tel(562)576-1330.Fax(562)699-4351 email: support@coaire.com Company Date Distributor Model Address Serial No. - Page 47 QUALITY AND RELIABILITY WITHOUT COMPROMISE COAIRE reserves the right to make changes, at any time without notice as a result of our commitment to continuous improvement.
Need help?
Do you have a question about the SCROLL CSOF-M3PL/H12 and is the answer not in the manual?
Questions and answers