
Related Manuals for Onix mp4-p13

Summary of Contents for Onix mp4-p13
-
Page 1: Multimedia Player
Multimedia Player Instruction Manual • Model Number mp4-p13 After Sales Support TEL: 1300 886 649 N13275... -
Page 2: What Your 1 Year Warranty Means
Congratulations on choosing to buy a ONIX product. All products brought to you by ONIX are manufactured to the highest standards of performance and safety, and, as part of our philosophy of customer service and satisfaction, are backed by our comprehensive Year Warranty. -
Page 3: Table Of Contents
Contents 1 What your 1 year warranty means 3 Feature list 4 Locating the controls Basic Operation 5 Keys operation 6 Play music Record voice 7 Play recorded files How to use FM 8 Browsing JPEG System setting 9 List of menus 11 USB Disk Convert video files into AMV 13 FAQ’s... - Page 4 The Media Player is a new generation digital portable device, supporting multiple music formats including MP3, WMA, WAV and more. Its perfect sound quality, great reliability and exquisite appearance makes it a masterpiece. Unique Features • MTV film function • Function to browse JPEG pictures •...
-
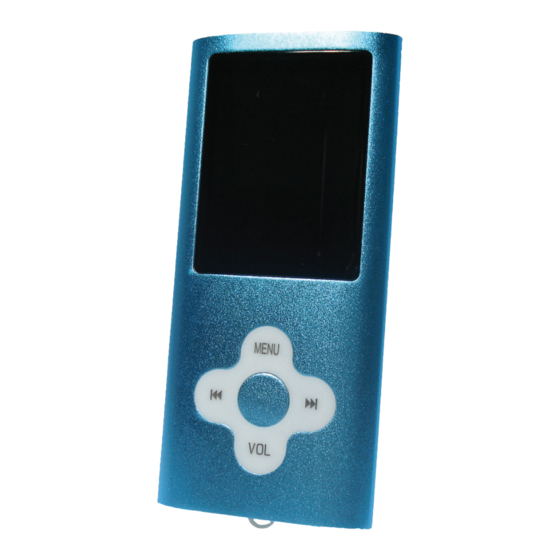
Page 5: Locating The Controls
Locating the Controls Display screen Repeat mode Equalizer Speaker Replay mode Battery Play times Song numbers Song name File format Basic Operation • Entering Menu System: Pressing the Menu button will enter into the menu system, including main menu (long press of menu key at Stop mode), submenu at Play mode (press to enter) and submenu at stop mode (press to enter). -
Page 6: Keys Operation
Voice mode: FM mode: Browsing picture mode: Setting mode: USB mode when connecting to a PC: • Volume Control. First press “VOL”, then press “Pre”/“Next” button to decrease/increase Volume. • Play & Stop (Pause when recording). Press “Play”. You may press the Play button to fast exit from setup submenu interfaces. Keys Operation 1. -
Page 7: Play Music
Play Music • Basic Operation 1. Connect the earphones 2. Press the PLAY button to turn on the player and enter the Music mode. Press the play button again to play music. 3. To select music: : to select the previous song : to select the next song 4. -
Page 8: Play Recorded Files
Play Recorded Files 1. Enter main menu. 2. Push Next to select “Voice mode”. 3. Press Menu button to enter Voice mode interface. 4. Press Play to start playing. 5. Select recorded files. Pre: to select the previous recorded file. Next: to select the next recorded file. -
Page 9: Browsing Jpeg
Browsing JPEG a. File selection: Enter the file selection. Press the “play” button and browse JPEG. Press the “ /Last” button to select the next/last file. Press the “mode” button, enter the stop submenu. 1. Local folder 2.play set 3.delete 4.exit Play set: manual play and auto play. -
Page 10: List Of Menus
Options introduction: System Time Setting date and time when saving recorded file REC type Sets the format which voice will be recorded on. LCD set Screensaver and brightness setting Language Choosing different languages Power off Setting a count down time in minutes, the player will shut off when time out. Replay Mode Setting repeat status Online Mode... - Page 11 • Language Setting This player has multi-languages. Press “Menu” to enter ‘Language’ interface Push to scrolling. After setting, press “Menu” to exit. • Power off Setting NOTE: You can set the time in seconds on ‘Off time’ mode, allow the player to shut down automatically when player becomes idle for the period you have set.
-
Page 12: Usb Disk
USB Disc The player supports standard USB disc function with operating system Windows98 (driver needed), Windows 2K and above (driver free), Mac OS 10.3 and above. The player supports power supply through USB. At Standby Mode, press Mode to quit to main menu, then select to enter desired mode. - Page 13 2. Select unprocessed AMV files, then click the icon will be highlighted into and a dialog box will appear. Choosing Pixels of AMV to “176*128” and Frames per second to “middle”, then click OK to confirm. 3. Click to start converting. 4.
-
Page 14: Faq's
FAQ’s No Power. Check whether the battery has been charged properly. Check whether the player is turned ON. No sound is heard from the Check whether Volume is set “0” and connect the headphone plugs firmly. headphones. Check whether the headphone plug is dirty. Corrupted MP3 may make a static noise and the sound may cut off. -
Page 15: Specification
Specifications Weight LCM Window 1.8” PC connection High-speed USB2.0 Flash memory Battery Max Play time: 4-6 hours Record Sample rate 8KHz Recording format WAV (32K bps), ACT (8K bps) Recording time 35 hours (ACT, 128M Flash) MP3, WMA Max output of headphone (L) 10mW + (R) 10mW (32Ohm) MP3 bit rate 8K bps –... - Page 16 After Sales Support TEL: 1300 886 649...
Need help?
Do you have a question about the mp4-p13 and is the answer not in the manual?
Questions and answers