Blackmagicdesign HyperDeck Shuttle Installation And Operation Manual
Hyperdeck shuttle; hyperdeck studio
Hide thumbs
Also See for HyperDeck Shuttle:
- Installation and operation manual (64 pages) ,
- Installation and operation manual (72 pages)

Related Manuals for Blackmagicdesign HyperDeck Shuttle


Summary of Contents for Blackmagicdesign HyperDeck Shuttle
- Page 1 Installation and Operation Manual HyperDeck Shuttle HyperDeck Studio Mac OS X ™ Windows ™ March 2012...
- Page 2 Welcome Welcome to HyperDeck! Welcome to HyperDeck! We hope you share our dream for the television industry to become a truly creative industry by allowing anyone to have access to the highest quality video. Our range of HyperDeck disk recorders have made it easier and more affordable than ever to capture and play back full 10-bit uncompressed video.
-
Page 3: Table Of Contents
How to Jog and Shuttle Preparing SSD's for use with HyperDeck Installing the HyperDeck Shuttle Mounting Plate HyperDeck Shuttle HyperDeck Studio How to Install the HyperDeck Shuttle Mounting Plate HyperDeck Utility Installing HyperDeck Utility Help Updating the Internal Software Getting Help... -
Page 4: Getting Started
You can also use the plate to power your HyperDeck Shuttle from an external battery by attaching a V-Mount or Anton Bauer style battery plate. -
Page 5: Important Information About Ssd Speeds
Getting Started Important note about Solid State Disk (SSD) speeds Some models of SSD cannot save video data at the speed indicated by the manufacturer because the disk uses hidden data compression to reach these higher write speeds. This data compression technique can only save data at the manufacturer’s claimed speed when storing simple files or simple data, such as blank data. -
Page 6: Preparing Ssd's For Use With Hyperdeck
Getting Started Preparing SSD's for use with HyperDeck SSD’s used by HyperDeck must be HFS+ formatted. Simply connect the SSD to your computer via an external dock or cable adapter and format it as you would a regular disk. Make sure you check there’s nothing important on your SSD as you will lose everything on it when you format it. -
Page 7: Hyperdeck Shuttle
You can use the power adapter supplied with HyperDeck You can connect your SDI video sources, such as cameras, HyperDeck Shuttle has a non-slip rubber base for use on a Shuttle or power it off an external camera battery as the routers, capture cards, switcher outputs or decks to this input. - Page 8 15. Power On/Off button to pause when reversing. charge level. When all the LEDs go off, there’s approximately The Power button turns the HyperDeck Shuttle on or off. To 4 minutes of battery power left. So you should plug in 11. Stop...
-
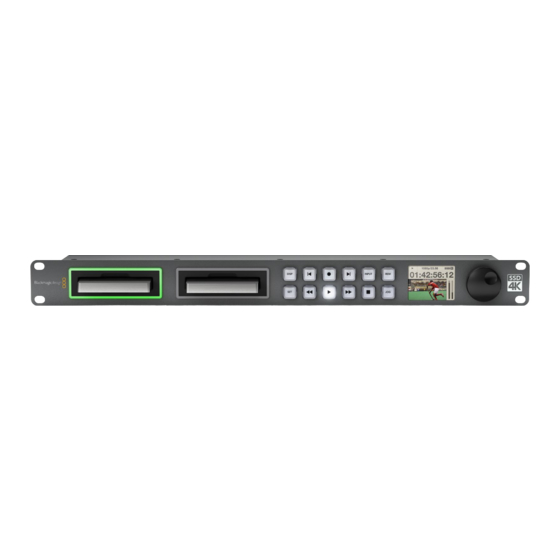
Page 9: Hyperdeck Studio
Getting Started HyperDeck Studio DISP INPUT LOOP OUT OUT 1 OUT 2 MON OUT REF IN +12V POWER REMOTE ETHERNET SD/HD/3GHD-SDI HDMI Connectors 1. +12V POWER 5. SD/HD-SDI LOOP OUT 10. HDMI IN You can use the universal power adapter supplied with This output is reclocked from the video input and can be You can connect your HDMI video sources to this input –... - Page 10 Getting Started HyperDeck Studio DISP INPUT LOOP OUT OUT 1 OUT 2 MON OUT REF IN SSD Slots +12V POWER REMOTE ETHERNET SD/HD/3GHD-SDI HDMI 13. SSD Slot 1 SSD is too slow and is dropping frames. To switch from one 23.
-
Page 11: Hyperdeck Utility
Getting Started Blackmagic HyperDeck Utility Blackmagic HyperDeck Utility is used to change settings and update the internal software in your HyperDeck. In addition to installing HyperDeck Utility, uncompressed 10 bit codecs are installed for Mac and Windows. If you use Avid Media Composer 6, you'll also find a HyperDeck Studio deck preset is installed to help with RS-422 deck control. -
Page 12: Choosing A Recording Format
To choose a recording format: Step 1. Connect HyperDeck to your computer via USB and launch HyperDeck Utility. Step 2. Launch HyperDeck Utility. The title bar of the utility will show you if you have an HyperDeck Shuttle, HyperDeck Shuttle 2 or HyperDeck Studio. -
Page 13: Recording With Timecode
Studio also displays the RP 188 timecode during playback. Trigger Recording HyperDeck Shuttle and HyperDeck Studio support trigger recording so that when you press the record button on an HD-SDI camera, HyperDeck will start recording without also having to press the record button on your HyperDeck disk recorder. -
Page 14: Using Hyperdeck
How HyperDeck Shuttle Checks Your SSD When you first switch on HyperDeck Shuttle, or any time you insert an SSD in to the SSD slot, the SSD indicator will light in green while checking the SSD and then switch off. If the SSD has not been formatted correctly, or fails to work, the SSD indicator will illuminate solid red until the SSD is removed. -
Page 15: How To Play Back
Press it again to switch to playback. Then simply press Play. The controls of HyperDeck Shuttle work just like a CD player so pressing next clip will skip to the start of the next clip and continue playing. Press previous clip once to go to the start of the current clip or press twice to skip back to the start of the previous clip. -
Page 16: Using Hyperdeck Studio
Using HyperDeck Using HyperDeck Studio How HyperDeck Studio Checks Your SSD When you first switch on HyperDeck Studio, or any time you insert an SSD in to an SSD slot, the surround of the SSD slot will light in green while checking the SSD and then switch off. If the SSD has not been formatted correctly, or fails to work, the SSD slot light will illuminate solid red until the SSD is removed. -
Page 17: How To Play Back
Using HyperDeck Step 5. Connect the video outputs of HyperDeck Studio to your HDMI or SDI monitor and other equipment. All outputs are active so you can use one or more outputs together. Step 6. Press the record button to start recording to the SSD instantly. The SSD slot light will illuminate with a looping red light to indicate it is being used for recording. -
Page 18: Using Hyperdeck Studio With Nle Software
Using HyperDeck You can remotely control HyperDeck Studio from a computer, instead of locally pushing buttons. Step 1. Connect an RS-422 cable between your capture device and HyperDeck Studio. Step 2. Press the REM button to enable remote deck control. You can now use your favorite NLE software, along with video capture hardware, to remotely capture, batch capture and play back video with your HyperDeck Studio. -
Page 19: Avid Media Composer Presets
Using HyperDeck Avid Media Composer 6 Create a project in Avid Media Composer 6 by following the documentation that accompanied your video capture hardware. Device Control in Media Composer 6 is provided by Media Composer itself and is configured via the Settings tab in your project window. HyperDeck Studio deck presets are provided for SD and HD video resolutions when the HyperDeck Utility software is installed. -
Page 20: Genlock
Using HyperDeck Genlock The REF IN port accepts bi-level and tri-level sync signals from a sync generator so you can lock your video equipment to the same signal. Not everyone needs to use genlock but it is particularly important when switching between multiple video sources as is common in larger facilities. -
Page 21: Installing The Hyperdeck Shuttle Mounting Plate
HyperDeck Shuttle Mounting Plate is an optional accessory which lets you secure your HyperDeck Shuttle to a camera rig with your choice of rail mounts, cold shoe mounts, articulated arms and more. You can also use the plate to power your HyperDeck Shuttle from an external battery by attaching HyperDeck Shuttle... -
Page 22: Help
Help Getting Help The fastest way to obtain help is to go to the Blackmagic Design online support pages and check the latest support material available for your HyperDeck. Blackmagic Design Online Support Pages The latest manual, software and support notes can be found at the Blackmagic Support Center at www.blackmagic-design.com/support. -
Page 23: Developer Information
Developer Information Supported RS-422 Commands for HyperDeck Studio Command Reply No Remote Notes 0 - System Control 0x00 0x0C Disable Acknowledge Always Ignored NTSC: 0xF0E0 0x00 0x11 DeviceTypeRequest PAL: 0xF1E0 Enabled 24P: 0xF2E0 0x00 0x1D Enable Acknowledge Always Ignored 1 - Slave Response 0x20 0x00 Stop... - Page 24 Developer Information Supported RS-422 Commands for HyperDeck Studio Command Reply No Remote Notes 0x21 0x23 ShuttleRev1 Acknowledge Disabled Treated as N=1; 0x22 0x23 ShuttleRev2 Acknowledge Disabled Same as ShuttleRev1 0x20 0x30 Preroll Acknowledge Disabled 0x24 0x31 CueData Acknowledge Disabled 0x20 0x34 SyncPlay Acknowledge...
- Page 25 Developer Information Supported RS-422 Commands for HyperDeck Studio Command Reply No Remote Notes Treated as N=1; 0x22 0x23 ShuttleRev2 Acknowledge Disabled Same as ShuttleRev1 0x20 0x30 Preroll Acknowledge Disabled 0x24 0x31 CueData Acknowledge Disabled 0x20 0x34 SyncPlay Acknowledge Disabled 0x21 0x38 ProgSpeedPlayPlus Acknowledge...
- Page 26 Developer Information Supported RS-422 Commands for HyperDeck Studio Command Reply No Remote Notes 0x40 0x27 AudioOutRecall Acknowledge Disabled Always Ignored 0x40 0x2D LostLockReset Acknowledge Disabled Always Ignored 0x42 0x30 EditPreset Acknowledge Disabled Always Ignored 0x44 0x31 PrerollPreset Acknowledge Disabled 0x41 0x32 TapeAutoSelect Acknowledge...
- Page 27 Developer Information Supported RS-422 Commands for HyperDeck Studio Command Reply No Remote Notes VITCTimeSense VITCTimeData Enabled Always Ignored SpecialTimSense CorrectedLTCTimeData Enabled Always Ignored Timer1Sense Timer1Data Enabled UserBitsVITCTimeSense UserBitsVITCTimeData Enabled LTCUserBitsTimeSense LTCUserBitsTimeData Enabled VITCUserBitsTimeSense VITCUserBitsTimeData Enabled 0x60 0x10 InDataSense InData Enabled 0x60 0x11 OutDataSense...
- Page 28 Developer Information Supported RS-422 Commands for HyperDeck Studio Command Reply No Remote Notes 0x74 0x11 OutData 0x74 0x12 AInData 0x74 0x13 AOutData 0x74 0x14 CorrectedLTCTimeData Current Time Please see “Status Bits” 0x70 0x20 StatusData sheet: Limited to 9 bytes of status, silently truncated 0x71 0x2E SpeedData...
-
Page 29: Rs-422 Status Bytes For Hyperdeck Studio
Developer Information RS-422 Status Bytes for HyperDeck Studio Bit 7 Bit 6 Bit 5 Bit 4 Bit 3 Bit 2 Bit 1 Bit 0 Byte 0 Cassette out Local Byte 1 Standby Stop Play Rewind Forward Byte 2 Servo Lock Shuttle Direction Still... - Page 30 Warranty 12 Month Limited Warranty Blackmagic Design warrants that this product will be free from defects in materials and workmanship for a period of 12 months from the date of purchase. If a product proves to be defective during this warranty period, Blackmagic Design, at its option, either will repair the defective product without charge for parts and labor, or will provide a replacement in exchange for the defective product.
Need help?
Do you have a question about the HyperDeck Shuttle and is the answer not in the manual?
Questions and answers