Advertisement
Quick Links
USER GUIDE
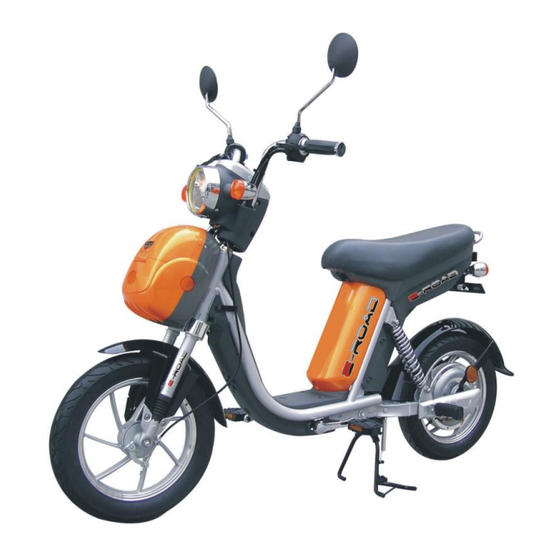
ELECTRIC BICYCLE
E-ROAD
THANK YOU FOR YOUR PURCHASE OF YOUR NEW E-ROAD
To insure that you are fully satisfied with your new electric bike for the longest possible time, we invite you to
take knowledge of this user guide .It will give you all the necessary information for the maintenance and
good usage of your E-ROAD.
Always keep this guide handy and safely.
Good maintenance of your bike will allow you to conserve all its original qualities, especially those that are
concerned with safety features.
Riding the E-ROAD, no matter for what use, isn't without risks .ALWAYS WEAR A SAFETY HELMET WELL
FASTENED, AS WELL AS PROTECTIVE CLOTHING.
- STREET LEGAL
- MANDATORY TO WEAR A HELMET
1
Advertisement

Subscribe to Our Youtube Channel
Summary of Contents for B.H.M E-ROAD
- Page 1 Good maintenance of your bike will allow you to conserve all its original qualities, especially those that are concerned with safety features. Riding the E-ROAD, no matter for what use, isn’t without risks .ALWAYS WEAR A SAFETY HELMET WELL FASTENED, AS WELL AS PROTECTIVE CLOTHING.
- Page 2 The Electric bicycles are means of transportations that are clean and contribute in the upgrade of the quality of life for all. The E-ROAD is a Product way ahead of its time in This Field, conceived with its strict criteria’s of esthetics, ergonomics and transportation.
-
Page 3: Technical Characteristic
TECHNICAL CHARACTERISTIC Dimensions (LxlxH) 1645x620x1010mm Wheel base 1130mm Net weight (without battery) 143Lb Maximum speed 20 mph Max loading weight 125kg Battery life ~35 miles Pedaling speed 4 mph Battery capacity 14Ah Voltage Motor power 500W Threshold protection for weak voltage 42V±0,5 Threshold protection for overcharge voltage 17A ±1,0... - Page 4 Rear view Mirror Location of the components Handle bars Battery compartment Commando under the seat Dash board Blinker Seat Ignition switch Front light Brake light Front basket Blinking signal light Helmet Hook Front fork Electric Motor Expansion brake Protection cover Foot peg Frame Crank...
-
Page 5: Pedals Installation
Pedals installation ATTENTIO Intermediary step Initial step Piece Actions state or final Align the wholes of the crank with Crank the fixation support Fasten the crank to its support with the bolt that is planned for this Bolt effect, screw bolt very tightly Place cap on top of bolt.. - Page 6 Installation of front basket or facade Step Initial state Actions Unscrew the 2 top screws with the help of a Phillips screw driver, keep screws on the side. Locate the 4 fixation points. Take basket out of packaging and open as shown in the picture on left .you will then be able to locate the 4 wholes of fixation.
- Page 7 Installation of steering (handle bars) Step Initial state Actions Remove plastic cover to access steering column. Remove handle bars from its packaging and place on steering column as is shown in the picture opposite .Coincide all the wholes and insert the fixation bolt.
-
Page 8: Operation
2) Please respect the codes of the road (laws) and ride on appropriate roads. 3) Your electric E-ROAD rides faster than a conventional bike, slow down on rainy days and keep you distance from other vehicle. . - Page 9 The commands High beam switch Light switch LEFT SIDE RIGHT SIDE Turning signal Speed handle Horn Horn High beam switch: Light switch: Controlee who allows switching between high Position lights off beams and head lights. Position dashboard light on Turning signals : Position lights on Push on the switch right or left to signal right...
- Page 10 Once the brakes are released the motor is ready to go again.. Parking Put the E-ROAD on the stand, turn the key toward the left to the off position and pull the key out. Locking the steering. Put the steering towards the left and turn the key to the position of parking/lock and the steering column will be locked.
- Page 11 Make sure to fully charge your battery before the first usage, or after long usage. In case of prolonged non usage, make sure to retrieve it from the E-ROAD and store it in a dry place and make sure to charge it at least once a month to avoid crystallization of lead sulfates.
- Page 12 Use of the battery charger: Battery charger characteristic Entrance voltage Time of charge Current of charge Alternate current 100-250V, 6-8 hours 1,6A±0,2A 50/60Hz How to charge the battery: 1. Lift open the seat to access the battery 2. Disconnect the main power cable ,and 3.
- Page 13 Use only the original charger. Don’t leave the charger in the E-ROAD; it could be damaged by the vibrations of the bike. ATTENTION: In case the charger overheats (≥65°C), stop immediately the charging. The motor and the power assisted wheel...
-
Page 14: Adjustment Tool
Brakes and chain adjusting Back brake adjusting Adjusting screw Tighten the adjusting bolt until the leeway of the lever of the back break is about 10 to 20 mm. Adjustment tool Attention: After the adjusting done, the back wheel should be able to spin freely. Front brake adjusting Tighten the adjusting bolt to get a firmer response from your brakes. - Page 15 The following maintenances have to be done as regularly as possible, general rule, once a week: 1) Clean the surface of the motor and of the entire E-ROAD. 2) Verify the motor and the pod of connection. 3) Check the fixation of each element, retighten the screws if necessary.
- Page 16 2. The main cable not connected to the battery terminal 3. The switch of the braking system that shuts motor off might be wet and is creating a short circuit, dry the switch if needed. Avoid prolonged exposures of the E-ROAD to the rain.
- Page 17 Connector controller.
Need help?
Do you have a question about the E-ROAD and is the answer not in the manual?
Questions and answers