Advertisement
Advertisement
Table of Contents

Related Manuals for Richmond CT312D

Summary of Contents for Richmond CT312D
- Page 1 CT312D, CT416D, CT520D DC TIG/MMA WELDER with PLASMA CUTTER OPERATION MANUAL...
-
Page 2: Safety First
S A FETY FI R S T Welding and plasma cutting is dangerous not only to the operator himself, but also to people in the surrounding area. Therefore, this machine must be used under the most strict and comprehensive observance of all relevant safety rules. Please read and understand this instruction manual fully before installing and operating this machine. -
Page 3: Safety Rules
SA FETY RU LE S General safety rules The following rules must be followed or accidents may happen; The design & construction of power supplies, the selection of installation site, and the use of high pressure air, etc., must abide by the relevant criteria and regulations; ... - Page 4 Welding cable and working pieces must be connected tightly to avoid fire caused by high heat; Do not operate when flammable gases are present. Do not weld on items containing flammable materials to avoid explorations; Do not weld within closed container; ...
-
Page 5: General Introduction
GEN ER A L IN TR ODU C T I ON RIRCHMOND CT312, CT416 and CT520 are multi-functional welders made with state-of-art inverter technology. They have three functions: TIG, MMA, and CUT. The advanced inverter technology used in our welders and cutters allows for converting 50/60Hz working frequency to high frequency of up to 100Hz, with high power factor V-MOS, and then reducing and rectifying the voltage, and producing a high power output with PWM for welding and cutting, thus greatly reducing the weight and size of the main components (transistors), and, at the same time, raising the efficiency by 30%. -
Page 6: Specifications
I. SPECIFICATIONS MODEL CT312D CT416D CT520D Input voltage (V, Hz) AC 110v or 220v 15%, 50/60 Input capacity (kVA) No-load loss (W) Duty cycle (%) Power factor 0.93 0.93 0.93 Efficiency (%) Insulation class Protection class IP21 IP21 IP21 Weight (kg) 12.4... -
Page 8: Installation
II. INSTALLATION 2-1 Power Cord The power cord at the back of the welder is to be connected to a 110/220V AC power supply. Ground the unit by connecting a 6 mm (10 gauge) wire from the grounding terminal at the back for the machine to the earth. 2-2 Hookups ... - Page 9 (2) Install the meter to the regulator. (3) Fasten the regulator support rack to the back of the machine as shown in the figure. (4) Fasten the air regulator to the support rack as shown in the figure. (5) Air pressure is displayed in the dial. (6) Lift the pressure adjustment knob to adjust the pressure as desired, and, when done, push the pressure adjustment knob down.
-
Page 10: Front Panel
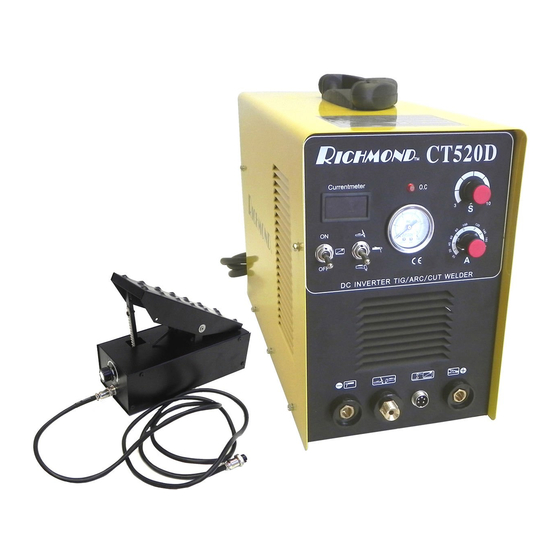
Assembly of Consumables for TIG Torch Head The panel of CT series welder is shown in the following figure: FRONT PANEL Connect fast connector of the earth ground clamp to EARTH INTERFACE before beginning to weld or cut; ... -
Page 11: Operation
III. OPERATION 3-1 TIG (1) Turn the power switch on the panel to “ON”, and the pilot light and the fan will come on. (2) Set the operation mode switch to the TIG position. (3) Turn on the argon gas switch, and set gas flow/pressure at desired level. Push down the button on the torch, and the electromagnetic valve will begin to work. -
Page 12: Working Environment
IV. CAUTIONS 4-1 Working Environment (1) The location where this machine is placed should be of little dust and no corrosive chemical gases or flammable gases and materials, with maximum moisture of no more than 80%; (2) Do not operate this machine in the open air unless the working area is sheltered from the sunshine, rain, water, snow, etc. -
Page 13: Maintenance
V. MAINTENANCE Clear the dust at regular intervals with clean and dry compressed air. Set the air flow at a reasonable pressure to avoid damaging small parts in the machine. If the working area is dusty, damp and heavy in smoke or corrosive gases, this machine should be cleaned at least once a month. -
Page 14: Troubleshooting
VI. TROUBLE SHOOTING Caution: For safety reasons, only qualified technicians are allowed to work on this unit if there’s an electrical failure. It is strongly recommended that, under all circumstances, you should contact the manufacturer, your authorized dealer or take this manual and your unit (if out of warranty) to a certified professional for diagnoses. 6-1 CT312 Trouble-Shooting Problems Possible Causes... - Page 15 4. Some parts of the HF arc-striking damaged. 6. Abnormal pilot light on. 1. Over-current protection triggered. Turn off power and wait till abnormal pilot light goes off. 2. Over-voltage protection triggered, no need to turn unit off, just wait for 2 or 3 minutes. 3.
Need help?
Do you have a question about the CT312D and is the answer not in the manual?
Questions and answers