Hitachi CP-RS55 User's Manual And Quick Manual
Hide thumbs
Also See for CP-RS55:
- User manual (99 pages) ,
- Service manual (70 pages) ,
- Operating manual (12 pages)
Table of Contents
Advertisement
Quick Links
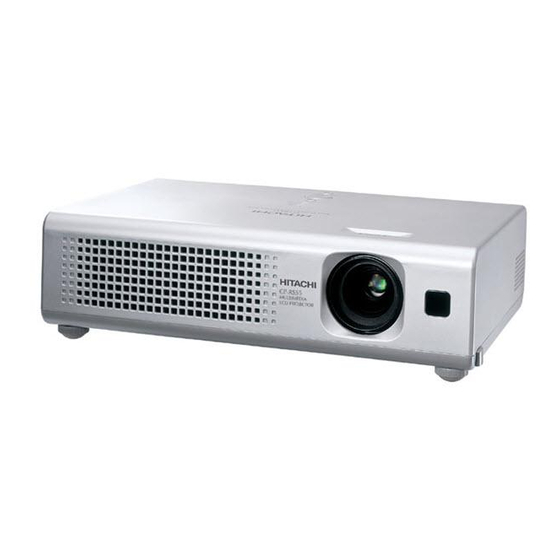
Projector
CP-RS55
User's Manual - Quick Guide
Please read this user's manual thoroughly to ensure correct usage understanding.
Manuel d'utilisation - Guide rapide
Nous vous recommandons de lire attentivement ce manuel pour bien assimiler le
fonctionnement de l'appareil.
Bedienungsanleitung - Kurz-Anleitung
Um zu gewährleisten, dass Sie die Bedienung des Geräts verstanden haben, lesen Sie
dieses Handbuch bitte sorgfältig.
Manual de usuario - Guía rápida
Lea atentamente el manual de usuario del proyector para garantizar un uso adecuado del
mismo.
Manuale d'istruzioni - Guide rapide
Vi preghiamo di leggere attentamente il manuale d'istruzioni per garantire una corretta
comprensione delle istruzioni.
Brukerhåndbok - Hurtigguide
Vennligst les denne brukerhåndbok grundig for å være garantert driftssikker bruk.
Gebruiksaanwijzing - Beknopte handleiding
Lees deze gebruikershandleiding grondig door, zodat u de werking ervan begrijpt en correct
gebruik verzekerd is.
Instruções do proprietário - Guia Rápido
Leia atentamente o presente manual do utilizador para garantir a utilização correcta por via
da sua compreensão.
使用说明书 - 快速指南
请仔细阅本《使用说明书》 ,在理解的基础上正确使用。
사용 설명서 - 빨리보기 가아드
본 사용자 설명서를 잘 읽으시고 이해하신 후 , 올바르게 사용해 주십시오 .
Bruksanvisningens - Snabbguide
Läs denna bruksanvisning noga för att förstå alla instruktionerna för ett korrekt bruk.
Руководство пользователя - Краткий справочник
Пожалуйста, внимателъно прочтите данное руководство полъзователя для
ознакомления и нравильно использования.
Käyttäjän ohjekirja - Pikaopas
Lue käyttäjän ohjekirja huolellisesti varmistaaksesi, että ymmärrät miten laitetta käytetään oikein.
Podręcznik użytkownika - Skrócony poradnik
Przeczytaj dokładnie i ze zrozumieniem niniejszy podręcznik użytkownika, aby zapewnić
prawidłowe użytkowanie urządzenia.
ENGLISH
FRANÇAIS
DEUTSCH
ESPAÑOL
ITALIANO
NORSK
NEDERLANDS
PORTUGUÊS
中文
한국어
SVENSKA
РУССКИЙ
SUOMI
POLSKI
Advertisement
Table of Contents

Subscribe to Our Youtube Channel
Related Manuals for Hitachi CP-RS55


Summary of Contents for Hitachi CP-RS55
- Page 1 Projector ENGLISH CP-RS55 FRANÇAIS User's Manual - Quick Guide Please read this user's manual thoroughly to ensure correct usage understanding. DEUTSCH Manuel d'utilisation - Guide rapide Nous vous recommandons de lire attentivement ce manuel pour bien assimiler le ESPAÑOL fonctionnement de l'appareil.
- Page 3 Projector ENGLISH User's Manual - Safety Guide Please read this user's manual thoroughly to ensure correct usage understanding. Manuel d'utilisation - Guide de sécurité FRANÇAIS Nous vous recommandons de lire attentivement ce manuel pour bien assimiler le fonctionnement de l'appareil. DEUTSCH Bedienungsanleitung - Sicherheits-Richtlinien Um zu gewährleisten, dass Sie die Bedienung des Geräts verstanden haben, lesen Sie...
- Page 5 ENGLISH Information for users applicable in European Union countries This symbol on the product or on its packaging means that your electrical and electronic equipment should be disposed at the end of life separately from your household wastes. There are separate collection systems for recycling in EU. For more information, please contact the local authority or the dealer where you purchased the product.
- Page 6 NORSK Informasjon som angår land i EU Dersom produktet eller emballasjen er merket med dette symbolet, bør ditt elektriske eller elektroniske utstyr kasseres atskilt fra ditt husholdningsavfall når det er utslitt. I Norge finnes det egne innsamlingssystemer for resirkulering. Vennligst ta kontakt med lokale myndigheter eller forhandleren hvor du kjøpte produktet for mer informasjon.
- Page 7 한국어 다음의 정보는 유럽 연합 (EU) 멤버 국가에만 관련됩니다 이 기호는 전기•전자장비 폐기물 처리지침 (WEEE) 2002/96/EC 에 따릅니다 . 이 기호를 가지는 제품은 지방자치단체의 폐기물로 폐기해서는 안되며 , 지역 법에 따라서 여러분의 국가 또는 지역에서 이용할 수 있는 회수수집 시스템을 이용해서 폐기해야합니 다...
- Page 9 Projector User's Manual - Safety Guide Thank you for purchasing this projector. WARNING • Before using, read these user's manuals of this projector to ensure correct usage through understanding. After reading, store them in a safe place for future reference. Incorrect handling of this product could possibly result in personal injury or physical damage.
-
Page 10: Safety Precautions
Safety Precautions WARNING Never use the projector if a problem should occur. Abnormal operations such as smoke, strange odor, no image, no sound, excessive sound, damaged casing or elements or cables, penetration of liquids or foreign matter, etc. can cause a fire or electrical shock. In such case, immediately turn off the power switch and then disconnect the power plug from the power outlet. - Page 11 Safety Precautions (continued) WARNING Be cautious of High temperatures of the projector. High temperatures are generated when the lamp is lit. It could result in fire or burn. Use special caution in households where children are present. Do not touch about the lens, air fans and ventilation openings during use or immediately after use, to prevent a burn.
- Page 12 Safety Precautions (continued) WARNING Be careful in handling the light source lamp. The projector uses a high-pressure mercury glass lamp made of glass. The lamp can break with a loud bang, or burn out. When the bulb bursts, it is possible for shards of glass to fly into the lamp housing, and for gas containing mercury to escape from the projector’s vent holes.
- Page 13 Safety Precautions (continued) CAUTION Be careful in moving the projector. Neglect could result in an injury or damage. • Do not move the projector during use. Before moving, disconnect the power cord and all external connections, and close the slide lens door or attach the lens cap.
- Page 14 Safety Precautions (continued) CAUTION Ask your dealer to cleaning inside of the projector about every year. Accumulations of dust inside the projector cause result in fire or malfunction. Cleaning inside is more effective if performed before every humid periods such as rainy season. •...
- Page 15 Safety Precautions (continued) NOTE Before turning on the power, make the projector cool down adequately. After turning the projector off, pushing the restart switch or interrupting of the power supply, make the projector cool down adequately. Operation in a high temperature state of the projector causes a damage of the electrode and un-lighting of the lamp.
- Page 16 Lamp WARNING HIGH VOLTAGE HIGH TEMPERATURE HIGH PRESSURE The projector uses a high-pressure mercury glass lamp. The lamp can break with a loud bang, or burn out, if jolted or scratched, handled while hot, or worn over time. Note that each lamp has a different lifetime, and some may burst or burn out soon after you start using them.
-
Page 17: Regulatory Notices
Regulatory Notices FCC Statement Warning WARNING: This equipment has been tested and found to comply with the limits for a Class B digital device, pursuant to Part 15 of the FCC Rules. These limits are designed to provide reasonable protection against harmful interference in a residential installation. This equipment generates, uses, and can radiate radio frequency energy and, if not installed and used in accordance with the instructions, may cause harmful interference to radio communications. - Page 19 Printed in China (P) * QR47496...
- Page 20 Projector CP-RS55 User's Manual – Operating Guide Thank you for purchasing this projector. WARNING ►Before using, read the "User's Manual - Safety Guide" and these manuals to ensure correct usage through understanding. After reading, store them in a safe place for future reference.
-
Page 21: Table Of Contents
Contents Contents About this manual ..1 EASY MENU ....25 Aspect, Zoom, Keystone, Mode, Contents . -
Page 22: Projector Features
Projector features / About contents of package Projector features This projector is used to project various computer signals as well as NTSC / PAL / SECAM video signals onto a screen. It requires just a little space for installation and gets a large image from short distance. ... -
Page 24: Controls
Part names Controls LAMP indicator (48) LAMP TEMP TEMP indicator (48) POWER POWER indicator (16, 17, 48) INPUT INPUT button (18) Cursor buttons ▲,▼,◄,► (18~40) MENU STANDBY/ON button (16, 17) STANDBY/ON Remote control STANDBY/ON button SEARCH button (19) (16, 17) RGB button (18) AUTO button (20) VIDEO button (18) -
Page 25: Preparations
Preparations Preparations Fastening the lens cover WARNING ►Do not fasten the lens cover during use or immediately after use. Handling while the projector is in a high temperature could cause a burn and/or malfunction to the projector. Before operating, make sure that the power switch is off, that the power cord is not plugged in, and that the projector is cool adequately. -
Page 26: Putting Batteries
Preparations Putting batteries WARNING ►Always handle the batteries with care and use them only as directed. Improper use may result in battery explosion, cracking or leakage, which could result in fire, injury and/or pollution of the surrounding environment. • Be sure to use only the batteries specified. Do not use batteries of different types at the same time. -
Page 27: Using The Remote Control
Preparations Using the remote control CAUTION ►Be careful in handling the remote control. Incorrect handling could cause damage or malfunction. • Do not drop or otherwise expose the remote control to physical impact. • Do not get the remote control wet or place it on wet objects. •... -
Page 28: About The Filter Cover For Bottom-Up Use
Preparations About the filter cover for bottom-up use WARNING ►Do not replace the filter cover and/or air filter during use or immediately after use. Handling while the projector is in a high temperature could cause a burn and/or malfunction to the projector. Before operating, make sure that the power switch is off, that the power cord is not plugged in, and that the projector is cool adequately. -
Page 29: Setting Up
Setting up Setting up WARNING ►Place the projector in a stable position horizontally. A fall or a turnover could cause an injury and/or damage to the projector. Then using damaged projector could result in a fire and/or an electric shock. •... -
Page 30: Arrangement
Setting up Arrangement Refer to the illustrations and tables below to determine the screen size and projection (c) up distance. The values shown in the table are calculated (c) down (±3%) for a full size screen: 800x600 At 4:3 screen (c) Screen height [cm (inch)] (a) Screen size (b) Projection distance... -
Page 31: Adjusting The Projector's Elevator
Setting up Adjusting the projector's elevator WARNING ►Do not adjust the projector’s elevator during use or immediately after use. Handling while the projector is in a high temperature could cause a burn and/or malfunction to the projector. Before operating, make sure that the power switch is off, that the power cord is not plugged in, and that the projector is cool adequately. -
Page 32: Connecting Your Devices
Setting up Connecting your devices CAUTION ►Turn off all devices prior to connecting them to the projector. Attempting to connect a live device to the projector may generate extremely loud noises or other abnormalities that may result in malfunction and/or damage to the device and/or projector. -
Page 33: Examples Of Connection With A Computer
Setting up Examples of connection with a computer Audio cable (stereo mini) RGB cable RS-232C cable RGB out RS-232C Audio out Examples of connection with a VCR/DVD player Audio cable (stereo mini) Video cable Audio out Video out Audio cable (stereo mini) S-Video cable Audio out S-Video out... -
Page 34: Connecting Power Supply
Setting up Connecting power supply WARNING ►Please use extra caution when connecting the power cord as incorrect or faulty connections may result in fire and/or electrical shock. • Only use the power cord that came with the projector. If it is damaged, contact your dealer to newly get correct one. -
Page 35: Power On/Off
Power on/off Power on/off Turning on the power WARNING ►When the power is on, a strong light is emitted. Do not look into the lens or vents of the projector. NOTE • Turn the power on in right order. Please power on the projector before the connected devices. -
Page 36: Turning Off The Power
Power on/off Turning off the power NOTE • Turn the power off in right order. Please power off the projector after the connected devices. • Except for an emergency, whenever you turn the projector off, obey the procedure of the following “Turning off the power”, and do not disconnect the power cord until the procedure is completed. -
Page 37: Operating
Operating Operating Adjusting the volume VIDEO SEARCH Press the VOLUME button on the remote control. VIDEO SEARCH ASPECT AUTO BLANK MAGNIFY VOLUME BLANK ASPECT AUTO A dialog will appear on the screen to aid you in adjusting MUTE FREEZE KEYSTONE ZOOM MAGNIFY VOLUME... -
Page 38: Searching An Input Signal
Operating Searching an input signal STANDBY/ON SEARCH VIDEO BLANK ASPECT AUTO Press the SEARCH button on the remote control. MAGNIFY HOME PAGE UP VOLUME PAGE DOWN MUTE The projector will begin to check its input ports in order FREEZE KEYSTONE to find any input signals. -
Page 39: Using The Automatic Adjustment Feature
Operating Using the automatic adjustment feature VIDEO SEARCH Press the AUTO button on the remote control. ASPECT AUTO BLANK VIDEO SEARCH MAGNIFY VOLUME MUTE ASPECT AUTO BLANK FREEZE KEYSTONE ZOOM MAGNIFY At a RGB signal VOLUME POSITION MENU ENTER MUTE RESET The vertical position, the horizontal position, the clock... -
Page 40: Using The Partial Magnify Feature
Operating Using the partial magnify feature VIDEO SEARCH BLANK ASPECT AUTO SEARCH VIDEO ASPECT AUTO BLANK Press the ON button of MAGNIFY on the remote control. MAGNIFY MAGNIFY VOLUME VOLUME MUTE The “MAGNIFY” indication will appear on the screen FREEZE KEYSTONE MUTE ZOOM... -
Page 41: Multifunctional Settings
Multifunctional settings Multifunctional settings NOTE • Regardless of description of this manual, these functions may not work correctly with some input. SEARCH VIDEO ASPECT AUTO BLANK Using the menu function MAGNIFY VOLUME This projector has the following menus: PICTURE, IMAGE, INPUT, SETUP, SCREEN, OPTION and EASY MENU. -
Page 42: Advanced Menu
Multifunctional settings (2) Main of Advanced MENU Main → one of Advanced Menus (ex. SETUP menu) MENU [ RGB ] :SELECT MENU [ RGB ] MENU [ RGB ] :SELECT :SELECT PICTURE BRIGHT PICTURE ZOOM PICTURE ZOOM IMAGE CONTRAST IMAGE KEYSTONE IMAGE KEYSTONE... - Page 43 Multifunctional settings To operate Please follow of the mention concerned in each. In general, (1) At EASY MENU, use the cursor buttons ◄/► to operate. (2) At Advanced MENU, use the cursor buttons ▲/▼. To return to the previous menu Press the cursor button ◄...
-
Page 44: Easy Menu
Multifunctional settings EASY MENU EASY MENU ASPECT With the EASY MENU, items shown in the table below can ZOOM KEYSTONE be performed. MODE NORMAL BRIGHT Choose an item using the cursor buttons ▲/▼ on the CONTRAST projector or remote control. Then perform it referring to the COLOR TINT following table. -
Page 45: Go To Advanced Menu
Multifunctional settings EASY MENU (continued) Item Description Using the buttons ◄/► adjusts the sharpness. SHARPNESS See the item SHARPNESS of section PICTURE menu. (28) Using the buttons ◄/► turns off/on the whisper mode. WHISPER See the item WHISPER of section SETUP menu. (34) Using the buttons ◄/►... -
Page 46: Picture Menu
Multifunctional settings PICTURE menu With the PICTURE menu, items shown in the table below MENU [ RGB ] :SELECT can be performed. PICTURE BRIGHT IMAGE CONTRAST Choose an item using the cursor buttons ▲/▼ on the INPUT GAMMA DEFAULT 1 SETUP COLOR TEMP HIGH... - Page 47 Multifunctional settings PICTURE menu (continued) Item Description Using the buttons ▲/▼ switches the mode of color temperature. COLOR TEMP [ RGB ] :SELECT OFFSET GAIN HIGH HIGH MIDDLE MIDDLE CUSTOM CUSTOM LOW To adjust CUSTOM Selecting the CUSTOM and then pressing the ENTER : button ►...
-
Page 48: My Memory
Multifunctional settings PICTURE menu (continued) Item Description Using the buttons ▲/▼ switches the progressive mode. TV FILM TURN OFF • This function performs only at an interlaced signal of a VIDEO input, a S-VIDEO input or a component video input of 525i (480i) or 625i (576i) signal. -
Page 49: Image Menu
Multifunctional settings IMAGE menu With the IMAGE menu, items shown in the table below can MENU [ RGB ] :SELECT be performed. PICTURE ASPECT IMAGE OVER SCAN Choose an item using the cursor buttons ▲/▼ on the INPUT V POSITION SETUP H POSITION projector or remote control, and press the cursor button ►... -
Page 50: Auto Adjust Execute
Multifunctional settings IMAGE menu (continued) Item Description Using the buttons ▲/▼ adjusts the horizontal size. Large Small • This item can be chosen only at a RGB signal. H SIZE • When this adjustment is excessive, the picture may not be displayed correctly. -
Page 51: Input Menu
Multifunctional settings INPUT menu With the INPUT menu, items shown in the table below can MENU [ RGB ] :SELECT be performed. PICTURE COLOR SPACE AUTO IMAGE VIDEO FORMAT AUTO Choose an item using the cursor buttons ▲/▼ on the INPUT FRAME LOCK TURN OFF... -
Page 52: Information
Multifunctional settings INPUT menu (continued) Item Description Using the buttons ▲/▼ turns the frame lock function on/off. TURN ON TURN OFF • This item performs only at a RGB signal with vertical frequency of 50 to 72 Hz. FRAME LOCK •... -
Page 53: Setup Menu
Multifunctional settings SETUP menu With the SETUP menu, items shown in the table below can MENU [ RGB ] :SELECT be performed. PICTURE ZOOM IMAGE KEYSTONE INPUT WHISPER NORMAL Choose an item using the cursor buttons ▲/▼ on the SETUP MIRROR NORMAL SCREEN... -
Page 54: Screen Menu
Multifunctional settings SCREEN menu With the SCREEN menu, items shown in the table below can MENU [ RGB ] :SELECT be performed. PICTURE LANGUAGE ENGLISH IMAGE MENU POSITION INPUT OSD BRIGHT Choose an item using the cursor buttons ▲/▼ on the SETUP BLANK BLACK... - Page 55 Multifunctional settings SCREEN menu (continued) Item Description Using the buttons ▲/▼ switches the mode for the start up screen. The start up screen is the screen displayed when no signal or an unsuitable signal is detected. MyScreen ORIGINAL TURN OFF MyScreen is the screen you can register a desired screen.
-
Page 56: Myscreen Lock, Message
Multifunctional settings SCREEN menu (continued) Item Description Using the buttons ▲/▼ turns on/off the MyScreen lock function. TURN ON TURN OFF MyScreen Lock When the TURN ON is selected, the item MyScreen cannot be performed. Use this function for protecting the current MyScreen. Using the buttons ▲/▼... -
Page 57: Option Menu
Multifunctional settings OPTION menu With the OPTION menu, items shown in the table below can MENU [ RGB ] :SELECT be performed. PICTURE AUTO SEARCH TURN OFF IMAGE AUTO OFF Choose an item using the cursor buttons ▲/▼ on the INPUT LAMP TIME SETUP... -
Page 58: Filter Time, Service
Multifunctional settings OPTION menu (continued) Item Description The lamp time is the time counted after the last resetting. It is shown in the OPTION menu as the use time of the lamp. Performing this item resets the time. Pressing the RESET button on the remote control or the button ► on the projector for about 3 seconds displays a dialog to make sure. - Page 59 Multifunctional settings OPTION menu (continued) Item Description Choosing this item displays the SERVICE menu. Choose an item using the buttons ▲/▼, and press the button ► or the ENTER button to progress. SERVICE :SELECT FAN SPEED AUTO ADJUST FANSPEED NORMAL AUTO ADJUST GHOST...
-
Page 60: Maintenance
Maintenance Maintenance Lamp WARNING HIGH VOLTAGE HIGH TEMPERATURE HIGH PRESSURE ►The projector uses a high-pressure mercury glass lamp. The lamp can break with a loud bang, or burn out, if jolted or scratched, handled while hot, or worn over time. Note that each lamp has a different lifetime, and some may burst or burn out soon after you start using them. - Page 61 Maintenance Lamp (continued) When the indicators or a message prompts you to replace the lamp, replace the lamp as soon as possible. Turn the projector off, and unplug the power cord. Allow the lamp to cool for at least 45 minutes. To prepare a new lamp, contact your dealer and tell the lamp type number = DT00701.
-
Page 62: Air Filter
Maintenance Air filter WARNING ►Do not replace the air filter during use or immediately after use. Handling while the projector is in a high temperature could cause a burn and/or malfunction to the projector. Before operating, make sure that the power switch is off, that the power cord is not plugged in, and that the projector is cool adequately. - Page 63 Maintenance Air filter (continued) Apply a vacuum cleaner to the air filter and filter cover. Then set a new or cleaned air filter into place. In case of the filter cover for bottom-up use, remove the air filter from the filter cover and clean each.
-
Page 64: Other Care
Maintenance Other care WARNING ►Do not take care of the projector during use or immediately after use. Handling while the projector is in a high temperature could cause a burn and/ or malfunction to the projector. Before operating, make sure that the power switch is off, that the power cord is not plugged in, and that the projector is cool adequately. -
Page 65: Troubleshooting
Troubleshooting Troubleshooting Related messages When the unit's power is on, messages such as those shown below may be displayed. When any such message is displayed on the screen, please respond as described below. If the same message is displayed after the treatment, or if a message other than the following appears, please contact your dealer or service company. - Page 66 Troubleshooting Related messages (continued) Message Description The internal portion temperature is rising. Please turn the power OFF, and allow the unit to cool down at least 20 minutes. After having confirmed the following items, please turn the power ON again. •...
-
Page 67: Regarding The Indicator Lamps
Troubleshooting Regarding the indicator lamps Lighting and flashing of the POWER indicator, the LAMP indicator, and the TEMP indicator have the meanings as described in the table below. Please respond in accordance with the instructions within the table. If the same indication is displayed after the treatment, or if an indication other than the following is displayed, please contact your dealer or service company. - Page 68 Troubleshooting Regarding the indicator lamps (continued) POWER LAMP TEMP Description indicator indicator indicator The cooling fan is not operating. Please turn the power off, and allow the unit to cool Blinking down at least 20 minutes. After the projector has Turned Blinking sufficiently cooled down, please make confirmation...
-
Page 69: Phenomena That May Easily Be Mistaken For Machine Defects
Troubleshooting Phenomena that may easily be mistaken for machine defects WARNING ►Never use the projector if abnormal operations such as smoke, strange odor, excessive sound, damaged casing or elements or cables, penetration of liquids or foreign matter, etc. should occur. In such cases, immediately turn off the power switch and then disconnect the power plug from the power outlet. - Page 70 Troubleshooting Phenomena that may easily be mistaken for machine defects (continued) Reference Phenomenon Cases not involving a machine defect page The lens cover is closed. 4, 16 Remove the lens cover. The signal cables are not correctly connected. 13, 14 Correctly connect the connection cables.
-
Page 71: Warranty And After-Service
Warranty and after-service / Specifications Warranty and after-service If a problem occurs with the equipment, first refer to the “Troubleshooting” (46) run through the suggested checks. If this does not resolve the problem, please contact your dealer or the service company. They will tell you what warranty condition is applied. - Page 72 Specifications Specifications (continued) [unit: mm]...
-
Page 74: Contents Of Package
Projector CP-RS55 User's Manual – Quick Guide Thank you for purchasing this projector. WARNING ►Before using, read the "User's Manual - Safety Guide" and these manuals to ensure correct usage through understanding. After reading, store them in a safe place for future reference. - Page 75 Preparations Preparations Preparations Fastening the lens cover WARNING ►Do not fasten the lens cover during use or immediately after use. Handling while the projector is in a high temperature could cause a burn and/or malfunction to the projector. To avoid losing, please fasten the lens cover to the projector using the strap. Strap Strap Strap ring...
- Page 76 Arrangement Arrangement Arrangement WARNING ►Install the projector in a suitable environment according to instuctions of the "User's Manual - Safety Guide". CAUTION ►This projector has some intake vents also on the bottom. Avoid blocking vents. Put nothing that is sucked or sticks to the bottom of projector.
- Page 77 Adjusting the projector's elevator / Connecting your devices Adjusting the projector's elevator Adjusting the projector's elevator WARNING ►Do not adjust the projector’s elevator during use or immediately after use. Handling while the projector is in a high temperature could cause a burn and/or malfunction to the projector. Before operating, make sure that the power switch is off, that the power cord is not plugged in, and that the projector is cool adequately.
- Page 78 Connecting your devices Examples of connection with a computer Audio cable (stereo mini) RGB cable RS-232C cable RGB out RS-232C Audio out Examples of connection with a VCR/DVD player Audio cable (stereo mini) Video cable Audio out Video out Audio cable (stereo mini) S-Video cable Audio out S-Video out...
- Page 79 Connecting power supply / Putting batteries Connecting power supply Connecting power supply WARNING ►Please use extra caution when connecting the power cord as incorrect or faulty connections may result in fi re and/or electrical shock. • Only use the power cord that came with the projector. If it is damaged, contact your dealer to newly get correct one.
- Page 80 Operating Operating Operating Turning on the power WARNING ►When the power is on, a strong light is emitted. Do not look into the lens or vents of the projector. NOTE • Turn the power on in right order. Please power on the projector before the connected devices.
- Page 81 Operating Controls LAMP indicator LAMP TEMP TEMP indicator POWER POWER indicator INPUT INPUT button Cursor buttons ▲,▼,◄,► MENU STANDBY/ON button STANDBY/ON Remote control SEARCH button STANDBY/ON button RGB button AUTO button VIDEO button SEARCH VIDEO BLANK button ASPECT button BLANK ASPECT AUTO MAGNIFY...
- Page 82 Operating Turning off the power NOTE • Turn the power off in right order. Please power off the projector after the connected devices. • Except for an emergency, whenever you turn the projector off, obey the procedure of the following “Turning off the power”, and do not disconnect the power cord until the procedure is completed.
- Page 83 Maintenance Maintenance Maintenance Lamp WARNING HIGH VOLTAGE HIGH TEMPERATURE HIGH PRESSURE ►The projector uses a high-pressure mercury glass lamp. The lamp can break with a loud bang, or burn out, if jolted or scratched, handled while hot, or worn over time. Note that each lamp has a different lifetime, and some may burst or burn out soon after you start using them.
- Page 84 Maintenance Lamp (continued) When the indicators or a message prompts you to replace the lamp, replace the lamp as soon as possible. Turn the projector off, and unplug the power cord. Allow the lamp to cool for at least 45 minutes. To prepare a new lamp, contact your dealer and tell the lamp type number = DT00701.
- Page 85 Maintenance Air fi lter WARNING ►Do not replace the air fi lter during use or immediately after use. Handling while the projector is in a high temperature could cause a burn and/or malfunction to the projector. Before operating, make sure that the power switch is off, that the power cord is not plugged in, and that the projector is cool adequately.
-
Page 86: System Requirements
In a while, Web browser automatically starts. Start up window comes up. Windows®: (1) Double-click on the ”Hitachi Projectors” icon appeared on the desktop Macintosh®: screen. (2) When “main.html” file is clicked, Web browser will start and Initial window will appear. -
Page 88: Example Of Computer Signal
Projector CP-RS55 User's Manual – Operating Guide Technical Example of computer signal Resolution (H x V) H. frequency (kHz) V. frequency (Hz) Rating Signal mode 720 x 400 37.9 85.0 VESA TEXT 640 x 480 31.5 59.9 VESA VGA (60Hz) 640 x 480 37.9... - Page 89 Technical (continued) Initial set signals The following signals are used for the initial settings. The signal timing of some computer models may be different. In such case, adjust the items V POSITION and H POSITION in the IMAGE menu. Back porch (B) Front porch (D) Back porch (b) Front porch (d)
- Page 90 Technical (continued) Connection to the ports CONTROL S-VIDEO VIDEO AUDIO D-sub 15pin mini shrink jack 11 12 13 14 15 At RGB signal • Video signal: RGB separate, Analog, 0.7Vp-p, 75Ω terminated (positive) • H/V. sync. Signal: TTL level (positive/negative) •...
- Page 91 Technical (continued) Connection to the ports (continued) CONTROL S-VIDEO VIDEO AUDIO CONTROL D-sub 9pin plug • About the details of RS-232C communication, please refer to the following page. Signal Signal Signal 1 (No connection) 4 (No connection) 7 RTS 2 RD 5 Ground 8 CTS 3 TD...
-
Page 92: Communications Setting
Technical (continued) RS-232C Communication CONTROL port RS-232C cable RS-232C port of the projector of the computer - (1) (1) CD RD (2) (2) RD TD (3) (3) TD - (4) (4) DTR GND (5) (5) GND - (6) (6) DSR RTS (7) (7) RTS CTS (8) - Page 93 Technical (continued) Requesting projector status (Get command) (1) Send the request code Header + Command data (‘02H’+‘00H’+ type (2 bytes)+ ‘00H’ +‘00H’) from the computer to the projector. (2) The projector returns the response code ‘1DH’+ data (2 bytes) to the computer. Changing the projector settings (Set command) (1) Send the setting code Header + Command data (‘01H’+‘00H’+ type (2 bytes) + setting code (2 bytes)) from the computer to the projector.
-
Page 94: Command Table
Technical (continued) Command table Command Data Names Operation Type Header Action Type Setting Code Power Turn off BE EF 06 00 2A D3 01 00 00 60 00 00 Turn on BE EF 06 00 BA D2 01 00 00 60 01 00 BE EF 06 00... - Page 95 Technical (continued) Command table (continued) Command Data Names Operation Type Header Action Type Setting Code User Gamma Point 1 BE EF 06 00 08 FE 02 00 90 30 00 00 Increment BE EF 06 00 6E FE 04 00 90 30 00 00 Decrement...
- Page 96 Technical (continued) Command table (continued) Command Data Names Operation Type Header Action Type Setting Code COLOR TEMP BE EF 06 00 BC F4 02 00 B7 30 00 00 OFFSET B Increment BE EF 06 00 DA F4 04 00 B7 30 00 00 Decrement...
- Page 97 Technical (continued) Command table (continued) Command Data Names Operation Type Header Action Type Setting Code OVER SCAN BE EF 06 00 91 70 02 00 09 22 00 00 Increment BE EF 06 00 F7 70 04 00 09 22 00 00 Decrement BE EF...
- Page 98 Technical (continued) Command table (continued) Command Data Names Operation Type Header Action Type Setting Code ZOOM BE EF 06 00 D0 D0 02 00 0A 30 00 00 Increment BE EF 06 00 B6 D0 04 00 0A 30 00 00 Decrement BE EF 06 00...
- Page 99 Technical (continued) Command table (continued) Command Data Names Operation Type Header Action Type Setting Code MENU POSITION V BE EF 06 00 40 D7 02 00 16 30 00 00 Increment BE EF 06 00 26 D7 04 00 16 30 00 00 Decrement BE EF...
- Page 100 Fax: +46 (0) 8 562 711 13 Tel: +39 02 38073415 Servizio Clienti Email: csgswe@hitachi-eu.com Fax: +39 02 48786381/2 Email: customerservice.italy@hitachi-eu.com HITACHI EUROPE S.A.S HITACHI EUROPE LTD (Norway) AB Lyon Office STRANDVEIEN 18 B.P. 45, 69671 BRON CEDEX 1366 Lysaker FRANCE...
Need help?
Do you have a question about the CP-RS55 and is the answer not in the manual?
Questions and answers