Advertisement
Table of Contents
- 1 Instruction Manual
- 2 Warranty
- 3 Parts List
- 4 Ama Safety Code
- 5 Equipment Selection
- 6 Assembly Instructions
- 7 Assembling the Wings
- 8 Installing the Main Landing Gear
- 9 Assembling the Fuselage
- 10 Setting up the Airplane
- 11 Install Receiver/Switches/Batteries
- 12 Install Wing Struts
- Download this manual
Pacific Aeromodel Mfg., Inc.
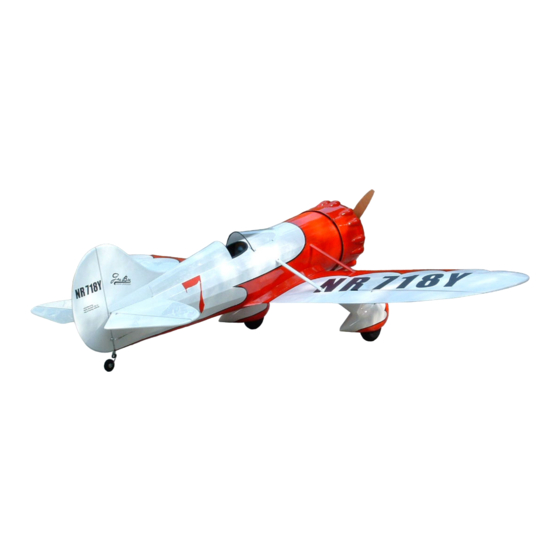
27% Gee Bee "Y" ARF
(A Giant Sport Scale Model)
INSTRUCTION MANUAL
Congratulations on your purchase of this high quality Almost-Ready-to-Fly model airplane kit. It
has been created by experienced designers and skilled craftsmen and many of its parts have been
factory built for you. Nevertheless, its ultimate success or failure depends on you. Be sure you have
read and understand this entire manual before attempting to assemble, set up and fly this model
airplane.
This manual is intended for experienced ARF assemblers. If you have any questions or anything
seems confusing, please contact us for clarification. Some pictures in this manual may not exactly
match the contents of your kit due to ongoing production improvements.
WARNING - THIS IS NOT A TOY!
Radio controlled model aircraft are capable of inflicting serious injury and/or property damage if not
assembled, operated and maintained in a competent and safe manner. The successful assembly,
operation and maintenance of radio controlled model aircraft are not intuitive skills and performing
them safely and competently takes experience. If you are not already an experienced radio
controlled aircraft assembler and flyer, we STRONGLY suggest that you find an experienced
modeler to assist you with the assembly and operation of this model airplane.
Page 1
Rev 508jf
Advertisement
Table of Contents

Summary of Contents for Pacific Aeromodel 27 percentGee Bee “Y” ARF
-
Page 1: Instruction Manual
Pacific Aeromodel Mfg., Inc. 27% Gee Bee “Y” ARF (A Giant Sport Scale Model) INSTRUCTION MANUAL Congratulations on your purchase of this high quality Almost-Ready-to-Fly model airplane kit. It has been created by experienced designers and skilled craftsmen and many of its parts have been factory built for you. -
Page 2: Warranty
In no event shall Pacific Aeromodel Mfg., Inc.’s liability exceed the original purchase price of this kit. Pacific Aeromodel Mfg., Inc. reserves the right to change or modify this warranty without notice. -
Page 3: Equipment Selection
EQUIPMENT SELECTION Engine: The Pacific 27% Gee Bee “Y” is very light for it’s size and it will fly very well with a mid- size gasoline engine. It was designed to use a classic, heavy 43 to 62cc engine (with tail-weight added), or one of the new, light 40 to 50cc engines, (with nose weight added). -
Page 4: Assembling The Wings
high temp material.) Then go over the entire airplane with a covering iron or a heat gun and a rag. Heat the covering until it is tight and wrinkle free (it can take a lot of heat, but stay away from the seams and “N”... -
Page 5: Installing The Main Landing Gear
There is a string attached to a small block of wood, tack glued inside the servo opening. This string leads to the hole in the top of the wing near the root rib where the servo lead must exit the wing. There you will find another wood block holding that end of the string. - Page 6 main strut assemblies. Also drill 3/32” pilot holes through the mounting flange of the fixed pants, one in front, one in back and one on each side. INSTALL THE MAIN STRUTS. Attach the main strut to the gear mount in the wing, using three 8-32 x 5/8”...
-
Page 7: Assembling The Fuselage
Center the wheel in the opening in the pant and then tighten the wheel collars. Twist the sliding pant until the axle is lined up with the leading edge of the wing, then drill 1/16” pilot holes and attach the fixed portion of the pant to the wing using 4 of the 2.6x10mm Phillips head self tapping screws. - Page 8 sure that your engine will be centered over the alignment marks on the firewall. Drill the holes and install the engine, using a thread-locking compound on the bolts. Cut a block of 1/2” thick scrap balsa approximately 1” x 1 3/4” to act as a spacer to keep the fuel lines from crimping against the firewall.
- Page 9 meets the fuselage. Remove the box, spread 30-minute epoxy behind the line and reinsert it into the fuselage. Set the fuselage aside until the epoxy sets up completely. INSTALL THE THROTTLE AND CHOKE SERVOS AND PUSHRODS. Although the choke can be operated manually, we recommend that you hook it up to a servo for ease of operation and to provide a way to stop the engine from the transmitter.
- Page 10 with 30-minute epoxy. The epoxy will give you time to set the dummy engine/cowl assembly up as shown and to carefully center the dummy engine within the cowl. INSTALL THE COWL MOUNTING BLOCKS. Locate the four factory covered hardwood cowl mounting blocks. Glue them into the notches in the fuselage nose ring with the long axis of the blocks running across the fuselage.
- Page 11 ATTACH THE STICKERS. It will be much easier to put the stickers on now, than later. See the picture for their proper location. (Run the rudder stickers parallel to the ribs in the fin. The bottom of the fin is not parallel to the direction of travel.) MOUNT THE STABILIZER.
- Page 12 Screw the bracket in place with the two 2.6 x 12m self-tapping screws provided. Push the wheel collar up under the bracket and tighten the setscrew to hold it in place. INSTALL THE ELEVATOR SERVOS. Add a 24” extension to each of your elevator servos and use tape or shrink tubing to secure the connections.
- Page 13 Pass one end of the cable through a crimp tube and through the hole in the threaded adapter. Loop the cable back through the crimp tube in the other direction, leaving about 3” of cable past the tube. Now loop the cable over the tube and pass it through the tube a third time going away from the clevis.
-
Page 14: Setting Up The Airplane
INSTALL YOUR RECEIVER, SWITCHES AND BATTERIES. We like to put the switches in the cockpit floor ahead of the pilot, but you can put them almost anywhere that strikes your fancy. Before you mount the batteries, assemble the airplane and check the balance. (The CG should be 5 ¼”... - Page 15 Rudder 1 1/2” 2” each way FLY SAFE, and HAVE FUN! Jim Johnson, Pacific Aeromodel Jim Johnson, Pacific Aeromodel Jim Johnson, Pacific Aeromodel Jim Johnson, Pacific Aeromodel Pacific Aeromodel Mfg., Inc. 12368 Valley Blvd. #109 El Monte, CA 91732 www.pacaeromodel.com...
- Page 16 Official Academy of Model Aeronautics National Model Aircraft Safety Code Effective January 1, 2006 GENERAL 1. A model aircraft shall be defined as a non-human-carrying device capable of sustained flight in the atmosphere. It shall not exceed limitations established in this code and is intended to be used exclusively for recreational or competition activity.
- Page 17 agreements, including an interference test report if the agreement indicates no interference exists, will be signed by all parties and copies provided to AMA Headquarters. 7. With the exception of events flown under official AMA Competition Regulations rules, excluding takeoff and landing, no powered model may be flown outdoors closer than 25 feet to any individual, except for the pilot and the pilot's helper(s) located at the flightline.
Need help?
Do you have a question about the 27 percentGee Bee “Y” ARF and is the answer not in the manual?
Questions and answers