Table of Contents
Advertisement
Quick Links
Advertisement
Table of Contents

Summary of Contents for Virgin Pulse VP-10
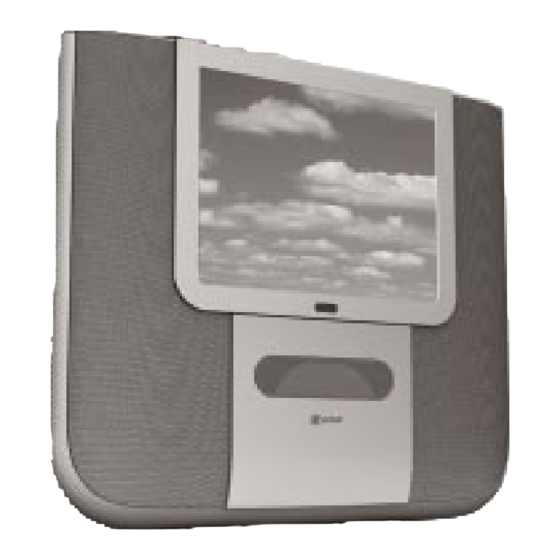
- Page 1 OWNER’S MANUAL LCD TV with DVD/CD Player VP-10...
- Page 2 INTRODUCTION Congratulations, you’ve just bought the sexiest, portable TV/DVD on the planet. Of course, we may be biased. But consider this: It’s cable, antenna and rabbit ears ready. It’ll play DVDs and CDs. It’s even MP3 compatible. Truly, it’s an all-in-one, one-of-a-kind wonder. But don’t let its compact size fool you.
-
Page 3: Safety Precautions
SAFETY PRECAUTIONS The lightning flash with an arrowhead symbol, within the equilateral triangle, is intended to alert the user to the presence of uninsulated "dangerous voltage" within the product's enclosure that may be of sufficient magnitude to cause an electric shock. The exclamation point within the equilateral triangle is intended to alert the user to the WARNING: TO REDUCE THE RISK OF ELECTRIC SHOCK,... -
Page 4: Important Safety Instruction
IMPORTANT SAFETY INSTRUCTIONS Read Instructions - All the safety and operating instructions should be read before the appliance is operated. Retain Instructions - The safety and operating instructions should be retained for future reference. Observe All Warnings - All warnings on the appliance and in the operating instructions should be adhered to. Follow Instructions - All operating and use instructions should be followed. -
Page 5: Table Of Contents
TABLE OF CONTENTS Safety Precautions ............1 Radio Operation ............26 Important Safety Instruction ........2 Tuning into a Station Manually ..............26 Disc Formats ..............4 FM Stereo ..........................26 Accessories ............... 5 Weak FM Station Reception ................ 26 Remote Control ............... 5 Search for a Station Automatically ............ -
Page 6: Disc Formats
DISC FORMATS The unit can playback. DVDs [8cm/12cm disc] Compatible Audio CDs [8cm/12cm disc] Region Management Information This unit is designed and manufactured to respond to the Region Management Information that is encoded on DVD discs. If the Region number printed on the DVD disc does not correspond to the Region number of this unit, this unit cannot play that disc. The region number of this unit is 1. -
Page 7: Accessories
ACCESSORIES Please check and identify the supplied accessories. Remote control ................................ x 1 AC adaptor ................................... x 1 AC power cord ................................x 1 12V car plug adaptor ............................... x 1 Audio/Video cable ..............................x 1 AA size battery (for remote control) ......................x 2 Wall mount bracket ............................... -
Page 8: Control Reference Guide
CONTROL REFERENCE GUIDE Remote Control STANDBY/ON button Press to switch between standby and on. 2) RETURN button Return to the normal operation after using the SETUP menu of a DVD. 3) Number (0 - 9) and (+10) buttons Use when creating Tuner stations preset programs and select the preset station. - Page 9 CONTROL REFERENCE GUIDE (CONTINUED) Remote Control 18) OPEN / CLOSE button To open or close the disc door. 19) FUNCTION button Select Tuner/TV/DVD/AV IN . 20) GOTO button Skip directly to a specific location on a DVD/CD disc. 21) TV SETUP button Open and close TV Setup menu screen.
-
Page 10: Control Reference Guide
CONTROL REFERENCE GUIDE Unit Telescopic RADIO FM ANTENNA 10) VOLUME ( ) control Adjust its position to obtain the best reception Adjust speaker output level. possible. 11) TV CHANNEL ( ) buttons OPEN/CLOSE button To select a desired TV channel. To open and close the disc door. -
Page 11: Display Information
DISPLAY INFORMATION Display CHAPTER / TRACK REPEAT 1 MEMORY ANGLE indicator indicator playback indicator Appears when multiple When a DVD is playing indicator Displayed camera angles are this indicator appears Displayed during recorded in the section of along with the chapter during repeat programmed the DVD that is currently... -
Page 12: Power Supply
POWER SUPPLY Using the AC Adaptor This AC adaptor operates on AC between 100V and 240V. AC adaptor To AC adaptor AC power cord Power indicator To AC outlet To DC IN 12V jack Right side of unit Notes: • The AC power cord and AC adaptor which come the unit are for use of this particular model only. -
Page 13: Connections
CONNECTIONS Connecting an ANTENNA for TV External TV antenna TV Antenna, Adjust the CATV cable or position External TV antenna to TV RF IN Terminal To stand To TV RF IN terminal Left side of unit Note: We recommend that television broadcasts be received by means of an external fixed antenna. Should you require the use of a temporary antenna, please ensure you purchase a an antenna, with sufficient ability to receive in weak signal areas. - Page 14 CONNECTIONS (CONTINUED) Watching a DVD on your External TV 1. Turn on the unit, use the FUNCTION button to select "DVD". 2.Turn on the TV and follow the instructions included with it to select the proper video in source. C. Audio Source Connection You can use your unit as an audio source to connect to your stereo amplifier.
-
Page 15: Installation
INSTALLATION Wall Mounting 1. Mark the correct mounting position on the wall (use the included template sheet for wall mounting). 2. Install the wall mounting brackets with screw(s) at the marked position on the wall. 3. Align the slot hole(s) of the unit over the bracket and slide the unit downward until it is firmly hooked. -
Page 16: Sound/Tone Adjustment
SOUND/TONE ADJUSTMENT Adjust the Sound Tone Press SOUND button until a desired sound effect (BASS or TREBLE) is displayed. Press CURSOR button to adjust the sound level. BASS : low range frequencies TREBLE : high range frequencies Sound Enhance (for DVD) Press SOUND ENHANCE (MOVIE or MUSIC) buttons to enhance the sound effect. -
Page 17: Cd/Dvd Operation
CD/DVD OPERATION This owner’s manual explains the basic instructions of this unit. Some DVD discs are produced in a manner that allows specific or limited operation during playback. As such, the unit may not respond to all operating commands. This is not a defect in the unit. Refer to the instruction notes of discs. -
Page 18: Fast Foward/Fast Reverse
CD/DVD OPERATION (CONTINUED) Fast Forward/Fast Reverse 1. Press the button when a disc is playing. • Begins with fast scan at 2 times normal speed. • Four speeds are available. Each time button is pressed, the speed of fast scan changes in the following sequence: 2. -
Page 19: Angle Selection (Dvd)
CD/DVD OPERATION (CONTINUED) Angle Selection (DVD) Some DVDs contain scenes which have been shot from a number of different angles. For these discs, the same scene can be viewed from each of these different angles. 1. While you are playing a DVD with different angles recorded, press the ANGLE button to view the number of the current angle. -
Page 20: Special Functions
SPECIAL FUNCTIONS DISPLAY Function (DVD) Using DISPLAY, you can check and change the current settings of the following items: ANGLE, AUDIO and SUBTITLE. • While the disc is playing, press the DISPLAY Elapsed Time Remaining Time button to display the screen shown below. Elapsed time: Elapsed time from the beginning of the chapter which is currently playing. -
Page 21: Subtitle Setting (Dvd)
SPECIAL FUNCTIONS (CONTINUED) Subtitle Setting (DVD) 1. Press the DISPLAY button twice. The FUNCTION menu is displayed on the screen and you can see how many subtitle formats are recorded on the disc. 2. Press the SUBTITLE button repeatedly to select your desired language. -
Page 22: Go To A Specific Chapter/Track
SPECIAL FUNCTIONS (CONTINUED) Go To a Specific Chapter/Track (DVD/CD) If you know the chapter / track number you want to play, you can go to a specific chapter/track by directly selecting the chapter/track number. 1. Press the GOTO button to search your desired chapter/track. 2. -
Page 23: Cd/Dvd Programmable Memory
CD/DVD PROGRAMMABLE MEMORY Programmable Memory (DVD) The two types of programmed playback provided by this unit are title programmed playback and chapter programmed playback. Title/Chapter Programmed Playback 1. Press the MEMORY button while the disc is stopped. 2. Enter the title numbers . -
Page 24: Repeat Playback
REPEAT PLAYBACK You can play a specific title or chapter of a DVD repeatedly. Repeating a Title (DVD) You can play the same title repeatedly. 1. While the disc is playing, press the REPEAT DISC button until the “ ” indicator displays on Repeat Title the screen. -
Page 25: Repeating A Specific Section (Dvd)
REPEAT PLAYBACK (CONTINUED) Repeating a Specific Section (DVD) You can play a specific section repeatedly. 1. While the disc is playing, press the REPEAT A-B button at the beginning of the section (( Rep A - displayed) you want to play repeatedly. 2. -
Page 26: Playing Mp3 And Picture Cds
PLAYING MP3 AND PICTURE CDs The VP-10 will play MP3 and Picture files recorded on CD-R and CD-RW discs. Playing a MP3 CD 1. Press OPEN /CLOSE button to open the disc door. 2. Hold a MP3 CD by its sides and gently press it onto the central support of compartment with the label side facing towards you until you hear a “click”. -
Page 27: Playing A Picture File Disc
PLAYING MP3 AND PICTURE CDs (CONTINUED) The VP-10 will automatically begin a full-screen review that will repeat. Playing a Picture File Disc 1. Press OPEN /CLOSE button to open the disc door. 2. Hold the Picture disc by its sides and gently press it onto the central support of compartment with the label side facing towards you until you hear a “click”. -
Page 28: Radio Operation
RADIO OPERATION Tuning a Station Manually 1. Press the FUNCTION button until the frequency band appears on the display. 2. Press the BAND button to select FM or AM. 3. Press the TUNING buttons to tune in a desired station. FM Stereo •... -
Page 29: Tv Setup
TV SETUP • Connect an antenna or CATV cable to the TV RF IN terminal before TV SETUP. • Use the remote control to access and adjust features as desired. 1. Press the FUNCTION button until TV appears on the fluorescent display. 2. -
Page 30: Manually Setting Or Deleting A Tv Channel
Manually Setting or Deleting a TV Channel 1. Select a channel number with the remote. (For channel 1 to 9 simply press the number button on the remote unit. For 10 or above, press 1 follow by 0, etc.). 2. Press the TV SETUP button to open the TV SETUP menu. 3. -
Page 31: Picture Setup
PICTURE SETUP Picture Mode Setting • You can choose between three preset and one customizable display modes. 1. Press the FUNCTION button until TV or DVD appears on the display. 2. Press the PICTURE button to open the Picture Setup menu. 3. -
Page 32: Picture Memory Setting
Picture Memory Setting Increase or decrease the levels of colored patches according to your personal preference. 1. Press the PICTURE button to open the Picture Setup menu. 2. Press the TV CH+ or TV CH- button to select the Picture Memory, then press the SET button to enter to the sub-menu. -
Page 33: Customize Dvd Player Settings
CUSTOMIZE DVD PLAYER SETTINGS LANGUAGE Setting 1. Press the FUNCTION button until DVD shows up on the fluorescent display. (Press the STOP button to ensure no disc is being played.) 2. Press the SETUP button. 3. Use button to select Language. 4. - Page 34 Explanation of Aspect Ratios Cut off when a wide-screen video image is played. 4:3 Pan Scan • When wide-screen video is played, this mode clips the right and left sides of the image so that it can be viewed on a conventional screen.
-
Page 35: Audio Setting
Edges Press the FUNCTION button until DVD shows on the fluorescent display. (Press the STOP button to ensure no disc is being played.) 2. Press the SETUP button. 3. Use button to select Video, then press the ENTER button. 4. Use button to select Edges, and then press the ENTER button. -
Page 36: Rating Setting
Virtual Effect To obtain expansive virtual surround sound effects from just two speakers. 1. Press the SETUP button on the remote control while the disc is stopped. 2. Use button to select Audio, press the ENTER button. 3. Use button to select Virtual Effect, then press the ENTER button. 4. - Page 37 5. To exit the FUNCTION SETUP MENU and return to the normal screen, press the RETURN button. Indicates Parental lock is NOT active. The Parental lock is active. STEP 2 STEP 3 STEP 4 Language Audio Rating Language Audio Rating Language Audio Rating...
-
Page 38: Language Code List For Disc Language
LANGUAGE CODE LIST FOR DISC LANGUAGE 1.877.4VPULSE or www.virginpulse.com... -
Page 39: Maintenance
MAINTENANCE Cleaning a Disc A defective or soiled disc inserted into the unit can cause sound or video to drop out during playback. Handle the disc by holding its inner and outer edges. • Do NOT touch the unlabeled surface side of the disc. •... - Page 40 PROBLEM SOLUTION No picture • The region number of the disc doesn't match the region number of this unit. • The function is not set to DVD mode . The picture is not clear • Clean the disc. • The disc is scratched. Severe hum or noise is •...
-
Page 41: Service
To obtain warranty service you must take or ship the product, freight prepaid, with a copy of the sales receipt or other proof of purchase and the date of purchase, to a Virgin Pulse Authorized Service Center. - Page 42 Virgin Item#VP-10 Made in China Products manufactured and distributed under license from Virgin Enterprises Limited. VIRGIN and the Virgin Signature logo are registered trademarks of Virgin Enterprises Limited. VIRGIN PULSE is a trademark of Virgin Enterprised Limited. 1.877.4VPULSE www.virginpulse.com Customer Care...
Need help?
Do you have a question about the Pulse VP-10 and is the answer not in the manual?
Questions and answers