
Subscribe to Our Youtube Channel
Related Manuals for Lok8u NU-M8+


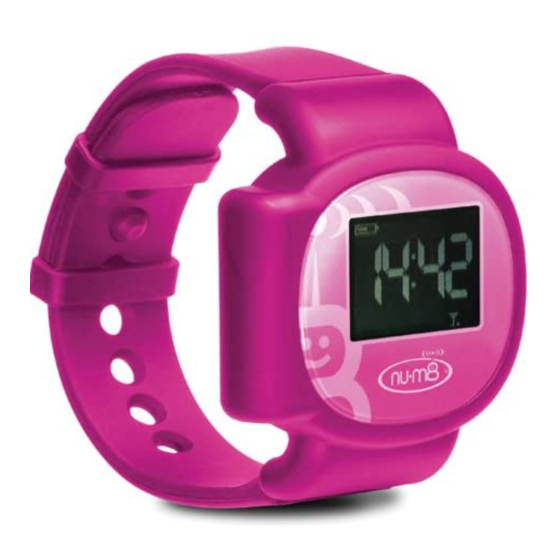
Summary of Contents for Lok8u NU-M8+
-
Page 1: User Guide
User Guide The world‟s first GPS locator that locates your child, not just the device nu•m8+ User Guide V1.06... -
Page 2: Table Of Contents
© Table of Contents Preface ..............................2 Lok8u Ltd and its Subsidiaries ......................4 1. Introduction ............................5 2. Product Design and Functionality Summary ................5 3. Getting Started ..........................6 3.1 Charge nu•m8+ ..........................6 3.2 Create Account and Register nu•m8+ ..................7 3.3 Activate nu•m8+ ......................... -
Page 3: Preface
I know that it will live up to your expectations but if there are any suggestions that you think © would be sensible to incorporate, I will give them my full attention. I can be contacted at steve@lok8u.com. Steven K Salmon Chief Executive nu•m8+... - Page 4 Disclaimer and Limitation of Liability The content of this user guide is accurate and reliable and is provided “as is”. Lok8u makes no warranties of any kind, either express or implied, including, but not limited to, any implied warranties of merchantability, fitness for a particular purpose, are made in relation to the accuracy, reliability or contents of this document.
-
Page 5: Lok8U Ltd And Its Subsidiaries
Lok8u Ltd and its Subsidiaries United Kingdom (UK) United States (USA) South Africa (SA) Lok8u Ltd Lok8u LLC Lok8u SA (Pty) Ltd Unit 2 2500 Plaza Five, 25th Fl PO Box 4459 Colemeadow Road Jersey City, NJ 07311 Tygervalley North Moons Moat... -
Page 6: Introduction
To locate the child, simply text “wru” from a mobile phone to the or click “Where ru” on the Lok8u secure Customer Portal. The child‟s location is then presented as an icon on Google maps and/or the street address and postal code is displayed. -
Page 7: Getting Started
3. Getting Started nu•m8+ is supplied in a high quality carton enclosure with information and functionality of the product, printed on the outside. The packaging contains all the equipment that is necessary for operation. The packaging includes the following: nu•m8+ GPS Watch ... -
Page 8: Create Account And Register Nu•M8
Select the required subscription tariff (to select the subscription that is most appropriate for nu•m8+ your planned use of , please refer to the Lok8u website, www.lok8u.com and select your country to view the available Tariff Options) Log In Click on “Create Account”... - Page 9 Terms & Conditions Please read through the Terms and Conditions and click on “Accept” to continue with the registration. You will not be able to create an account to register your device if you “Decline” the Terms and Conditions. Registration Enter your “Login Details”, “Personal Details”...
- Page 10 nu•m8+ ‟s - Main Page nu•m8+ To register a , click on “My Details”. User Profile Click in “Register Device” to nu•m8+ register a new Click on “Back” to return to the Main Portal page. Click on “Logout” to log out of Portal.
- Page 11 Terms & Conditions Please read through the Terms and Conditions and click on “Accept” to continue with the registration. You will not be able to register your device if you “Decline” the Terms and Conditions. Registration The registration consists of 2 easy steps: Step1: Add Devices Step2: Payment...
- Page 12 Device Details Enter the details of the nu•m8+ select Icon Colour and upload an image of your child. You can “Edit” the details of your device in the main Portal when logged in. All the fields marked with “*” are mandatory. Click on “Next”...
-
Page 13: Activate Nu•M8
nu•m8+ 3.3 Activate nu•m8+ nu•m8+ Before activating ensure that the battery is fully charged. To activate MUST switch it On by inserting the strap into the housing whilst the watch is off the wrist and press the Reset button gently for 5 seconds with the release tool provided in the desk-top charger base. - Page 14 IT IS CRITICAL THAT IN ORDER TO COMPLETE THE ACTIVATION PROCESS THE FOLLOWING 3 STEPS ARE FOLLOWED. STEP 1 nu•m8+ When switching ON for the first time, the GPS needs learn the satellite location in your area, in order to obtain a GPS location. nu•m8+ nu•m8+ To enable the GPS functionality of your...
- Page 15 A "warm" start means the GPS has most of the data it needs in memory, and will start quickly - a minute or less. GPS receivers cannot receive a signal underground, underwater, under any conductive type material like metal, indoors or become inaccurate under thick glass as the signal travels slower through glass.
-
Page 16: Nu•M8+ Battery
nu•m8+ Your is now ready to be used. nu•m8+ Simply place around your child‟s wrist, insert and lock the open end of the strap into the housing of the nu•m8+ , as indicated. nu•m8+ The back plate of the is manufactured from Stainless Steel. If you child has a know allergic reaction to Stainless Steel and or Nickel, the Self adhesive 3M medical label, supplied in the packaging, must be applied to the nu•m8+... -
Page 17: Nu•M8+ Start-Up
nu•m8+ Start-up nu•m8+ It is recommended to ensure that is fully charged and that the correct nu•m8+ time display on before you let your child out to play. nu•m8+, i nu•m8+ When the correct time display on t is a visible indication that is connected to the mobile phone (GSM) network. -
Page 18: Time Configuration
To update your subscription details contact the support service of your selected country. (See Lok8u Ltd and its Subsidiaries, Page 4, for contact details.) 5. Time Configuration nu•m8+ nu•m8+... -
Page 19: Customer Portal Login
6. Customer Portal Login To log in to the Customer Portal, go to the Lok8u website, www.lok8u.com and select your country on the home page. On the home page of your country, click on the icon, Portal Login. Log In... -
Page 20: My Nu•M8+"S - Main Page
nu•m8+ s – Main Page ‟ 6.1 My nu•m8+ You are now ready to interact with using the functionality that is described in the following sections of this user guide. The map displayed in the main page will always open as default on the address that was entered at registration. - Page 21 nu•m8+ Configuration Details of Selected Icon / Name of nu•m8+ selected nu•m8+ Off indication Standby mode indication and configuration Live Track mode indication and configuration Safe Zone indication and configuration; Add New; Edit; Delete Safe Zones Configuration of Alert List and contact details Indication of current contact configured that can send / receive SMS and Alerts Configuration Home zone Home Zone indication and configuration;...
-
Page 22: Help
If you require any further assistance, contact Customer Services for your country. Lok8u Subsidiaries contact details for your country. If you are using a public computer please ensure that you do not click “Remember my Password” as your log in details will be visible to the next user. -
Page 23: Forgotten Password
6.3 Forgotten Password If you have forgotten your password, simply click on “Forgotten Password” on the Log In page. To close the window, click on the 'X' in the top right corner. Enter the Username that were chosen at registration and click on “Send”. The password details will be e-mailed to the e-mail address that was entered at registration. -
Page 24: Where Are You "Wru" Request
8. Where are you “wru” Request I want to know where my child is now! This can be done from either your Mobile Phone or Desk-top Computer (Customer Portal). 8.2 From your Mobile Phone nu•m8+ via your mobile phone, the “Alerts Send To” on the To send text commands to nu•m8+ Customer Portal must be set to the mobile phone that you will be using to text... -
Page 25: From A Desk-Top Computer (Customer Portal)
8.2 From a Desk-top Computer (Customer Portal) Log in to the Customer Portal using the Username and Password that were chosen at registration. (See Section 6, Customer Portal Login, for more detail on the Customer Portal for your selected country.) Log In Log in using the Username and Password that were... - Page 26 The settings have been sent nu•m8+ to your . Please wait. It is not possible to click the “Where ru” button again until the Portal has completed its process locating your child. nu•m8+ Once has responded the location will be shown as a cross hair which if you place your mouse in the area will give the degree of accuracy and the time.
- Page 27 Once a GPS location is received the image in the left hand panel will change to nu•m8+ the image of the selected at registration and the GPS location will be shown on the map. You can select the format of the map to be: “Map”...
- Page 28 You can now drag the map and pan in or out. Data updates will not refresh the map. This particularly useful when reviewing a Live Track trip for example. position, status nu•m8+ change of a received whilst in drag mode, the orange “Drag Mode”...
-
Page 29: Set, Apply And Edit A Safe Zone
9. Set, Apply and Edit a Safe Zone A Safe Zone is an area on a map where you are happy and feel save for your child to play. If they move outside of this area you will receive an alert (this may be school, a playground, a shopping centre or even home). -
Page 30: From A Desk-Top Computer (Customer Portal)
9.2 From a Desk-top Computer (Customer Portal) A Safe Zone can be set and applied immediately, saved for later, or you can select a previously saved Safe Zone by name and apply. A Safe Zone can be defined by multiple points on a map or a defined radius circle with its central point as a location on a map. - Page 31 In the “Find” box, enter the name of a town or postal code to get the map to the general area of where you want to set the Safe Zone. Zoom in or out, pan right, left, up or down to get the exact location.
- Page 32 Give the Safe Zone area a Name and select the Live Update Rate. You can clear the zone by clicking on “Clear” in the bottom left corner. Click on “Save” to save the Point-to-Point Safe Zone created. To cancel the operation, click on “Cancel”.
- Page 33 When selecting “Set Now” the Safe Zone will be set immediately and the Zone settings will sent nu•m8+ The settings have been sent nu•m8+ to your Please wait. When a Safe Zone is set, the Customer Portal status will change to the name of the Safe Zone configured when nu•m8+ confirms that the...
- Page 34 Click on “Save” to save the Radius Safe Zone created. You can choose to either “Set Now” or “Save to list” You can set the Safe Zone immediately, “Set Now”, in which case the settings will nu•m8+ or “Save be sent to to list”, which will save the Safe Zone to the list to be selected and applied later,...
- Page 35 Confirm your choice of the Safe Zone selected and click on “Yes”. Click on “No” to cancel the operation. The settings have been sent nu•m8+ to your Please wait. When a Safe Zone is set, the Customer Portal status will change to the name of the Safe Zone nu•m8+ configured when confirms that the instruction has been received and applied.
- Page 36 9.2.3 Edit a Safe Zone To Edit a “Safe Zone”, go to “Safe Zone” in the right hand panel and select the “Safe Zone” you wish to edit and click “Edit”. You will then be directed to the Edit Safe Zone window. Make the changes that you require to the area, the type of shape, “Radius”...
- Page 37 9.2.4 Delete a Safe Zone To Delete a “Safe Zone”, go to “Safe Zone” in the right hand panel and select the “Safe Zone” you wish to delete and click “Delete”. Click on “Yes” to delete the selected Safe Zone. Click on “No”...
- Page 38 9.2.5 Disable a Safe Zone To disable a Safe Zone, select “Standby” on the main Customer Portal. Select “Yes” to switch the device mode to Standby and to disable the Safe Zone. Click on “No” to cancel the operation. The settings have been sent nu•m8+ to your Please...
-
Page 39: Removing Nu•M8+ Without Triggering An Alert
nu•m8+ 10. Removing without triggering an Alert nu•m8+ Your strap is impregnated with a wound steel core which is very difficult to cut. nu•m8+ If the release button in the watch housing is depressed releasing the strap before put in to “Off “mode a priority alert “Strap Compromised” will be sent to the designated alert recipients by email and / or text message. -
Page 40: From A Desk-Top Computer (Customer Portal)
10.2 From a Desk-top Computer (Customer Portal) nu•m8+ that you want to “Switch Off”. The Log in to the Customer Portal and select the nu•m8+ selected will be displayed in the top right corner of the Customer Portal. Click on “Switch Off” to nu•m8+ Switch Off Select... - Page 41 The settings have been sent nu•m8+ to your Please wait. When the LCD display goes blank it is safe to remove nu•m8+ from your child. The status Customer Portal will be updated to “Off”. nu•m8+ nu•m8+ To remove depress the release button in the strap with the release tool provided and the bracelet will release.
-
Page 42: Live Track
11. Live Track Live Track can only be used from the Customer Portal and should be used carefully as it is a very battery intensive operation. nu•m8+ to “Live Track”, log in to the Customer Portal and select the To change the status of nu•m8+ nu•m8+ that you want to set. - Page 43 nu•m8+ is in Live Track mode. Waiting for the first location. Please Wait. nu•m8+ Once confirmed the Live Track settings the screen changes to the image above whilst you wait for the first location to be displayed on the map. The Start location of Live Track will be indicated with a Red icon on the map.
- Page 44 Each updated position will be linked to create a snail trail. The last updated position of nu•m8+ will be indicated with a Blue icon on the map. To disable a Live Track, select “Standby” on the main Customer Portal. Select “Yes” to switch the device mode to Standby and to disable Live Track.
-
Page 45: Alerts
12. Alerts nu•m8+ When you first registered you were asked to enter your contact details; mobile phone and email contact details, which were then saved and recorded as the primary contact. Alterations, “Change”, “Add New” and “Edit” can be made to your contact details entered at registration. -
Page 46: Change The Recipient Of Alerts
Each text alert (SMS) received uses up increments of your monthly text (SMS) allowance in the tariff that you have selected. It is possible, at anytime, to restrict alerts to email only, by disabling text alert. After the new contact was entered and saved, select if you want to set the Alert on the device now or save the... -
Page 47: Edit Recipient Of Alerts
Confirm by clicking on “Yes” Alert will changed that contact allowing the person to issue instructions from their mobile phone. Click on “No” to cancel the operation. 12.3 Edit Recipient of Alerts To “Edit” an existing contact, click on “Alerts” and select the individual you want to edit and click on <Edit>... -
Page 48: Home Zone
Make the required changes and click on “Save” to save the alterations. Click on “Cancel” to cancel editing contact. Click on “Exit” to return to the main Portal. 13. Home Zone nu•m8+ The purpose of Home Zone is to create an area in which it is safe to remove from your nu•m8+ child‟s wrist without first sending the “Switch Off”... -
Page 49: Create New Home Zone
13.1 Create New Home Zone Click on “Home Zone” in the right hand panel. Click on <New> to create a new Home Zone. Home Zone is set, edited and added in exactly the same way as Safe Zone with the exception that you select “Home”... -
Page 50: My Details
14. My Details Click on “My Details” on the navigation Customer Portal to change the default settings of your User Profile. Click on “Back” to return to the Main Portal page. Click on “Logout” to log out of Portal. Click on “Save” to save any changes made. - Page 51 You can select and configure your Time Zone. nu•m8+ click on “Edit” To change the icon, name and colour of your The configured details of the nu•m8+ will be displayed. Device Name, Icon Colour and Image can be changed. Make the required changes and click on “Save”...
-
Page 52: Product Specification
Proprietary Cell ID location to 1000m (max) when no GPS signal is received, i.e. indoors All interaction with the device is from mobile phone (SMS) or computer through Lok8u‟s encrypted pinpoint services. Encrypted data sharing to ensure no un-authorised access of location, all requests for location pass through the Lok8u server infrastructure, with recorded history in the parent‟s... -
Page 53: Certification
CE symbol also includes a number that identifies the so called Notified Body. 17.2 WEE LOK8U Ltd is registered under the WEE imitative registration number, 158864. The WEEE directive (Waste Electrical and Electronic Equipment 2002/96/EC) has been put in to place to ensure that products are recycled using best available treatment, recovery and recycling techniques to ensure human health and high environmental protection. -
Page 54: Sar
The equipment is designed to transmit worst case one GSM data burst every 2 minutes. Any change or modification to the product not expressly approved by Lok8U may violate FCC RF Exposure guidelines and void the user's authority to operate the device. -
Page 55: Product Information
If it is uneconomic to repair, Lok8u may offer the customer a replacement nu•m8+ on terms to be agreed on a case by case basis. - Page 56 nu•m8+: Caring for your nu•m8+ is constructed of high quality materials and does not require maintenance except cleaning. Cleaning the Case: nu•m8+ ‟s outer casing (except for the screen) using a cloth damped with a mild Cleaning detergent solution and then wipe dry. Avoid chemical cleaners and solvents that may damage the plastic components.
-
Page 57: Useful Information
19. APPENDIX I 19.1 Useful Information nu•m8+ will check that it can get a fix on the satellites to ensure that it can get the most nu•m8+ accurate location when required. However, although uses the latest technology, including assisted GPS, there will be times, particularly indoors, on a cold start, that this may nu•m8+ cannot get a fix, as indicated on the screen “no GPS”... -
Page 58: Troubleshooting
If nu•m8+ does not proceed beyond the first bar then hit the reset button on the back, if this problem persists contact Lok8u customer service. Adjust the time by following the instructions in Clock shows the wrong time the time section of this manual. -
Page 59: Nu•M8+ Faq"S
21. APPENDIX III nu•m8+ FAQ‟s 21.1 nu•m8+ doesn‟t start up when I have switched it On? nu•m8+ Location info from being inconsistent? What is the battery life of my nu•m8+? nu•m8+ is taking a long time to respond to my instructions? nu•m8+ clock shows the wrong time? How do I charge nu•m8+? - Page 60 Bar 4 – Full Service Communication completed and successful. nu•m8+ The black bars is an indication that acquired mobile phone signal and connected to the GSM network. If the time still does not appear, gently push and hold the Reset button on the back plate next to the charging pins for approximately 5 seconds, using the tool that is in the charger base unit.
- Page 61 Time to First Fix (TTFF) describes the time and process required for a GPS device to acquire enough usable satellite signals and data to provide accurate locations. A GPS must have three sets of data before it can provide accurate locations: GPS satellite signals, almanac data, and ephemeris data.
- Page 62 Poor GSM coverage or handshaking between multiple base stations, i.e. during a car journey will also consume extra battery power. Powering up the GPS module consumes the most power. It is expected that 5-10 “wru” requests, when outdoors, will give you 14-18 hours of battery life. It is expected that 5-10 “wru”...
- Page 63 nu•m8+ The Red light comes on when I place on the charger base? nu•m8+ This shows is correctly positioned on the charger base and is charging the battery. nu•m8+ is fully charged and ready for use when the Red light goes Off and the Green light comes On.
- Page 64 LCD display shows the correct time, confirming that is activated. The only way the service can be disabled is if you login to the Lok8u Portal and send a “Switch Off” command or text „Off‟ from your mobile phone.
- Page 65 Which phones are compatible with the service? nu•m8+ All mobile phones can receive text messages which is the standard way for communicate your child‟s position or give an alert. If you have a phone with internet connectivity (GPRS, 3G or Wifi) and the relevant tariff, you can also view the child‟s location on Google maps linked to the text message.
- Page 66 Notes: nu•m8+ User Guide V1.06...
Need help?
Do you have a question about the NU-M8+ and is the answer not in the manual?
Questions and answers