Soleus Air LX-140 Operating Instructions Manual
14,000 btu portable air conditioner 14,200 btu heat pump
Hide thumbs
Also See for LX-140:
- Operating instructions manual (19 pages) ,
- Owner's manual (16 pages) ,
- Operating instructions (4 pages)

Related Manuals for Soleus Air LX-140


Summary of Contents for Soleus Air LX-140
- Page 1 14,000 BTU Portable Air Conditioner 14,200 BTU Heat Pump Model Number: LX-140 Operating Instructions 3092402 Model No. LX-140 V.121031...
-
Page 2: Important Instructions
Thank you for choosing a Soleus Air LX-140 Portable Air Conditioner & Heat Pump. This owner’s manual will provide you with valuable information necessary for the proper care and maintenance of your new product. Please take a few moments to thoroughly read the instructions and familiarize yourself with all the operational aspects of your new Soleus Air Portable Air Conditioner with Heat Pump technology. -
Page 3: Package Contents
These specifications are for reference only. For actual data, please refer to the rating label on the back of the unit. • If the environment temperature is higher than the max operating temperature or lower than the minimum operating temperature, the air conditioner may not work properly. MODEL LX-140 COOLING CAPACITY 14,000 BTU/H HEATING CAPACITY 14,200 BTU/H... -
Page 4: Lcdi Power Cord And Plug
3. Press RESET button for use If test button is pressed and unit can still be turned on, current leakage has been detected. Do not use the air conditioner or attempt to reset the LCDI Plug. Contact Soleus Air Customer Service for troubleshooting recommendations. -
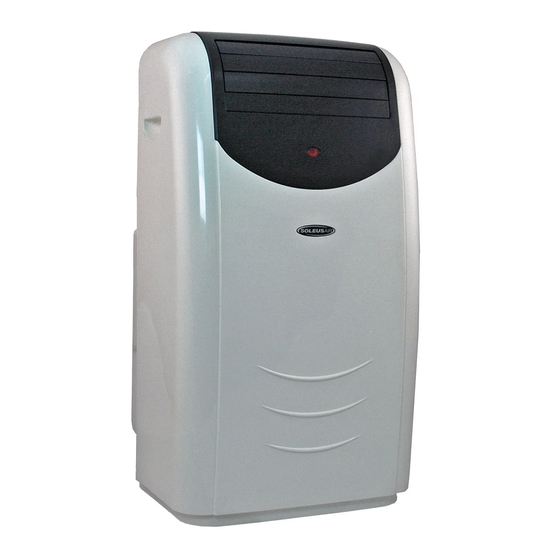
Page 5: Product Diagram
PRODUCT DIAGRAM Control Panel Louvers Signal Receptor Casters Filter Compartment Air Intake Cover/Filter... -
Page 6: Parts & Assembly
PARTS & ASSEMBLY PARTS EXHAUST HOSES Window Kit Adapter WINDOW KIT ASSEMBLY & INSTALLATION INSTALLATION When the unit is operating as an air conditioner, heater, or dehumidifier, the unit draws in fresh outdoor air and exhausts hot air (in AC or dehumidifier mode) or cool air (in Heat mode) out of the room to complete the air exchange. When the unit is operating in fan mode, no outdoor air exchange takes place. - Page 7 DUAL HOSE WINDOW KIT INSTALLATION - To quickly and efficiently cool a large area. When using with a sliding door, it is recommended to place the air outtake hose above the air intake hose...
-
Page 8: Window Kit Assembly
Window Kit Assembly 1.Parts: A) 2 Track Screws B) 2 Wing Nuts C1 & C2) 2 Hose Panels, one with Two Exhaust Hose Openings D) 1 Sliding Track Panel 5. Next, take the other Hose Panel (C2) and connect it to Hose Panel (C1) by placing the Sliding Track Panel (D) over the Track Screw (A) on Hose Panel (C2). - Page 9 SINGLE HOSE EXHAUST & WINDOW KIT INSTALLATION When you want quick spot cooling, install the LX-140 using the single hose window kit installation. For Single Hose Installation Install only the left exhaust hose over the circular air outlet (this outlet will be on the left side of the unit when you are facing the back of the unit).
-
Page 10: Control Panel, Display, & Operating Instructions
CONTROL PANEL, DISPLAY, & OPERATING INSTRUCTIONS CONTROL PANEL & MULTI-COLOR DISPLAY CONTROL PANEL TEMP & TIMER SELECTION POWER BUTTON MODE BUTTON TIMER BUTTONS TEMP SELECT FAN SPEED BUTTON MULTI-COLOR DISPLAY AUTO DEHUM. HEAT TIMER ON TIMER OFF FAN SPEED TEMPERATURE AND TIMER INDICATOR OSCILLATION ON/OFF... -
Page 11: Operating The Unit Using The Control Panel
OPERATING INSTRUCTIONS CONTROL PANEL BUTTONS (Refer to the images on page 10) 1) Power On and Off - Press the POWER button once to manually turn the unit on. Press the POWER button once more to turn the unit off. 2) Mode Selection - Press the MODE Button repeatedly to cycle between the different modes: Auto mode, Air Conditioner, Dehumidifier, Fan only, and Heater. - Page 12 NOTE: During hot days, the unit will cool the room most efficiently by setting the temperature at the lowest setting and the fan speed on high. Reducing the length of the exhaust duct, insulating the exhaust hose and window kit, and keeping direct sunlight to a minimum will also improve the cooling efficiency. NOTE: When the unit is running on cooling mode, the exhaust hoses are required and must be vented outside using the supplied window kit.
- Page 13 Auto Mode 1) Install the exhaust hoses and window kit properly (see pages 7 , 8 & 9 ). 2) Plug the Power Cord into an electrical outlet. 3) Turn on the unit by pressing the POWER button on the control panel. 4) Press the MODE button until the “...
-
Page 14: Screw Plug
Emergency Condensate Holding Tank When the room temperature is low and the indoor humidity is high, the air conditioner may not be able to evaporate some of the moisture fast enough. When this happens, the water will accumulate in an emergency condensate tank inside the unit. -
Page 15: Operating The Unit Using The Remote Control
OPERATING THE UNIT USING THE REMOTE CONTROL REMOTE CONTROL LCD DISPLAY MODE BUTTON POWER BUTTON FAN SPEED TEMP SETTING SWING (LOUVER OSCILLATION) TIMER ON SLEEP BUTTON TIMER OFF MINUTE SELECTER HOUR SELECTER... - Page 16 REMOTE CONTROL OPERATING INSTRUCTIONS 1) Power On and Off - If the unit is already on, press the POWER (I/O) button on the remote while point- ing the remote away from the unit. This will turn the remote on. If the unit is off, now press the POWER (I/O) button once to manually turn the unit on.
-
Page 17: Maintenance
MAINTENANCE Note: Make sure power is off and the power cord is not plugged into an electrical outlet prior to performing any maintenance on the unit. Clean or replace filter - If the air filter is blocked with a dust, the airflow volume may reduce. It is recommended to clean the filter once every two weeks or as needed. -
Page 18: Warranty
WARRANTY One Year Limited Warranty Soleus International Inc. warrants the accompanying Soleus Air LX-140 Portable Air Conditioner with Heat Pump technology to be free of defects in material and workmanship for the applications specified in its operation instruction for a period of ONE (1) year from the date of original retail purchase in the United States.
Need help?
Do you have a question about the LX-140 and is the answer not in the manual?
Questions and answers