Table of Contents
Advertisement
Available languages
Available languages
Quick Links
READ THIS BOOK
LEA ESTE MANUAL
LISEZ CE MANUEL
This book has important information for the use and safe operation of this machine. Failure to read
this book prior to operating or attempting any service or maintenance procedure to your Clarke
machine could result in injury to you or to other personnel; damage to the machine or to other
property could occur as well. You must have training in the operation of this machine before using it.
If your operator(s) cannot read this manual, have it explained fully before attempting to operate this
machine.
All directions given in this book are as seen from the operator's position at the rear of the machine.
For new books write to: Clarke®, 2100 Highway 265, Springdale, Arkansas 72764.
Form No. 909 6772 000 - 06/2008
Vantage 17 Battery
Operator's Manual
Manuel d'utilisation
Libro de Instrucciones
EN
English (3 - 24)
Español (25 - 47)
ES
Français (48 - 70)
FR
Advertisement
Chapters
Table of Contents

Related Manuals for Clarke Vantage 17 Battery


Summary of Contents for Clarke Vantage 17 Battery
-
Page 1: Operator's Manual
This book has important information for the use and safe operation of this machine. Failure to read this book prior to operating or attempting any service or maintenance procedure to your Clarke machine could result in injury to you or to other personnel; damage to the machine or to other property could occur as well. -
Page 2: Table Of Contents
SQUEEGEE BLADE CHECK AND REPLACEMENT BRUSH CLEANING CLEANING OF THE TANK AND VACUUM GRID FLOAT SOLUTION FILTER CLEANING MACHINE SPEED ADJUSTMENT BATTERY CHARGING FUSE CHECK/REPLACEMENT Vantage 17 Battery ACCESSORIES/OPTIONS HOW TO CORRECT PROBLEMS IN THE MACHINE Parts List Operator’s Manual - Vantage 17 Battery... -
Page 3: Operator Safety Instructions
Do not allow to be used as a toy. Close attention is necessary when used near children. WARNING! Use only as described in this Manual. Use only Clarke recommended accessories. WARNING! Take all necessary precautions to prevent hair, jewerly and loose clothing from being caught in the machine moving parts or vacuuming parts of the machine. - Page 4 Use the brushes and the pads supplied with the machine and those specified in the Operator’s Manual. Using other brushes or pads could reduce safety. CAUTION! This machine contains lead acid batteries. The batteries must be disposed of in an environmentally acceptable manner. Operator’s Manual - Vantage 17 Battery...
-
Page 5: Introduction
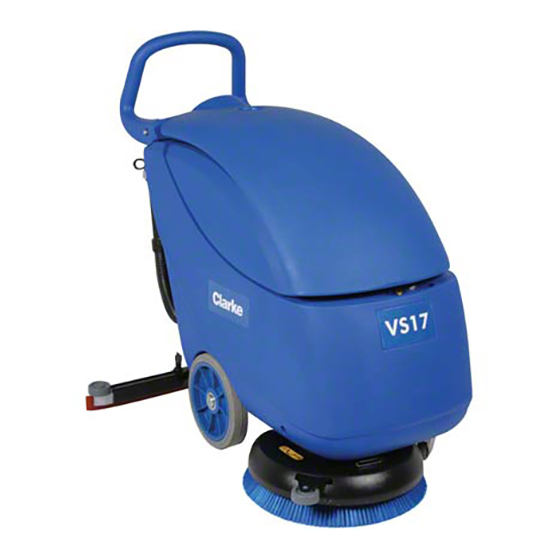
INTRODUCTION The model of the Clarke scrubber-dryer ensures a highly effective floor cleaning performance. The Vantage 17 Battery model uses a single rotary brush to clean an area of 17.0 in (430 mm) in width. The rear squeegee performs the floor cleaning and the vacuum system recovers the washing water in a single pass. -
Page 6: Machine Specifications
Machine Weight with Batteries, Brush and Full Solution 346.1 lbs (157 kg) Tank (Working Condition) Sound Pressure Level (at the Operator's Position) 67 dB(A) Battery Compartment Size (Length x Width x Height) 13.8x13.8x10.2 in (350x350x260 mm) Operator’s Manual - Vantage 17 Battery... -
Page 7: Machine Transport Procedures
Figure 1 SYMBOLS SHOWN ON THE MACHINE WARNING! Carefully read maintenance/repair instructions before performing maintenance/repair procedure. WARNING! Do not wash the machine with pressurized water. WARNING! Do not open the cover. Electric danger! Operator’s Manual - Vantage 17 Battery... -
Page 8: Machine Description
AA. Battery charger warning lights Squeegee knobs AB. Battery installation diagram M. Front squeegee blade AC. Recovery tank N. Rear squeegee blade AD. Solution tank O. Squeegee blade fixing springs P. Recovery tank drain hose Figure 2 Operator’s Manual - Vantage 17 Battery... -
Page 9: Inner Structure
D. Recovery tank N. Brush E. Solution tank O. Pad-holder F. Vacuum grid with automatic shut-off float P. Pad G. Recovery water drain hole Q. Vent hole H. Vacuum motor Brush/pad motor Batteries Figure 3 Operator’s Manual - Vantage 17 Battery... - Page 10 When one or both the activation switches are pressed, the brush/pad rotation is activated. The switches are active only if the brush/pad rotation switch (D, Fig. 4) is turned to the "I" position. Figure 4 Operator’s Manual - Vantage 17 Battery...
-
Page 11: Use
If the yellow or red warning light (D or E, Fig. 6) turns on, it is necessary to charge the batteries before using the machine (see the procedure in the Maintenance chapter). Figure 6 Operator’s Manual - Vantage 17 Battery... -
Page 12: (Wet Or Gel) Battery Setting, Installation And Charging
10. Reinstall the tank (C, Fig. 9) by carrying out steps 5 to 9 in the reverse order. Battery Charging 11. Charge the batteries (see the relevant procedure in the Figure 8 Maintenance chapter). Figure 9 Operator’s Manual - Vantage 17 Battery... -
Page 13: Before Machine Start-Up
7. Press the brush push-button on “I” (Fig. 12, F), then press on or both push-buttons (Fig. 12, G) for a few seconds. If the hooking operation is difficult, manually rotate the brush/pad-holder counterclockwise (Fig. 13). Figure 13 Figure 12 Operator’s Manual - Vantage 17 Battery... -
Page 14: Machine Start And Stop
Lift the squeegee by pushing the lever (B, Fig. 15) completely upwards. Lift the brush/pad by activating (B, Fig. 16) the transport/parking device (A) after inserting the relevant Figure 15 pin (C). Figure 16 Operator’s Manual - Vantage 17 Battery... -
Page 15: Machine Operation (Scrubbing/Drying)
3. Grasp the handlebar (A, Fig. 19) and slightly lower it until the rear wheel (B) comes into contact with the floor, as shown in the figure. While holding the machine in this position, push it to the transport/parking area. Figure 19 Operator’s Manual - Vantage 17 Battery... -
Page 16: Tank Emptying
Perform the maintenance operations to be carried out after using the machine (see the Maintenance chapter). Store the machine in a clean and dry place, with the brush/pad and the squeegee lifted or removed. Figure 21 Operator’s Manual - Vantage 17 Battery... -
Page 17: Recovery Tank Removal
Figure 22 3. Reinstall the recovery tank (A, Fig. 23). 4. Store the machine in a clean and dry place, with the brush/pad and the squeegee lifted or removed. Figure 23 Operator’s Manual - Vantage 17 Battery... -
Page 18: Maintenance
Screw and Nut Tightening Check Brush Motor Carbon Brush Check or Replacement Vacuum Motor Carbon Brush Check or Replacement (1): and after the first 8 working hours (2): for these maintenance operations, contact an authorized Clarke Service Center Operator’s Manual - Vantage 17 Battery... -
Page 19: Squeegee Cleaning
– Reinstall the spring clamps (G, Fig. 25). 4. Reinstall the squeegee (D, Fig. 24) and screw down the squeegee knobs (F). 5. Connect the vacuum hose (E, Fig. 24) to the squeegee (D). Figure 25 Operator’s Manual - Vantage 17 Battery... -
Page 20: Brush Cleaning
The hole (L, Fig. 27) compensates the air in the cover interspaces, thus allowing the creation of vacuum in the recovery tank. Remove the cover stand (B, Fig. 27) and close the cover (A). Figure 27 Operator’s Manual - Vantage 17 Battery... -
Page 21: Solution Filter Cleaning
3. Install the recovery tank as shown in the Use chapter. 4. With the machine ready to operate, carry out hands-on tests of the machine speed and, if other adjustments are necessary, repeat steps 1 to 4. Figure 28 Figure 29 Operator’s Manual - Vantage 17 Battery... -
Page 22: Battery Charging
CAUTION! Batteries must be charged indoors, in a dry Figure 30 environment. Drive the machine indoors, in a dry environment (damp free), to charge the batteries. Charge the batteries according to the following procedure. Operator’s Manual - Vantage 17 Battery... -
Page 23: Fuse Check/Replacement
– Brush fuse (C, Fig. 32): (40 A) – Vacuum system fuse (D, Fig. 32): (40 A) – Solenoid valve and electronic board fuse (E, Fig. 32): (5 A) 5. Reassemble in the reverse order of disassembly. Figure 32 Operator’s Manual - Vantage 17 Battery... -
Page 24: Vantage 17 Battery Accessories/Options
Insufficient solution flow to the brushes Clogged recovery tank output hole Clean the hole Debris under the squeegee blades Remove the debris The squeegee leaves lining on the floor streaks. Worn, chipped or torn squeegee blades Replace the blades Operator’s Manual - Vantage 17 Battery... -
Page 25: Parts List
Todas las indicaciones de dirección dadas en estre libro están dadas desde la posición del operador en la parte de atrás de la máquina. Puede Ud. conseguir libros suplementarios dirigiéndose a su distribuidor Clarke. INDICE... -
Page 26: Instrucciones De Seguridad Para El Operador
ESPAÑOL INSTRUCCIONES DE SEGURIDAD PARA EL OPERADOR PELIGRO: Indica un peligro con riesgo, incluso mortal, para el operador. ATENCIÓN: Se usa para indicar el riesgo de infortunios para las personas o daños para las cosas. ADVERTENCIA:Indica una advertencia o una nota sobre una función importante o útil. Tener cuidado de las partes del texto marcadas con este símbolo. - Page 27 ESPAÑOL ATENCIÓN: No dejar que material extraño entre en las aperturas. No utilizar la máquina en el caso de que las aperturas estén bloqueadas; las aperturas deben mantenerse libre de polvo, hilacha, pelos y cualquier otro cuerpo extraño que pueda reducir el flujo de aire. ATENCIÓN: Cuando se utiliza esta máquina, tener cuidado de salvaguardar la incolumidad de las personas.
-
Page 28: Introducción
INTRODUCCIÓN El modelo Vantage 17 Batería de las fregadoras/secadoras Clarke es una máquina eficaz y de calidad superior para la limpieza de los suelos. El modelo Vantage 17 Batería utiliza un cepillo rotativo de 17.0 in (430 mm) de anchura. Una boquilla trasera limpia el suelo y un sistema de aspiración recupera el agua de lavado del suelo, todo en una pasada. -
Page 29: Datos Técnicos
ESPAÑOL DATOS TÉCNICOS Modelo Vantage 17 Batería Tensión de funcionamiento 24 V Baterías estándar (cantidad: 2) 12V - 70 Ah, de GEL Capacidad de batería (80 Ah) 20 hr Velocidad de tracción Aquélla determinada por la rotación del cepillo Parada de la rotación del cepillo y de la aspiración con Protección de las baterías baja tensión Motor de aspiración... -
Page 30: Procedimientos Para El Transporte
Controlar que la rampa esté seca y limpia. Posicionar la rampa correctamente. Quitar el conjunto boquilla y el cepillo/portafieltro antes de cargar la máquina. Clarke recomienda vaciar los depósitos de la solución detergente y del agua de recuperación antes de cargar la máquina. -
Page 31: Descripción De La Máquina
ESPAÑOL DESCRIPCIÓN DE LA MÁQUINA ESTRUCTURA EXTERIOR (Véase Fig. 2) A. Placa número de serie/datos técnicos/marcación de Q. Soporte del tubo de descarga del agua de recuperación conformidad R. Válvula de descarga de la solución detergente B. Manillar S. Palanca de subida/bajada de la boquilla C. -
Page 32: Estructura Interna
ESPAÑOL ESTRUCTURA INTERNA (Véase Fig. 3) A. Tapa del depósito del agua de recuperación (abierta) K. Esquema de instalación de las baterías B. Guarnición de la tapa del depósito del agua de Cobertura mango enganche para recuperación cepillo/portafieltro C. Soporte de la tapa (insertado) M. -
Page 33: Panel De Control Y Mandos
ESPAÑOL PANEL DE CONTROL Y MANDOS (Véase Fig. 4) Indicador luminoso de baterías cargadas (verde) (A, Fig. 4) Cuando está encendido indica que las baterías están cargadas. Indicador luminoso de baterías casi descagadas (amarillo) (B, Fig. 4) Cuando está encendido indica que las baterías están casi descargadas. Indicador luminoso de baterías descargadas (rojo) (C, Fig. -
Page 34: Uso
ESPAÑOL ATENCIÓN: En unas partes de la máquina hay unas placas adhesivas que indican: – PELIGRO – ATENCIÓN – ADVERTENCIA – INFORMACIONES Leyendo este manual, el operador tiene que aprender el sentido de los símbolos indicados en las placas. Por ninguna razón estas placas deben cubrirse y si están dañadas tienen que sustituirse de inmediato. -
Page 35: Ajuste Del Tipo De Baterías (Wet O Gel), Instalación Y Carga
ESPAÑOL AJUSTE DEL TIPO DE BATERÍAS (WET O GEL), INSTALACIÓN Y CARGA Según el tipo de baterías instaladas, de plomo (WET) o de gel (GEL) efectuar la regulación de la tarjeta electrónica de la máquina llevando a cabo los siguientes procedimientos. Ajuste de la máquina 1. -
Page 36: Antes De La Puesta En Marcha De La Máquina
ESPAÑOL ANTES DE LA PUESTA EN MARCHA DE LA MÁQUINA Antes de poner en marcha la máquina, efectuar las operaciones siguientes de preparación de la máquina o controlar si han sido efectuadas correctamente. Instalación de la boquilla Instalar la boquilla (A, Fig. 10) y fijarla con las empuñaduras (B), luego conectar el tubo de aspiración (C) a la boquilla. -
Page 37: Puesta En Marcha Y Parada De La Máquina
ESPAÑOL PUESTA EN MARCHA Y PARADA DE LA MÁQUINA Puesta en marcha 1. Preparar la máquina como indicado en el párrafo antecedente. 2. Bajar la boquilla (A, Fig. 15) empujando la palanca (B) hacia abajo. 3. Colocar la palanca de ajuste de flujo de la solución detergente (C, Fig. -
Page 38: Máquina En Función (Lavado/Secamiento)
ESPAÑOL MÁQUINA EN FUNCIÓN (LAVADO/SECAMIENTO) Poner en marcha la máquina como indicado en el párrafo antecedente. Teniendo ambas las manos sobre el manillar (D, Fig. 18), maniobrar la máquina y empezar el trabajo de lavado/secamiento del suelo. ADVERTENCIA: Para evitar que el suelo se dañe: –... -
Page 39: Vaciado De Los Depósitos
ESPAÑOL VACIADO DE LOS DEPÓSITOS Un sistema de cierre automático de flotador (A, Fig. 20) bloquea el sistema de aspiración cuando el depósito de recuperación (B) está lleno. Es posible darse cuenta del bloqueo del sistema de aspiración por causa del llenado del depósito del agua de recuperación porque la máquina no aspira más el agua de recuperación;... -
Page 40: Remoción Del Depósito Del Agua De Recuperación
ESPAÑOL REMOCIÓN DEL DEPÓSITO DEL AGUA DE RECUPERACIÓN Para controlar las baterías o para otras operaciones, puede ser necesario quitar el depósito del agua de recuperación (A, Fig. 23) mediante el procedimiento siguiente. Vaciar el depósito (A, Fig. 23) como indicado en el párrafo específico. -
Page 41: Mantenimiento
Control o sustitución de las escobillas de carbón del motor eléctrico de aspiración (1): y después de las primeras 8 horas de trabajo (2): por estas operaciones de mantenimiento acudir a un Centro de asistencia autorizado Clarke Manual de uso - Vantage 17 Batería... -
Page 42: Limpieza De La Boquilla
ESPAÑOL LIMPIEZA DE LA BOQUILLA NOTA: Para un buen secamiento, la boquilla debe estar limpia y con los cauchos en buenas condiciones. ADVERTENCIA: Durante estas operaciones se aconseja utilizar guantes de trabajo, porque residuos cortantes podrían estar en la boquilla. Controlar que los interruptores (A y B, Fig. -
Page 43: Limpieza Del Cepillo
ESPAÑOL LIMPIEZA DEL CEPILLO ADVERTENCIA: Durante estas operaciones se aconseja utilizar guantes de trabajo, porque residuos cortantes podrían estar en el cepillo. 1. Quitar el cepillo de la máquina como indicado en el capítulo "Uso". 2. Limpiar el cepillo con agua y detergente. 3. -
Page 44: Limpieza Del Filtro De La Solución Detergente
ESPAÑOL LIMPIEZA FILTRO SOLUCIÓN DETERGENTE Vaciar el depósito de la solución detergente (A, Fig. 28) como indicado en el párrafo específico. Llevar la máquina sobre un suelo llano. Controlar que los interruptores (B y C, Fig. 28) estén en posición "0". Desenroscar la tapa transparente (D, Fig. -
Page 45: Carga De Las Baterías
ESPAÑOL CARGA DE LAS BATERÍAS NOTA: Cargar baterías cuando indicadores luminosos (A o B, Fig.30) se encienden y al final de cada trabajo. mantienen baterías cargadas, durabilidad aumenta. ADVERTENCIA: No dejar las baterías descargadas durante mucho tiempo, porque su durabilidad podría reducirse. Controlar la carga de las baterías por lo menos una vez por semana. -
Page 46: Control/Sustitucion Fusibles
ESPAÑOL Controlar que el cable (A, Fig. 31) del cargador de baterías esté conectado a un enchufe con tensión y frecuencia compatibles con los valores indicados en la placa del número de serie/datos técnicos (D). NOTA: Cuando el cargador de baterías está conectado a la red eléctrica, todas las funciones de la máquina se paran automáticamente. -
Page 47: Accesorios/Opciones, Vantage 17 Batería
ESPAÑOL ACCESORIOS/OPCIONES, Vantage 17 Batería Además de los componentes instalados en la versión estándar, la máquina puede equiparse con los siguientes accesorios/opciones, según la utilización específica: Para informaciones suplementarias sobre estos accesorios opcionales, acudir al Revendedor autorizado. ACCESORIOS/OPCIONES 909 5691 000 Cepillo de 17"... - Page 48 Toutes les indications de direction figurant dans ce manuel sont visualisées depuis la position du conducteur, à l’arrière de la machine. Des manuels supplémentaires peuvent être obtenus auprès de votre revendeur Clarke. INDEX Manuel d’utilisation...
-
Page 49: Consignes De Securite Pour L'operateur
FRANÇAIS CONSIGNES DE SECURITE POUR L'OPERATEUR DANGER : Indique un danger qui comporte des risques, ou même la mort, pour l’opérateur. ATTENTION : Indique une situation exposant les personnes au risque de blessures ou de dommages matériels. AVERTISSEMENT: Indique un avertissement ou une remarque sur des fonctions clé ou utiles. Prêter la plus grande attention aux segments de texte marqués par ce symbole. - Page 50 FRANÇAIS ATTENTION : Ne pas laisser entrer d'objets dans les ouvertures. Ne pas utiliser la machine si les ouvertures sont bouchées ; garder les ouvertures de la machine libres de poussière, filasse, poils et tout autre corps étranger à même de réduire le flux d'air. ATTENTION : Pendant l'utilisation de cette machine, faire attention à...
-
Page 51: Introduction
INTRODUCTION Le modèle Vantage 17 Batterie de l'autolaveuse Clarke est une machine performante qui assure un nettoyage de haute qualité des sols. Le modèle Vantage 17 Batterie utilise une brosse tournante pour nettoyer une bande de 430 mm de largeur. Un embouchure arrière essuie le sol et un aspirateur en récupère l'eau de lavage, le tout en une seule passe. -
Page 52: Caracteristiques Techniques
FRANÇAIS CARACTERISTIQUES TECHNIQUES Modèle Vantage 17 Batterie Tension de fonctionnement 24 V Batteries standard (quantité : 2) 12V - 70 Ah, au GEL Capacité de batterie (80 Ah) 20 hr Vitesse de traction Déterminée par la rotation de la brosse Sécurité... -
Page 53: Procedures Pour Le Transport
Procédure de fixation de la machine dans le moyen de transport 5. Clarke conseille de fixer la machine à l'aide de courroies pendant le transport. a : Figure 1 SYMBOLES UTILISES SUR LA MACHINE ATTENTION : Avant d'effectuer toute activité... -
Page 54: Description De La Machine
FRANÇAIS DESCRIPTION DE LA MACHINE STRUCTURE EXTERNE (Voir Fig. 2) A. Plaque avec numéro de série/données techniques/ Q. Support tuyau de vidange eau de récupération marque de conformité R. Soupape de vidange solution B. Guidon S. Levier de soulèvement/abaissement embouchure C. -
Page 55: Structure Interne
FRANÇAIS STRUCTURE INTERNE (Voir Fig. 3) A. Couvercle réservoir eau de récupération (ouvert) K. Schéma d’installation batteries B. Joint d'étanchéité couvercle réservoir Couverture avec queue d'accrochage pour récupération brosse/plateau C. Support couvercle (en position d'activation) M. Vis de réglage vitesse d'avance machine D. -
Page 56: Tableau De Bord
FRANÇAIS TABLEAU DE BORD (Voir Fig. 4) Témoin lumineux de batteries chargées (vert) (A, Fig. 4) Lorsqu'il s'allume, il indique que les batteries sont chargées. Témoin lumineux de batteries demi-chargées (jaune) (B, Fig. 4) Lorsqu'il s'allume, il indique que les batteries sont presque déchargées. Témoin lumineux de batteries déchargées (rouge) (C, Fig. -
Page 57: Utilisation
FRANÇAIS UTILISATION ATTENTION : Sur certains points de la machine sont appliquées des plaques adhésives qui indiquent : – DANGER – ATTENTION – AVERTISSEMENT – INFORMATIONS Lors de la lecture de ce manuel, l'opérateur doit bien comprendre le sens des symboles illustrés sur les plaques. Ne pas couvrir les plaques et les remplacer immédiatement en cas d'endommagement. -
Page 58: Etablissement (Wet Ou Gel), Installation Et Chargement Des Batteries
FRANÇAIS ETABLISSEMENT (WET OU GEL), INSTALLATION ET CHARGEMENT DES BATTERIES Selon le type de batteries installées, au plomb (WET) ou au gel (GEL), il est nécessaire de configurer la carte électronique de la machine, en procédant comme suit. Configuration de la machine La configuration en usine de la machine est pour batteries au GEL ;... -
Page 59: Avant La Mise En Marche
FRANÇAIS AVANT LA MISE EN MARCHE Avant le démarrage de la machine, contrôler que les opérations suivantes ont été effectuées correctement. Installation de l'embouchure 1. Installer l'embouchure (A, Fig. 10) et la fixer à l'aide des boutons (B), puis connecter le tuyau d'aspiration (C) à l'embouchure. -
Page 60: Mise En Marche Et Arret De La Machine
FRANÇAIS MISE EN MARCHE ET ARRET DE LA MACHINE Mise en marche Préparer la machine comme indiqué au paragraphe précédent. Baisser l'embouchure (A, Fig. 15) en tournant le levier (B) vers le bas. Positionner le levier de réglage du flux de solution (C, Fig. -
Page 61: Machine Au Travail (Lavage/Sechage)
FRANÇAIS MACHINE AU TRAVAIL (LAVAGE/SECHAGE) 1. Démarrer la machine comme prévu au paragraphe précédent. 2. Tout en gardant les mains sur le guidon (D, Fig. 18), déplacer la machine et commencer le travail de lavage/séchage du sol. AVERTISSEMENT : Afin d'éviter d'endommager la surface du sol à nettoyer : –... -
Page 62: Vidange Des Reservoirs
FRANÇAIS VIDANGE DES RESERVOIRS Un système de fermeture automatique à flotteur (A, Fig. 20) bloque le système d'aspiration lorsque le réservoir de récupération (B) est plein. Le blocage du système d'aspiration, dû au remplissage du réservoir de l'eau de récupération, peut être détecté grâce à l'augmentation soudaine de la fréquence du bruit du moteur d'aspiration et à... -
Page 63: Depose Du Reservoir De L'eau De Recuperation
FRANÇAIS DEPOSE RESERVOIR L'EAU RECUPERATION Pour contrôler ou charger les batteries ou pour d'autres opérations, il peut être nécessaire de déposer le réservoir de l'eau de récupération (A, Fig. 23) en procédant comme suit. 1. Vider le réservoir (A, Fig. 23) en procédant comme indiqué... -
Page 64: Entretien
Contrôle ou remplacement charbons moteur électrique brosse Contrôle ou remplacement charbons moteur électrique d'aspiration (1): et après les 8 premières heures de travail (2): pour ces opérations d'entretien, contacter un Service après-vente autorisé Clarke Manuel opérateur - Vantage 17 Batterie... -
Page 65: Nettoyage De L'embouchure
FRANÇAIS NETTOYAGE DE L'EMBOUCHURE REMARQUE : Pour un bon séchage, l'embouchure doit être propre et les lamelles en caoutchouc doivent être en bon état. AVERTISSEMENT : Lors du nettoyage de l'embouchure, il est conseillé de porter des gants de protection à cause de la présence éventuelle de débris tranchants. -
Page 66: Nettoyage De La Brosse
FRANÇAIS NETTOYAGE DE LA BROSSE AVERTISSEMENT : Lors du nettoyage de la brosse, il est conseillé de porter des gants de protection à cause de la présence éventuelle de débris tranchants. Déposer la brosse de la machine comme prévu au chapitre Utilisation. -
Page 67: Nettoyage Du Filtre De Solution
FRANÇAIS NETTOYAGE DU FILTRE DE SOLUTION 1. Vider le réservoir de la solution (A, Fig. 28) en procédant comme indiqué au paragraphe spécifique. 2. Porter la machine sur un sol plat. 3. Contrôler que les interrupteurs (B et C, Fig. 28) sont en position “0”. -
Page 68: Chargement Des Batteries
FRANÇAIS CHARGEMENT DES BATTERIES REMARQUE : Charger les batteries lorsque les témoins lumineux (A ou B, Fig. 30) s'allument et à chaque fin de travail. Garder les batteries chargées prolonge leur vie. AVERTISSEMENT : Lorsque batteries sont déchargées, recharger dès que possible, car cela réduirait leur durée de vie utile. -
Page 69: Controle/Remplacement Des Fusibles
FRANÇAIS 3. Vérifier que le câble (A, Fig. 31) du chargeur de batterie est branché à une prise électrique avec une tension et un fréquence conformes aux valeurs indiquées sur la plaque avec numéro de série/données techniques (D). REMARQUE : Lorsque le chargeur de batterie est branché... -
Page 70: Accessoires/Options Vantage 17 Batterie
FRANÇAIS ACCESSOIRES/OPTIONS Vantage 17 Batterie Outre les composants présents dans le modèle standard, la machine peut être livrée avec les accessoires/options suivants, selon l'emploi spécifique de la machine : Pour de plus amples informations relatives aux accessoires optionnels susmentionnés, s'adresser au revendeur agréé. ACCESSOIRES/OPTIONS 909 5691 000 Brosse Midlite Grit 180 de 17"... -
Page 71: Parts List
Vantage 17 Battery Parts List [] = Not shown * = optional # = Modified item No. or New item No. xxxxx = Contained in a Kit Form No. 909 6772 000 - 06/2008 Printed in Italy... -
Page 72: Solution Tank
Vantage 17 Battery Solution Tank Parts List - Vantage 17 Battery... - Page 73 RUBBER SHOCK ABSORBER KIT [42] 909 6227 000 INSTALL. INSTRUCTION F RUBBER SHOCK ABSORBER KIT 909 6236 000 BLACK CAP 9096916000 FILTER NOTE: # indicates a change has been made since th last pubblication of this manual Parts List - Vantage 17 Battery...
-
Page 74: Vacuum System
Vantage 17 Battery Vacuum System Parts List - Vantage 17 Battery... - Page 75 909 5565 000 PIPE ACOUSTIC INSULATION 909 5713 000 KIT VACUUM MOTOR WITH CONNECTOR 909 5579 000 VACUUM MOTOR HOSE 145 0543 000 HOSE CLAMP [10] 909 5987 000 VACUUM SYSTEMS HARDWARE KIT (1,2) Parts List - Vantage 17 Battery...
-
Page 76: Recovery Tank
Vantage 17 Battery Recovery Tank Parts List - Vantage 17 Battery... - Page 77 909 6575 000 LEVER FIXING CLAMP xxxxxxxxxx DECAL BATTERIES (KIT DECALS) [22] 909 5988 000 RECOVERY TANK HARDWARE KIT (1,5,6,7,8) NOTE: # indicates a change has been made since th last pubblication of this manual Parts List - Vantage 17 Battery...
-
Page 78: Handle Assembly
Vantage 17 Battery Handle Assembly Parts List - Vantage 17 Battery... - Page 79 909 6488 000 HANDLE BAR PE 909 6768 000 HARNESS HANDLE CABLE 909 6774 000 PIN HANDLE BAR 11053A SWITCH ASSEMBLY NOTE: # indicates a change has been made since th last pubblication of this manual Parts List - Vantage 17 Battery...
-
Page 80: Control Panel Assembly
Vantage 17 Battery Control Panel Assembly Parts List - Vantage 17 Battery... - Page 81 Control Panel Assembly - 09/07 Ref. Part No. Description 33005101 SCREW M3X8 L08812909 BOARD LED 145 1756 000 SCREW 2.9X9 THD FORM SS 909 5584 000 SWITCH 909 6275 000 CONTROL PANEL 909 6763 000 DECAL CONTROL PANEL Parts List - Vantage 17 Battery...
-
Page 82: Solution System
Vantage 17 Battery Solution System Parts List - Vantage 17 Battery... - Page 83 909 5977 000 SOLENOID VALVE KIT (1,5,14,22,24,27,28,29,30) [33] 909 5990 000 SOLUTION SYSTEMS HARDWARE KIT (3,4,6,7,8,9,10,11,13,15,19,20,21,25) A: SEE TSB IT 2007-021 NOTE: # indicates a change has been made since th last pubblication of this manual Parts List - Vantage 17 Battery...
-
Page 84: Squeegee Assembly
Vantage 17 Battery Squeegee Assembly Parts List - Vantage 17 Battery... - Page 85 GEE COMPLETE - SQUEEGEE ASSEMBLY HARDWARE KIT) 909 5702 000 KIT SQUEEGEE COMPLETE (1,2,3,4,5,6,7,8,9,10,11,12,13, 16) [18] 909 5991 000 SQUEEGEE ASSEMBLY HARDWARE KIT (1,2,4,5,6,7,12,13,16) NOTE: # indicates a change has been made since th last pubblication of this manual Parts List - Vantage 17 Battery...
-
Page 86: Brush System
Vantage 17 Battery Brush System Parts List - Vantage 17 Battery... - Page 87 A: BEFORE 2007-02 - B/C: STARTING FROM 2007-02 - SEE TSB IT 2007-011 - D: SEE TSB IT 2007-021 NOTE: # indicates a change has been made since th last pubblication of this manual Parts List - Vantage 17 Battery...
-
Page 88: Wiring System
Vantage 17 Battery Wiring System Parts List - Vantage 17 Battery... - Page 89 BATTERY CHARGER POWER CABLE A: BEFORE SN 072115105 - B: STARTING FROM SN 072115105 - SEE TSB IT 2007-019 NOTE: # indicates a change has been made since th last pubblication of this manual Parts List - Vantage 17 Battery...
- Page 90 Vantage 17 Battery Wiring System Parts List - Vantage 17 Battery...
- Page 91 INSTALLATION INSTRUCTION KIT, BATTERY CHARGER 24V 8/9A 100-240V A: BEFORE SN 072115105 - B: STARTING FROM SN 072115105 - SEE TSB IT 2007-019 NOTE: # indicates a change has been made since th last pubblication of this manual Parts List - Vantage 17 Battery...
- Page 92 Vantage 17 Battery Accessories - Pad holder kit Parts List - Vantage 17 Battery...
- Page 93 909 5691 000 BRUSH Ø430 17” MIDLITE GRIT180 909 5695 000 PAD HOLDER 410 L08603966 RING NYLON L08837030 RETAINER PAD NOTE: # indicates a change has been made since th last pubblication of this manual Parts List - Vantage 17 Battery...
- Page 94 BATTERY, 12V GEL 90AH NOTE: # indicates a change has been made since th last pubblication of this manual NOTE: # indicates a change has been made since th last pubblication of this manual Parts List - Vantage 17 Battery...
- Page 95 Vantage 17 Battery Wiring Diagram - Before SN 07215105 Parts List - Vantage 17 Battery...
- Page 96 Vantage 17 Battery Wiring Diagram - Starting from SN 072115105 Parts List - Vantage 17 Battery...
- Page 97 ALTO Cleaning Systems (UK) Ltd., Penrith (810) 544-6300 Gilwilly Industrial Estate Penrith American Lincoln ® / Clarke, Marietta, Georgia 30066 Cumbria CA11 9BN 1455 Canton Road +44 1768 868 995 (770) 973-5225 ALTO France S.A. Strasbourg B.P. 44, 4 Place d’Ostwald...
- Page 98 STATED WARRANTIES ARE IN LIEU OF ALL OTHER WARRANTIES, EXPRESSED OR IMPLIED Clarke's liability under this warranty is limited to repair of the product and/or replacement of parts and is given to purchaser in lieu of all other remedies, including INCIDENTAL AND CONSEQUENTIAL DAMAGES.