Table of Contents
Advertisement
* INSTALLATION * OPERATION * SERVICE * PARTS *
CAUTION:
Read all instructions carefully before starting the
installation or operating the heater. Failure to
follow these instructions could result in property
damage, bodily injury or even death. Contact local
building or fire officials about restrictions and
installation inspection requirements in your area.
Save this manual for future reference.
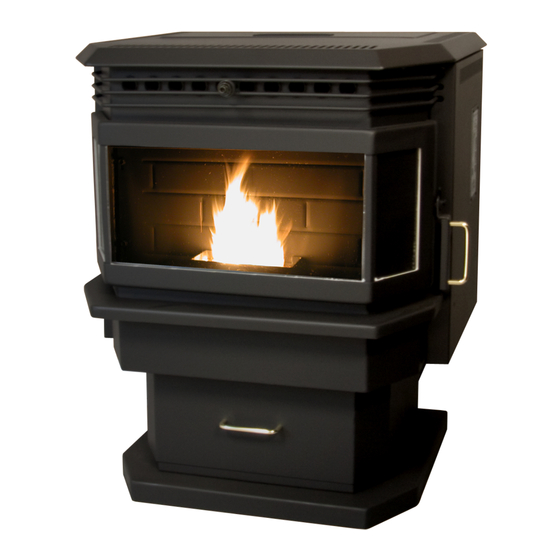
BayWin
Pellet Burner
®
OWNER'S MANUAL
WWW.KOZISTOVES.COM
Manufactured By:
APR Industries Ltd.
1354 Waverley Street
Winnipeg, Manitoba, R3T 0P5
Canada
Lithoid in Canada
Rev July 2004
Page 1
Advertisement
Table of Contents
Troubleshooting

Related Manuals for Kozi BayWin


Summary of Contents for Kozi BayWin
- Page 1 BayWin Pellet Burner ® OWNER’S MANUAL * INSTALLATION * OPERATION * SERVICE * PARTS * CAUTION: Manufactured By: Read all instructions carefully before starting the APR Industries Ltd. installation or operating the heater. Failure to 1354 Waverley Street follow these instructions could result in property Winnipeg, Manitoba, R3T 0P5 damage, bodily injury or even death.
- Page 2 CAUTION: Stove has moving parts. Disconnect power before servicing. Page 2...
-
Page 3: Table Of Contents
5.3 Combustion Air Intake Requirements ................10 6. Location of the Heater ......................11 7. Typical Installation Configurations ..................11 8. KOZI KOZI BayWin ® Pellet Insert Additional Considerations ..........13 KOZI KOZI KOZI 8.1 KOZI BayWin® Pellet Insert Additional Requirements ..........13 8.2 Surround Assembly ...................... -
Page 4: Installation And Operation Manual
I. Installation and Operation Manual This heater is suitable for both mobile home and conventional home installation. Read all instructions carefully before starting installation. Save this manual for future reference. 1. Preamble: Instructions for Safe Installation and Operation 1. Read these instructions carefully. Failure to follow them could cause a malfunction of the heater resulting in damage to the heater, property, bodily injury and even death. -
Page 5: Clearance To Combustible Walls
C. Floor Protector to Front of Unit 6 inches (150 mm) D. Width of Unit 25 inches (635 mm) E. Depth of Unit 25 inches (635 mm) Figure 1. KOZI pellet stove with a non- combustible floor protector. Page 5... -
Page 6: Free Standing Stove
2.2 Free Standing Stove Minimum clearance must be: A. Side Wall to Unit 12 inches (300 mm) B. Back Wall to Unit 1 inch (25 mm) C. Corner to Unit 1 inch (25 mm) 2.3 Free Standing Installed in an Alcove Alcove dimensions must be: Minimum width 48 inches (1220 mm) -
Page 7: Electrical Requirements
INSTALLATION COMMENT: We recommend sufficient space be provided (minimum 20 inches/500 mm) on each side of the heater to service the equipment area. If this is not possible, a provision must be made to pull the heater out for service. Figure 2 Certification Label 3. -
Page 8: Fuel Requirements
This KOZI pellet burner is certified for 3 and 4 inch exhaust venting. 3 inch venting is sufficient for most direct vent installations. However, installations with several elbows, long horizontal and/or vertical runs may add excessive resistance against the flow of air which reduces the volume of air movement and creates burn problems. -
Page 9: Exhaust Vent Termination Requirements
To calculate EVL use the following formula: for each 90° Elbow or T fitting = add 5 EVL for each 45° Elbow = add 3 EVL for each Horizontal run of vent = add 1 EVL per foot of horizontal venting for each Vertical run of vent = add 1/2 EVL per foot of vertical venting CAUTION: EVL CANNOT EXCEED 25ft (7.6 meters). -
Page 10: Combustion Air Intake Requirements
2. The exhaust vent must be at least: * 4 feet (1.2 m) below * 4 feet (1.2 m) horizontally from * 1 foot (0.3m) above any opening in the building such as doors, windows, ventilation air intakes, etc. 3. The exhaust vent opening must be a minimum of: * 12 inches (0.3m) from the ground * 24 inches (0.61m) from any combustible surface i.e. -
Page 11: Location Of The Heater
2. The combustion air intake must terminate into a vented space, i.e. outside, vented attic, vented crawl space. This heater cannot draw air from a closed space such as a closed garage, airtight crawl space or any other sealed room. 3. - Page 12 Figure 4. Free standing through the wall installation Figure 6. Free standing through the Figure 5. Free standing through the roof wall and the roof installation installation Figure 7. Free standing basement Figure 8. Free standing through a installation masonry chimney installation Page 12...
-
Page 13: Kozi Kozi
23” (585 mm) in height. The minimum opening of a fireplace that is suitable for a KOZI pellet insert is 22” (560 mm) wide, 19.5” (500 mm) high and 16” (410 mm) deep. The minimum clearances for an insert installed in a masonry or listed factory built fireplace can be found in the “Clearance to Combustible Walls”... -
Page 14: Surround Assembly
Figure 11. KOZI pellet insert surround 8.3 KOZI BayWin Pellet Insert Installation ® Please follow the following steps when installing a KOZI pellet insert: 1. Verify that the fireplace opening meets the insert’s minimum require- ments. Working from the exterior of the building: 2. -
Page 15: Kozi Baywin® Pellet Insert Removal
8.5 Operation and Maintenance A KOZI pellet insert operates in the same manner as a free standing stove. The only difference between the stove and the insert is the method of loading the fuel into the hopper. -
Page 16: Exhaust Vent Requirements
9.2 Exhaust Vent Requirements Venting a KOZI pellet burner for a mobile home is similar to that of a conventional home. Please refer to the “Typical Mobile Home Installation Configuration” section for typical venting configurations. It is highly recommended that a minimum vertical venting of 3 ft be used (as shown in Figure 13). -
Page 17: Recommendations For Mobile Home Installation
Figure 13. Mobile home installation through wall Figure 14. Mobile home installation Figure 15. Mobile home installa- through roof tion through wall 9.5 Recommendations for Mobile Home Installation 1. Make sure there is an effective vapor barrier where the venting penetrates to the outside of the mobile home. -
Page 18: Understanding Your Pellet Burning Heater
1. Component Description 1.1 General Overview The first step in understanding your new KOZI heater is to familiarize yourself with its operation. Your heater has 3 main systems: Combustion, Circulation and Feed. The combustion system includes the air intake, burn pot, exhaust fan and exhaust venting. -
Page 19: Trouble Shooting Module Status Lights
1.5 Trouble Shooting Module Status Lights Your heater is equipped with 3 status lights. Each light indicates a different safety device. Together, these lights are intended to keep you informed as to what is happening in the feed system. The top light indicates the status of the auger cycle timer, the middle light indicates the high temperature manual reset thermal disk and the bottom light indicates the... -
Page 20: Circulation Fan Speed Control
2.1 Circulation Fan Speed Control The fan speed control is located on the top center of the control panel (see diagram). Turning this knob counter-clockwise turns the circulation fan OFF. Rotating the knob clockwise decreases the speed of the circulation fan from High to Low. It is NOT recommended to leave this knob in the OFF position. -
Page 21: Starting (Lighting) Your Heater
5. Once fuel has accumulated in the burn pot, the igniter will lite the fuel and a flame will appear. Allow the flame to stabilize. IN THE EVENT YOUR HEATER SHUTS OFF BEFORE THE FLAME IS STABLE, press the start button one more time. Your heater is now working for the first time. -
Page 22: Stopping Your Heater
2.7 Stopping your Heater To stop your heater, turn the fuel feed control knob counter-clockwise to the OFF position. This will cause the feed system to stop (trouble shooting lights will stop blinking) and the flame should die out within 5 minutes. The exhaust fan and circulation fan will continue to run until you heater is cold (approximately 30 minutes). - Page 23 ALLOW THE HEATER TO COOL TO ROOM TEMPERA- TURE AND UNPLUG THE HEATER BEFORE PER- FORMING ANY MAINTENANCE. Before each heating season: 1. Clean the venting system. If there is a significant amount of soot build up, it should be removed to prevent the risk of a chimney fire. By making sure the exhaust venting system and the heater itself are being maintained properly and are cleaned on a regular basis, you reduce the likelihood of a chimney fire occuring.
- Page 24 5. Oil the circulation fan motor. To oil the motor bearings, the right hand side panel must first be opened. This is done by removing the 2 screws near the front of the stove as shown in Figure 18. Use a Robertson (square head) or Common (flat head) screwdriver to remove the screws.
-
Page 25: Trouble Shooting Guide
IV. Trouble Shooting Guide The KOZI BayWin is equipped with trouble shooting module status lights located at the back bottom right hand corner of the heater. This module consists of a set of three red lights. Under normal working conditions, while the heater is operating, all three lights are BLINKING (ON and OFF). - Page 26 Note: For safety, contact a qualified serviceman for all repair work. RELEVANT SECTION OR PROBLEM LIGHT STATUS POSSIBLE CAUSES REQUIRED ACTION 1. Move auger motor back and forth to 1. Auger jammed. free jam. Top Light Blinking 2. Auger motor failed. 2.
-
Page 27: Diagrams And Parts List
V. Diagrams and Parts List 1. KOZI KOZI BayWin® Circuit Diagram KOZI KOZI KOZI Page 27... -
Page 28: Stove Cross Section
2. Stove Cross Section Page 28... -
Page 29: Equipment Compartment
3. Equipment Compartment Page 29... -
Page 30: Parts List
4. Parts List Item No Description Part No Panels & Trims Pedestal Base Assembly (Black) Gold grill BV11 Top Lid (Black) BV12 Hopper Lid (Black) 10023 Back Cover Plate (Black) BV17 Top Heat shield BV19 Back Heat Shield, Embossed Brick Pattern (Black) BV20, BV21 Not Shown Right Side Panel (Black) -
Page 31: Accessories List
5. Accessories List Item No. Description Part No. Optional Equipment Igniter Replacement Kit Not Shown Air Intake Kit AK100 Not Shown Air Intake Check Valve CV100 Not Shown Hopper Extension Not Shown Insert Loading Chute LC100 VI. Warranty APR Industries Ltd. honors a five-year limited warranty on all steel fabricated parts and a one-year warranty on all electrical parts. - Page 32 WWW.KOZISTOVES.COM Page 32...
Need help?
Do you have a question about the BayWin and is the answer not in the manual?
Questions and answers