GE Profile DPSR610 Owner's Manual
Hide thumbs
Also See for Profile DPSR610:
- Owner's manual (33 pages) ,
- Owner's manual (33 pages) ,
- Owner's manual (33 pages)
Table of Contents
Advertisement
Available languages
Available languages
ge.com
Safety Instructions
. . . . . . . . 2-4
Owner's Manual
Operating Instructions
DPSE810
Control Panels . . . . . . . . . . . . . . . .5, 7
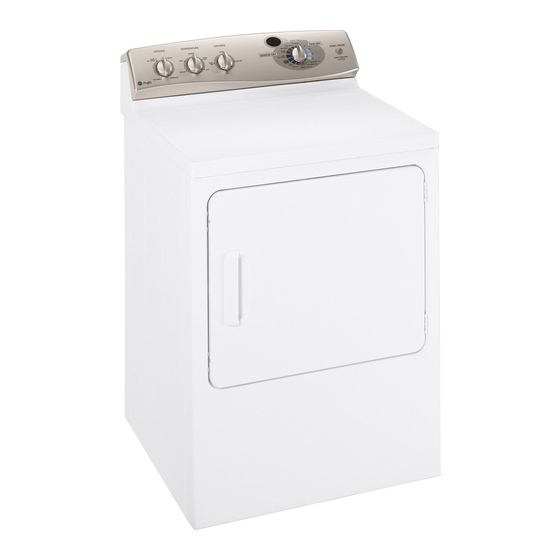
DPSR610
Control Settings . . . . . . . . . . . . . . .6, 8
Dryer Features . . . . . . . . . . . . . . . . . .9
Loading and Using the Dryer . . . .11
Reversing the Door . . . . . . . . . . . . .10
Venting the Dryer . . . . . . . . . . . . . .12
. . . 13, 14
Consumer Support
Consumer Support . . . . . . . . . . . . . 16
Warranty . . . . . . . . . . . . . . . . . . . . . 15
Write the model and serial
number here:
Model # __________________
Serial # __________________
You can find them on a label
on the front of the dryer
behind the door.
175D1807P558 49-90290 06-06 JR
Advertisement
Chapters
Table of Contents
Troubleshooting

Subscribe to Our Youtube Channel
Related Manuals for GE Profile DPSR610

Summary of Contents for GE Profile DPSR610
-
Page 1: Table Of Contents
DPSE810 Control Panels ....5, 7 DPSR610 Control Settings ....6, 8 Dryer Features ....9 Loading and Using the Dryer . -
Page 2: Important Safety Information
This dryer must be properly installed and located in accordance with the Installation Instructions before it is used. If you did not receive an Installation Instructions sheet, you can receive one by visiting ge.com or by calling 800.GE.CARES (800.432.2737). ■ Properly ground dryer to conform with all Exhaust/Ducting: governing codes and ordinances. - Page 3 YOUR LAUNDRY AREA ■ Keep the area underneath and around your ■ Keep all laundry aids (such as detergents, bleaches, appliances free of combustible materials etc.) out of the reach of children, preferably in a (lint, paper, rags, etc.), gasoline, chemicals locked cabinet.
-
Page 4: Save These Instructions
IMPORTANT SAFETY INFORMATION. READ ALL INSTRUCTIONS BEFORE USING. WARNING! WHEN USING YOUR DRYER (cont.) ■ Never attempt to operate this appliance ■ You may wish to soften your laundered fabrics if it is damaged, malfunctioning, partially or reduce the static electricity in them by using disassembled, or has missing or broken parts, a dryer-applied fabric softener or an anti-static including a damaged cord or plug. -
Page 5: Control Settings
About the control panel—for model DPSE810. ge.com Step 1 Step 2 Step 3 Step 4 • Select Dry Cycle • Shut door • Clean lint filter • Add clothes • Push START Quick Start Guide NOTE: When making a selection with any knob, simply point the knob anywhere within the shaded range for that setting. - Page 6 About the control settings. Temperature HIGH For regular to heavy cottons. MEDIUM For synthetics, blends, delicates and items labeled permanent press. For delicates, synthetics and items labeled tumble dry low. EXTRA LOW For delicates, synthetics and items labeled tumble dry low. NO HEAT For fluffing items without heat.
- Page 7 About the control panel—for model DPSR610. ge.com Step 2 Step 1 Step 3 Step 4 • Select Dry Cycle • Shut door • Clean lint filter • Add clothes • Push START Quick Start Guide NOTE: When making a selection with any knob, simply point the knob anywhere within the shaded range for that setting.
- Page 8 About the control settings. IMPORTANT: Clean the lint filter each time you use the dryer. Temperature HIGH HEAT For regular to heavy cottons. MEDIUM HEAT For synthetics, blends, delicates and items labeled permanent press. NO HEAT For fluffing items without heat. For use only with the TIMED DRY cycles. LOW HEAT For delicates, synthetics and items labeled tumble dry low.
-
Page 9: Dryer Features
These dryer drum provides the highest reliability surface blemishes will not affect the function available in a GE dryer. If the dryer drum or durability of the drum. should be scratched or dented during normal... -
Page 10: Reversing The Door
About reversing the door. Reversing the Door Tools needed: ■ Standard #2 ■ Tape-tipped Phillips screwdriver putty knife Open the door and remove the filler plugs opposite the hinges. With the door completely open, remove the bottom screw from each hinge on the dryer face. Insert these screws about half way into the TOP holes, for each hinge, on the opposite side (where you removed the filler plugs). - Page 11 Bounce ® Fabric Conditioner Dryer Sheets plastic trim and foam-filled items. have been approved for use in all GE Dryers when used in accordance with the manufacturer’s instructions. Care and Cleaning of the Dryer The Exterior: Wipe or dust any spills or washing Stainless Steel: To clean stainless steel surfaces, compounds with a damp cloth.
-
Page 12: Venting The Dryer
About venting the dryer. For the best drying performance, the dryer needs to be properly vented. The dryer will use more energy and run longer if it is not vented to the below specifications. Carefully follow the details on Exhausting in the Installation Instructions. ■... -
Page 13: Troubleshooting Tips
Before you call for service… ge.com Troubleshooting Tips Save time and money! Review the charts on the following pages, or visit ge.com. You may not need to call for service. Problem Possible Causes What To Do Dryer doesn’t start Dryer is unplugged •... -
Page 14: Before You Call For Service
Before you call for service… Problem Possible Causes What To Do Clothes take too long Improper sorting • Separate heavy items from lightweight items (generally, to dry a well-sorted washer load is a well-sorted dryer load). Large loads of heavy fabrics •... - Page 15 This warranty is extended to the original purchaser and any succeeding owner for products purchased for home use within the USA. If the product is located in an area where service by a GE Authorized Servicer is not available, you may be responsible for a trip charge or you may be required to bring the product to an Authorized GE Service location for service.
-
Page 16: Consumer Support
Contact Us ge.com If you are not satisfied with the service you receive from GE, contact us on our Website with all the details including your phone number, or write to: General Manager, Customer Relations... - Page 17 Instrucciones de operación DPSE810 Ajustes de control ... . .6, 8 DPSR610 Cómo cambiar el sentido de apertura de la puerta ..10 Cómo cargar y usar la secadora .11 Funciones de la secadora .
- Page 18 Antes de usarse, la secadora se debe instalar apropiadamente de acuerdo con las Instrucciones de instalación. Si no recibió una Hoja de instrucciones de instalación, puede obtener una visitando ge.com o llamando al 800.GE.CARES (800.432.2737). ■ Conecte la secadora a tierra de manera apropiada Escape/Ductos: que cumpla con todos los códigos y ordenanzas...
- Page 19 SU ÁREA DE SECADO ■ Mantenga el área debajo y alrededor de sus ■ Mantenga todos los artículos de limpieza (tales electrodomésticos libre de materiales combustibles como detergentes y blanqueadores) fuera del (pelusas, papel, trapos, etc.), gasolina, productos alcance de los niños, preferiblemente encerrados químicos y otros líquidos y vapores inflamables.
-
Page 20: De Seguridad
INFORMACIÓN DE SEGURIDAD IMPORTANTE. LEA TODAS LAS INSTRUCCIONES ANTES DE USAR. ¡ADVERTENCIA! CUANDO USE SU SECADORA (cont.) ■ Nunca intente operar éste electrodoméstico ■ Es posible que usted desee suavizar su ropa si está dañado, si no funciona bien, si está o reducir la electricidad estática en ella usando parcialmente desarmado, o si le faltan partes o una toalla suavizante para secadora o un... -
Page 21: Ajustes De Control
Panel de control—para modelo DPSE810. ge.com Paso 1 Paso 2 Paso 3 Paso 4 • Seleccione el ciclo • Cierre la puerta de secado • Limpie el filtro • Agregue ropa • Presione START de pelusa Guía rápida NOTA: Al hacer una selección con cualquier perilla, simplemente apúntela a cualquier sitio dentro del área sombreada para esa selección. - Page 22 Ajustes de control. Temperatura HIGH (ALTA) Para algodones normales a pesados. MEDIUM (MEDIA) Para telas sintéticas, combinadas, delicadas y artículos etiquetados como permanent press (planchado permanente). LOW (BAJA) Para telas delicadas, sintéticas y artículos etiquetados como tumble dry low (secado con giro lento). EXTRA LOW Para telas delicadas, sintéticas y artículos etiquetados como tumble dry low (secado con giro lento).
- Page 23 Panel de control—para modelo DPSR610. ge.com Paso 2 Paso 1 Paso 3 Paso 4 • Seleccione el ciclo • Cierre la puerta de secado • Limpie el filtro • Agregue ropa • Presione START de pelusa Guía rápida NOTA: Al hacer una selección con cualquier perilla, simplemente apúntela a cualquier sitio dentro del área sombreada para esa selección.
- Page 24 Ajustes de control. IMPORTANTE: Limpie el filtro de pelusa antes de cada uso de la secadora. Temperatura HIGH HEAT (CALOR ALTO) Para algodones normales a pesados. MEDIUM HEAT Para telas sintéticas, combinadas, delicadas y artículos etiquetados como permanent press (planchado permanente). (CALOR MEDIO) NO HEAT (SIN CALOR) Para esponjar artículos sin calor.
- Page 25 Estas marcas en la superficie no afectarán la alta confiabilidad en una secadora GE. Si el funcionamiento o la durabilidad del el tambor giratorio de la secadora llegara a tambor giratorio.
-
Page 26: Cómo Cambiar El Sentido De Apertura De La Puerta
Cómo cambiar el sentido de apertura de la puerta. Cambiar el sentido de apertura de la puerta Herramientas que se necesitarán: ■ Destornillador ■ Espátula con cinta de estrella #2 en la punta Abra la puerta y remueva los tapones del lado opuesto a las bisagras. Con la puerta completamente abierta, remueva el tornillo inferior de cada bisagra en la cara de la secadora. -
Page 27: Cómo Cargar Y Usar La Secadora
Bounce ® se han aprobado para usarse con todas de espuma. las secadoras GE de acuerdo con las instrucciones del fabricante. Cuidado y limpieza de la secadora El exterior: Pásele un trapo y elimine el polvo El acero inoxidable: Para limpiar las superficies o cualquier derrame de productos de lavandería... -
Page 28: Ventilación De La Secadora
Ventilación de la secadora. Para obtener el mejor desempeño, la secadora debe estar ventilada adecuadamente. La secadora utilizará más energía y funcionará más tiempo si no se ventila siguiendo las especificaciones indicadas más abajo. Siga cuidadosamente los detalles en la sección de Escape en las Instrucciones de instalación. -
Page 29: Consejos Para La Solución De Problemas
Antes de llamar para solicitar servicio… ge.com Consejos para la solución de problemas ¡Ahorre tiempo y dinero! Consulte primero las tablas de las páginas siguientes o visite ge.com y quizás no necesite llamar al servicio. Problema Posible causa Qué hacer... - Page 30 Antes de llamar para solicitar servicio… Problema Posible causa Qué hacer Secar las prendas toma Clasificación incorrecta • Separe las prendas pesadas de las livianas (generalmente demasiado tiempo una carga de lavado bien clasificada es una carga de secado bien clasificada). Cargas grandes de telas pesadas •...
- Page 31 GE, podría tener que hacerse cargo de los costes de envío o bien podría solicitársele que lleve el producto a un centro de servicio de GE autorizado para realizar la reparación. En Alaska, la garantía excluye el costo de envío o las visitas de servicio a su casa.
-
Page 32: Garantía
El servicio de expertos GE está a tan sólo un paso de su puerta. ¡Entre en línea y solicite su reparación cuando le venga bien 24 horas al día cualquier día del año! O llame al 800.GE.CARES (800.432.2737) durante horas normales de oficina.
Need help?
Do you have a question about the Profile DPSR610 and is the answer not in the manual?
Questions and answers