
Subscribe to Our Youtube Channel
Related Manuals for Sharp LC-24LE250V-BK


Summary of Contents for Sharp LC-24LE250V-BK
- Page 1 LC-24LE250V-BK LC-24LE250V-WH LCD COLOUR TELEVISION OPERATION MANUAL LCD TELEVIZOR U BOJI KORISNIČKI PRIRUČNIK BAREVNÝ LCD TELEVIZOR NÁVOD K POUŽITÍ ΕΓΧΡΩΜΗ ΤΗΛΕΟΡΑΣΗ LCD ΕΓΧΕΙΡΙΔΙΟ ΧΡΗΣΗΣ...
-
Page 2: Table Of Contents
General TV Operation .......... 18 Contents Using the Channel List ......... 18 Features ..............3 Confi guring Parental Settings ....... 18 Dear SHARP customer ........... 3 Electronic Programme Guide (EPG) ....18 Introduction ............. 3 Programme Options .........18 Important safety precautions ........4 Software upgrade search via user interface ..18... - Page 3 SPECIAL NOTE FOR USERS IN THE U.K. The mains lead of this product is fi tted with a non-rewireable (moulded) plug incorporating a 5A fuse. Should the fuse need to be replaced, a BSI or ASTA approved BS 1362 fuse marked and of the same rating as above, which is also indicated on the pin face of the plug, must be used.
-
Page 4: Features
Features Dear SHARP customer • Remote controlled colour LCD TV. Thank you for your purchase of the SHARP LCD colour TV product. To ensure safety and many years • Fully integrated digital/cable TV (DVB-T/C) of trouble-free operation of your product, please read •... -
Page 5: Important Safety Precautions
Important safety precautions • Cleaning—Unplug the AC cord from the AC outlet before cleaning the product. Use a damp cloth to clean the product. Do not use liquid cleaners or aerosol cleaners. • Use a soft damp cloth to gently wipe the panel when it is dirty. To protect the panel, do not use a chemical cloth to clean it. - Page 6 Lightning Safety Precautions In case of storm and lightning or when Read the following recommended safety going on holiday, disconnect the power precautions carefully for your safety. cord from the wall outlet. Power Source Replacement Parts The TV set should be operated only from a 220-240V When replacement parts are required, make sure that AC, 50Hz outlet.
-
Page 7: Connection To A Television Distribution System (Cable Tv Etc.) From Tuner
LCD Screen • “HDMI, the HDMI logo and High-Definition The LCD panel is a very high technology product with Multimedia Interface are trademarks or registered about a million thin fi lm transistors, giving you fi ne trademarks of HDMI Licensing LLC.” picture details. -
Page 8: Environmental Information
Environmental Information Package Contents This television is designed to consume less energy to save environment. You not only help to save the environment but also you can save money by reducing electricity bills thanks to the energy effi ciency feauture of this TV. -
Page 9: Viewing The Tv
To turn the TV off: Press the middle of the button down Viewing the TV and hold it down for a few seconds, the TV will turn into standby mode. , switch is used for turning the TV on or off. Standby Notifi... -
Page 10: Antenna/Cable Connection
Specifi cation Antenna/Cable Connection Connect the “aerial” or “cable TV” plug to AERIAL INPUT (ANT) socket located on the back of the TV. TV Broadcasting PAL B/G D/K K Receiving Channels VHF (BAND I/III) - UHF Aerial or Cable (BAND U) - HYPERBAND N u m b e r o f P r e s e t 10000 Channels... -
Page 11: Viewing Remote Control
Viewing remote control Standby / On Channel list Volume up-down Menu on/off OK / Confi rm Return / Back No Function My button 1 (*) My button 2 (**) 10. Coloured buttons (Red, Green, Yellow, Blue) 11. Mono-Stereo Dual I-II / Current language 12. -
Page 12: Viewing The Connections
Viewing the Connections Connector Type Cables Device Scart Connection (back) Connection (back) PC/YPbPr SIDE AV Audio Connection Side Audio/Video (side) Connection Cable PC Audio Cable (Supplied) (Not supplied) HDMI Connection (back) SPDIF Connection (back) Side AV SIDE AV (Audio/Video) Connection AV Connection Cable (supplied) (side) -
Page 13: Switching On/Off
Aerial Installation Switching On/Off If you select AERIAL option from the Search Type screen, To Switch the TV On the television will search for digital terrestrial TV broadcasts. Connect the power cord to the 220-240V AC 50 Hz. NOTE: You can press MENU button to cancel. Switch the “... -
Page 14: Recording A Programme
Recording a Programme Note : You cannot use the timeshift fast reverse feature before advancing the playback with the fast IMPORTANT: When using a new USB hard disk drive, forward option. it is recommended that you fi rst format the disk using your TV’s “Format Disk”... -
Page 15: Quick Menu
Media Browser Menu You can play photo, music, and movie fi les stored on a USB disk by connecting it to your TV. Connect a USB disk to one of the USB inputs located on the side of the TV. Pressing the MENU button while in the Media Browser mode will access the Picture, Sound and Settings menu options. -
Page 16: Tv Menu Features And Functions
TV Menu Features and Functions Picture Menu Contents You can change the picture mode to suit your preference or requirements. Picture mode can Mode be set to one of these options: Cinema,Game,Sport,Dynamic and Natural. Contrast Sets the lightness and darkness values of the screen. Brightness Sets the brightness value for the screen. -
Page 17: Sound Menu Contents
Sound Menu Contents Volume Adjusts the volume level. Selects the equalizer mode. Custom settings can be made only when Equalizer in user mode. Balance This setting is used for emphasizing left or right speaker balance. Headphone Sets headphone volume. Sound Mode You can select a sound mode. -
Page 18: Install And Retune Menu Contents
You can set the timeout value of auto off feature. When the timeout value is reached Auto TV Off and the TV has not been operated for a selected time, the TV will go into standby mode. If the Standby Search is set to On, when the TV is in standby mode, available Standby Search broadcasts will be searched. -
Page 19: General Tv Operation
General TV Operation Record / Delete Record Timer Using the Channel List After you have selected a programme in the The TV sorts all stored stations in the Channel List. EPG menu, press the OK button. Select the You can edit this channel list, set favourites or set Record option and press the OK button. -
Page 20: Troubleshooting & Tips
Troubleshooting & Tips Tv will not turn on Make sure the power cord is plugged in securely to wall outlet. The batteries in the remote control may be exhausted. Press the Power button on the TV. Poor picture • Have you selected the correct TV system? •... -
Page 21: Pc Input Typical Display Modes
AV and HDMI Signal Compatibility PC Input Typical Display Modes The following table is an illustration of some of the typical video Source Supported Signals Available display modes. Your TV may not support all resolutions. Your TV PAL 50/60 supports up to 1920x1080. NTSC 60 Index Resolution... -
Page 22: Dimensional Drawings
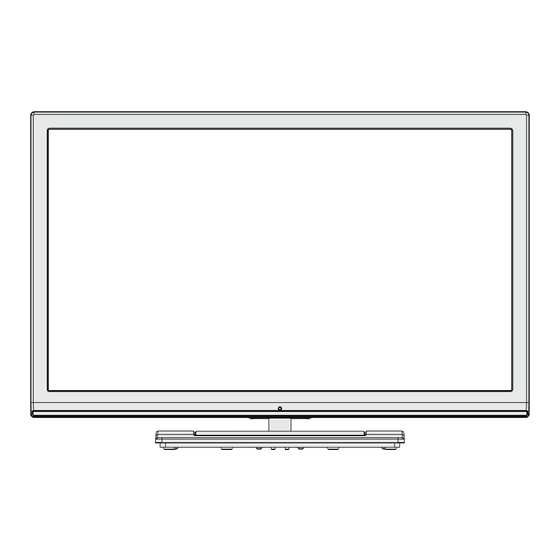
Dimensional Drawings English - 21 - A01_[GB]_MB95S_4847UK_DVBT_C_24205LED_ROCKER_SILVER16_10081844-10083115_50232547_basic IB.indd 21 A01_[GB]_MB95S_4847UK_DVBT_C_24205LED_ROCKER_SILVER16_10081844-10083115_50232547_basic IB.indd 21 28.01.2013 15:50:17 28.01.2013 15:50:17... -
Page 23: End Of Life Disposal
End of life disposal English - 22 - A01_[GB]_MB95S_4847UK_DVBT_C_24205LED_ROCKER_SILVER16_10081844-10083115_50232547_basic IB.indd 22 A01_[GB]_MB95S_4847UK_DVBT_C_24205LED_ROCKER_SILVER16_10081844-10083115_50232547_basic IB.indd 22 28.01.2013 15:50:18 28.01.2013 15:50:18... -
Page 24: Installing The Stand
Place the Stand Cover (2) on the Stand (3). Ensure the Stand Cover (3) is placed correctly and that you can see the screw holes on the back of the Sharp Television. DO NOT insert the screws before placing the plastic molding. -
Page 25: Uninstalling The Stand
Uninstalling the Stand English - 24 - A01_[GB]_MB95S_4847UK_DVBT_C_24205LED_ROCKER_SILVER16_10081844-10083115_50232547_basic IB.indd 24 A01_[GB]_MB95S_4847UK_DVBT_C_24205LED_ROCKER_SILVER16_10081844-10083115_50232547_basic IB.indd 24 28.01.2013 15:50:18 28.01.2013 15:50:18... -
Page 26: Screw Dimensions
Screw Dimensions Model Item Number VESA Installation of the Screw Ø4 To the wall LC-24LE250E 75 x 75 (W x H) To the product English - 25 - A01_[GB]_MB95S_4847UK_DVBT_C_24205LED_ROCKER_SILVER16_10081844-10083115_50232547_basic IB.indd 25 A01_[GB]_MB95S_4847UK_DVBT_C_24205LED_ROCKER_SILVER16_10081844-10083115_50232547_basic IB.indd 25 28.01.2013 15:50:19 28.01.2013 15:50:19... - Page 27 50232547...
Need help?
Do you have a question about the LC-24LE250V-BK and is the answer not in the manual?
Questions and answers