
Summary of Contents for Merlin Home Multimedia Center Premium
- Page 1 Инструкция Merlin Home Multimedia Center Premium 2TB Перейти в карточку товара 8 800 775 98 98...
-
Page 3: Table Of Contents
Table of Contents 1. Introduction.......................... 2 1.1 Preface......................2 1.2 Packing List .....................3 1.3 Cautions ......................3 1.4 Connection .......................5 1.5 Power On / Off....................11 1.6 Menu Language ..................... 11 1.7 HDD Format ....................11 2. About the Player ........................ 13 2.1 Remote Control....................13 2.2 Front Panel .....................15 2.3 Rear Panel ......................15... -
Page 4: Introduction
1. Introduction 1.1 Preface Thank you very much for purchasing the product. We hope you will enjoy using it as a great home entertainment partner. This player has the following functionality. A/V Output HDMI V1.3 for high-definition video and digital audio Composite &... -
Page 5: Packing List
Note: All the information contained in this manual was correct at the time of publication. However, as our engineers are always updating and improving the product, your device’s software may have a slightly different appearance or modified functionality than presented in this manual. - Page 6 cleaning it. Never connect the adapter to the player in a humid or dusty area. Do not replace the adapter or cable’s wire or connector. 1.3.3 Radio Interference - If not properly shielded, almost all electronic devices will get radio interference. Under some conditions, your player might get interference.
-
Page 7: Connection
Do not disassemble the player, repair the player or change the design of the player, any damage done will not be included in the repair policy. Do not press the buttons of the player too hard. Avoid hitting the player with hard object, avoid shaking the player, and stay away from magnetic fields. - Page 8 In this way, you can manage content on the built-in HDD of the player on your local PC. 1.4.3 Connecting a USB Device (1) Make sure the player is powered on; (2) Plug in the USB stick or USB HDD etc. to the USB HOST port of this player. In this way, you can browse contents on the USB device.
- Page 9 In this way, you can browse contents on the memory card. 1.4.5 Connecting to a TV 1.4.5.1 A/V IN (1) Follow the picture and plug in the 3 color connector to the player’s A/V IN jack; (2) Follow the picture and plug in the 3 color connector to the A/V OUT jack of the TV/IPTV Set-Top Box (STB).
- Page 10 In this way, you can enjoy the content in the player on TV or other display devices. 1.4.5.3 Y/Pb/Pr Component OUT (1) Follow the picture and plug in the 3 color connector to the player’s Y/Pb/Pr jack; (2) Follow the picture and plug in the 3 color connector to the TV’s Y/Pb/Pr jack. Audio Connection while using Y/Pb/Pr Video out: First method: use the audio output from the A/V OUT jack;...
- Page 11 In this way, you can have the highest quality video and audio via a single cable. 1.4.5 Connecting to an Digital Amplifier (1) Follow the picture and plug in the RCA connector on your coaxial cable to the player’s S/PDIF Coaxial jack. Or if you use optical fiber, please plug in the Toslink connector on your optical fiber to the player’s S/PDIF Optical jack;...
- Page 12 In this way, you can enjoy powerful Dolby Digital, DTS, or MPEG sound. (Please refer to ‘3.2 Changing Audio Settings’ for configuration) 1.4.7 Connecting to a LAN To connect to a LAN (Local Area Network) you require a cat5, cat5e or cat6 network cable (not supplied).
-
Page 13: Power On / Off
1.5 Power On / Off Power On After connecting the DC IN jack and press the power button on the front panel, the player will soon enter the home screen, and the power indicator will turn blue. Power Off Press the power button on the front panel, the player will soon enter standby mode, and the power indicator will turn red. - Page 14 Step 2: Press the up / down button to adjust the capacity of time shift buffer. Press the left / right button to select Next, and the enter button to confirm. Step 3: Select Format, press ENTER, and then hard disk format will start. The formatting procedure will be finished within a few minutes.
-
Page 15: About The Player
2. About the Player 2.1 Remote Control All procedures in this manual can be carried out using the remote control buttons. See the following for details on each button and its function: 1. STANDBY 2. TV SYSTEM 3. BROWSER 4. Numeric buttons 5. - Page 16 Press to fast rewind the current playback. Press repeatedly to select speeds. Press to fast forward the current playback. Press repeatedly to select speeds. Press to begin/pause the playback. PLAY/PAUSE Press to enter the home screen. HOME Press the arrow buttons to select menu options, and the ENTER Navigational buttons button to confirm.
-
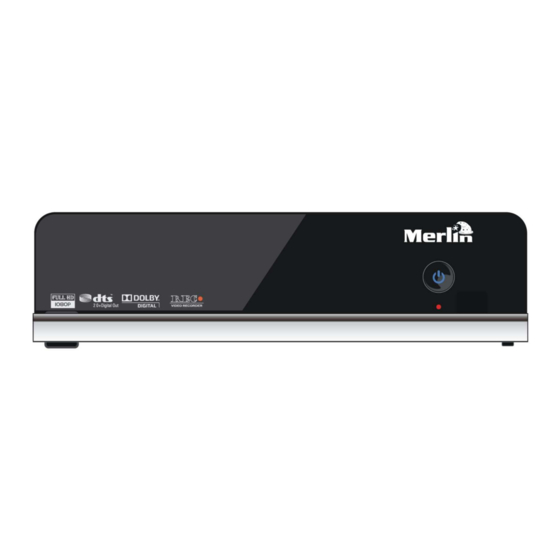
Page 17: Front Panel
Press to select options in menus. ENTER SETUP Press to enter the setup menu. Press to set the beginning and end points of a section to repeat. Press to jump to a specific point on a title. Specify the point GOTO using Title, Chapter and Time. -
Page 18: Side Panel
1. Air Flow hole RJ45 LAN socket 2. S/PDIF COAXIAL jack 3. S/PDIF OPTICAL jack 4. HDMI jack 5. Y/Pb/Pr OUT jack 6. A/V OUT jack 7. A/V IN jack 8. DC IN jack 2.4 Side Panel 1. Memory Card slot 2. -
Page 19: Setup Menu
3. Setup Menu The Setup menu allows you to personalize and configure the preferences for your player. To select a Setup option: Select the Setup icon on the home screen, or press the SETUP button on the remote control. Use the LEFT/RIGHT navigational buttons to select an option, and then press ENTER. There are seven Setup options, including Audio, Video, REC, Network, System, and MISC. -
Page 20: Changing Video Settings
Digital Output Choose between HDMI LPCM / HDMI RAW / SPDIF LPCM / SPDIF RAW. In raw mode, Dolby Digital, DTS, or MPEG sound can be bypassed to the HDMI TV or Digital amplifier. 3.2 Changing Video Settings Use this menu to configure video settings. Aspect Ratio Pan Scan 4:3: Display a wide picture on the entire screen and cuts off the redundant portions. -
Page 21: Changing Record Settings
TV SYSTEM Select to adjust video output resolution: NTSC / PAL / 480P / 576P / 720P 50HZ / 720P 60HZ / 1080I 50HZ / 1080I 60HZ / 1080P 50HZ / 1080P 60HZ. 3.3 Changing Record Settings Quality Select to set the default recording quality setting. Press the up / down button to select the quality setting you require.The highest quality setting is HQ which requires the most storage space. - Page 22 Wired LAN Setup DHCP IP (AUTO) Select to obtain IP address automatically. FIX IP (MANUAL) Select to manually input the IP Address, Subnet Mask, Default Gateway, and DNS Server IP Address. Wireless Setup Selecting a connection profile This player can store up to three wireless network connections. Press ENTER to go to next step, press RETURN to cancel, and press PLAY to connect.
- Page 23 Choose between Infrastructure (AP) and Peer to Peer (Ad Hoc). Press ENTER to go to next step, and press RETURN to cancel. Infrastructure (AP) Infrastructure mode is used to connect computers with wireless network adapters, also known as wireless clients, to an existing wired network with the help from wireless router or access point.
- Page 24 Encryption keys can be inputted via the virtual keyboard. Press the navigational buttons to select, ENTER to input, CAPS to switch between uppercase and lowercase, <- to delete a character, -> to insert a space, shift to make more symbols available, and OK to confirm. Test connection The testing process will take for a while, please be patient to wait.
-
Page 25: Changing System Settings
Press ENTER to go to next step, press RETURN to cancel, and press PLAY to connect. 3.5 Changing System Settings Use this menu to configure system settings. Menu Language Select to choose the OSD (On-Screen Display) language. Text Encoding Select to set the text encoding option (subtitle display). Login Control Select to turn on / off password protect for the Web server (Neighbor Web). - Page 26 System Update Select Extension Package Upgrade to update extension files for BT download and SAMBA services. Select system upgrade to update the firmware via a USB stick. 1) Copy ‘install.img’ to the root directory of a USB stick, and connect it to the USB HOST port of the player.
-
Page 27: Miscellaneous
Restore Default Select to restore factory defaults. 3.6 Miscellaneous Use this menu to adjust miscellaneous settings. Slide Show Timing Select to set the interval time for photo slide show. Transition Effect Select to set the transition effect for photo slide show. Background Music Select to set the background music options while view pictures: Off / Folder / Playlist. -
Page 28: Main Menu
4. MAIN Menu 4.1 AV IN Menu In this menu, you can watch and record audio-visual signal from the A/V IN jack on the rear panel of the unit, or have the time shift function. Select the A/V In icon on the main interface to enter this menu. 4.2 Timer Record Menu The Timer Record menu allows you to create, edit and delete recording schedules and view all schedule status and history. - Page 29 Edit Schedule Press the left / right button on the remote control to select the Edit tab from the menu bar. Select the schedule you want to edit from the list and press the enter button. The schedule setting screen appears. Modify the schedule as described in ‘ Create a New Schedule’. Delete Schedule Press the left / right button on the remote control to select the Delete tab from the menu bar.
-
Page 30: Browser Menu
Select Enable the selected schedule or Pause the selected schedule. Press the enter button to confirm. Viewing Recording History Press the left / right button on the remote control to select the History tab from the menu bar. Here you can view a complete history of all recordings that were set. 4.3 Browser Menu The browser menu allows you to browse and play media files stored on Removable Devices (USB, Card), HDD, Network, UPnP-server, and Playlist. - Page 31 Button Function UP / DOWN Move cursor up / down to select devices, folders, or files. LEFT / RIGHT Select filter options: All, Music, Photos, and Movies. Go to previous / next page. PREV / NEXT Enter or confirm the selected item. ENTER Select files under Browser ->...
- Page 32 The following buttons can be used to control music playback. Button Function Begin/pause playback. PLAY/PAUSE Fast rewind or fast forward. Press repeatedly to select the speed. FR / FF Set repeat options: One, All, (and Shuffle). REPEAT INFO Hide or display the information bar during playback. Stop playback.
- Page 33 The following buttons can be used to control video playback. Button Function Begin/pause playback. PLAY/PAUSE SLOW Play video in slow motion. Press repeatedly to select the speed. FR / FF Fast rewind or fast forward. Press repeatedly to select the speed. PREV / NEXT View the previous or next movie.
- Page 34 4.3.5.1 Browsing though Workgroup You can choose the workgroup which your PC belongs to from the workgroup list, find your PC name, and press the ENTER button to confirm. Then you can select and play the shared media files that you want to browse. Note: While browsing high definition video files (resolution up to 720p / 1080i / 1080p) via Ethernet or WLAN, the video might be buffering.
- Page 35 Select Add to open a popup menu where you can input Label, Net User ID, Net Password, Domain, Host Name, and Specific File Server IP. Select OK to confirm, Cancel to cancel, and Simple / Detail to switch between simple and advanced options. Select the shortcut you added and press the ENTER button to confirm.
- Page 36 There’re a lot of free and commercial UPnP Media Server software, such as Windows Media Connect, Windows Media Player 11, XBMC Media Center (Linux/Mac/Windows), MediaTomb (Linux), etc. Please install one of them on you computer. In the following chapters, we will take Windows Media Player 11 on Microsoft Windows XP SP2 for an example.
- Page 37 Connect your player to the home network (LAN or WLAN). Visit Browser - > UPnP menu on the player, select the UPnP-server, and press ENTER. Then you can browse the media library shared by Windows Media Player 11. Note: Make sure your player and your computer are on the same local area network and subnet. Firewalls may prevent your player to communicating with your computer.
-
Page 38: Media Library
Press the UP / DOWN buttons to select from Return, Rename, and Delete. And press ENTER to confirm. 4.3.8 Managing the Playlist This player supports the playlist function, which allows you to add your favorite contents on local HDD to the playlists (All, Music, Photos, and Movies), and enjoy them at any time. 4.3.8.1 Adding files to the playlist Select the favorite file you wish to add, press the RED button, and the file will be ticked. - Page 39 Owning to a powerful search engine, the library menu allows you to search and browse multimedia files stored on the internal HDD in most easy ways. To enter this menu, select the Library icon on the home screen. 4.4.1 Music library Use the left / right button on the remote control to select the Music tab.
- Page 40 Select to search for music files by artist. Artist Press the up / down button to select the artist, and press the enter button to confirm. Select to search for music files by genre. Genre Press the up / down button to select the genre, and press the enter button to confirm.
- Page 41 Press the up / down button to select the album, and press the enter button to confirm. Quick-Search You can also press the right button to turn on a Quick-Search bar while browsing music files in the library. Press the up / down button to select characters on the Quick-Search bar, and press the enter button to confirm.
- Page 42 Select to update and synchronize all the photos stored on the internal Update HDD to the library. Select to search for photos by their names. Search Use the navigational buttons to select, and press the enter button to confirm. Select OK and press the enter button, and then the files you desired will be displayed on the screen.
- Page 43 Press the up / down button to select the date, and press the enter button to confirm. You can also press the right button to turn on a Quick-Search bar while Quick-Search previewing photos in the library. Press the up / down button to select characters on the Quick-Search bar, and press the enter button to confirm.
- Page 44 Press the up / down button to select from Update, Search, All, Actor, Genre, and Year. And press the enter button to confirm. Select to update and synchronize all the movies stored on the internal Update HDD to the library. Select to search for movies by their names.
- Page 45 Press the up / down button to select the actor, and press the enter button to confirm. Select to search for movies by genre. Genre Press the up / down button to select the genre, and press the enter button to confirm. Select to search for movies by year.
-
Page 46: File Copy Menu
Press the up / down button to select characters on the Quick-Search bar, and press the enter button to confirm. And then movies with name starting with the specific characters will be displayed onto the top. Press the left button to delete characters, and press the back button to close the Quick-Search bar. -
Page 47: Internet Radio
The following buttons can be used under the file copy menu. Button Function UP / DOWN Move cursor up / down to select devices, folders Go to the next step. RIGHT Select (or cancel) folders or files (The selected items will be MENU ticked). -
Page 48: P2P Share Menu
Station All downloaded stations will be listed under this menu. Genre You can search for stations by genre (pop, rock, jazz, etc.) under this menu. Favorite Your favorite stations can be kept under this menu. 4.7 P2P Share Menu Select the P2P Share icon on the main menu. You can see the status of torrents download progress and configure the BT download settings in this menu. - Page 49 The following buttons can be used under this menu. Button Function UP / DOWN Move cursor up / down. press to adjust the priority of the download task MENU PAUSE Press to pause the download. PLAY Press to start download. Press to stop the download.
-
Page 50: Ims Menu
Set to delete the finished torrent files automatically or not. Set the maximum number of simultaneous download tasks. 4.8 IMS Menu Several Internet Multimedia Services have been integrated into the player. Select the IMS (Internet Multimedia Service) icon on the main interface to enter this menu. Youtube You can view videos directly from Youtube though different classifications, like Recently Added, Recently Featured, Top Favorites, etc. - Page 51 News You can read newest news directly from different websites(CNN News, BBC news, etc.). In title list, press RIGHT button to view news in a full screen. You also can add RSS (Really Simple Syndication) URL to the list. Flickr You can view photos from http://www.flickr.com/.
-
Page 52: Nas Function
Note: Make sure the player is connected properly to a LAN or WLAN with Internet access, please refer to ‘3.5 Changing Network Settings’ for more details; It will take several seconds to get data from the Internet, please be patient to wait. 4.9 NAS Function This player can be used as a NAS (Network-Attached Storage) device. -
Page 53: Upgrading The Firmware
5. Upgrading the Firmware The firmware is the operating system (OS) installed on the device. Firmware upgrades can bring new features, improvements and bug fixes. (1) Copy ‘install.img’ or extension files to the root directory of a USB stick, and connect it to the USB HOST port of the player. -
Page 54: Appendixes
6. Appendixes 6.1 Specifications I/O INTERFACES SUPORTED: 3.5’’ SATA HDD USB 2.0 HOST port x 2 (compatible to USB 1.1) Memory Card slot (supports SD/MMC/MS/MS Pro) USB 2.0 DEVICE port (connecting to PC) Composite (CVBS) A/V IN jack Composite (CVBS) A/V OUT jack Component Y/Pb/Pr jack HDMI V1.3 interface S/PDIF coaxial &... -
Page 55: Frequently Asked Questions
Note: The specifications and design of this product are subject to change without notice. 6.2 Frequently Asked Questions Question 1. When I try to disconnect the USB device, I keep on getting “The device ‘Generic volume’ cannot be stopped right now. Try stopping the device again later.” message, what should I do? Answer: Close any program that might be accessing data on the player, including Windows®... - Page 56 Answer: Please check if your TV supports Y/Pb/Pr 480p, 576p, 720p, 1080i, and 1080p output, if your TV does not support, please use the A/V signal display instead, press the TV SYSYEM button on the remote control, then switch the TV’s video input to NTSC or PAL. Question 7.
- Page 57 unicast cipher. If you use these encryption methods (e.g. WEP, WPA-TKIP), your data rate will drop to 54 Mbps. You may contact the Access Point or router manufacturer to download the latest firmware, or try other encryption methods (WPA2-AES or WPA2-TKIP), or choose to configure an unsecured profile, but this option is not recommended.
-
Page 58: Copyrights And Trademarks
If you find some functions do not work properly on the player, please change system settings to the default (Refer to 3.6 for changing system settings). 6.3 Copyrights and Trademarks Copyrights All rights reserved. No part of this manual may be reproduced, or transmitted in any form or by any means, whether by electronically or mechanically, without the express written permission from the copyright holder. - Page 59 To obtain a copy of our open source software, please contact our support center and we will provide you with a CD-ROM of the source code that is used, charging only the actual expense involved. However, please be noted that we can not provide guarantee with the source code, and there is also no technical support for the source code from us.
- Page 60 Merlin Home Multimedia Center Premium 2TB Описание Характеристики...
Need help?
Do you have a question about the Home Multimedia Center Premium and is the answer not in the manual?
Questions and answers