Table of Contents
Advertisement
Advertisement
Table of Contents

Subscribe to Our Youtube Channel
Summary of Contents for SLS Audio Q-Line Silver
-
Page 2: Safety Instruction
SAFETY INSTRUCTION 1. Read Instructions - All the safety and operating instructions should grounding conductors, location of antenna-discharge unit, be read before the product is operated. connection to grounding electrodes, and requirements for the 2. Retain instructions - The safety and operating instructions should grounding electrode. -
Page 3: Read This Before Operating Your Unit
Introduction READ THIS BEFORE OPERATING YOUR UNIT This symbol is intended to alert the user to the presence of uninsulated "dangerous voltage" within the product's enclosure that may be of sufficient magnitude to constitute a risk of electric shock to persons. CAUTION : TO REDUCE THE RISK OF ELECTRIC SHOCK, DO NOT... -
Page 4: Table Of Contents
CONTENTS Introduction • SAFETY INSTRUCTION ..........................1 • READ THIS BEFORE OPERATING YOUR UNIT ..................2 System Connections ............................4 Front Panel Controls ............................6 Remote Controls .............................. 7 • REMOTE CONTROL OPERATION RANGE ..................... 8 • LOADING BATTERIES ..........................8 Operations •... -
Page 5: System Connections
System Connections • Do not plug the AC input cord into the wall AC outlet until all connections are completed. • Be sure to observe the color coding when connecting audio and video cords. • Change the position of the FM indoor antenna until you get the best reception of your favorite FM stations. •... -
Page 7: Front Panel Controls
Front Panel Controls... -
Page 8: Remote Controls
Remote Controls... -
Page 9: Remote Control Operation Range
REMOTE CONTROL OPERATION RANGE • Use the remote control unit within a range of about 7 meters (23 feet) and angles of up to 30 degrees aiming at the remote sensor. LOADING BATTERIES Remove the cover. Load two batteries matching the polarity. •... -
Page 10: Operations
Operations LISTENING TO A PROGRAM SOURCE Select the desired input source. Before operation • Enter standby mode by pressing MAIN POWER button. • The STANDBY indicator lights up. This means that the receiver is connected to the AC mains and a small amount of current is retained to •... - Page 11 To compensate for edgy or shrill movie When CD, VIDEO 1~3 is selected as an sound tracks. input source Select the digital or analog input connected as desired. • Then “C-EQ ON” is displayed. • Each time this button is pressed, the corresponding •...
- Page 12 At the desired tone mode, adjust the tone Adjusting the tone (bass and treble) as desired. Enter the tone mode. • If the tone display disappears, start from the step 10 again. • Each time this button is pressed, the corresponding tone mode is selected and shown for 3 seconds as Notes: follows:...
-
Page 13: Surround Sound
SURROUND SOUND • This receiver incorporates a sophisticated Digital Signal Processor that allows you to enjoy mutichannel surround sound in your Home Theater. Surround modes DTS Digital Surround Dolby Pro Logic DTS Digital Surround (also called simply DTS) is a multi- Dolby Pro Logic is a specially encoded two channel channel digital signal format which can handle more surround format which consists of four channels (front... -
Page 14: Speaker Setup
Delay time When the center speaker or the rear speakers are closer to the listener than the front speakers, the sound from the center speaker or the rear speakers can arrive at the listener’s ears earlier than the sound from the front speakers. In this case, the imaging is not as sharp and stable as it could be. -
Page 15: Enjoying Surround Sound
ENJOYING SURROUND SOUND • Surround sound effect will not work properly if the signal passes through a graphic equalizer. Please refer to your equalizer operating instructions for guidance on switching off (or defeating) the equalizer. Depending on the input digital signal format, select the desired decoding mode. - Page 16 When canceling the surround mode for stereo operation. • Then the stereo mode is selected. • To cancel the stereo mode, select the desired surround mode using the DSP MODE button. Adjusting the Dolby Pro Logic II parameters • When selecting Dolby Pro Logic II Music and Custom modes, you can adjust the various surround parameters for optimum surround effect.
-
Page 17: Adjusting The Speaker Settings
Note: You do not need to adjust speaker and subwoofer Select the desired speaker setting. settings when using QS system speakers. Your QS-AVR500 receiver speaker settings are preset to all speakers as small (FS-CS-RS) and subwoofer "Yes" for optimal sound quality and ease of operaion with your QS speakers. - Page 18 Adjust the level of the selected channel Adjusting each channel level as desired. Select the desired channel. • The LFE level can be adjusted within the range of 10 to 0 dB and other channel levels within the range of -15 to +15 dB.
- Page 19 Adjusting delay times of speakers in Adjust the delay time. Dolby Digital, Dolby Pro Logic II or Dolby Pro Logic Mode • In case of Dolby Digital, Dolby Pro Logic II or Dolby Pro Logic mode, when the distances from the prime listening position to front left, center, front right, rear left and rear right speakers are the same, the basic settings are as follows according to the surround modes :...
-
Page 20: Listening To Radio Broadcasts
LISTENING TO RADIO BROADCASTS Select the desired band. Auto tuning Select the tuner. • Each time this button is pressed, the band is changed to FM or AM. • When pressing the BAND button without selecting the TUNER, the tuner will be selected automatically. Press the TUNING/PRESET UP( ) or Select the tuning mode. - Page 21 Repeat the above steps 1 to 3 to memorize Select the desired preset number (1~30) and other stations. press the MEMORY/ENTER button. • When using the NUMERIC buttons on the remote control. MEMORY BACKUP FUNCTION Examples For “3” : The following items, set before the receiver is turned For “15”...
-
Page 22: Recording
RECORDING • The analog signals from the 6 CH DIRECT inputs as well as the digital signals from the coaxial or optical digital input can be heard but cannot be recorded. • The volume and tone control settings (bass, treble) have no effect on the recorded signals. Start recording on the TAPE MONITOR. -
Page 23: Other Functions
Start play on VIDEO 2 and the CD Start recording on VIDEO 1. respectively. • The audio from the CD and the video from VIDEO 2 will be recorded onto VIDEO 1. The CD's audio will play over the speakers and the video from VIDEO 2 will be displayed on the TV. -
Page 24: Troubleshooting Guide
Troubleshooting Guide If a fault occurs, run through the table below before taking your receiver for repair. If the fault persists, attempt to solve it by switching the receiver off and on again. If this fails to resolve the situation, consult your dealer. -
Page 25: Specifications
Specifications [Audio/Video Receiver (QS-AVR500)] AMPLIFIER SECTION • Power output, stereo mode, 6 Ω, THD 0.7%, 40 Hz~20 kHz ................. 2 100 W • Total harmonic distortion, 6 Ω, 100 W, 1 kHz ......................0.09% • Intermodulation distortion 60 Hz : 7 kHz= 4 : 1 SMPTE, 6 Ω, 100 W ........................0.1% •... - Page 26 • Controls ..............Power ON/OFF, Volume (front panel), Phase (0-180 degrees), Auto/ON • Dimensions (WxHxD)..................9.6" x 1.8" x 19.5" (0.24 m x0.46 m x 0.5m) • Weight (net) ................................ 33 lbs (15kg) The complete Q-Line Silver system gross weight including QS-AVR500 receiver is 106lbs (48kg).
- Page 27 SLS Audio products can occasionally have problems. At SLS Audio we recognize this and so are pleased to offer this warranty in the event that you should have trouble with your new SLS Audio product. It is important that you read the contents of this warranty and be familiar with it.
- Page 28 SLS Audio shall not be responsible for incidental or consequential damages. Some states do not allow limitations on how long an implied warranty lasts or the exclusion or limitation of incidental or consequential damages, so the above limitations or exclusions may not apply to you.
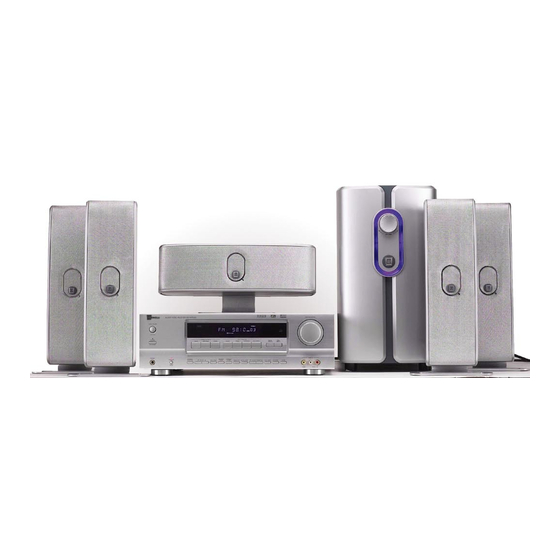
- Page 29 O P E R A T I N G I N S T R U C T I O N S QS-AVR500 AUDIO/VIDEO RECEIVER A N D Q-LINE SILVER SPEAKER SYSTEM...
Need help?
Do you have a question about the Q-Line Silver and is the answer not in the manual?
Questions and answers