Advertisement
Quick Links
ASSEMBLY & INSTALLATION INSTRUCTIONS
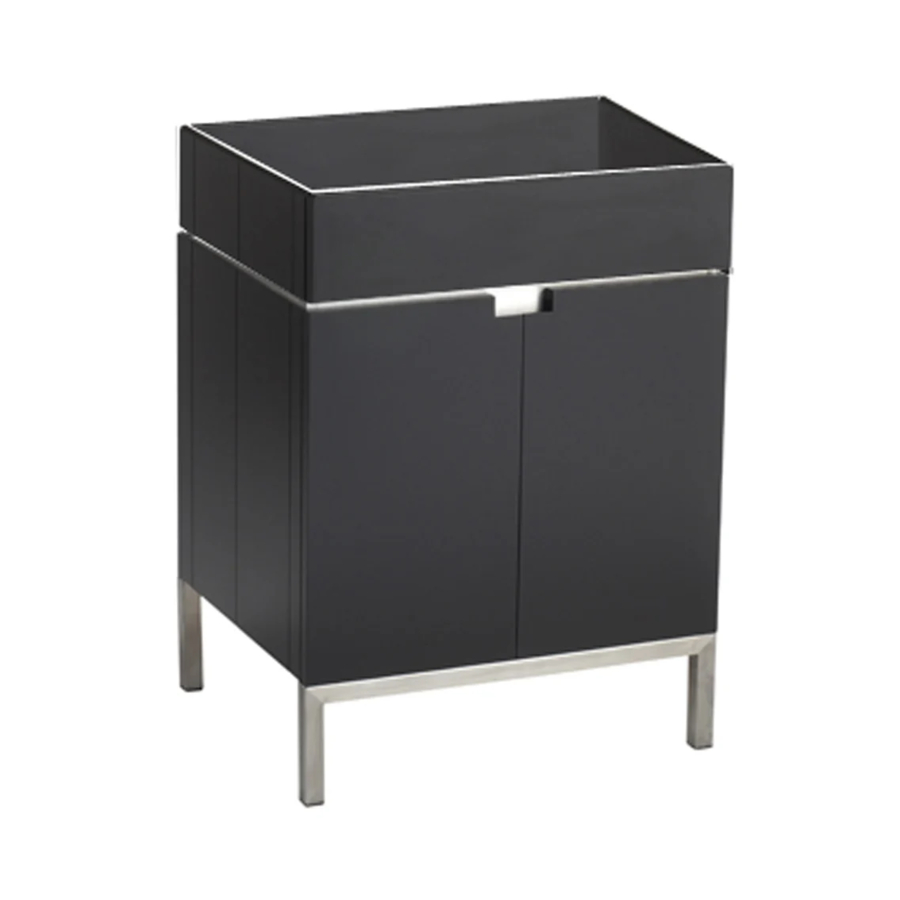
Studio 22" RTU Vanity
9205.024.339
VANITY TOP
9205.124 Laminated 22" Marble Top
No top required for Rectangular
Vessel Sink
Thank you for selecting our products...products which have been the benchmarks of fine quality for over 100 years.
To help insure that the installation process will proceed smoothly, please read these instructions carefully before you begin.
Also, review the recommended tools and materials list; carefully unpack and examine your new plumbing fixture.
To maintain the beauty of the finish, avoid placing the furniture in direct sunlight, as sunlight causes fading. Also avoid
extreme changes in temperature by arranging furniture away from radiators, heat and air vents, and air conditioning units.
Avoid placing furniture directly under windows.
Recommended Tools & Materials
Adjustable Wrench
Basin Wrench
Tubing Cutter
Roughing-in
SQUARE
CHINA
Dimensions
30-1/4"
(768mm)
Product names listed herein are trademarks of AS America, Inc.
© AS America, Inc. 2008
0978.000.321 Frosted Glass Round Vessel
0978.000.200 Clear Glass Round Vessel
0960.000.020 China Round Vessel
0621.001.020 Rectangular Vessel Sink
Channel Locks
Plumbers' Putty or
Caulking
21-3/4"
(552mm)
SINK
8"
(203mm)
6-3/8"
(162mm)
RECOMMENDED SINKS
Hacksaw
Tape
Measure
OPTIONAL:
LAMINATED MARBLE
TOP WITH VESSEL
1-1/4"(32mm)
18"
O.D. WASTE
(456mm)
16"
(406mm)
FINISHED
FLOOR
- 1 -
RECOMMENDED FAUCETS
2506.101 Moments Faucet
Pipe Wrench
Phillips Screwdriver
Putty Knife
Regular Screwdriver
18-3/16"
(462mm)
FINISHED
FLOOR
Drill
Level
REAR STRINGER
WITH ANCHORING
HOLES TO SECURE
VANITY TO WALL
3-7/8"
(98mm)
FINISHED
WALL
7 7 00 1 5- 1 00
Advertisement

Related Manuals for American Standard Studio 22" RTU Vanity 9205.024.339


Summary of Contents for American Standard Studio 22" RTU Vanity 9205.024.339
- Page 1 ASSEMBLY & INSTALLATION INSTRUCTIONS Studio 22" RTU Vanity 9205.024.339 VANITY TOP 9205.124 Laminated 22" Marble Top No top required for Rectangular Vessel Sink Thank you for selecting our products...products which have been the benchmarks of fine quality for over 100 years. To help insure that the installation process will proceed smoothly, please read these instructions carefully before you begin.
- Page 2 RTU (Ready to Unfold) VANITY INSTALLATION Unpack unit carefully, taking care that bottom shelf does not drop and damage front legs (see Figure 2). Provide suitable reinforcement for anchoring the vanity to the wall. Centerline of reinforcement should be 28-1/2" up from the floor (see Figure 1).
- Page 3 Optional Laminate Marble Top Installation NOTE: Tops are precut to accommodate recommended sinks and faucet. OPTION 1: Glass Vessel or Round China Vessel Place the riser (“O” Ring side down) over the hole in countertop surface. Position Glass Vessel onto riser aligning holes. The sink is mounted and secured on the countertop by the grid drain assembly, which is installed as follows: 1.
- Page 4 This limited warranty is void if the product has been moved from its initial place of installation; if it has been subjected to faulty maintenance, abuse, misuse, accident or other damages; if it was not installed in accordance with American Standard’s instructions; or if it has been modified in a manner inconsistent with the product as shipped by American Standard.