
Summary of Contents for SmileCAM SU-320
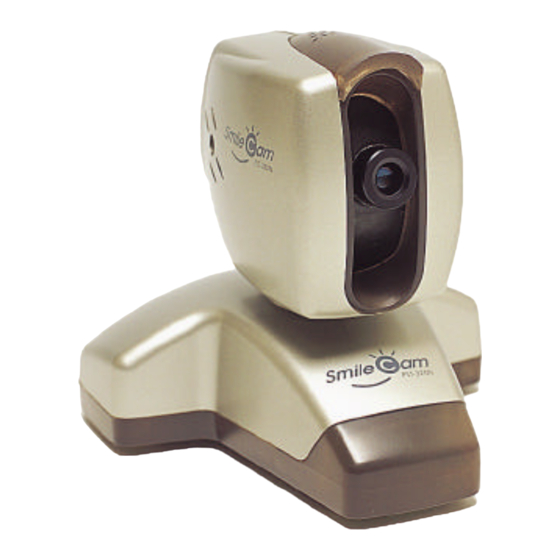
- Page 1 SmileCAM SU-320 USER’S GUIDE SmileCAM 4 Video Conferencing & Monitoring 4 Remote Pan / Tilt Control via Internet 4 Automatic Motion Tracking...
- Page 2 : Please make sure the lens cap is on when the camera is not in use. >>If SmileCAM is being used in network behind IP sharer, Router or in firewall, or during using if there is any problem with Video and Sound, please refer to Customer Service on www.smilecam.com.
- Page 3 (2) ezWebCam21 A. ezWebCam21 Server Set-up B. Main Functions C. ezWebCam21 Client Set-up Installation type 1. Using www.smilecam.com as your web broadcasting server (recommended) Installation type 2. Setting via ftp . Default Set-up . User Defined Set-up Installation type 3.
- Page 4 1. Pack Contents SmileCAM Install CD Manual...
- Page 5 2. Driver Set-up(Windows 98/ME/2000) Please install USB driver supplied in CD to use SmileCAM-USB camera according to your O/S system. (1) Windows 98/98Se 1) Turn on your computer. Connect USB cable and RS232 serial cable to each USB port and serial port in your computer.
- Page 6 2) The computer will automatically detect SmileCam as newly added hardware. Click “Next”. 3) Select “Search for the best driver for your device(recommended)”and click “Next”. 4) Select “Specify a location” and click “Browse”.
- Page 7 5) Put the supplied CD into CD-ROM drive and Specify ”USB Driver” folder and click “OK”. 6) Click “Next”.
- Page 8 7) Click "Next" after checking "smilecam.inf" driver file 8) Copying driver files… (if you see "Insert Disk" message while copying driver files, please put "Windows 98 CD" into CD-ROM drive. Then click "OK")
- Page 9 10) If the video image is not displayed properly through application program check if the USB Driver "SmileCAM SU-320" has been successfully installed under the image device by following path. Start/Settings/Control Panel/System/Device Manager/Image Device. >> If you have any problem on driver set-up, refer to Customer Service at www.smilecam.com .
- Page 10 1) Turn on your computer. Connect the USB cable and RS232 serial cable to each USB and Serial port in your computer. Refer to page 5. 2) The computer will automatically detect newly added hardware of SmileCAM. 3) Select “Specify the location of the driver(Advanced)” and click “Next”.
- Page 11 5) Put the supplied CD into CD-ROM drive and Specify ”USB Driver” folder and click “OK”. 6) Click “Next”.
- Page 12 7) Click "Next" after checking "smilecam.inf" driver file. 8) Copying driver files... 9) Click "Finish".
- Page 13 10) If the video image is not displayed properly through application program check if the USB Driver "SmileCAM SU-320" has been successfully installed under image device by the following path. Start/Settings/Control Panel/System/Device Manager/Image Device. >> If you have any problem on driver set-up, refer to Customer Service at www.smilecam.com .
- Page 14 1) Turn on your computer. Connect the USB cable and RS232 Serial cable to each USB and Serial port in your computer. Refer to page 5. 2) The computer will automatically detect newly added hardware of SmileCAM. Then, click “Next”.
- Page 15 4) Select “Specify a location” and click “Next”. 5) Put the supplied CD into CD-ROM drive and Specify ”USB Driver” folder and click “OK”. Click “Open”.
- Page 16 6) Click “O.K” after specifying “USB Driver” folder. 7) Check driver “smilecam.inf” and click “Next” . 8) Click “Yes”...
- Page 17 9) Click “Finish”. If the video image is not displayed properly through application program check if USB Driver “SmileCAM SU320” has been successfully installed under image device by following path. Start/Settings/Control Panel/System/Device Manager/Image device.
-
Page 18: Program Setup
3. Program Set-up (1) What is ezNetmeeting ezNetmeeting is a live video conferencing program that fits best with SmileCAM. You can enjoy live video communication with your family, your friends and the world with ezNetmeeting, which enables control of both local and remote camera while conferencing. Diverse additional functions such as file transfer, white board, message sending, chatting, etc. - Page 19 >> Once program is executed, a window for setting on user information, connection to www.smilecam.com Server and basic information to use program will be appeared. >> Type your name, e-mail address and comment, and select the other options. Then click “O.K”.
- Page 20 B. Getting know main functions [ ezNetmeeting Program ] Name : shows your name My IP : shows my IP Name : shows your name Partner's IP : shows partner's IP Auto-Tracking : Camera tracks moving object automatically by clicking button, by clicking again auto-tracking function stops.
- Page 21 Chatting text input : you can type a letter for chatting. Note) >> ezNetmeeting is a bundled S/W for the SmileCAM users. One of the two users must be equipped with SmileCAM to enjoy ezNetmeeting program. >> Let your partner visit www.smilecam.com to download ezNetmeeting for free and...
- Page 22 (2) ezWebCam21 ezWebCam21 provides you real time Web Broadcasting and Monitoring Service with camera control & image recording. All you need to enjoy this program is to set up EzWebCam21 server and client by clicking the icon on the initial screen of that bundled software.
- Page 23 “ezWebCam21” icon created on the Desk top (or go to Start Program SmileCam folder and execute "ezWebCam21"). >> Once executed, below screen will be appeared. Click "O.K". >> Select "SmileCAM SU-320" Driver and click "O.K". [ Driver Select ]...
- Page 24 [ ezWebCam21 Server Program ] B. Getting know main functions Video On/Off : Starts or stops video transfer Sound On/Off : Starts or stops sound transfer Control On/Off : Allows or limits clients to camera control Setup : Settings "ezWebCam21 server" Close Chatting box : Opens or closes chatting box.
- Page 25 Each input title will be shown on server and client program. My IP Transfer Setting Automatically transfer Server IP, connected with SmileCAM, to the webserver that client is installed when installing and starting the program. Static IP users are not required to transfer the IP except other special cases.
- Page 26 C. ezWebCam21 Client Set-up >> Click "ezWebCam21 Client" to install. [ AutoSetup Screen ] [Note] Be sure to close "ezWebCam21 Server" program when installing "ezWebCam21 Client" because Client program can not be installed properly if Server program is being executed. >>...
- Page 27 >> How to install Select "On smilecam.com" and click "Next". Fill in the following form with your registry information and click "OK". Note) Carefully type your ID since ID is not changeable once registered.
- Page 28 Installation type 2 : Setting via ftp Those who are having web hosting service from internet service provider are recommended to follow this way of installation. This way installs the client program at ftp server currently having been serviced by Internet Service Provider and lets you receive the WebCam broadcasting service through specified URL path.
- Page 29 after deleting needless files at your ftp server. >> After uploading you will see the window that uploading has been completed like below. >> Check your ezWebCam21 URL and click "O.K" to complete Set up. >> How to check the client program has been successfully installed. 1.
- Page 30 l User defined Set-up Users can specify a folder or can create a new folder to install ezWebCam21 Client program in ftp server. >> Select "User defined" from initial installation screen and click "Next". >> Fill the following form with your registry information and click "Next". [ User Defined Set-up 1 ] >>...
- Page 31 >> Click "Next" if you selected folder. [ User Defined Set-up 3 ] >> Type your Homepage address up to the folder you selected at Homepage address column ( Homepage address/selected folder). Ex: (http://)my.netian.com/~kllee/webcam [Note] If input your Homepage address and a selected folder in Homepage Address column, ezWebCam21 address will be marked automatically in below ezWebCam21 URL column.
- Page 32 Select a folder and click "Next" to install . Then client program will be installed at the selected folder. >> Connect the folder that client program is installed with WebServer. For more information regarding installation, please refer to HELP in provided install CD or visit SmileCAM users' community site http://www.smilecam.com...
- Page 33 Then, [Save Start] and [Save Stop] menu are published. >> If store image by clicking [Save Start], it is stored with serial jpeg file to Program files/SmileCAM/ezWebCam21Kor/images folder. [Save Stop] ends recording image. >> If do password setting in "Setup" window of ezWebCam21 Server Program, you can limit or prevent recording image.
- Page 34 4. Caution Cancellation of Screen saver or Power schemes mode In case that ezWebCam21 or ezNetmeeting are in use for an extended time, sometimes video image cannot be displayed due to the function of Screen saver or Power scheme of your computer. In case of using for an extended time, control your computer as follows.
- Page 35 Host Controller are properly installed. If not, reinstall them. And if there is/are any collision(s) with other device resources, change their settings to fix them. 2. After Installing the SmileCAM SU-320 driver, video Image is not displayed on ezWebCam21 or ezNetmeeting.
- Page 36 TEL: +82 32 234 2000 FAX: +82 32 234 2020 E-mail : sit@sitway.com US Office 3435 Wilshire Blvd., Suite 2700, Los Angeles, CA 90010 U.S.A. TEL: (213) 251 5470 FAX: (213) 251 5472 E-mail : david@sitway.com SmileCAM is a trademark of Sintec Corporation. All rights reserved. Made in Korea...
Need help?
Do you have a question about the SU-320 and is the answer not in the manual?
Questions and answers