Table of Contents
Advertisement
Quick Links
Download this manual
See also:
User Manual
Advertisement
Table of Contents

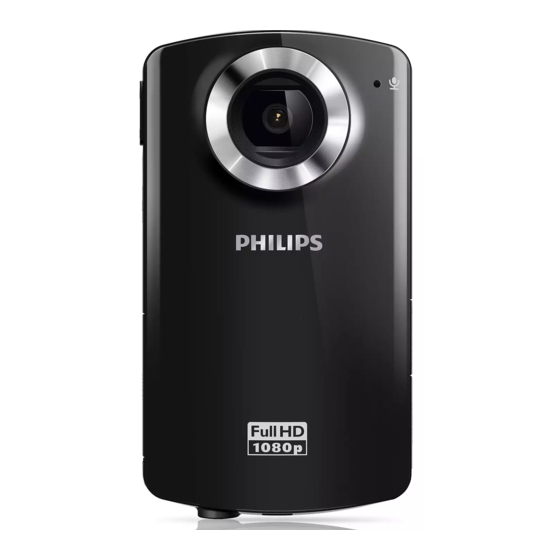
Summary of Contents for Philips CAM102
- Page 1 Register your product and get support at www.philips.com/welcome CAM102 EN User manual...
-
Page 2: Table Of Contents
Contents Important Safety Notice Your camcorder Introduction What’s in the box Functional overview Get started Load the Micro SD card Turn on Set the date and time (for first-time users only) 8 Select a menu display language Charge the built-in battery Use your camcorder Record video Take pictures... -
Page 3: Important
Any changes or modifications made to this negative consequences for the environmental device that are not expressly approved by and human health. Philips Consumer Lifestyle may void the user’s Always bring your product to a professional to authority to operate the equipment. remove the built-in battery. -
Page 4: Your Camcorder
2 Your camcorder Introduction With this portable camcorder, you can: • take full HD (1080P) or VGA movies • take pictures • play recorded movies or pictures either directly or on the large screen of a connected TV • upload the recorded movies or pictures to the Internet directly What’s in the box Make sure that the following items are packed... -
Page 5: Functional Overview
Functional overview • During video play, change the volume. a Built-in speaker • Perform the specific function as b Display panel shown on the display panel. c +/- d Shutter button • In viewfinder mode, zoom in/out. • In viewfinder mode, take a picture or •... - Page 6 • In viewfinder mode, switch to play mode. • In play mode, play a selected video clip. • Confirm settings. f MICRO SD • Connect a Micro SD card. • Navigate left/right in a menu. • Select a menu option. •...
-
Page 7: Get Started
3 Get started • To save energy, the camcorder turns off automatically after being idle for 3 minutes. Load the Micro SD card Set the date and time (for first-time users only) When you turn on the camcorder for the first time, a menu for date and time setting appears. -
Page 8: Select A Menu Display Language
You can also charge the camcorder via a USB Select a menu display adaptor (not supplied) connected to mains language power. The charge time is about 2 hours. In viewfinder mode, press . » A settings menu appears. Press to highlight [Language]. Press to select a language. -
Page 9: Use Your Camcorder
4 Use your Play camcorder In viewfinder mode, press to enter play mode. » The last recorded video clip is played Record video automatically. Press to select a picture or video Switch the mode switch button to . clip for play. »... -
Page 10: Adjust Settings
Adjust settings In viewfinder mode, press . » A settings menu appears. Press to highlight an option. Press to select a setting. Press to confirm the setting and return to viewfinder mode. Description [Scene] Select an automatic exposure mode that matches your shot for easy shooting. -
Page 11: Use More Of Your Camcorder
5 Use more of Install and use the camcorder software your camcorder With the software (ArcSoft MediaImpression HD Edition) available in the internal memory View video or pictures on TV of the camcorder, you can import, edit, archive or upload your pictures/videos to the Internet easily. - Page 12 Install and use the camcorder Transfer video/pictures to a PC/Mac software Connect the camcorder to a PC/Mac (see ‘Get started’ > ‘Charge the built-in On your PC, click Start\(All) Programs\ battery’). ArcSoft MediaImpression HD Edition. » » It may take some time for the PC/Mac The main screen of the software to recognize the camcorder.
-
Page 13: Technical Specifications
6 Technical Audio file format AAC Battery 700mAh Li-ion (built-in) specifications PC interface Mini USB 2.0 port System support Windows XP/Vista/ Windows 7, Mac (mass storage only ) Product information is subject to change TV out NTSC/PAL selectable, without prior notice. Mini HDMI (type C) Image sensor 1/3.2”... -
Page 14: Frequently Asked Questions (Faq)
7 Frequently How do I charge the camcorder? • You can charge the camcorder via the USB pop-out connector. When you asked questions connect it to your PC/laptop it will automatically charge. You can also plug (FAQ) the camcorder via the pop-out USB into a USB charger. - Page 15 • To play back on TV, please use an HDMI are stored on the CAM102. To play the connector (mini HDMI to standard videos from the CAM102, it depends if HDMI) if your TV accepts HDMI input, or your host supports the file format H.264...
- Page 16 Tips on video making • You can easily look back on fun moments and relive them with the camcorder. To enjoy these memories to the fullest, here are some simple video tips: • When capturing videos, hold your camcorder steady in your hand •...
- Page 17 © 2011 Koninklijke Philips Electronics N.V. All rights reserved. CAM102_10_UM_V1.0...


Need help?
Do you have a question about the CAM102 and is the answer not in the manual?
Questions and answers