Table of Contents
Advertisement
Advertisement
Table of Contents

Related Manuals for VIORE LCD24VF75


Summary of Contents for VIORE LCD24VF75
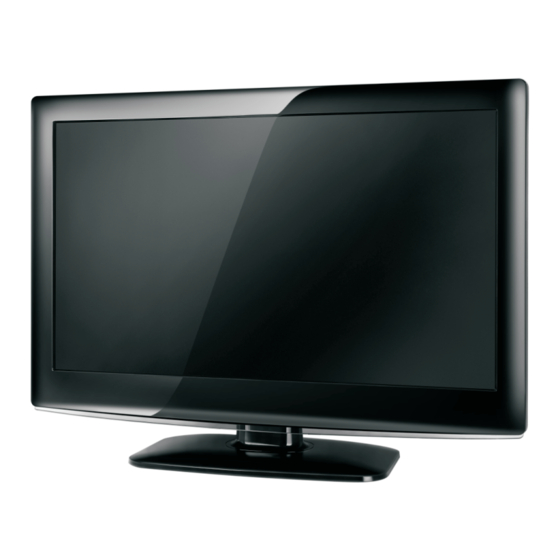
- Page 1 24" 1080p LCD Television with Built-in DVD Player LCD24VF75...
-
Page 2: Table Of Contents
Contents Safety and warnings..................2-3 Introduction....................4 Installation....................5-8 Wall Mount ....................9 Remote Control...................10 Operation.....................11-15 Trouble Shooting..................16 DVD Operation....................17-20 DVD Trouble Shooting..................21... -
Page 3: Safety And Warnings
SAFETY AND WARNINGS IMPORTANT SAFETY INSTRUCTION CAUTION 1) Read these instructions. RISK OF ELECTRIC SHOCK 2) Keep these instructions. DO NOT OPEN! 3) Heed all warnings. CAUTION TO REDUCE THE RISK OF ELECTRIC SHOCK, DO 4) Follow all instructions. NOT REMOVE COVER (OR BACK).NO USER 5) Do not use this apparatus near water. -
Page 4: Safety And Warnings
SAFETY AND WARNINGS High voltages are used in the operation of this television Never stand on, lean on, or suddenly push the television or receiver. Do not remove the cabinet back from your set. its stand. You should pay special attention to children. Refer servicing to qualified service personnel. -
Page 5: Introduction
INTRODUCTION INTRODUCTION Main features Accessories 1920 x 1080 native resolution for Full-HD (1080p) ■ Power Cable........performance Integrated ATSC TV tuner for HDTV broadcast reception ■ Infrared Remote Control... Built-in progressive scan DVD player ■ High brightness provides a vivid and brilliant picture User’... -
Page 6: Installation
INSTALLATION Front panel Side panel SOURCE MENU VOL+ VOL- STANDBY 1.SOURCE To display the input source menu. 2.MENU To display main MENU. 3.CH+/CH- In TV mode,to change the channel up and down. 1: Remote control sensor. In MENU mode, to select the menu items . 2: Indicator LED: In standby mode, it can turn on the TV. - Page 7 INSTALLATION STEPS: Be sure both the TV and computer are set to Power off. 1.Connect VGA and audio cable. 2.Connect the power cord. 3.Power on the TV, switch to VGA mode. 4.Power on the VGA. This sequence is very important. PC AUDIO HDMI1 I NPUT HDMI2 INPUT...
- Page 8 INSTALLATION ANTENNA Note: Aerial connections:IEC(female). Input impendance:75 unbalanced.
-
Page 9: Installation
INSTALLATION AV EQUIPMENT This TV provides one group of AV ,one group of YPbPr for convenient connectionto VCR,DVD or other video equipment. Please refer to the owner s manual of the equipment to be connected as well. You can use the input terminals on TV set rear as follows. VIDEO EQUIPMENT with YPbPr Yellow (video) White(audio L) -
Page 10: Wall Mount
- 4 pcs of type M4 screws are required for installing the wall mount bracket to your VIORE TV. Do not use screws that are longer than 10 mm. Screws that are too long may cause damage to the inside of the TV set. -
Page 11: Remote Control
REMOTE CONTROL POWER MUTE 1:POWER RECALL To set the TV standby or on. 2:NUMBER KEY: For direct access to program. 3:MENU To display TV menu or to return to the previous menu. 4:CURSOR MENU SOURCE To move within the menu. 5:EXIT Used to exit menu. -
Page 12: Operation
OPERATION 3. SETUP MENU 1. PICTURE MENU The first item of the MENU is PICTURE MENU. The third item of the MENU is SETUP MENU. You can adjust picture effect here, such as contrast, brightness, etc. You can setup system here. Press to select and press to adjust. -
Page 13: Change Password
OPERATION Change Password: Press button and the screen will display as follows: Content Rating Content (Fantasy (Violence) (Sexual (Adult (Sexually violence) situation) language) suggestive dialog) TV-Y (All children) ---- TV-Y7(Direct to Old password order children) ---- Suggested New password TV-G(General ---- audience) Confirm password... - Page 14 OPERATION 3.2 Timer Description Rating You can adjust timer here. Press to select, and press to adjust. Press MENU Exempt: Includes news, sports, documents and other information programming: talk shows, music videos, and variety programming. to exit. Children: Intended for younger children under the age of 8 years. Pays careful attention to themes that could threaten their sense of securityand well-being.
-
Page 15: Channel Menu
OPERATION 3.4 Menu Settings You can adjust Menu Settings here. 1). Air/Cable: Select Air TV signal or cable TV signal. Press to select. Press to adjust. Press MENU 2). Auto Scan: If you selected Air on Air/Cable selection, to exit. scanning all TV channels is required prior to starting watching the TV programs. -
Page 16: Operation
OPERATION 5. Multimedia MENU : play If you select storage source. You can use Multimedia Menu to play the JPEG picture and Mp3 music. : pause : stop 1. Select Photo item If select Photo item, the JPEG menu display on screen : fast back below: : previouse... -
Page 17: Trouble Shooting
TROUBLE SHOOTING Trouble phenomenon Symptom Inspection Check Picture Audio antenna position, direction Snow Noise or connection antenna position, direction Ghost Normal audio or connection electronic equipment,car/ Interference Noise motorcycle,fluorescent light Volume(check if mute is activated or if the audio system Normal Picture connections are not correct) Mute... -
Page 18: Dvd Operation
DVD OPERATION DVD SIDE PANEL Caution: When using USB function, please do not insert in the wrong direction, or else it will damage the unit. CLASS 1 LASER Disc data side Disc label side facing you NEXT PRODUCT PREV STOP PLAY/PAUSE OPEN/CLOSE Caution... - Page 19 DVD OPERATION MENU OPERATION SYSTEM SETUP Press the SETUP button on the remote control, the Aspect Ratio SETUP MENU will be displayed. After accessing the Select the aspect ratio. setup menu, press the direction buttons for up and Notes: down movement to select an item desired, and press The image display ratio is related to the recorded disc RIGHT direction button to select the SUBMENU format.
- Page 20 DVD OPERATION PICTURE CD PLAYBACK MP3/WMA/JPEG PLAYBACK The PICTURE CD disc has such a directory structure structure as shown in the following picture. The MP3/WMA disc has such a directory structure as shown picture above Press Direction key to choose the root Press Direction key to choose the root directory and directory and then press ENTER button to then press ENTER button to enter into the sub...
- Page 21 DVD OPERATION Function Buttons OPEN/CLOSE DISPLAY To open the disc tray, press Press the button to show the OPEN/CLOSE; To close the disc tray, information of the current playing disc. press OPEN/CLOSE again. ENTER Press the button to confirm your choice SUBTITLE Press the button to choose different on screen.
-
Page 22: Dvd Trouble Shooting
DVD TROUBLE SHOOTING If you have any questions, please consult the troubleshooting guide below: NO PICTURE OR SOUND REMOTE NOT WORKING Ensure the power button is on. Make sure the Main unit s POWER button is on Ensure the power outlet is operational. Ensure the remote batteries are working. - Page 23 Ver.110824-1 Viore,Inc. 7801 Hayvenhurst Avenue, Van Nuys,CA 91406 Printed in China...
Need help?
Do you have a question about the LCD24VF75 and is the answer not in the manual?
Questions and answers