
Related Manuals for Gigaset A510


Summary of Contents for Gigaset A510
- Page 1 Congratulations By purchasing a Gigaset, you have chosen a brand that is fully committed to sustainability. This product’s packaging is eco-friendly! To learn more, visit www.gigaset.com.
-
Page 3: Gigaset A510 - Your High-Quality Accessory
(¢ page 38). Other practical information Transfer the directory from an existing Gigaset handset (¢ page 28), use the shortcut func- tion (¢ page 28) and adjust the background colour and contrast of the display to your requirements (¢ page 37). -
Page 4: Overview
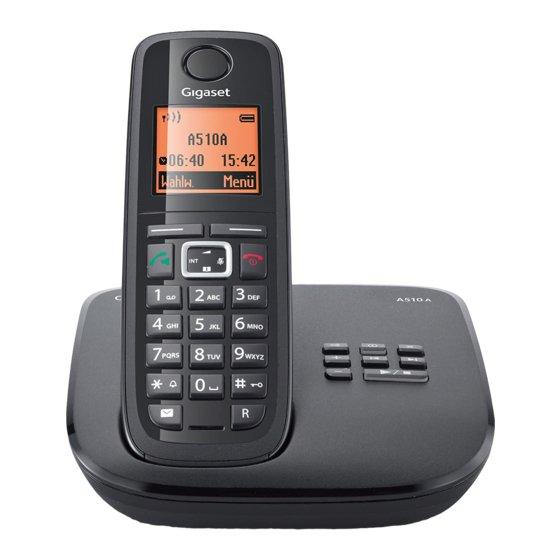
Overview Overview 1 Signal strength (¢ page 16) Icon changes when Eco Mode+ is activated (¢ page 33) 2 Control key (¢ page 18) Mute microphone (¢ page 26) 3 Talk/Handsfree key Flashing: incoming call; Lights up: handsfree mode activated; accept call;... -
Page 5: Display Icons
Overview Display icons The following icons are displayed depending on the settings and the operating status of your telephone: ¨ Signal strength (¢ page 16) or Eco Mode + icon ¼ (¢ page 33) Keypad locked (¢ page 20) Ringtone switched off (¢ page 38) Batteries are charged (¢... -
Page 6: Display Keys
Display keys Other display icons: Connection cannot be estab- lished or connection interrupted Establishing a connection Connection established ˜ — External call (¢ page 24) Internal call (¢ page 35) Alarm call (¢ page 34) Ø Ü Ú Ø å Ú Ø... -
Page 7: Table Of Contents
Contents Gigaset A510 – your high-quality accessory ......1 Overview ............2 Display icons . - Page 8 Contents Using the network mailbox ........32 Using fast access for the network mailbox .
-
Page 9: Safety Precautions
Otherwise you risk serious and permanent damage to your hearing. Your Gigaset is compatible with the majority of digital hearing aids on the market. However, perfect function with all hearing aids cannot be guaranteed. The handset may cause interference in analogue hearing aids. If you require assist- ance, please contact the hearing aid supplier. -
Page 10: First Steps
First steps First steps Checking the package contents One Gigaset A510 base One power adapter for the base One Gigaset handset Two batteries One battery cover One phone cord One user guide If you have purchased a model with multiple hand-... -
Page 11: Setting Up The Base And Charging Cradle (If Included)
Please note: u Never expose the telephone to the effects of heat sources, direct sunlight or other electrical devices. u Protect your Gigaset from moisture, dust, corrosive liquids and fumes. Connecting the base ¤ First connect the telephone jack and insert the cables into the cable ducts. -
Page 12: Connecting The Charging Cradle (If Included)
First steps Connecting the charging cradle (if included) ¤ Connect the flat plug from the power adapter 1. ¤ Plug the power adapter into the plug socket 2. To disconnect the plug from the charger, press the release button and disconnect the plug 4. -
Page 13: Setting Up The Handset For Use
Inserting the battery and closing the battery cover Warning Use only rechargeable batteries (¢ page 44) recommended by Gigaset Com- munications GmbH, as this could otherwise result in significant health risks and personal injury. For example, the outer casing of the batteries could be destroyed or the batteries could explode. - Page 14 ¤ Charge the handset in the base for 6 hours. Please note The handset must only be placed in the designated Gigaset A510 base or charger. ¤ After charging, remove the handset from the base and only replace it when the batteries are fully discharged.
-
Page 15: Changing The Display Language
First steps Changing the display language Change the display language if you do not understand the language currently set. ¤ Press right on the control key. ¤ Press the keys L and 4 slowly one after the other. English The display for setting languages appears and the current language (e.g., English) is ³... -
Page 16: Setting The Date/Time
First steps Setting the date/time Set the date and time so that the correct date and time can be assigned to incoming calls, and so that the alarm clock can be used. Please note Depending on your network provider, the date and time may be displayed auto- matically. - Page 17 First steps μ Saved The display shows Saved. You will hear a confirmation tone and the handset auto- matically reverts to idle status, or returns to the "Settings" menu if the setting was made via the menu. Please note If your phone receives the date and time during calling line display (e.g., via your network provider, a router or PABXs), you can specify whether this data should be copied to your phone: ¤...
-
Page 18: Charge Status Of The Batteries
First steps Display in idle status Once the phone is registered and the time set, the screen display is as follows (example). Ð Screen display u Reception between the base and the handset: Ð ¨ § ¦ – Good to poor: INT 1 ¥... -
Page 19: What Would You Like To Do Next
First steps What would you like to do next? Now that you have successfully set up your Gigaset, you can immediately start call- ing – or you can adapt it to your personal requirements. Use the following guide to quickly locate the most important functions. -
Page 20: Using The Phone
Using the phone Using the phone Control key In the description below, the side of the control key (up, down, right, left) which you have to press in the different operating situ- ations is marked in black e.g., v for "press the right edge of the control key". -
Page 21: Menu Guidance
Using the phone Menu guidance Your telephone's functions are accessed via a menu consisting of several levels (menu overview ¢ page 23). Main menu (first menu level) ¤ With the handset in idle status, press the display key §Menu§ or right on the control key v to open the main menu. -
Page 22: Activating/Deactivating The Handset
Using the phone Activating/deactivating the handset In idle status, press and hold the end call key (confirmation tone). Activating/deactivating the keypad lock The keypad lock prevents any unwanted use of the phone. In idle status, press and hold the hash key (confirmation tone). The keypad lock is activated or deactivated. -
Page 23: Understanding The Operating Steps
Using the phone Understanding the operating steps The operating steps are shown in abbreviated form, for example: ¤ Settings ¤ Eco Mode+ (³ = on) §Menu§ ¤ This means you should proceed as follows: Redial Menu ¤ Press the key below §Menu§... -
Page 24: Eco Mode
Using the phone Eco Mode+ ... until the Eco Mode+ menu item ³ appears. Back ¤ Press the key below §OK§ on the display screen to switch the function on or off (³ = on). ¤ Press the key below §Back§... -
Page 25: Menu Tree
Menu tree Menu tree The menu entries are partially subdivided. The page numbers refer to the rel- evant description in the user guide. To open the main menu: press the display key §Menu§ when the phone is in idle mode. ì... -
Page 26: Number (Or Name) Of Caller
Making calls Making calls Calling Line Identification When you receive a call, the caller's number is displayed on the screen if the following Making an external call prerequisites are met: u Your network provider supports CLIP, CLI. External calls are calls using the public –... -
Page 27: Notes On Phone Number Display (Clip)
By default, the number of the caller is shown phone number display (CLIP) and that the in the display of your Gigaset telephone. You function has been activated for you. If do not have to make any other settings on necessary, contact your provider. -
Page 28: Switching To Mute
Making calls Switching to mute Storing preselection numbers ¤ Settings ¤ Telephony §Menu§ You can deactivate your handset's micro- ¤ Preselection ¤ Preselection Number phone during a call. Enter or change the preselec- Press right on the control key to tion number (call-by-call mute the handset. -
Page 29: Using The Directory And Lists
Using the directory and lists Using the directory and Storing a number in the directory s ¤ ¤ New Entry §Menu§ lists §OK§ Enter the number and press §OK§ Enter the name and press The options are: u Directory Order of directory entries u Redial list u Calls lists Directory entries are generally sorted alpha-... - Page 30 Using the directory and lists Managing directory entries Using speed dial keys s ¤ s (Select entry) You can assign directory entries to the keys Q and 2– O: §Menu§ Press the display key. s ¤ q (select entry) ¤ §Menu§...
-
Page 31: Redial List
Using the directory and lists Adding a displayed number to Redial list the directory The redial list contains the ten numbers last You can copy numbers displayed in a list, dialled with the handset (max. 32 numbers). e.g., the calls list or redial list, to the directory. If one of the numbers is in the directory, the A number is displayed: corresponding name will be displayed. -
Page 32: Function Of The Message Key
Using the directory and lists Function of the message key The list is displayed with the number of new entries (1) and the number of old, read entries (2) (example): Opening lists Use the message key f to open the follow- ing lists: Calls List: u Network mailbox, if your network pro-... -
Page 33: Calls List
Using the directory and lists Calls list List entry Example of list entries: Prerequisite: Calling Line Identification Presentation (CLIP, page 24) New Call Depending on the type of list, the calls list 1234567890 contains the last 25 numbers of u All calls 28.06. -
Page 34: Using The Network Mailbox
(¢ page 30). Gigaset A510 base. If you have registered your handset to a different base, such as Please note the Gigaset A510A, please refer to your Enter the network mailbox phone base user guide. -
Page 35: Eco Dect
¤ Settings ¤ Eco Mode §Menu§ §OK§ Press the display key. You are helping to protect the environment (An advisory message appears with your Gigaset. when Eco Mode is activated; .) ³ = on. §OK§ confirm with Reducing energy consumption... -
Page 36: Using The Handset As An Alarm Clock
³ ¤ Alarm Clock ¤ Activation ( §Menu§ = on) Registering a Gigaset handset to a After you activate the alarm clock, the menu Gigaset A510 for setting the wake up time opens automat- You must manually register the handset on ically. -
Page 37: De-Registering Handsets
Calling all handsets ("group call") Press and hold. You can de-register all other registered handsets from each of the registered Initiate internal call. Gigaset handsets. ¤ Settings ¤ Registration Press the star key. §Menu§ ¤ De-register Handset Select the internal number Initiate internal call. -
Page 38: Listening In To An External Call (Conference)
Using multiple handsets Accepting a waiting call Internal listening in If you receive an external call during an The line is engaged with an external call. internal call, you will hear the call waiting Your screen will display information to that tone (short tone). -
Page 39: Handset Settings
Handset settings Handset settings Contrast Nine contrast settings are available. Your handset comes with default settings, Activating/deactivating auto but you can change the settings to suit your individual requirements. answer Changing the display If you activate this function, when you receive a call you can simply lift the handset language out of the charging cradle without having to... -
Page 40: Changing Ringtones
Handset settings Changing ringtones External Calls §OK§ Select and press u Volume: q can be used for the following: You can choose between five volumes Melodies (e.g., volume 3 = ˆ ) and the "cre- You can set the ringtone as described scendo"... -
Page 41: Restoring The Handset Default Settings
Base settings Press and hold the star key. The ó icon appears in the display. The base settings are carried out using a reg- istered Gigaset handset. Reactivating the ringer Press and hold the star key. Activating/deactivating Deactivating the ringer for the current... -
Page 42: Protecting Against Unauthorised Access
Base settings Protecting against Resetting the base to the unauthorised access default settings Protect the system settings of the base sta- When restoring default settings: u Individual settings are reset tion with a PIN known only to yourself. The system PIN must be entered when, for exam- u All lists are deleted ple, registering/de-registering a handset to/ u Eco Mode and Eco Mode+ are deacti-... -
Page 43: Connecting The Base To The Pabx
Connecting the base to the PABX Connecting the base to Setting pauses the PABX Changing the pause after line seizure The following settings are only necessary if your PABX requires them; see the PABX user You can change the length of the pause that is inserted between pressing the talk key c manual. -
Page 44: Service (Customer Care)
We offer you support that is fast and tailored to your specific needs! Our Online Support on the Internet: www.gigaset.com/service For more information on aftersales service, please refer to your local warranty card. In some countries repair and replace services are impossible where the products are not sold through our authorised dealers. -
Page 45: Environment
They are a precondition for the re- We, Gigaset Communications GmbH, bear social responsibility and are actively com- use and recycling of used electrical and elec- mitted to a better world. Observing our eco- tronic equipment. -
Page 46: Appendix
- With Eco Mode+ Charging time in base (hours) Charging time in charger (hours) Due to the constant progression in battery development, the list of recommended bat- teries in the FAQ section of the Gigaset Cus- tomer Care pages is updated regularly: www.gigaset.com/service... -
Page 47: General Specifications
Appendix Base power consumption Pin connections on the telephone jack A510 A510A 1 unused In standby mode * approx. 0.7 W approx. 0.7 W 2 unused Base in standby < 0.4 W < 0.4 W mode ** 5 unused During a call approx. -
Page 48: Writing And Editing Text
Appendix Writing and editing text Writing names ¤ Enter the individual letters/characters by The following rules apply when writing text: pressing the corresponding key. u Multiple letters and characters are assigned to each key between Q and O The characters assigned to the key are as well as P and #. -
Page 49: Accessories
Accessories Accessories Gigaset handsets Upgrade your Gigaset to a cordless PABX: Gigaset A510H handset u Hear whom the call is for with VIP ringtones u High-quality keypad u 1.8" b/w display u Directory for 150 entries u Talk/standby time of up to 18 h/260 h,... - Page 50 Accessories Gigaset SL400H handset u Genuine metal frame and keypad u High-quality keypad backlight u 1.8" TFT colour display u Bluetooth® and mini USB u Directory for up to 500 vCards u Talk/standby time of up to 14 h/230 h...
- Page 51 Accessories Gigaset C610H handset u Social life management with room monitor and birthday reminders u Individual programming of ringers with 6 VIP groups u High-quality keypad with backlight u 1.8" TFT colour display u Directory for up to 150 vCards...
- Page 52 Indoors: ranges of up to 50 m, outdoors: up to 300 m www.gigaset.com/gigasetl410 Gigaset repeater The Gigaset repeater can be used to increase the reception range between your Gigaset handset and the base. www.gigaset.com/gigasetrepeater Compatibility You can find more information about the handset functions in connection with the individual Gigaset bases at: www.gigaset.com/compatibility...
-
Page 53: Mounting The Base On The Wall
Mounting the base on the wall Mounting the base on the wall 30 mm approx. 7.4 mm Mounting the charger on the wall 21.6 mm approx. 3.3... -
Page 54: Index
Index Index Call waiting ......internal call ......Call-by-call Calling . - Page 55 Index Dialling mode ........... Digital clock Handset .
- Page 56 Index ......Key 1 (quick dial) Name ......
- Page 57 Index ............Range Unknown caller .
Need help?
Do you have a question about the A510 and is the answer not in the manual?
Questions and answers