Table of Contents
Advertisement
Quick Links
LP/NATURAL CONVERSION KIT INSTRUCTIONS
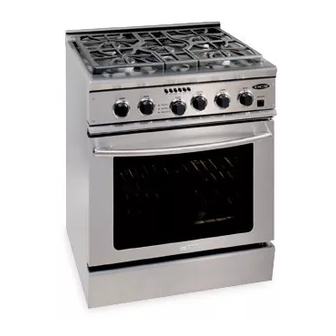
RGSC-305 PROFESSIONAL RANGE
Before you begin, read these instructions completely and carefully.
WARNING
This conversion kit must be installed by a qualified service agency in accordance with the
manufacturer's instructions. All applicable codes and requirements of the authority
having jurisdiction must be followed. If the information in these instructions is not
followed exactly, fire, explosion or production of carbon monoxide may result, causing
property damage, personal injury or loss of life. The qualified service agency is
responsible for the proper installation of this kit. The installation is not proper and
complete until the operation of the converted appliance is checked as specified in the
manufacturer's instructions supplied with the kit.
PARTS INCLUDED
Valve Bypass Jet (5)
Broil Burner Orifice (1)
Conversion Sticker (1)
Valve Stem C-Clip (5)
CAUTION:
Before proceeding with the conversion, shut off gas supply to the appliance prior
to disconnecting the electrical power.
STEP 1
GAS SUPPLY
Measure the incoming gas pressure to the regulator.
With the installation of this conversion kit, the range should operate on LP gas at 10" of water column pressure
and on natural gas at 5" of water column pressure.
The pressure regulator must be connected in series with the manifold of the range and must remain in
series with the supply line.
When checking the regulator, the inlet pressure must be at least 1" greater than the regulator output
setting.
– If the regulator is set for 10" of water column pressure, the inlet pressure must be at least 11".
For proper operation, the maximum inlet pressure to the regulator must be no more than 14" of water column
pressure for LP gas and 9" water column pressure for natural gas.
CKL-RGSC305 Natural to LP
CKN-RGSC305 LP to Natural
TOOLS NEEDED
1/8" Flat-blade Screwdriver
Adjustable Wrench
7mm Nut Driver
4mm Nut Driver (included)
1
Phillips Screwdriver
Ratchet with 1-1/16" Hex Deep Socket
25/32" Socket
1/2" Deep Socket
Manometer
Advertisement
Table of Contents

Related Manuals for DCS RGSC-305


Summary of Contents for DCS RGSC-305
- Page 1 LP/NATURAL CONVERSION KIT INSTRUCTIONS RGSC-305 PROFESSIONAL RANGE CKL-RGSC305 Natural to LP CKN-RGSC305 LP to Natural Before you begin, read these instructions completely and carefully. WARNING This conversion kit must be installed by a qualified service agency in accordance with the manufacturer’s instructions.
- Page 2 IMPORTANT: Disconnect the range and the individual shut-off valve from the gas supply piping system during any pressure testing of that system at test pressures greater than 1/2 psig. Isolate the range from the gas supply piping system by closing the individual manual shut-off valve to the range during any pressure testing of the gas supply piping system at test pressures equal to or less than 1/2 psig.
- Page 3 TO REPLACE THE VALVE BYPASS JETS: 1. Remove the control knobs from the valve shafts and thermostat. 2. Remove the four mounting screws from the corners of the valve panel. 3. Pull the panel forward over the valve stems. 4. Disconnect the wiring terminals at the light switch. Unsnap the indicator lights from the back of the valve panel, being careful not to allow the lenses to fall from the face of the panel.
- Page 4 STEP 4 REPLACE THE OVEN BAKE AND BROILER BURNER ORIFICES To replace the bake burner orifice: 1. Open and remove the oven door (refer to range installation instructions). Remove racks. 2. Remove the two screws that retain the convection inlet spout to the convection baffle and remove spout. 3.
- Page 5 STEP 6 RE-ASSEMBLE SURFACE BURNERS, CHECK OPERATION Cooktop Section Re-assemble the burners and valve panel in the reverse order shown in Step 2 above. Make sure the brass port rings are properly engaged in the simmer rings. Check for proper ignition: Connect electrical power.
- Page 6 STEP 7 CHECK OVEN OPERATION, RE-ASSEMBLE OVEN Bake Burner Push the “BAKE”mode select button. Turn the oven control knob to set a temperature. The bake igniter will begin to glow. In approximately 45 seconds, the burner will light. Check Flame Quality Burner flames should be blue and stable.
- Page 7 A. From Natural Gas to LP B. From LP to Natural Gas THIS CONVERSION RATING LABEL RELATES TO THE FOLLOWING THIS CONVERSION RATING LABEL RELATES TO THE FOLLOWING DCS MODELS: DCS MODELS: RGSC305 RGSC305 SUPPLY PRESSURE - MINIMUM 6" W.C.
- Page 8 5800 Skylab Road, Huntington Beach, CA 92647 Tel: (714) 372-7000 Fax: (714) 372-7001 Customer Service: (888) 281-5698 www.dcsappliances.com As product improvement is an ongoing process at DCS, we reserve the right to change specifications or design without notice. P/N 17618 Rev. B...
Need help?
Do you have a question about the RGSC-305 and is the answer not in the manual?
Questions and answers