Table of Contents
Advertisement
Take the time to read through this instruction manual.
Familiarity with installation and operation procedures will help you obtain the best performance from
your new Digital Media Receiver.
For your records
Record the serial number, found on the back of the unit, in the spaces designated on the warranty card, and in the
space provided below. Refer to the model and serial numbers whenever you call upon your Kenwood dealer for
information or service on the product.
Model KMM-100/ KMM-100U Serial number
US Residents Only
Register your Kenwood product at www.Kenwoodusa.com
© 2013 JVC KENWOOD Corporation
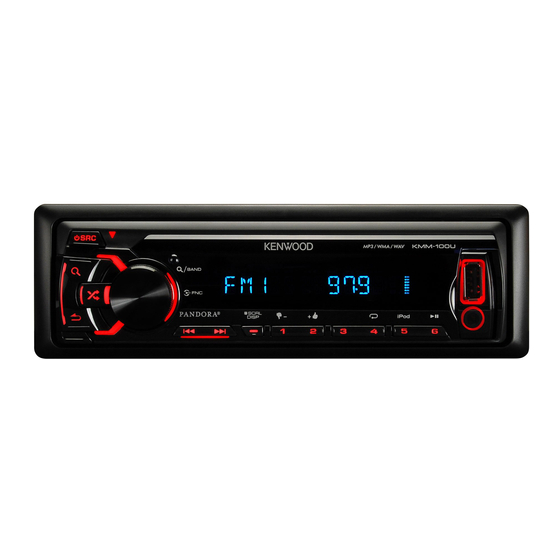
KMM-100
KMM-100U
DIGITAL MEDIA RECEIVER
INSTRUCTION MANUAL
RÉCEPTEUR MULTIMÉDIA NUMÉRIQUE
MODE D'EMPLOI
RECEPTOR DE MEDIOS DIGITALES
MANUAL DE INSTRUCCIONES
Register Online
GET0867-001A (KN)
Advertisement
Table of Contents

Related Manuals for Kenwood KMM-100


Summary of Contents for Kenwood KMM-100
-
Page 1: Instruction Manual
Record the serial number, found on the back of the unit, in the spaces designated on the warranty card, and in the space provided below. Refer to the model and serial numbers whenever you call upon your Kenwood dealer for information or service on the product. -
Page 2: Table Of Contents
(for • Operations explained mainly using buttons on the faceplate. • [XX] indicates the selected items. • ( XX) indicates references are available on the stated page number. • Do not leave the remote control in hot places such as on the dashboard. •... -
Page 3: Basics
Remote sensor (Do not expose to bright sunlight.) Display window How to replace the battery Detach button Volume knob (turn/press) * Not used. Pull out the insulation sheet when using for the first time. Your preset adjustments will also be erased. Do this (on the faceplate) Do this (on the remote control) Press L SRC. -
Page 4: Getting Started
Cancel the demonstration When you turn on the power (or after you reset the unit), the display shows: “CANCEL DEMO” \ “PRESS” \ “VOLUME KNOB” [YES] is selected for the initial setup. “DEMO OFF” appears. Set the clock [FUNCTION] [SETTINGS] [CLOCK] [CLOCK ADJ] Press 4 / ¢... -
Page 5: Radio
Default: XX PRESET TYPE NORM KEY BEEP PANDORA SRC BUILTIN AUX SWITCH PRE REAR SUB-W SP SELECT OFF 5/4 6 × 9/6 OEM F/W UPDATE F/W UP xx.xx Search for a station L SRC AM– #FM+ 4 / ¢ 4 ¢ + Direct Access Tuning (using RC-406) AM–... - Page 6 Other settings [FUNCTION] [SETTINGS] Default: XX 4 ¢ SEEK MODE AUTO1 AUTO2 MANUAL AUTO MEMORY [NORM] [PRESET TYPE] ( MONO SET 4 / ¢ PTY SEARCH CLOCK TIME SYNC TUNER SET • [MONO SET]/ [PTY SEARCH]/ [TI] is selectable only when the source is FM. •...
-
Page 7: Usb / Ipod
Select a file from a list * • MP3/WMA file: Select the desired folder, then a file. • iPod or KENWOOD Music Editor Light (KME Light)/ KENWOOD Music Control (KMC) file * : Select the desired file from the list (PLAYLISTS,... - Page 8 • To search for a character other than A to Z Repeat play and 0 to 9, enter only “ ”. (iPod source: Applicable only when [MODE OFF] • To return to the previous hierarchy, press is selected.) • To return to the top menu, press number button 5 iPod.
-
Page 9: Pandora
(for Preparation: Install the latest version of the Pandora application into your device (iPhone/ iPod touch), then log in and create an account with Pandora. • Select [ON] for [PANDORA SRC]. ( Start listening • Pandora is only available in the US. •... -
Page 10: Aux
Preparation: Set the AUX name Select [ON] for [BUILTIN AUX]. ( While listening to AUX... Start listening [FUNCTION] [SETTINGS] [AUX NAME] AUX (default)/ DVD/ PORTABLE/ GAME/ VIDEO/ [FUNCTION] [SETTINGS] Repeat step until the desired item is selected or activated. • To return to the previous hierarchy, press Default: XX DISPLAY DISP DIMMER... -
Page 11: Audio Settings
While listening to any source... [FUNCTION] [AUDIO CTRL] Repeat step until the desired item is selected or activated. [AUDIO CTRL] 5 ∞ ENT 38 • To return to the previous hierarchy, press Default: XX SUB-W LEVEL –15 +15 0 BASS LEVEL –8 +8 0 MID LEVEL –8 +8 0... -
Page 12: More Information
In this case, “RESUMING” is displayed without displaying a folder name, etc. Changing the browse item will display the correct title, etc. • You cannot operate iPod if “KENWOOD” or “ ” is displayed on iPod. -
Page 13: Troubleshooting
Symptom Remedy... -
Page 14: Installation / Connection
• The unit can only be used with a 12 V DC power supply, negative ground. • Disconnect the battery’s negative terminal before wiring and mounting. • Do not connect Battery wire (yellow) and Ignition wire (red) to the car chassis or Ground wire (black) to prevent a short circuit. - Page 15 · (See Wiring connection. ( 16)) (See Installing the unit (in-dash mounting).) ·...
-
Page 17: Specifications
Subject to change without notice. - Page 19 96488 Identification du produit WARRANTY FOR MILITARY MARKET Modele do aparelho e numero serie EXCLUSION OF CERTAIN DAMAGES Kenwood corporation rs proud of quality and workmanship GUAM: Model number serial number & KENWOOD' liability any defective product rs limited audio equipment.
- Page 20 SOUS GARANTIE (d) Defellos danos decorrencia de consertos realizados por pessoas nao autorizadas; JVC KENWOOD DO BRASIL COMERCIO DE ELETRONICOS LTDA sauf dans les produits Kenwood sont employes dans service garantie devolre produit Kenwood...
Need help?
Do you have a question about the KMM-100 and is the answer not in the manual?
Questions and answers