Table of Contents
Advertisement
Quick Links
Advertisement
Table of Contents

Related Manuals for Sagem DSI86


Summary of Contents for Sagem DSI86
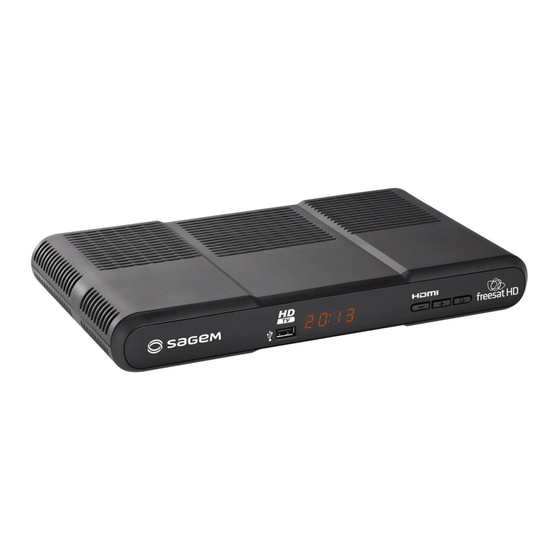
- Page 1 FREESAT HD DIGITAL SATELLITE TV RECEIVER DSI86 HD Freesat SER MANUAL ENGLISH...
-
Page 2: Important Notice
The CE marking also certifies that the product complies with the following harmonised standards: EN60065, EN55013, EN55020, EN61000-3-2, EN61000-3-3. The CE declaration of conformity can be viewed in the support section of the Sagem Communications site www.sagem-communications.com, or it can be obtained from the following address:... -
Page 3: Table Of Contents
CONTENTS 1. PRODUCT OVERVIEW......................1 1-1. FRONT PANEL OF THE RECEIVER ..................1 1-2. REAR PANEL OF THE RECEIVER .................... 2 1-3. REMOTE CONTROL ........................3 2. SAFETY RECOMMENDATIONS ..................4 2-1. WHERE TO PUT YOUR RECEIVER? ..................4 2-2. WARNINGS AND SAFETY INSTRUCTIONS ................4 2-3. - Page 4 8. EVERYDAY USE.........................22 8-1. SELECTING A CHANNEL ......................22 8-2. ADJUSTING THE AUDIO VOLUME ..................23 8-3. CHANGING THE FAVOURITES LIST ..................23 8-4. TEMPORARILY SELECTING AUDIO LANGUAGES AND SUBTITLES ........24 8-5. TELETEXT AND INTERACTIVE SERVICES ................24 8-6. ELECTRONIC PROGRAMME GUIDE ..................24 9.
-
Page 5: Product Overview
1. PRODUCT OVERVIEW Your Receiver is a digital receiver that lets you watch freesat HD and SD channels. YOUR NEW EQUIPMENT INCLUDES: 1 remote control with 2 batteries (AAA) 1 power supply unit (power adapter and power cord) 1 HDMI lead for connection to the HD TV set 1 installation guide 1 freesat presentation leaflet this user manual... -
Page 6: Rear Panel Of The Receiver
1-2 REAR PANEL OF THE RECEIVER 6. Satellite dish input 10. Scart connector (to VCR or DVD recorder) 7. Ethernet port (for future use) 11. Digital audio connector 8. HDMI Digital video audio connector 12. Analogue audio connectors (to hi-fi unit) 9. -
Page 7: Remote Control
1-3 REMOTE CONTROL Functions Put the receiver in standby mode/Wake up the receiver from standby mode. Access channels and various on-screen options Display programme information and options Turn the volume up or down Turn the sound off or on Move in a page, a menu… Go back to the previous screen or mode Schedule a recording from the electronic programme guide (EPG) -
Page 8: Safety Recommendations
2. SAFETY RECOMMENDATIONS Use of the receiver is subject to safety measures designed to protect users and their environment. 2-1 WHERE TO PUT YOUR RECEIVER? In order to guarantee the correct operation of your receiver, you must: • place it indoors to protect it from lightning, rain, and sun rays, •... -
Page 9: Batteries
• The receiver must be disconnected from mains supply (from the power outlet or rear panel) before any modification of connection between TV, VCR or dish. • In the event of a storm, it is advisable to unplug the dish. Even if the receiver and the television set are disconnected from the power supply, lightning can still damage them. -
Page 10: Environment
3. ENVIRONMENT Preservation of the environment is an essential concern of the manufacturer. The desire of the manufacturer is to operate systems observing the environment and consequently it has decided to integrate environmental performances in the life cycle of its products, from manufacturing to commissioning, use and elimination. -
Page 11: European Directive On Waste Electrical And Electronic
3-3 EUROPEAN DIRECTIVE ON WASTE ELECTRICAL AND ELECTRONIC EQUIPMENT (WEEE) In the context of sustainable development, the reduction of wastes to be eliminated by reusing, recycling, composting and energy recovery is strongly advised. In order to comply with this directive which is applicable to EEEs sold after 13/08/2005, your receiver will be taken back free of charge and recycled by the distributor of the EEE within the limits of the quantity and types of equipment bought from them. -
Page 12: Connections
4. CONNECTIONS Before installing your receiver, please check that the delivery is complete (see “Product Overview”, page 1). Please ensure that the appliances to be connected together (receiver, TV, VCR…) are unplugged before making any connections. 4-1 CONNECTION TO THE SATELLITE DISH To get all the freesat HD and SD channels, make sure that your satellite dish is oriented towards ASTRA 2, facing 28.2°... -
Page 13: Connection To The Tv Set
4-2 CONNECTION TO THE TV SET 4-2-1 Connection to a High-Definition television 1. To take advantage of HD high-quality definition, you must connect the HDMI connector of your digital receiver to the HDMI connector on your television set. 2. To connect other devices to the receiver (VCR, home cinema...), refer to the following pages. 3. -
Page 14: Connection To The Vcr/Dvd Recorder
4-3 CONNECTION TO THE VCR/DVD RECORDER • See the diagram below to connect your receiver to a VCR/DVD recorder. Note: If your VCR/DVD recorder has more than one Scart connector, choose the TV or EXT1 socket. 4-4 CONNECTION TO A HOME CINEMA AMPLIFIER Some digital channels are shown in DTS or DOLBY DIGITAL quality sound. -
Page 15: Connection To A Hi-Fi Unit
4-5 CONNECTION TO A HI-FI UNIT To make the most of the digital quality sound and listen to radio channels with the TV turned off, just connect the right and left audio outputs of the receiver to the auxiliary input of your hi-fi system (cable not supplied). -
Page 16: First Installation
5. FIRST INSTALLATION Once the receiver is physically connected, you need to go through the setup procedure to get your freesat HD and SD channels. 1. Switch on your TV. 2. Switch on your receiver by pressing the On/Off button. 3. - Page 17 You receiver is now set. You can start watching and enjoying all your freesat HD and SD channels. Should any problem that prevents you from completing the installation arise, please contact your retailer or the Sagem Communications SAS Hotline. UK Hotline: 0871 07 50 710* *0.10 £/min, tariff cost effective from 01/01/2009...
-
Page 18: Installation Menus
6. INSTALLATION MENUS To move around the screens and change various settings, just use the keys to highlight your selections, press to confirm, and to leave a screen. 6-1 ICONS Timer Receiver settings User settings Information Channels 6-2 USER SETTINGS To access the user settings screen, press Once you are in the main menu, select USER SETTINGS. - Page 19 6-2-2 Hiding Adult channels In USER SETTINGS, select ADULT GENRE. This feature lets you hide adult genre channels. If you activate this function, all adult genre channels will be hidden : you will not be able to switch to an adult genre channel, or browse this category in the electronic programme guide.
-
Page 20: Managing Channels And Favourite Lists
6-3 MANAGING CHANNELS AND FAVOURITE LISTS To access the channels settings screen, press Once you are in the main menu, select CHANNELS. 6-3-1 Managing Channels In CHANNELS, select MANAGE CHANNELS. By default, all TV channels and radio stations found during the receiver installation are saved and available. -
Page 21: Receiver Settings
6-4 RECEIVER SETTINGS To access the receiver settings screen, press . Once in the main menu, select RECEIVER SETTINGS. If the installation lock is activated, enter your parental code (to change your parental code, see “Changing your Parental code”, page 15). 6-4-1 Searching for channels In RECEIVER SETTINGS, select CHANNEL SEARCH. - Page 22 6-4-2 Picture settings In RECEIVER SETTINGS, select PICTURE. TV Screen Size: select the display mode for your TV: 16:9 (widescreen TV) or 4:3 (Traditional TV). Resizing on 4:3 TV: if your display mode is 4:3, select the desired resizing mode: Centre Cut Out or 16:9 Letterbox.
- Page 23 6-4-5 Receiver upgrade The receiver automatically checks if new software is available for download. You can however manually launch this operation and download updated software if available. In RECEIVER SETTINGS, select RECEIVER UPGRADE. The receiver searches for new software. For more information on this feature, refer to “Software Update”, page 28.
- Page 24 6-4-7 Adding Non freesat channels You can manually add non freesat channels by entering the transponder parameters (frequency, symbol rate, etc.). In RECEIVER SETTINGS, select ADD NON FREESAT CHANNEL. Enter the required transponder parameters, then press the red key to launch the scanning. To save the scanning results, press Non freesat channels that are manually added will start with channel number 3000, features such as EPG, MHEG will be restated.
-
Page 25: Information Menu
7. INFORMATION MENU The information contained in this menu may be requested if you contact your supplier or another technical service. You will find here important information about the receiver, and the embedded software. To access the receiver technical information, press In the main menu, select INFORMATION 7-1 SIGNAL INFORMATION In INFORMATION, select SIGNAL. -
Page 26: Everyday Use
8. EVERYDAY USE 8-1 SELECTING A CHANNEL The operations described in this section apply to television channels and radio stations. 8-1-1 Using the keys , or keys 0-9 Press on your remote control to change channel or enter its number on the numeric keypad to switch to the channel you want. -
Page 27: Adjusting The Audio Volume
8-1-4 Detailed programme information If you want more information on the current and following programme, press twice while watching a programme to display the extended information banner. Press to view information on the next/ current programme. to see information on the current/next programme on other channels. -
Page 28: Temporarily Selecting Audio Languages And Subtitles
8-4 TEMPORARILY SELECTING AUDIO LANGUAGES AND SUBTITLES All modifications take place immediately. However, temporary adjustments are not retained when you change channel. Press to display the audio tracks, subtitles or audio description selection screen. to select your settings then press to confirm. - Page 29 Press to access the electronic programme guide. Select the channel genre you are interested in with the navigation keys and press You can PIN-lock access to adult genre using the parental control feature (see “Hiding Adult channels”, page 15). The electronic guide shows programme information for the selected genre on all available channels. To help you navigate in the electronic programme guide, a vertical line shows the current time.
-
Page 30: Recording Programmes To Vcr/Dvd
9. RECORDING PROGRAMMES TO VCR/DVD To record a programme to VCR or DVD recorder, make sure that : • your recorder is connected to the receiver as shown on page 10, • your recorder is set to record at the same time than the receiver, •... -
Page 31: Recording Programmes From The Electronic Programme Guide
9-1 RECORDING PROGRAMMES FROM THE ELECTRONIC PROGRAMME GUIDE The advantage of recording from the electronic programme guide is that you can record specific programmes instead of choosing channel time slots. You can only do this if the programme information is provided by the channel broadcaster. -
Page 32: Software Update
10. SOFTWARE UPDATE Your receiver automatically checks if new software is available for download and will ask you if you want to accept, postpone until the next wake up or refuse the download. You can also manually request that the receiver searches for new software upgrade in the RECEIVER SETTINGS >... -
Page 33: Troubleshooting
11. TROUBLESHOOTING Point the remote control at the receiver. ☞ The remote control is not working. Check the battery life and check the batteries are inserted ☞ properly. The receiver display shows no information Switch the receiver on by pressing the On/Off button. ☞... -
Page 34: Specifications
12. SPECIFICATIONS TRANSMISSION STANDARDS VIDEO DECODING For SD broadcast on HDMI DVB-S, DVB-S2, MPEG-2/MPEG-4 MPEG2 720x576 @ 50 Hz interlaced Standard MPEG-2 MP@HL for Unscaled (original format) or scaled SATELLITE FRONT END 50 Hz 720p and 1080i by set up menu Satellite RF input Input rates (max): 15 Mbit/s Zoom function on HDMI: 4/3, 14/9... - Page 35 DATA PORT Ethernet 10/100BT Fully integrated IEEE 802.3/802.3u 10/100 base T-Physical layer Auto-negotiation 10/100 Full/Half Duplex Adaptive equaliser Baseline wander correction Host USB 2.0 High speed (480 Mbits/s) FRONT PANEL 4 x 7-segment amber display 1 x IR sensor: 38 kHz 1 x Bicolor LED 3 x Buttons (P+,P-,ON/OFF) 1 x Smart Card reader...
-
Page 36: Customer Support
13. CUSTOMER SUPPORT At Sagem Communications we believe that a high quality product should come with the highest quality customer service. In the design of this product we have taken great care to ensure the maximum quality possible and are sure that you will be delighted with your purchase. -
Page 37: Guarantee Terms
If you bought your equipment from Sagem Communications SAS directly, the following shall apply: 1) Sagem Communications SAS undertakes to remedy by repair, free of charge for labour and replacement parts, any defects in the equipment during a period of twelve (12) months from the date of original delivery of the equipment, where those defects are a result of faulty workmanship. - Page 38 •supply of new versions of software, •work on any equipment or software modified or added without the prior written consent of Sagem Communications SAS, •malfunctions not resulting from the Equipment or from software installed in user workstations for the purpose of use of the equipment, •communication problems related to an unsuitable environment, including:...
- Page 40 Sagem Communications SAS Digital STB & TV Business Unit Headquarters: Le Ponant de Paris 27, rue Leblanc - 75015 Paris - FRANCE www.sagem-communications.com...
Need help?
Do you have a question about the DSI86 and is the answer not in the manual?
Questions and answers